Learn how to add new products and edit existing products.
Products are the foundation of your business. The Routeique Digital Control Tower allows you to create and manage a comprehensive list of your products and build price plans for those products.
Products in Routeique have a unique hierarchy structure that enable you to group similar products, create relations between products and pricing, and organize the view for customers ordering from your Customer Order Portal. Each product has a name and can have as many SKUs as needed.
We will further elaborate below on how to create a product using this structure.
Create a New Product
NOTE: The structure of how a product is set up needs to be determined when creating a product, as this won't be able to be changed afterwards. Consider how you want to organize the products and SKUs prior to creating a new product.
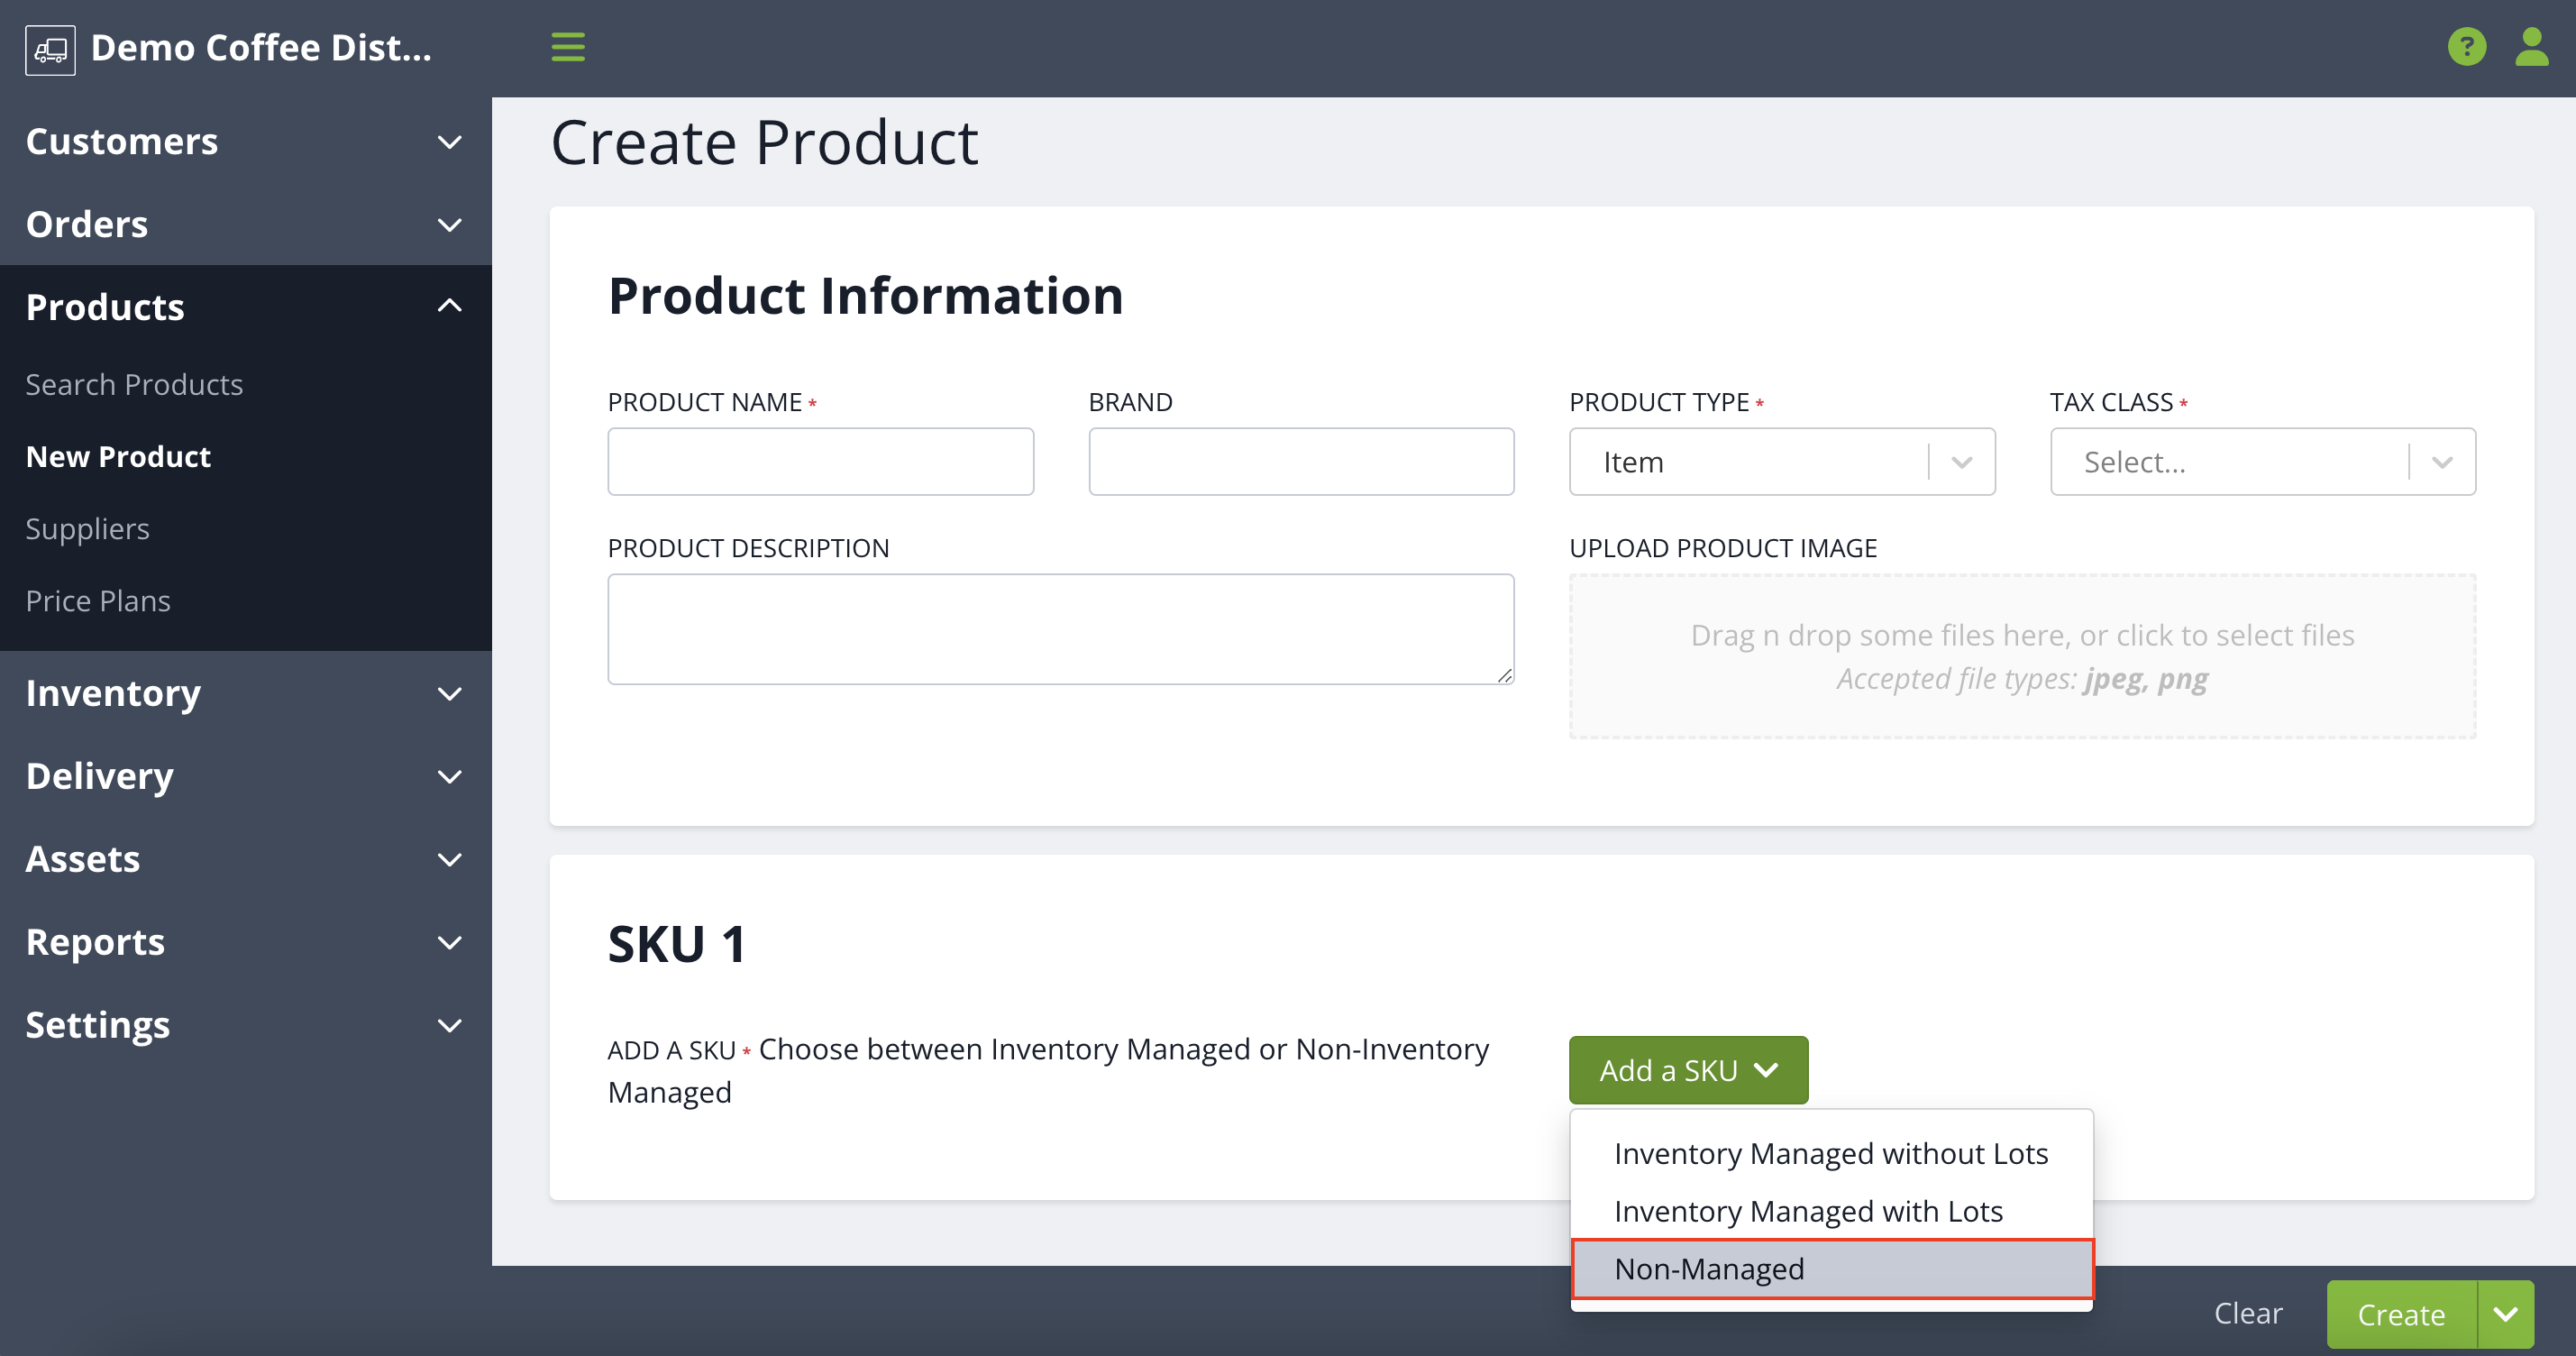
To create a new product, go to New Product under the Product menu. On the Create Product page, you will proceed to fill in the following general fields regarding your new product. The product name should be used to identify the general product that you are selling. For example:
Product Name: Hill Climb Blonde Roast
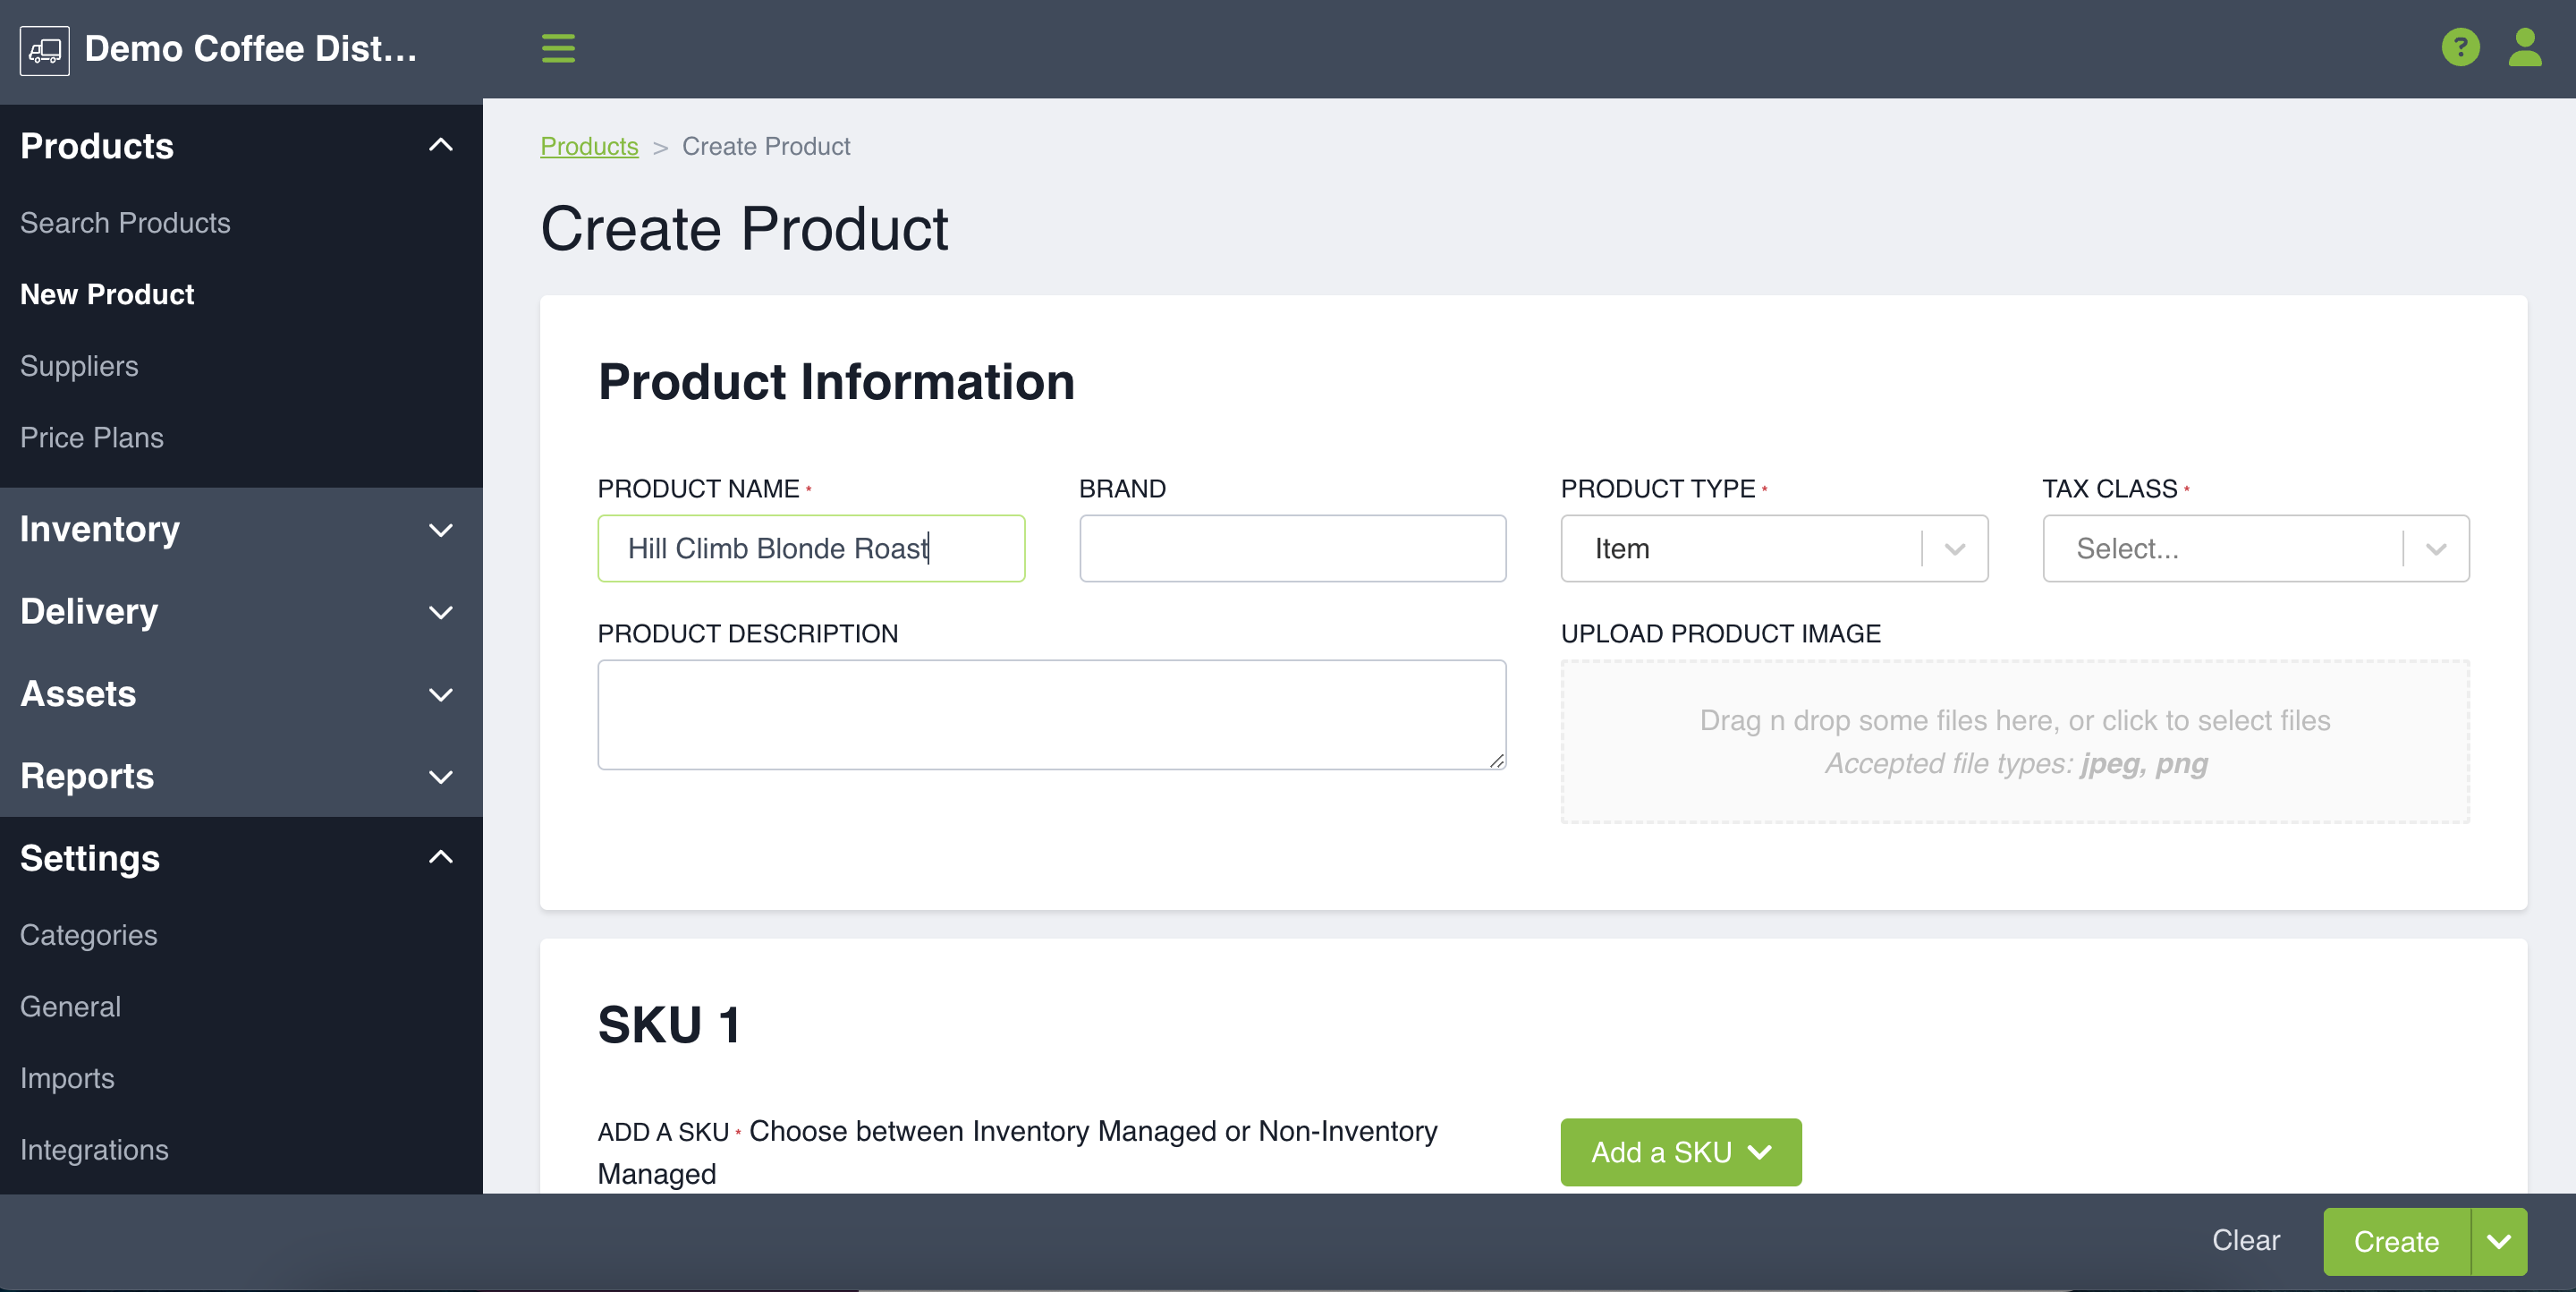
Enter in all the required fields (those marked with an asterisk) and any additional information you have such as product images (these will help your customers when ordering through the Customer Order Portal).
When selecting your Tax Class, you can select either Default or Zero-Rated Goods, as defined below:
Default: Will charge taxes based on the system default (identified by province). For example, default for products in Alberta will default to GST only on the product tax.
Zero-Rated: No tax is ever charged on the product.
Images can be added at any or all levels in the product structure: Products or SKUs.
Create Product SKUs
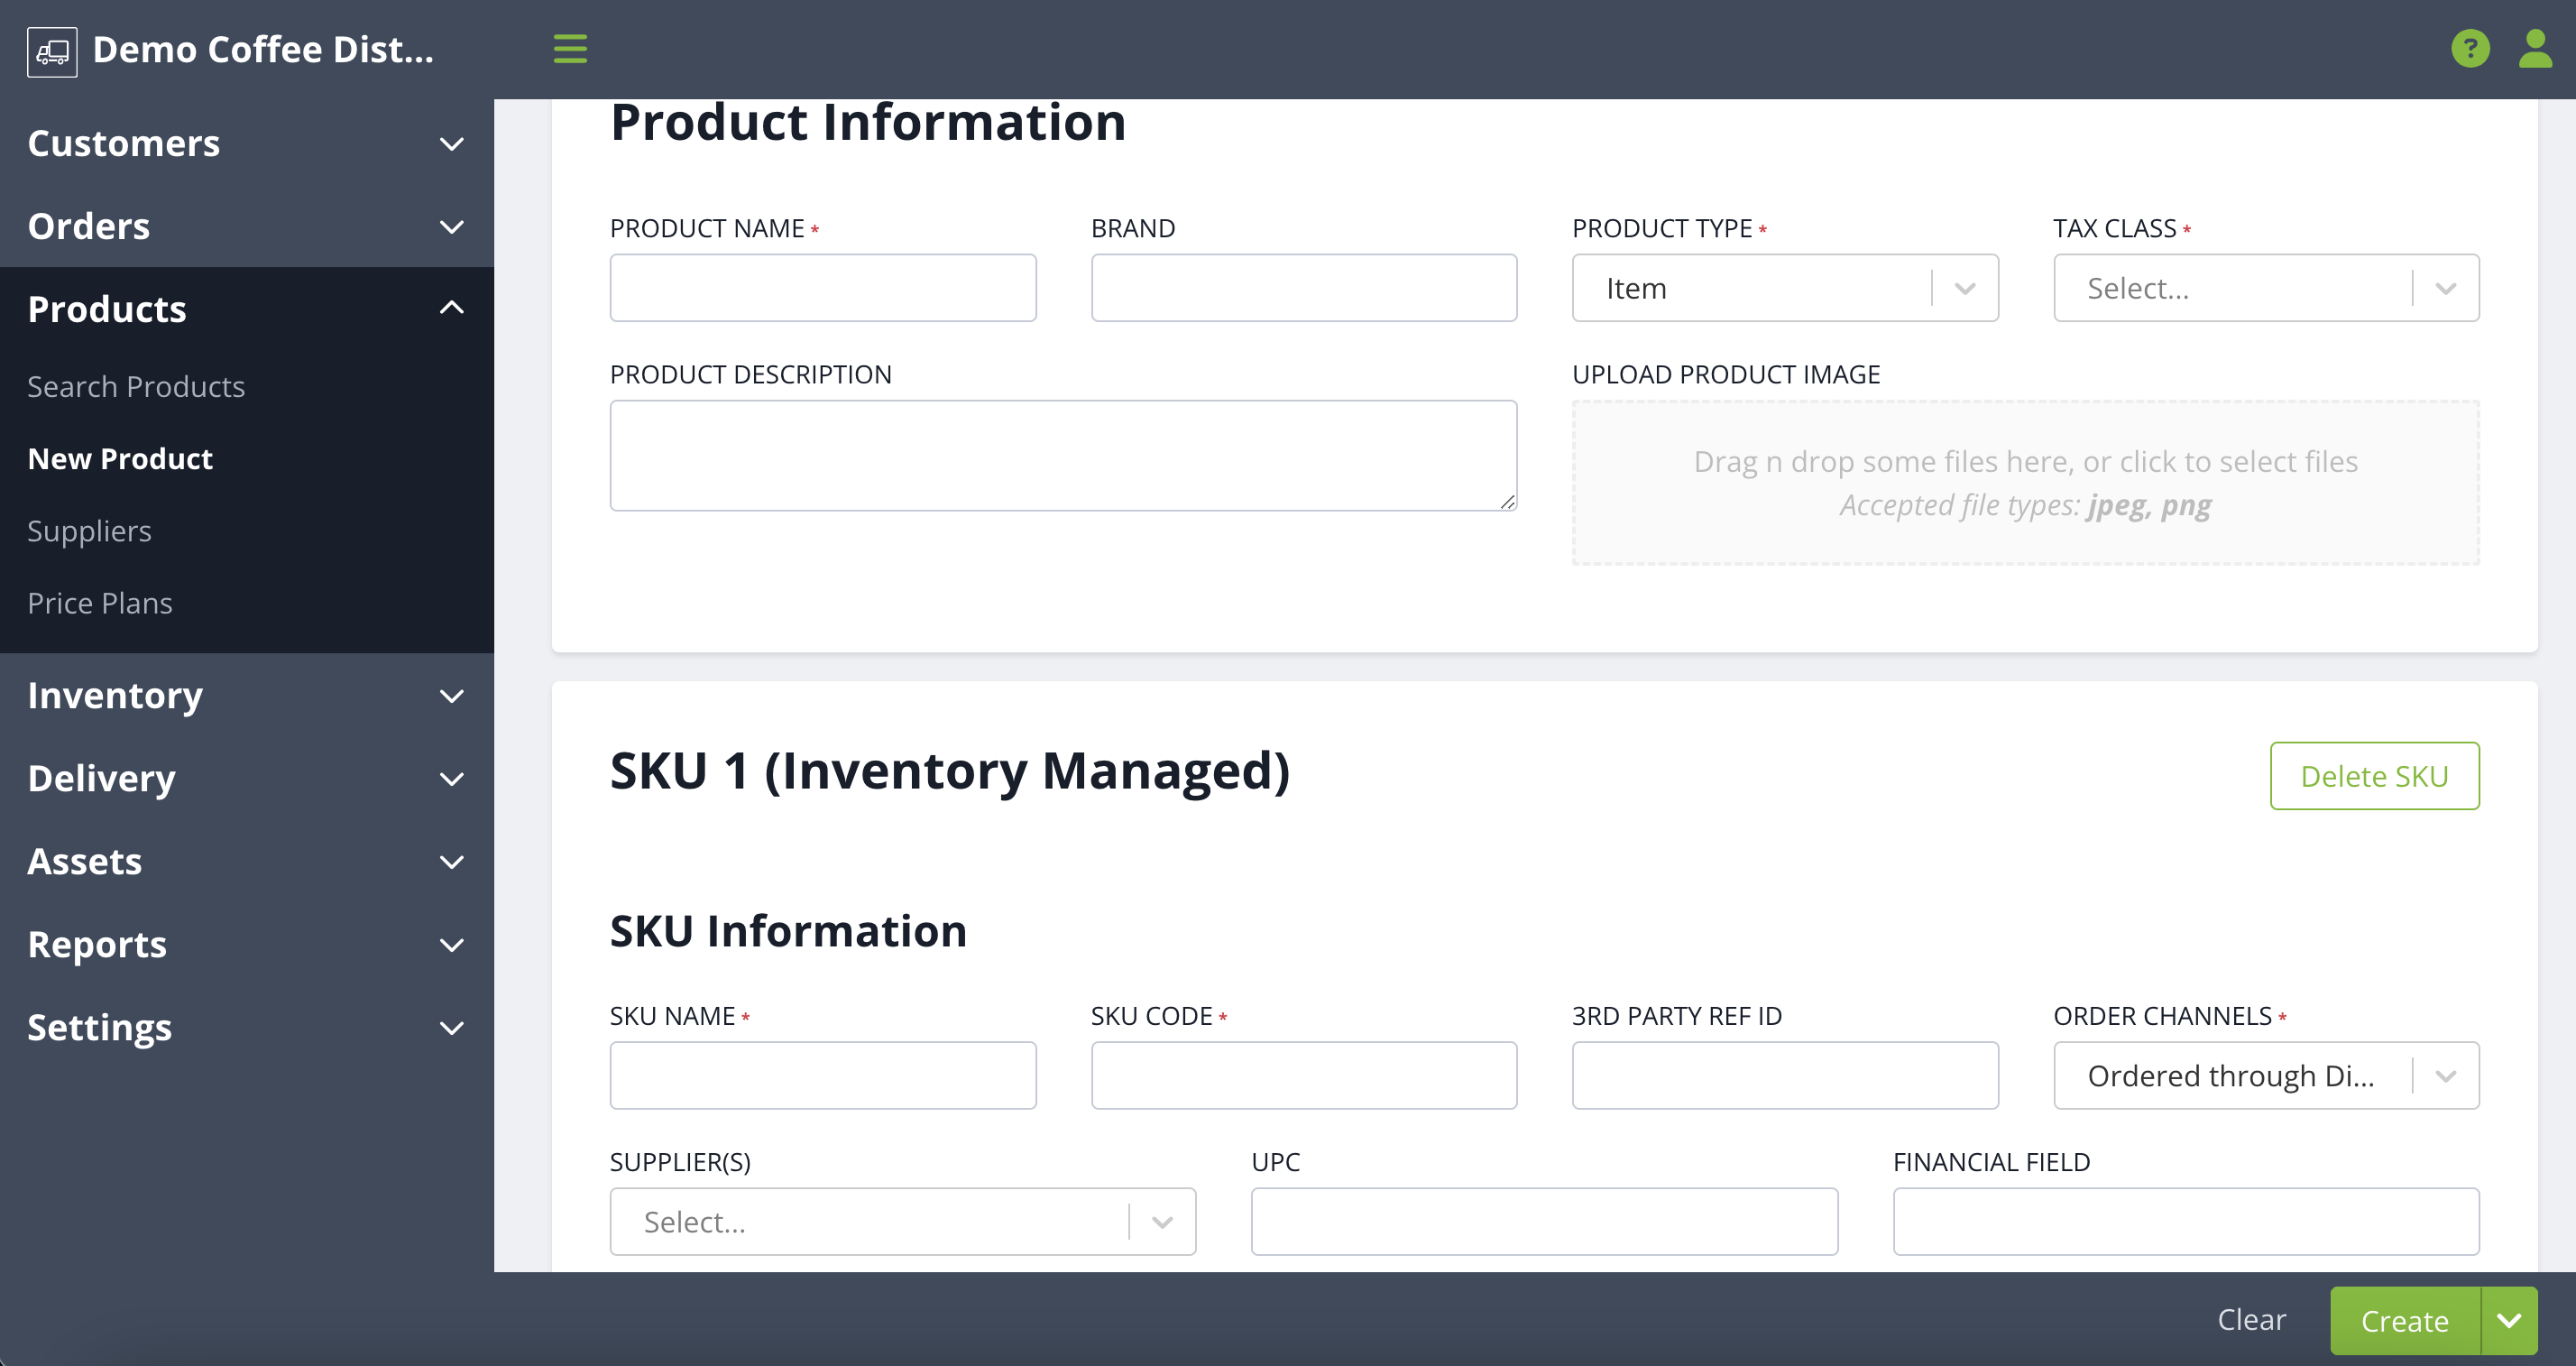
A SKU Name is used as a description for that specific SKU unit and is helpful to differentiate between variations of the same product, if they exist. Often, size options product work well for a SKU Name. Setting up the product helps organize how the product appears to a customer when ordering in the Customer Order Portal. For example:
Product Name: Hill Climb Blonde Roast
SKU Name: 200g
NOTE: You will need to make a choice about creating an inventory-managed SKU or a non-inventory managed SKU. This cannot be edited after the SKU is created. You can only create an inventory-managed SKU if the product type is an item; service products cannot have inventory-managed SKUs. Orders with inventory-managed SKUs require fulfillment to be eligible for delivery. Keep reading to see the differences between the two types of SKUs.
Create an Inventory Managed SKU
To begin creating an inventory-managed SKU, click Add SKU, and select Inventory Managed with or without lots depending on your use case.
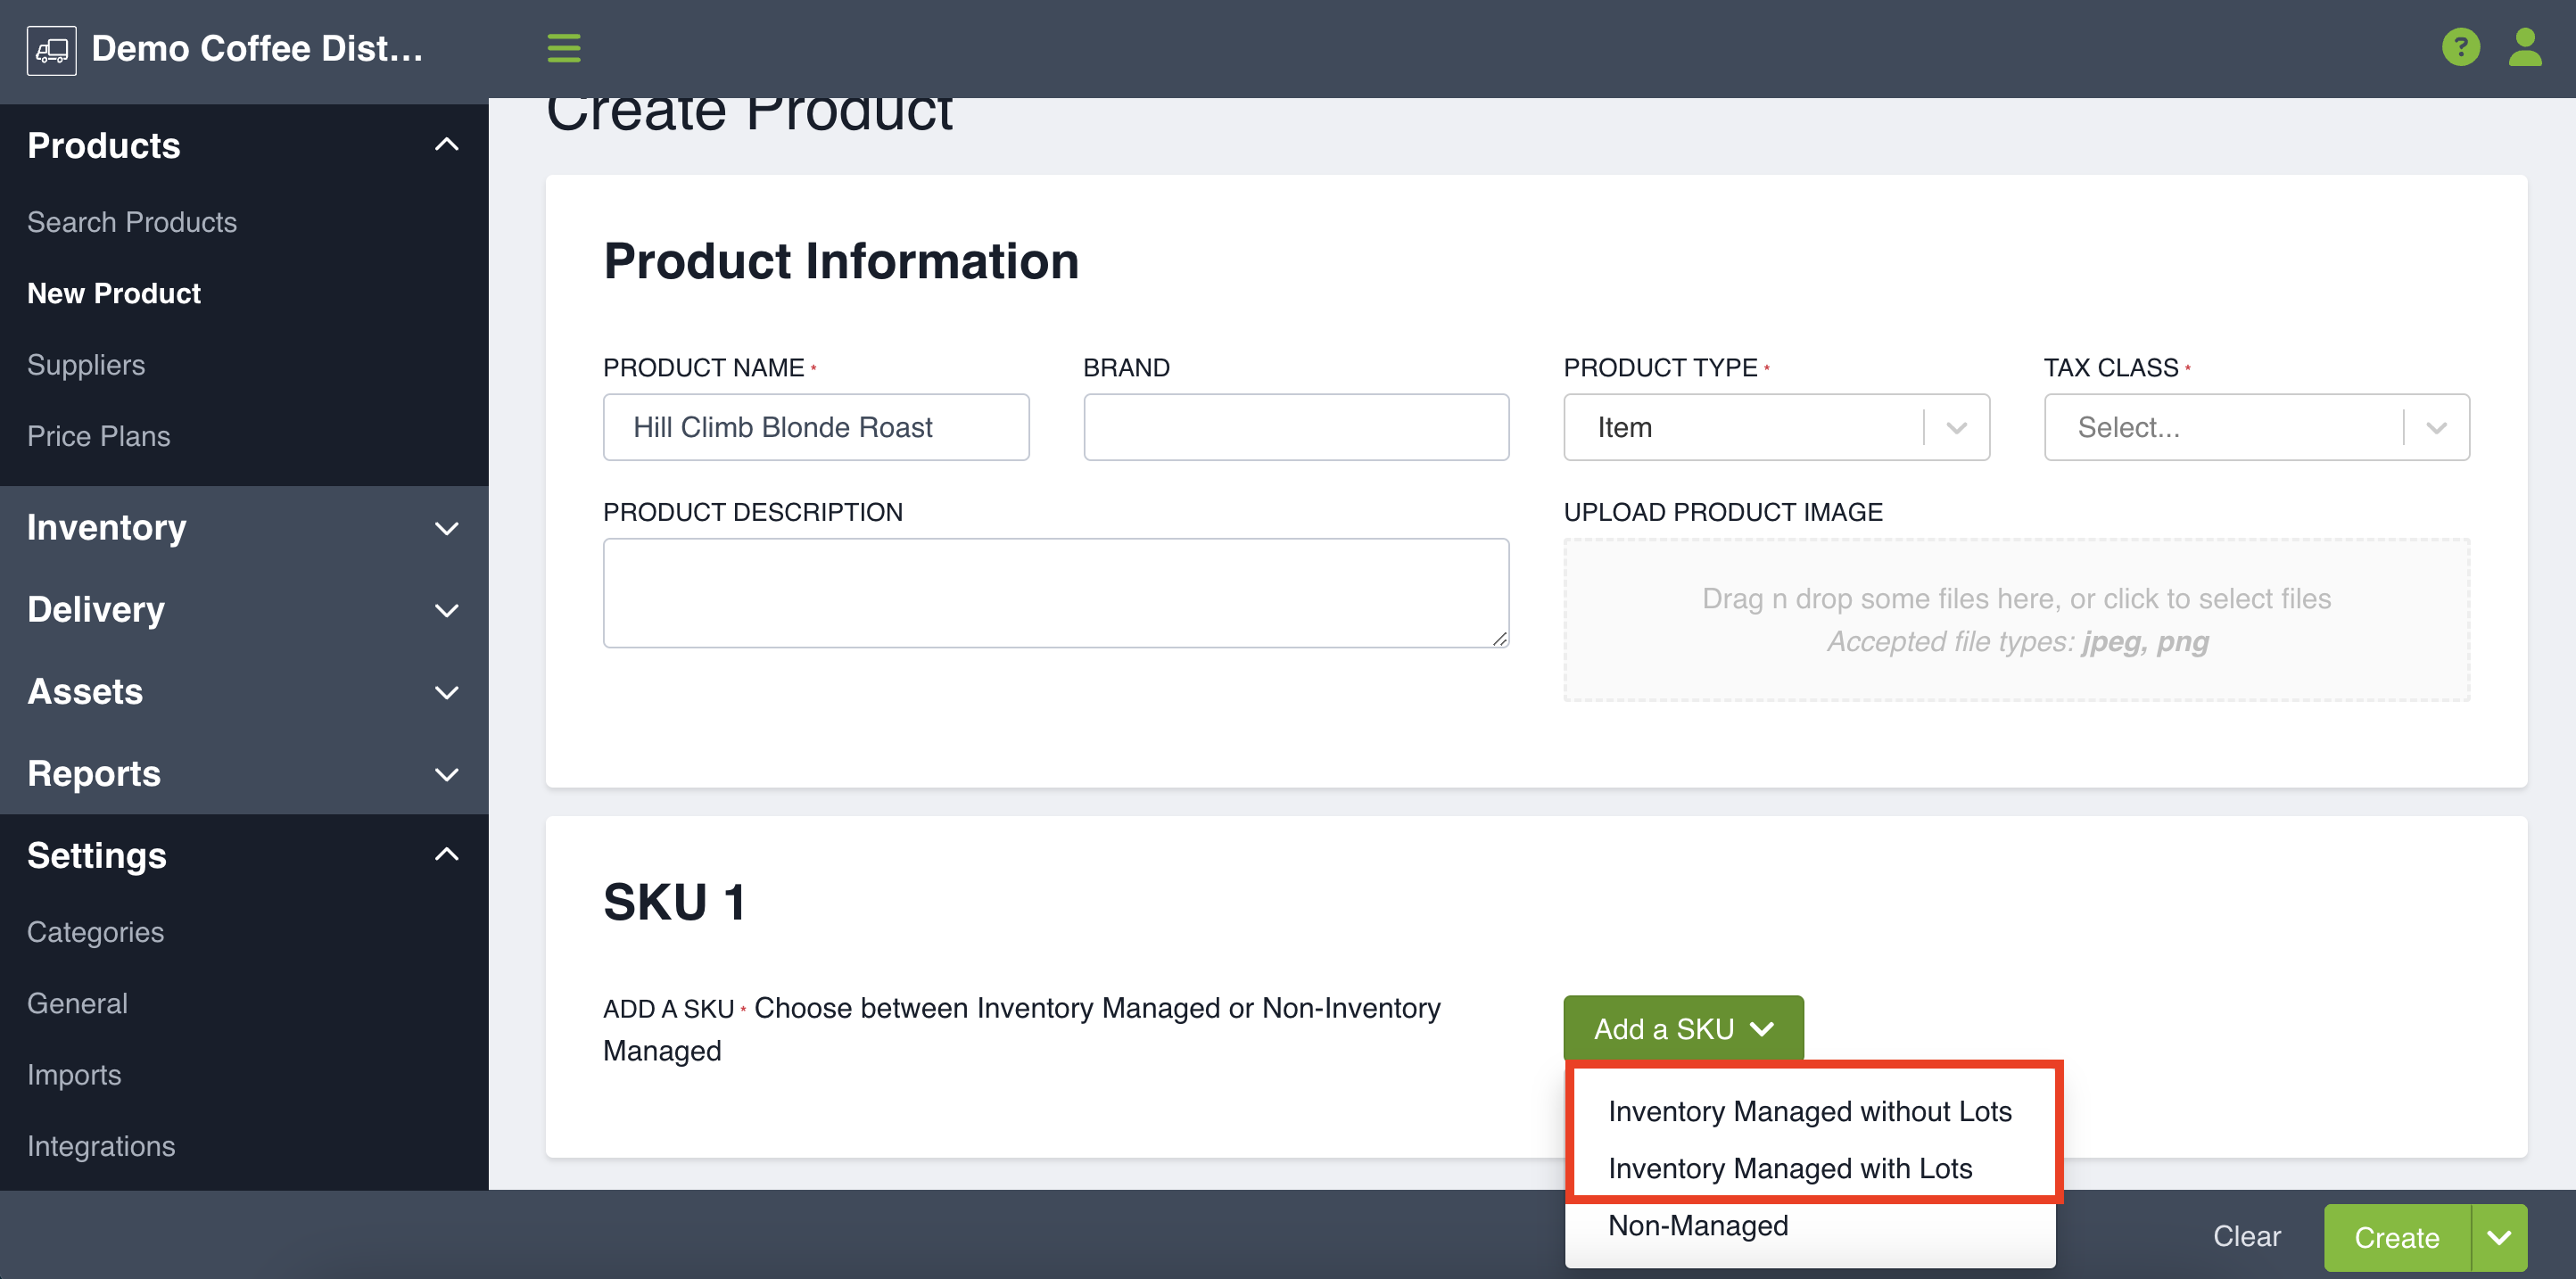
NOTE: Variable unit type SKUs are ineligible for inventory management.
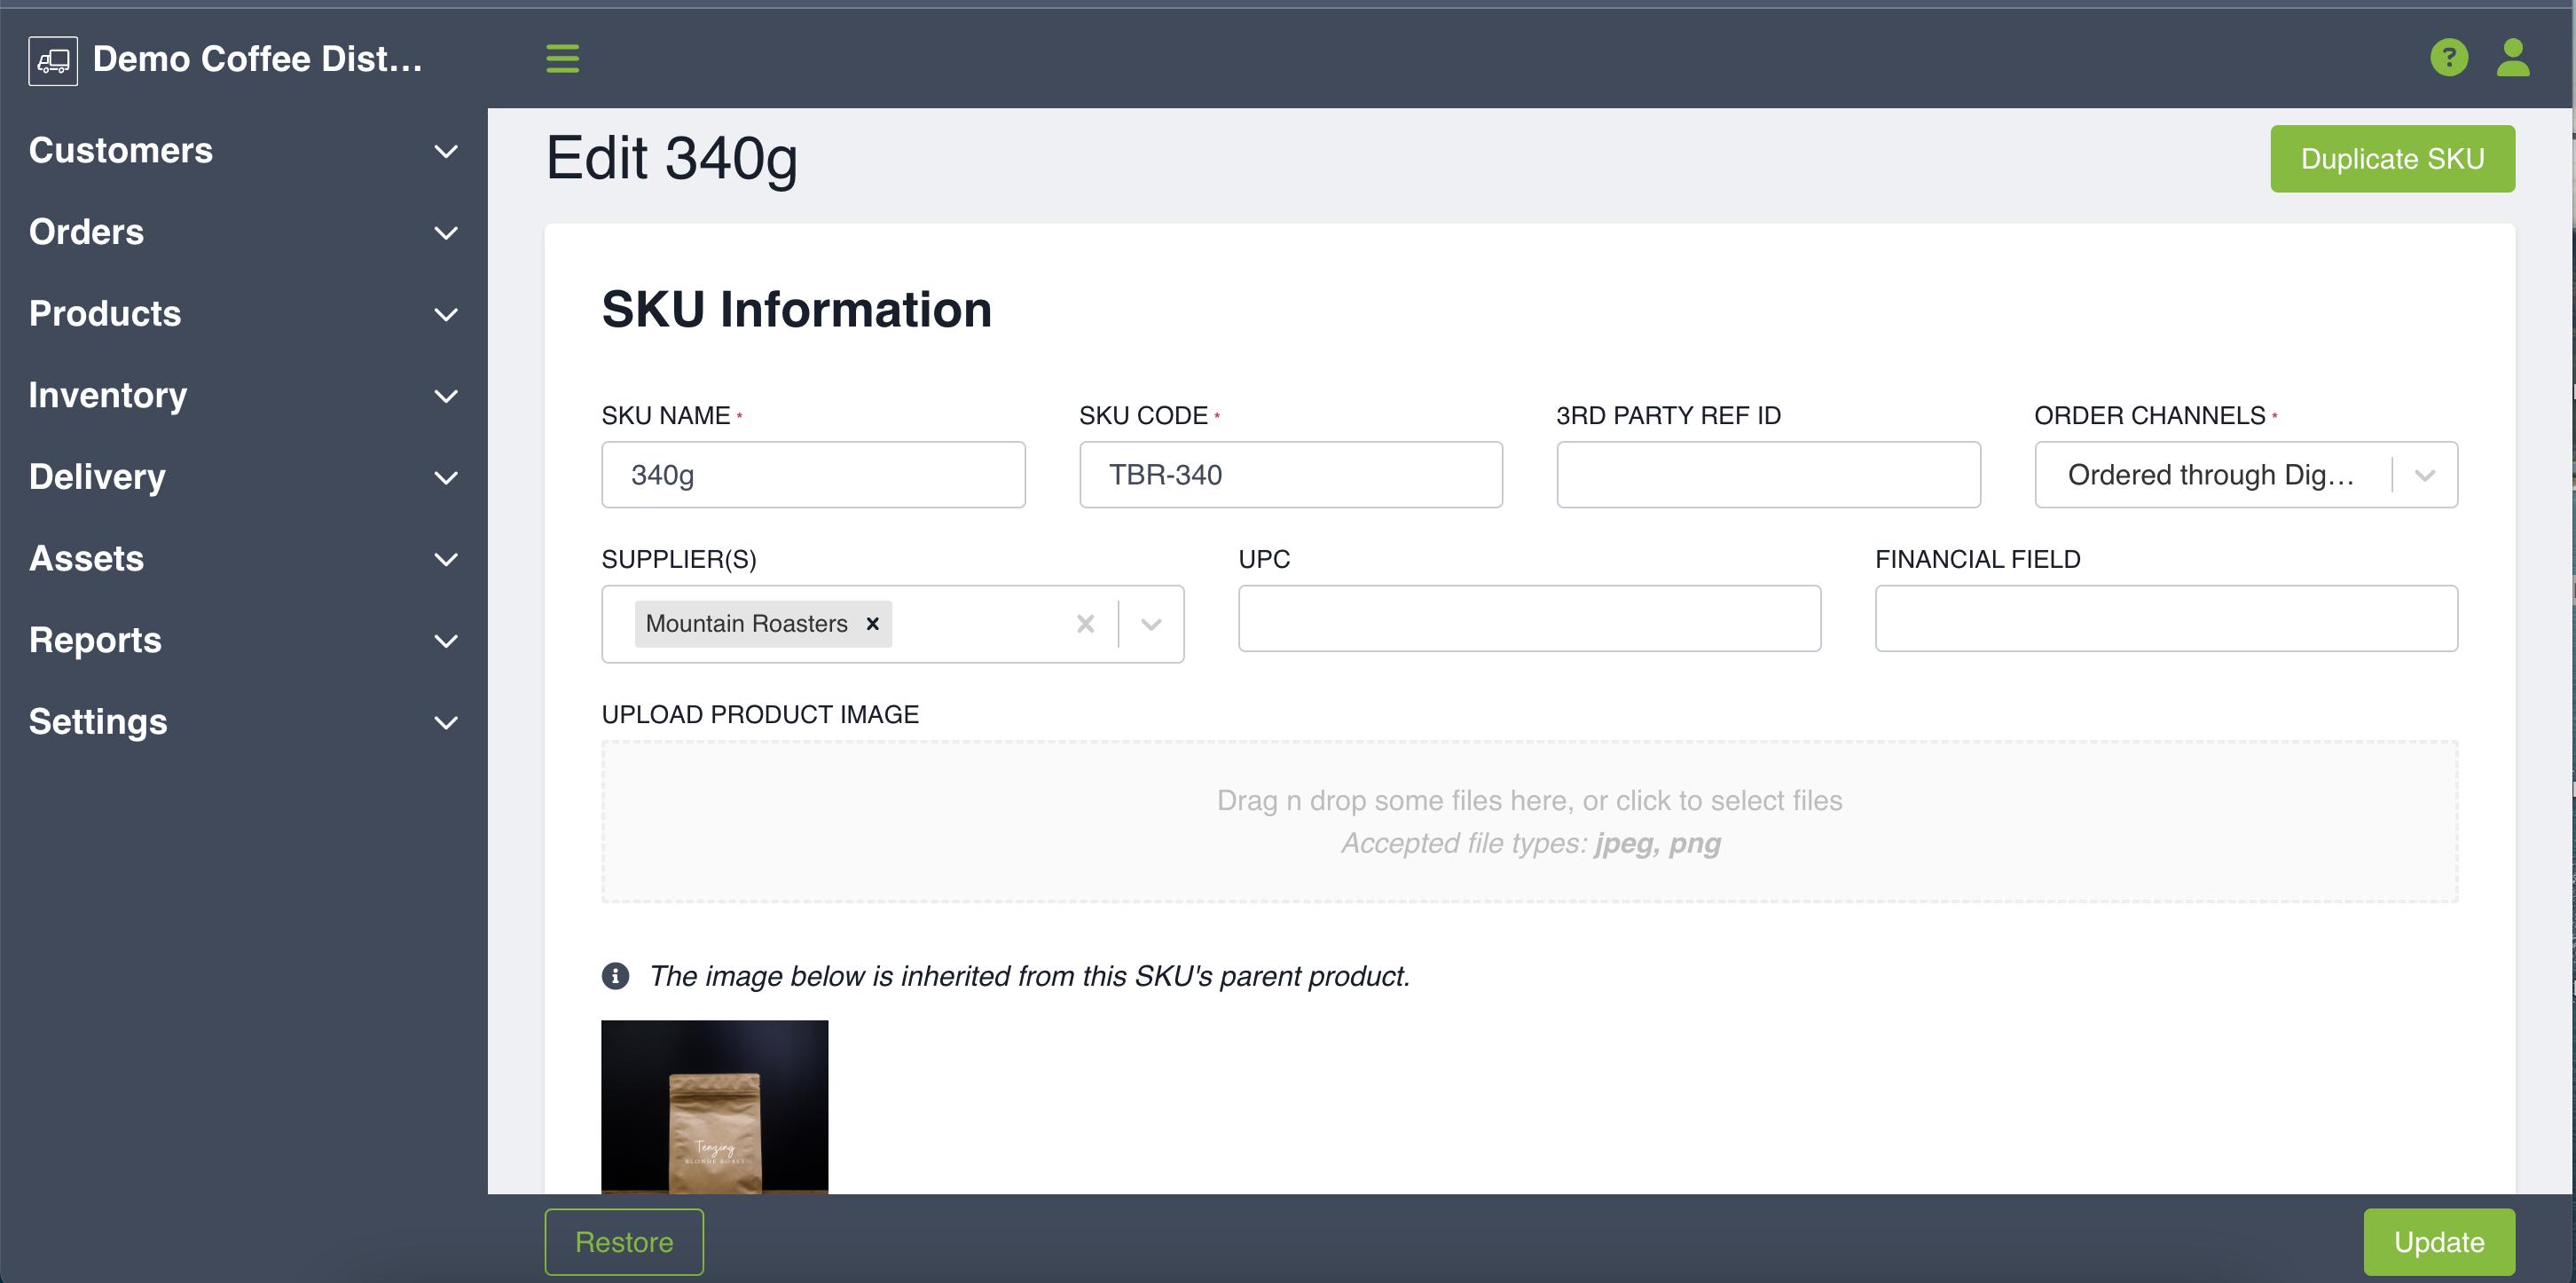
- SKU Name: Description that identifies the specific SKU of the product.
- SKU Code: This is used as your Product ID.
- 3rd Party Ref ID: This is a unique identification code provided by the Third Party.
- Order Channels: You can determine through which channels you would like your product available to be ordered: Ordered through Digital Control Tower only, Ordered through Digital Control Tower & Order Portal, Cannot be manually added to orders.
- Suppliers: You can set one, multiple, or no suppliers to be associated to your product. Suppliers must be set up in Routeique first to add them to a SKU. Next you will set your pricing information associated to the specific SKU.
- UPC - Universal Product Code: This is an optional field where you can enter the product UPC.
- Financial Field: An extra field that can be used to map back to QuickBooks Online.
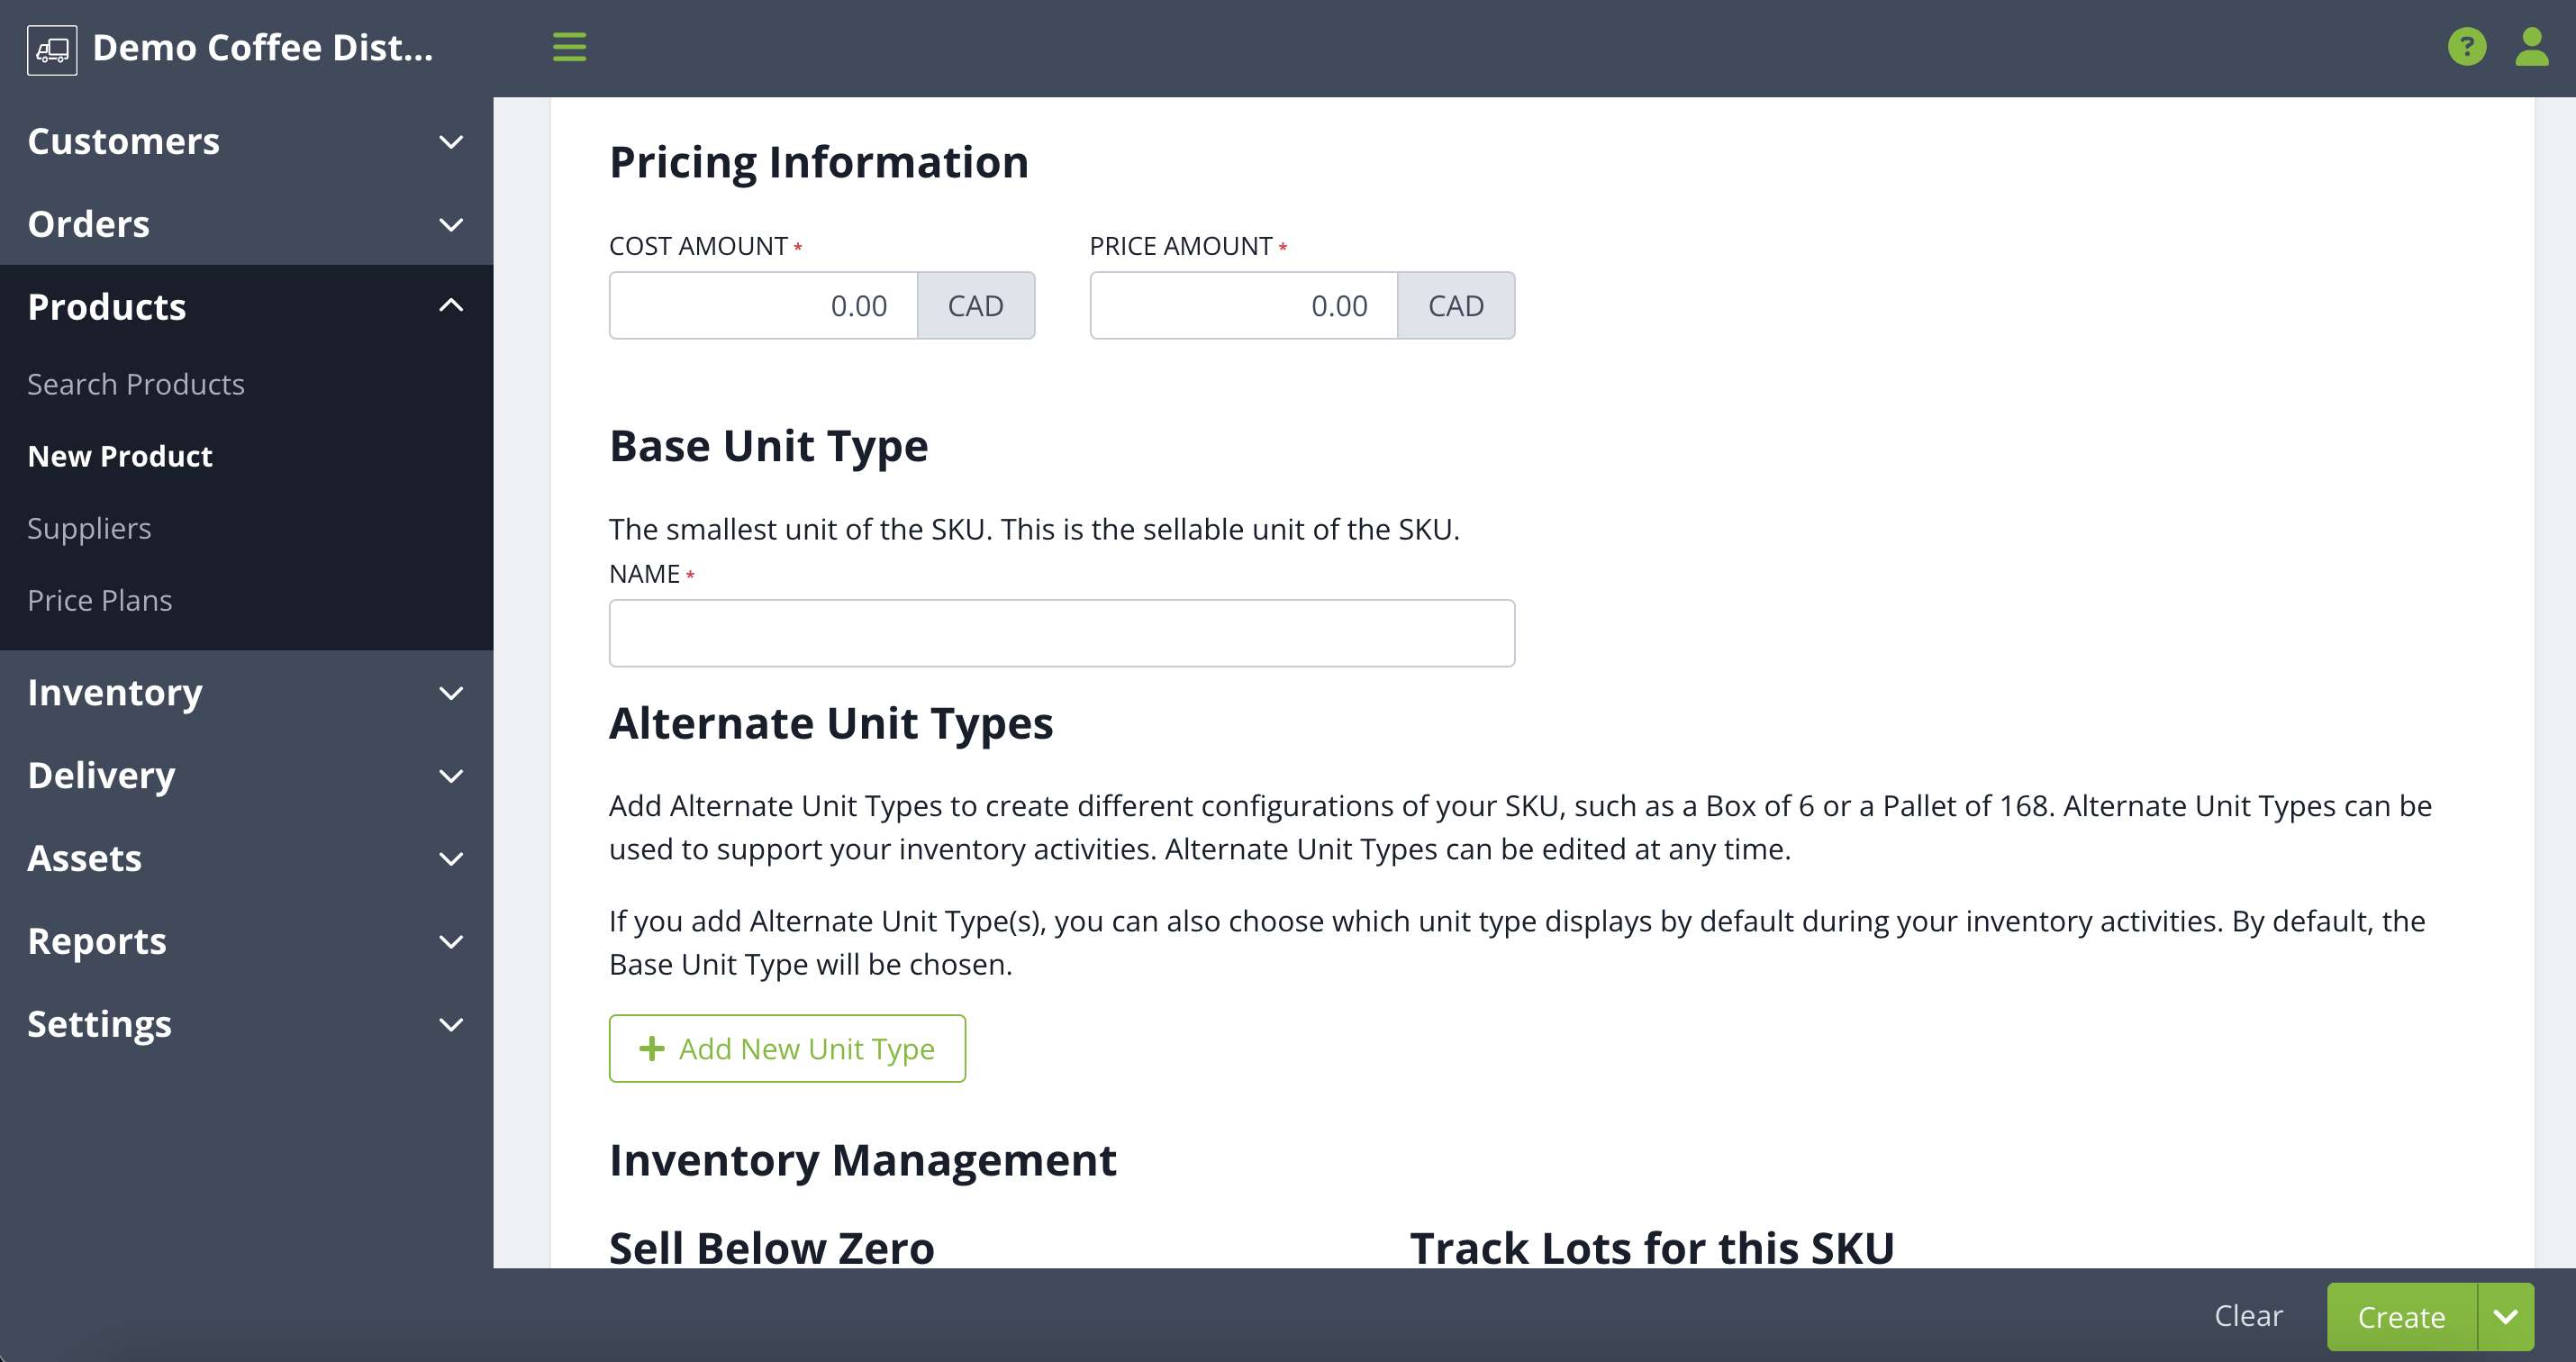
- Cost Amount: This is the cost of this product to your business. This product cost is used in comparison to the price to generate valuable reports on your margins.
- Price Amount: This is the default price for this product. This is the price that your customers will pay for this product if they aren't on a specific price plan or have specific prices set for their customer account.
- Price Calculation Type: Your SKU will default to a price calculation type of Fixed Unit Size, since as mentioned above, variable unit sized products cannot be inventory managed.
- Base Unit Type: Select the unit type that best describes your SKU (bag, case etc.).
- Alternate Unit Types: This optional field allows you to create configurations of your SKU to use as quantity shortcuts in inventory processes, including stock adjustments, stock transfers, and packing.
Next, you have additional optional characteristics you can set for your inventory-managed SKU.
- Oversell Limit: Creating orders with inventory managed products are subject to quantity validation - you can only create orders if your inventory-managed products have enough available inventory to fulfill the order. If you operate just-in-time delivery, you may not have enough inventory available at the time the order is created. In these cases, you can choose if you permit your SKU to be oversold, and if so, by how much. If you choose to oversell and leave the oversell limit field empty, you will be able to oversell infinitely. This can be updated at any point after SKU create.
- Lot Tracking: You can optionally choose to track lots for your SKU. This means you can manage characteristics such as sell by date, lot saleability, and third party lot code. The choice to track lots or not is locked in on SKU create, and cannot be changed afterwards.
Finally, you can optionally enter dimensional information about your SKU, including length, width, height, and weight. Click Save to create your Product & SKU, or you can choose to add another SKU.
Create a Non-Inventory Managed SKU
Creating a non-inventory managed SKU starts very similarly to creating an inventory-managed SKU. To begin creating a non-managed SKU, click Add SKU, and select Non-Managed.
- SKU Name: Description that identifies the specific SKU of the product.
- SKU Code: This is used as your Product ID.
- 3rd Party Ref ID: This is a unique identification code provided by the Third Party.
- Order Channels: You can determine through which channels you would like your product available to be ordered: Ordered through Digital Control Tower only, Ordered through Digital Control Tower & Order Portal, Cannot be manually added to orders.
- Suppliers: You can set one, multiple, or no suppliers to be associated to your product. Suppliers must be set up in Routeique first to add them to a SKU. Next you will set your pricing information associated to the specific SKU.
- UPC - Universal Product Code: This is an optional field where you can enter the product UPC.
- Financial Field: An extra field that can be used to map back to QuickBooks Online.
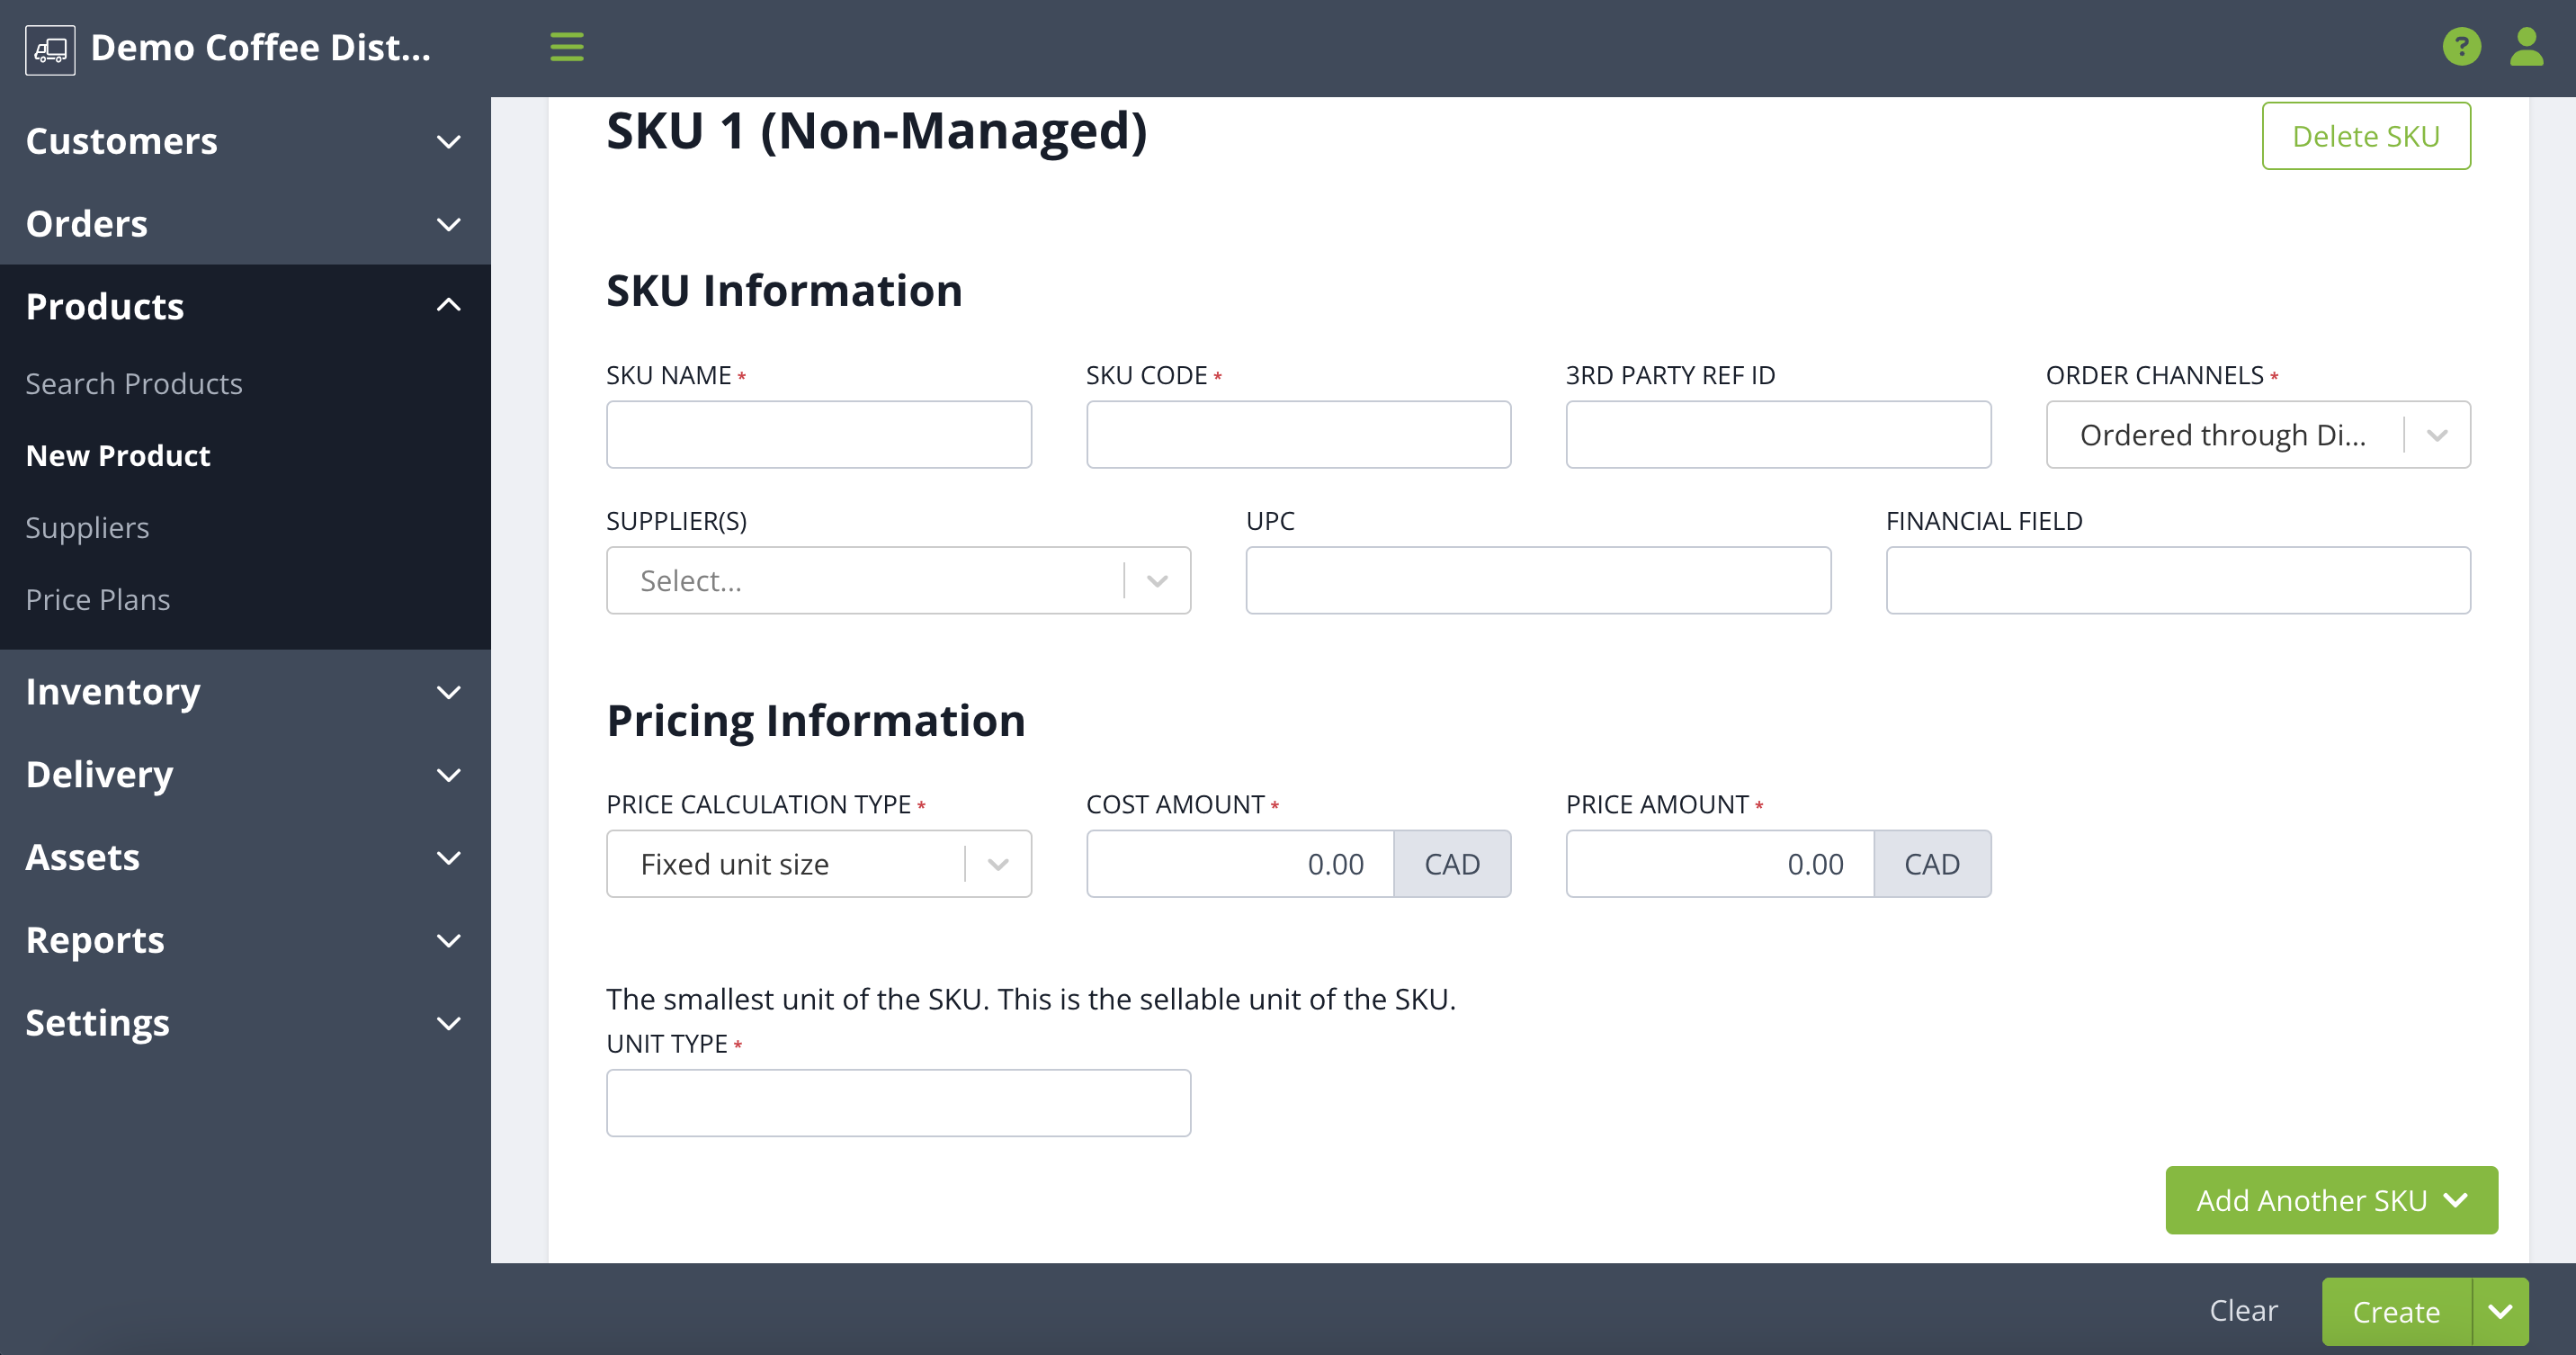
- Price Calculation Type: You can choose between fixed price or variable price calculation types.
- Cost Amount: This is the cost of this product to your business. This product cost is used in comparison to the price to generate valuable reports on your margins.
- Price Amount: This is the default price for this product. This is the price that your customers will pay for this product if they aren't on a specific price plan or have specific prices set for their customer account.
- Base Unit Type: Select the unit type that best describes your SKU (bag, case etc.)
Click Save to create your Product & SKU, or you can choose to add another SKU.
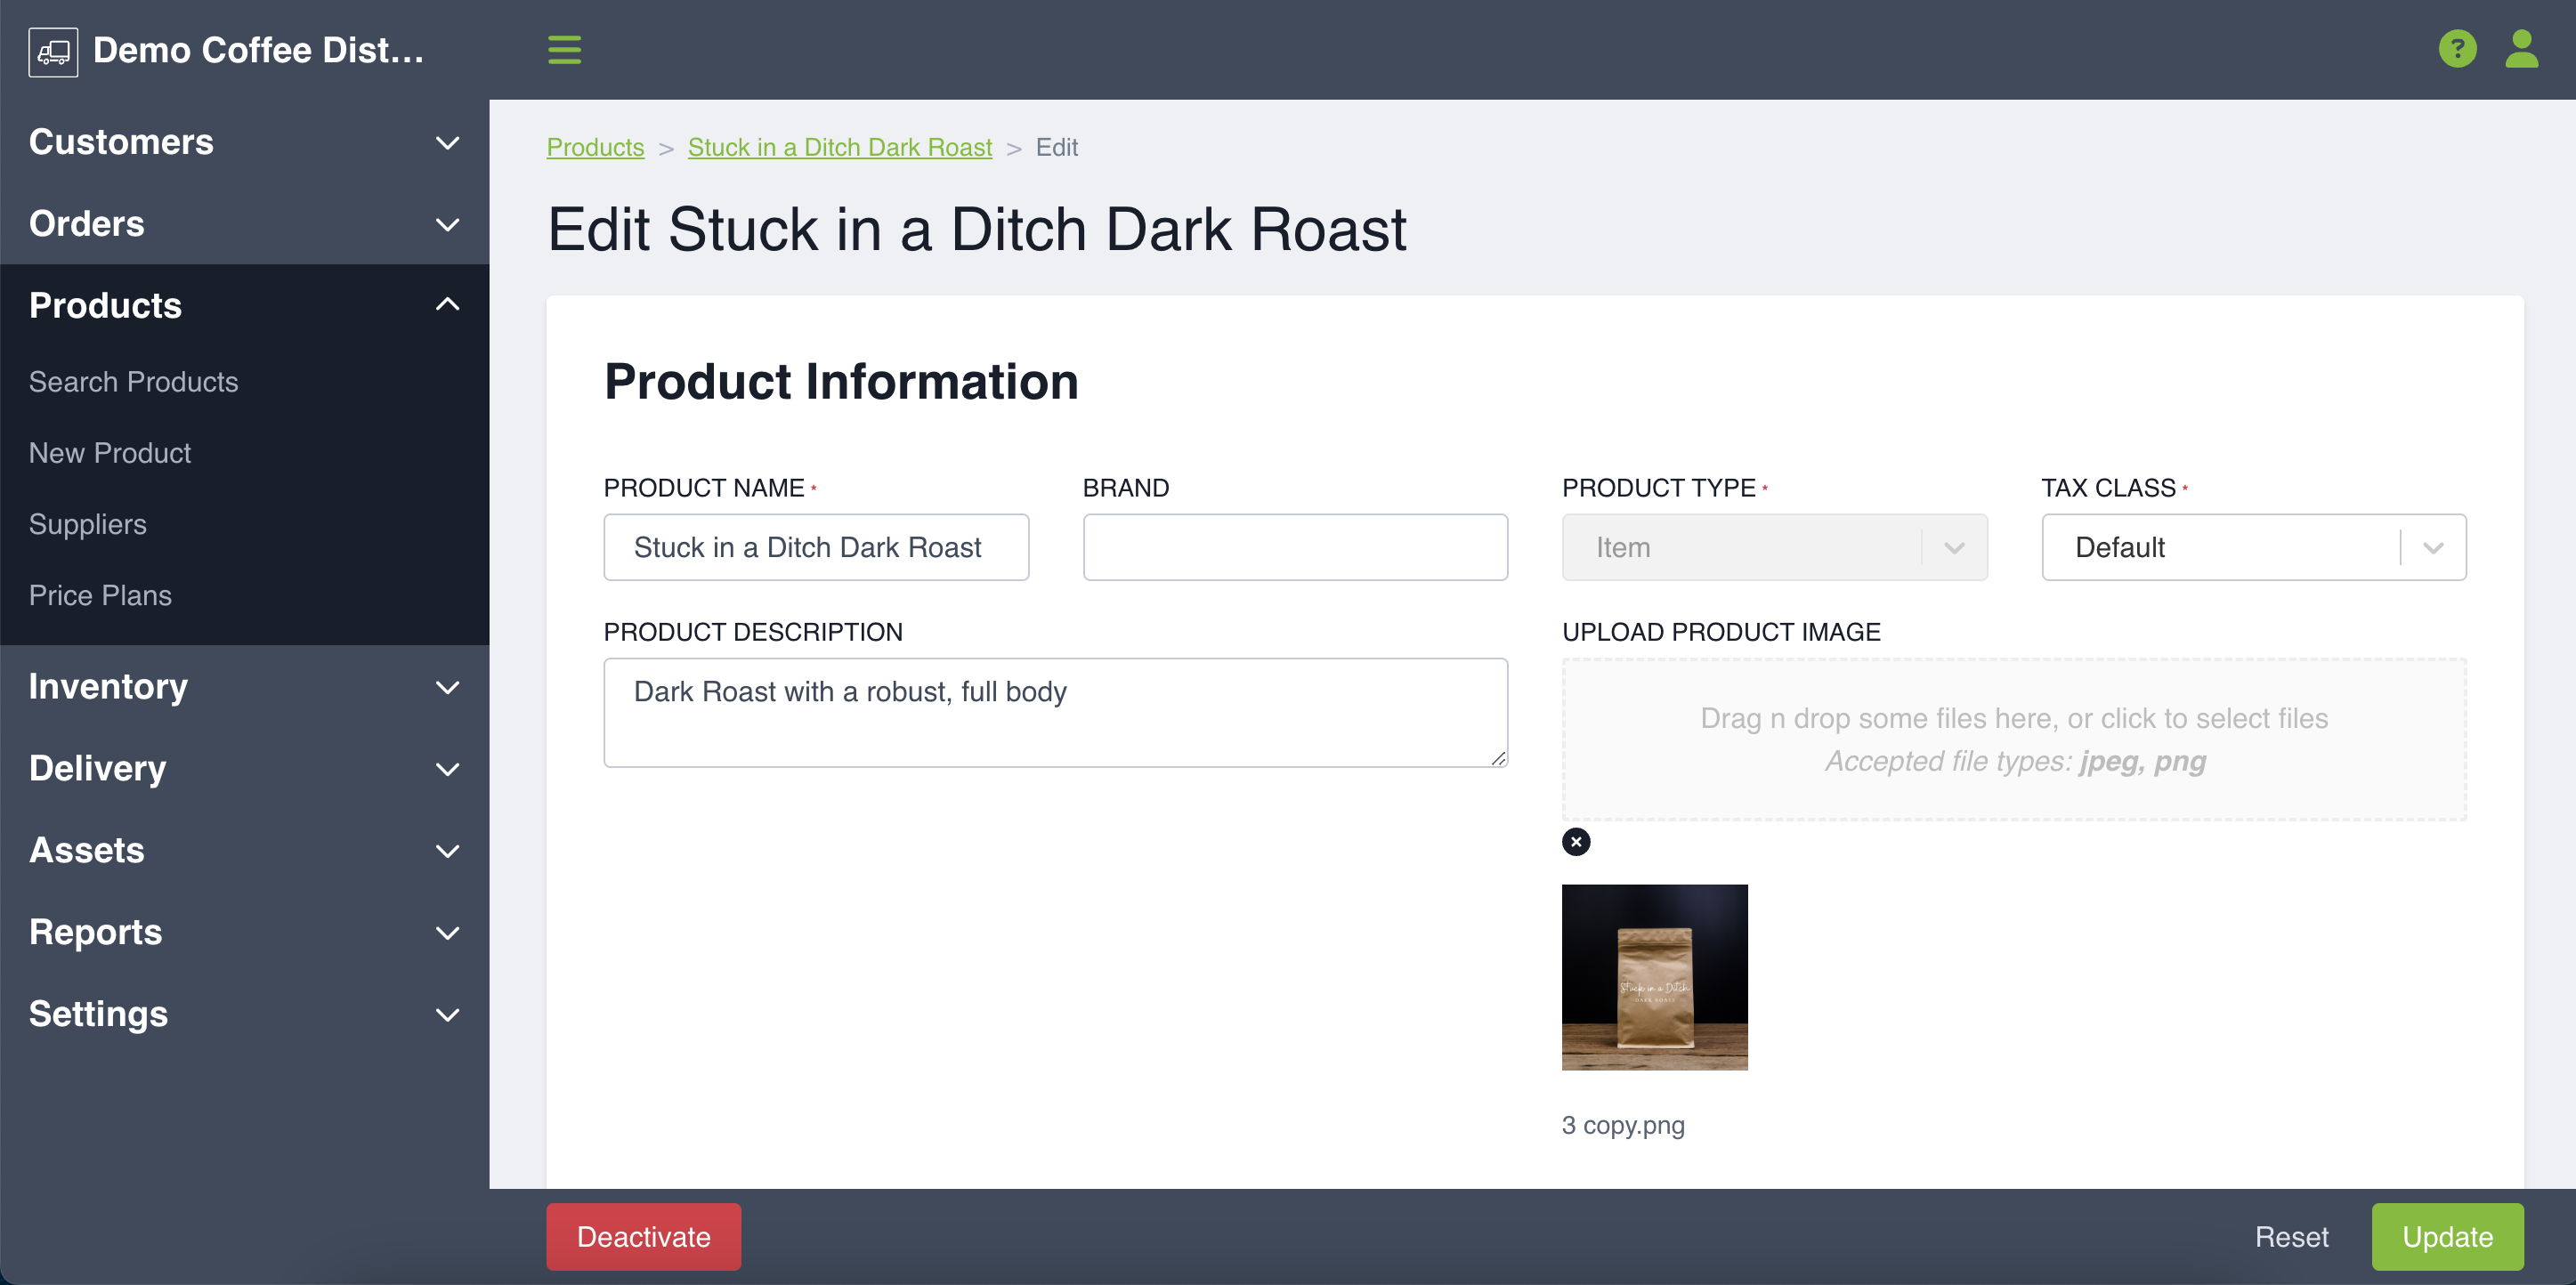
Edit an Existing Product
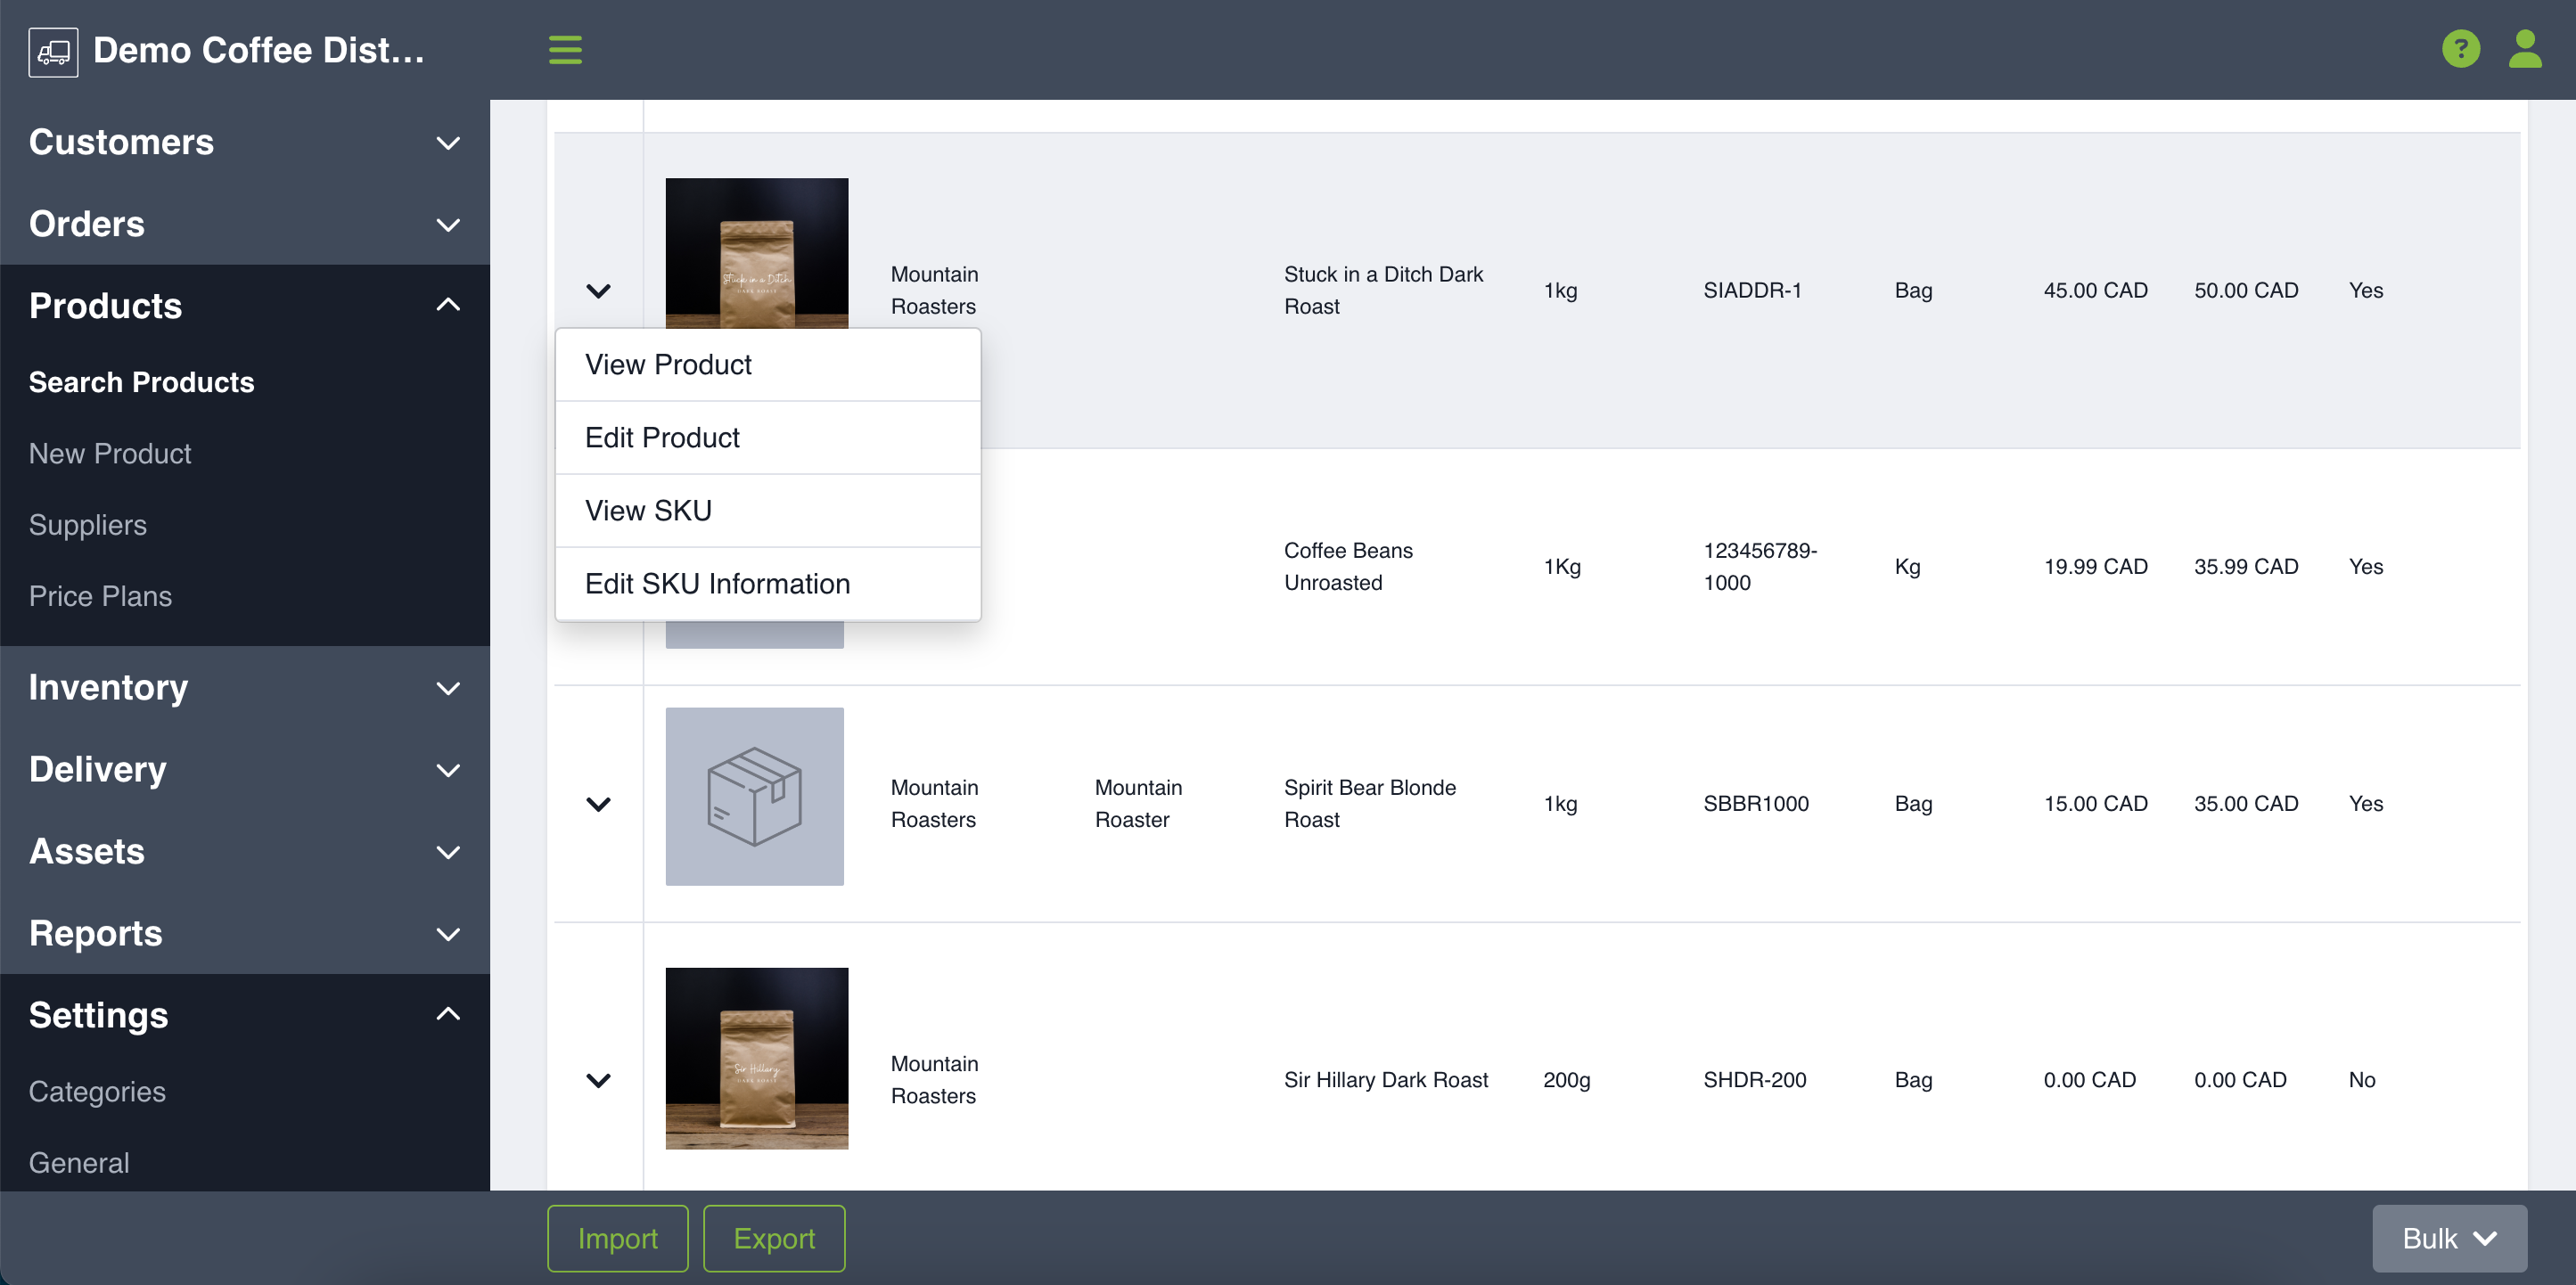
Most of your SKU’s information can be edited any time. Go to the Search Products page under the Products menu. Use the search tool to find your product and click the green Search button. When you find your product, click on the drop-down arrow to either edit your product or edit your SKU information. The product or SKU profile page will open, where you can make any changes and click Update in the bottom-right corner to ensure your changes are saved.
NOTE: Certain fields on a SKU cannot be edited after creation. This includes:
- Whether a product is an item or a service
- Whether or not a SKU is inventory managed
- Whether an inventory managed SKU can be lot tracked
Once a product has been created, you will find more information such as Product Price Plans, Product Categories and Product Links that can be added to the product and/or SKU. Click below for more information.
Deactivating Products
If a product is no longer being sold, it can easily deactivated at any time. Inactive products won't show up in searches. You won't be able to add inventory to your SKU to add it to orders. You will need to remove any on hand, packaged, and stock claimed inventory before deactivating an inventory-managed SKU.
To deactivate a product or SKU, click within its respective profile and click the Deactivate button at the bottom-left corner.
Restoring Products
If you would like to restore a previously deactivated product or SKU, you can click within its respective profile and click the Restore button at the bottom-left corner. This will mean that the SKU can be added to orders and be managed within in inventory, if applicable.