Learn how to create, update, and manage storage locations to ensure your warehouse team can efficiently navigate their digital and physical space .
Looking for an overview of storage management or suggestions on storage location types? Click here.
To begin, understand the definition of a storage location:
Storage Location: A storage location that may be used as a container for other storage locations, or may hold inventory itself.
Setting up your Storage Locations
Matching your digital space in Routeique to your physical warehouse is essential to your distribution operations. The more logical and concise your warehouse design, the easier and faster it will be for your team to locate product in the warehouse.
First, you need to navigate to Settings, then to Inventory to set up the storage location types that you will use when building out your hierarchy. For more information about setting up your Storage Location types, you can read our article about inventory settings.
Warehouse and Vehicle types are added by default, and since they are not editable, they will not show up in this list. From here, you can add any additional storage locations used in your warehouse - zones, aisles, and bins as examples. There is no enforced hierarchy so you can set up locations as you see fit!
NOTE: Warehouse and Vehicle storage types are added by default and may not be edited or deactivated.
First Time Set Up
To get started building out your storage structure, navigate to the Storage page by selection Inventory in the main menu, and then to Storage.
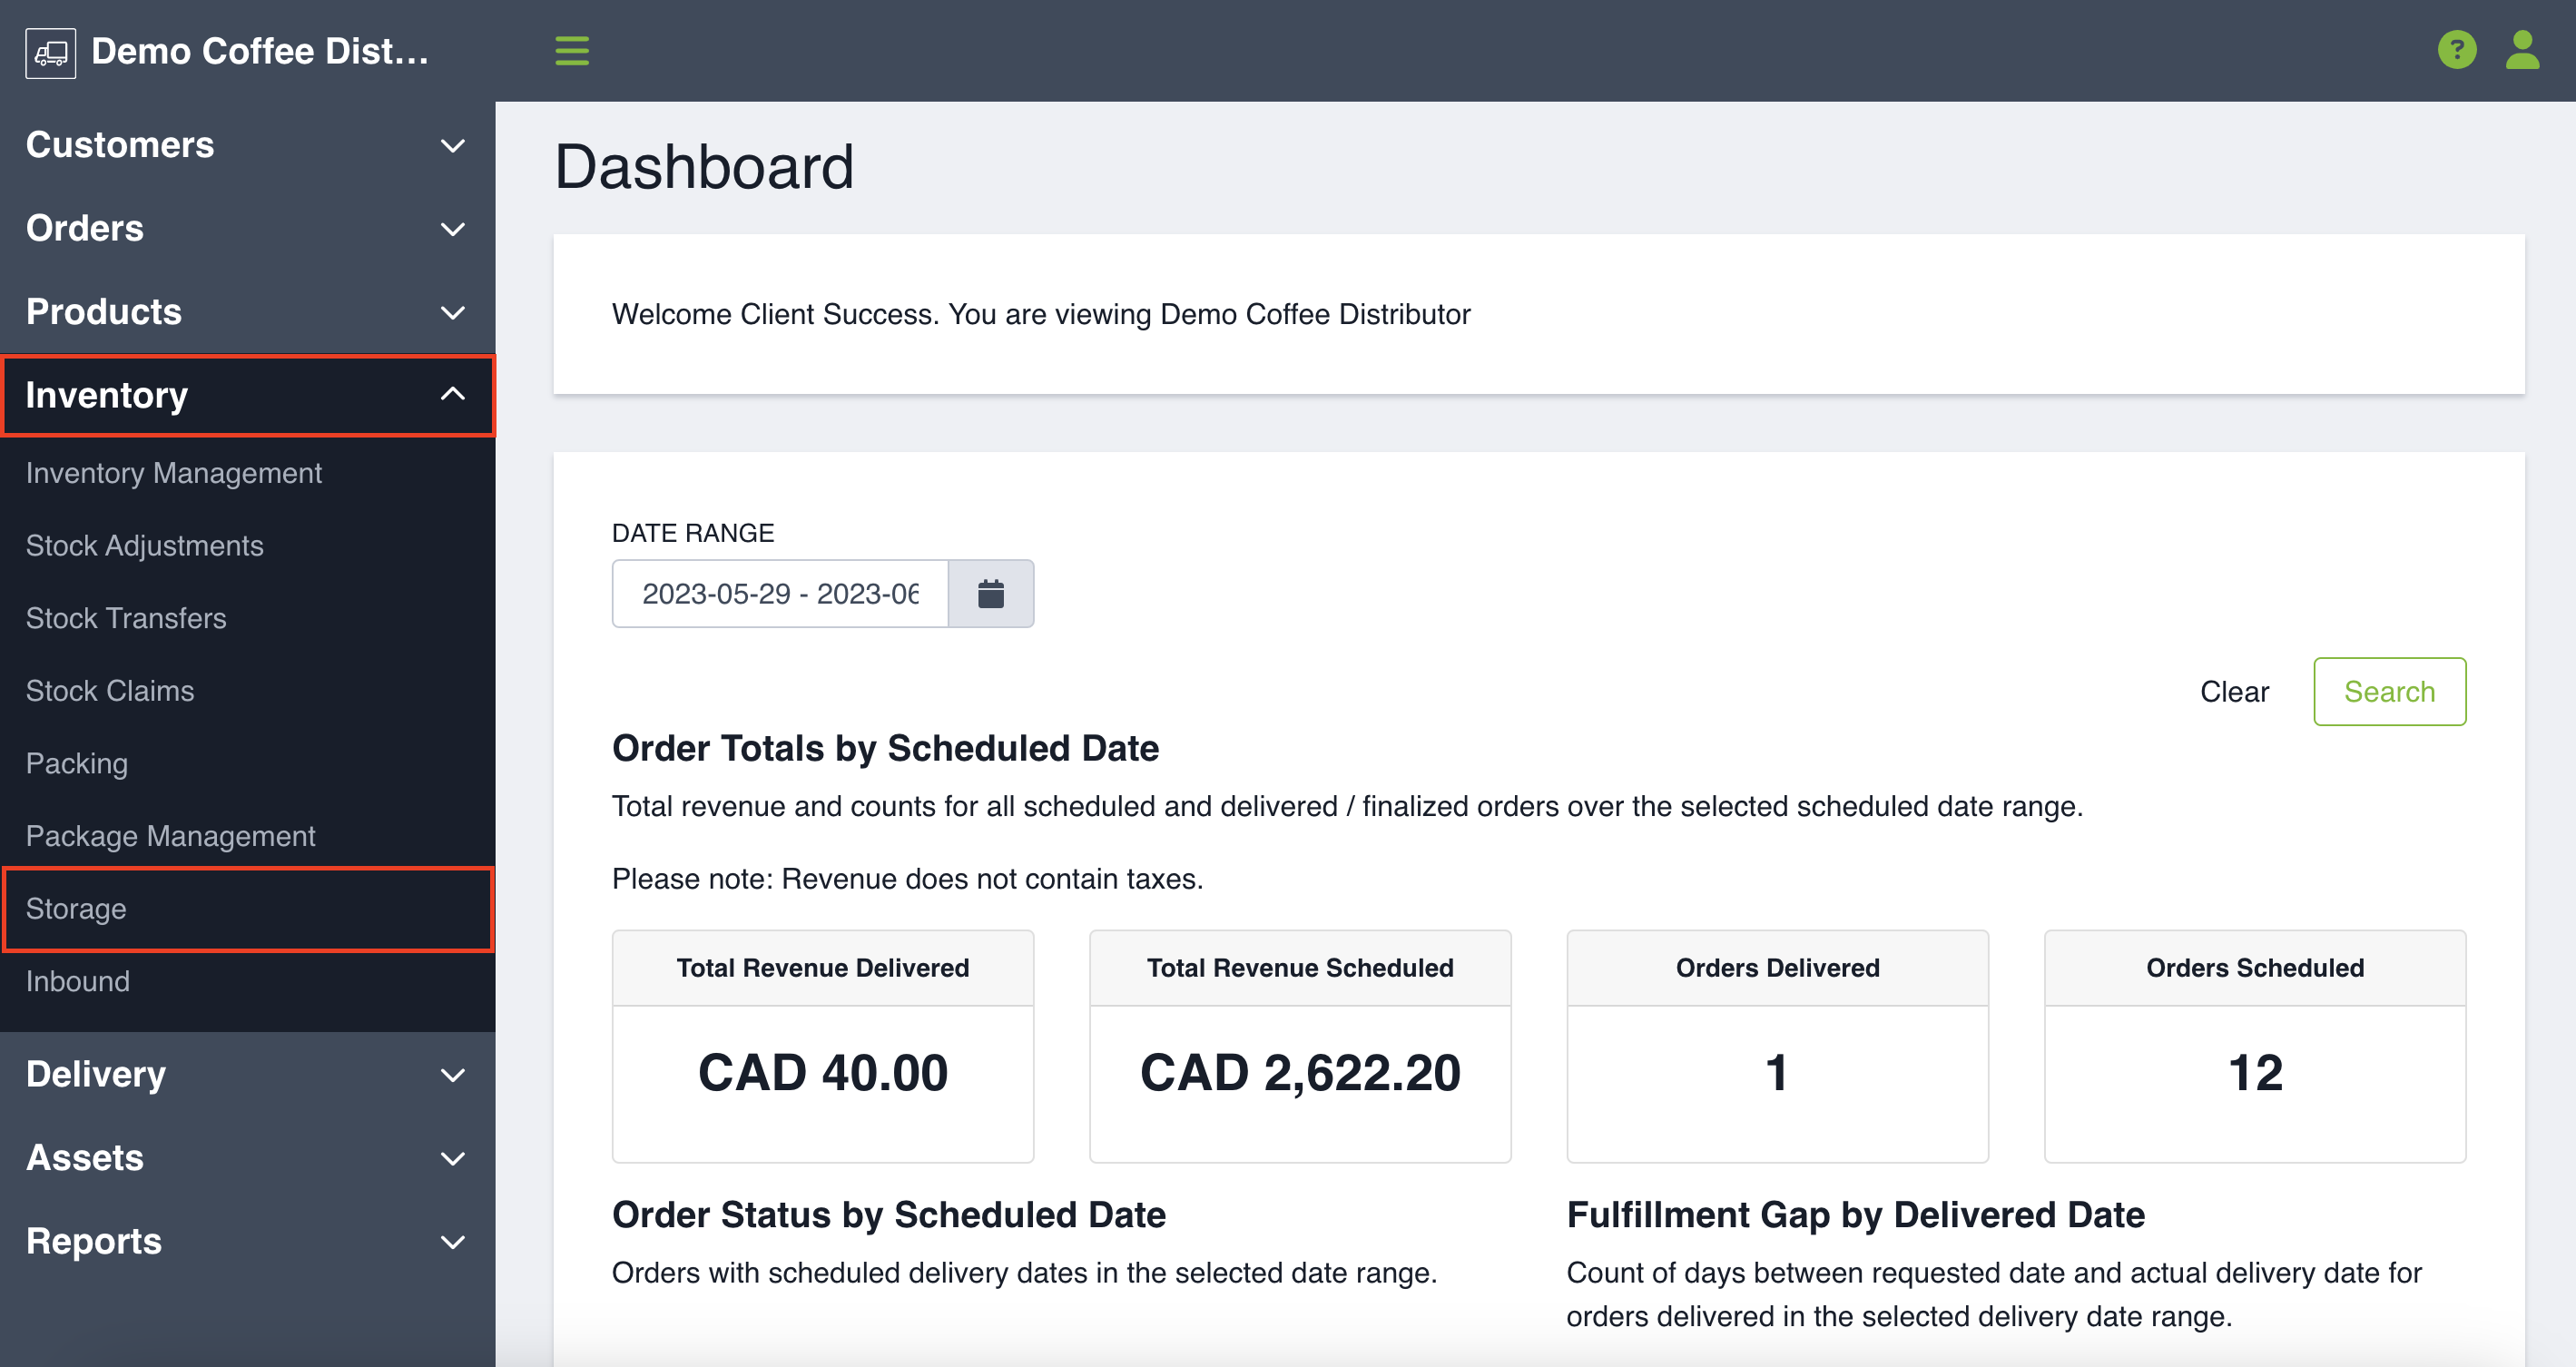
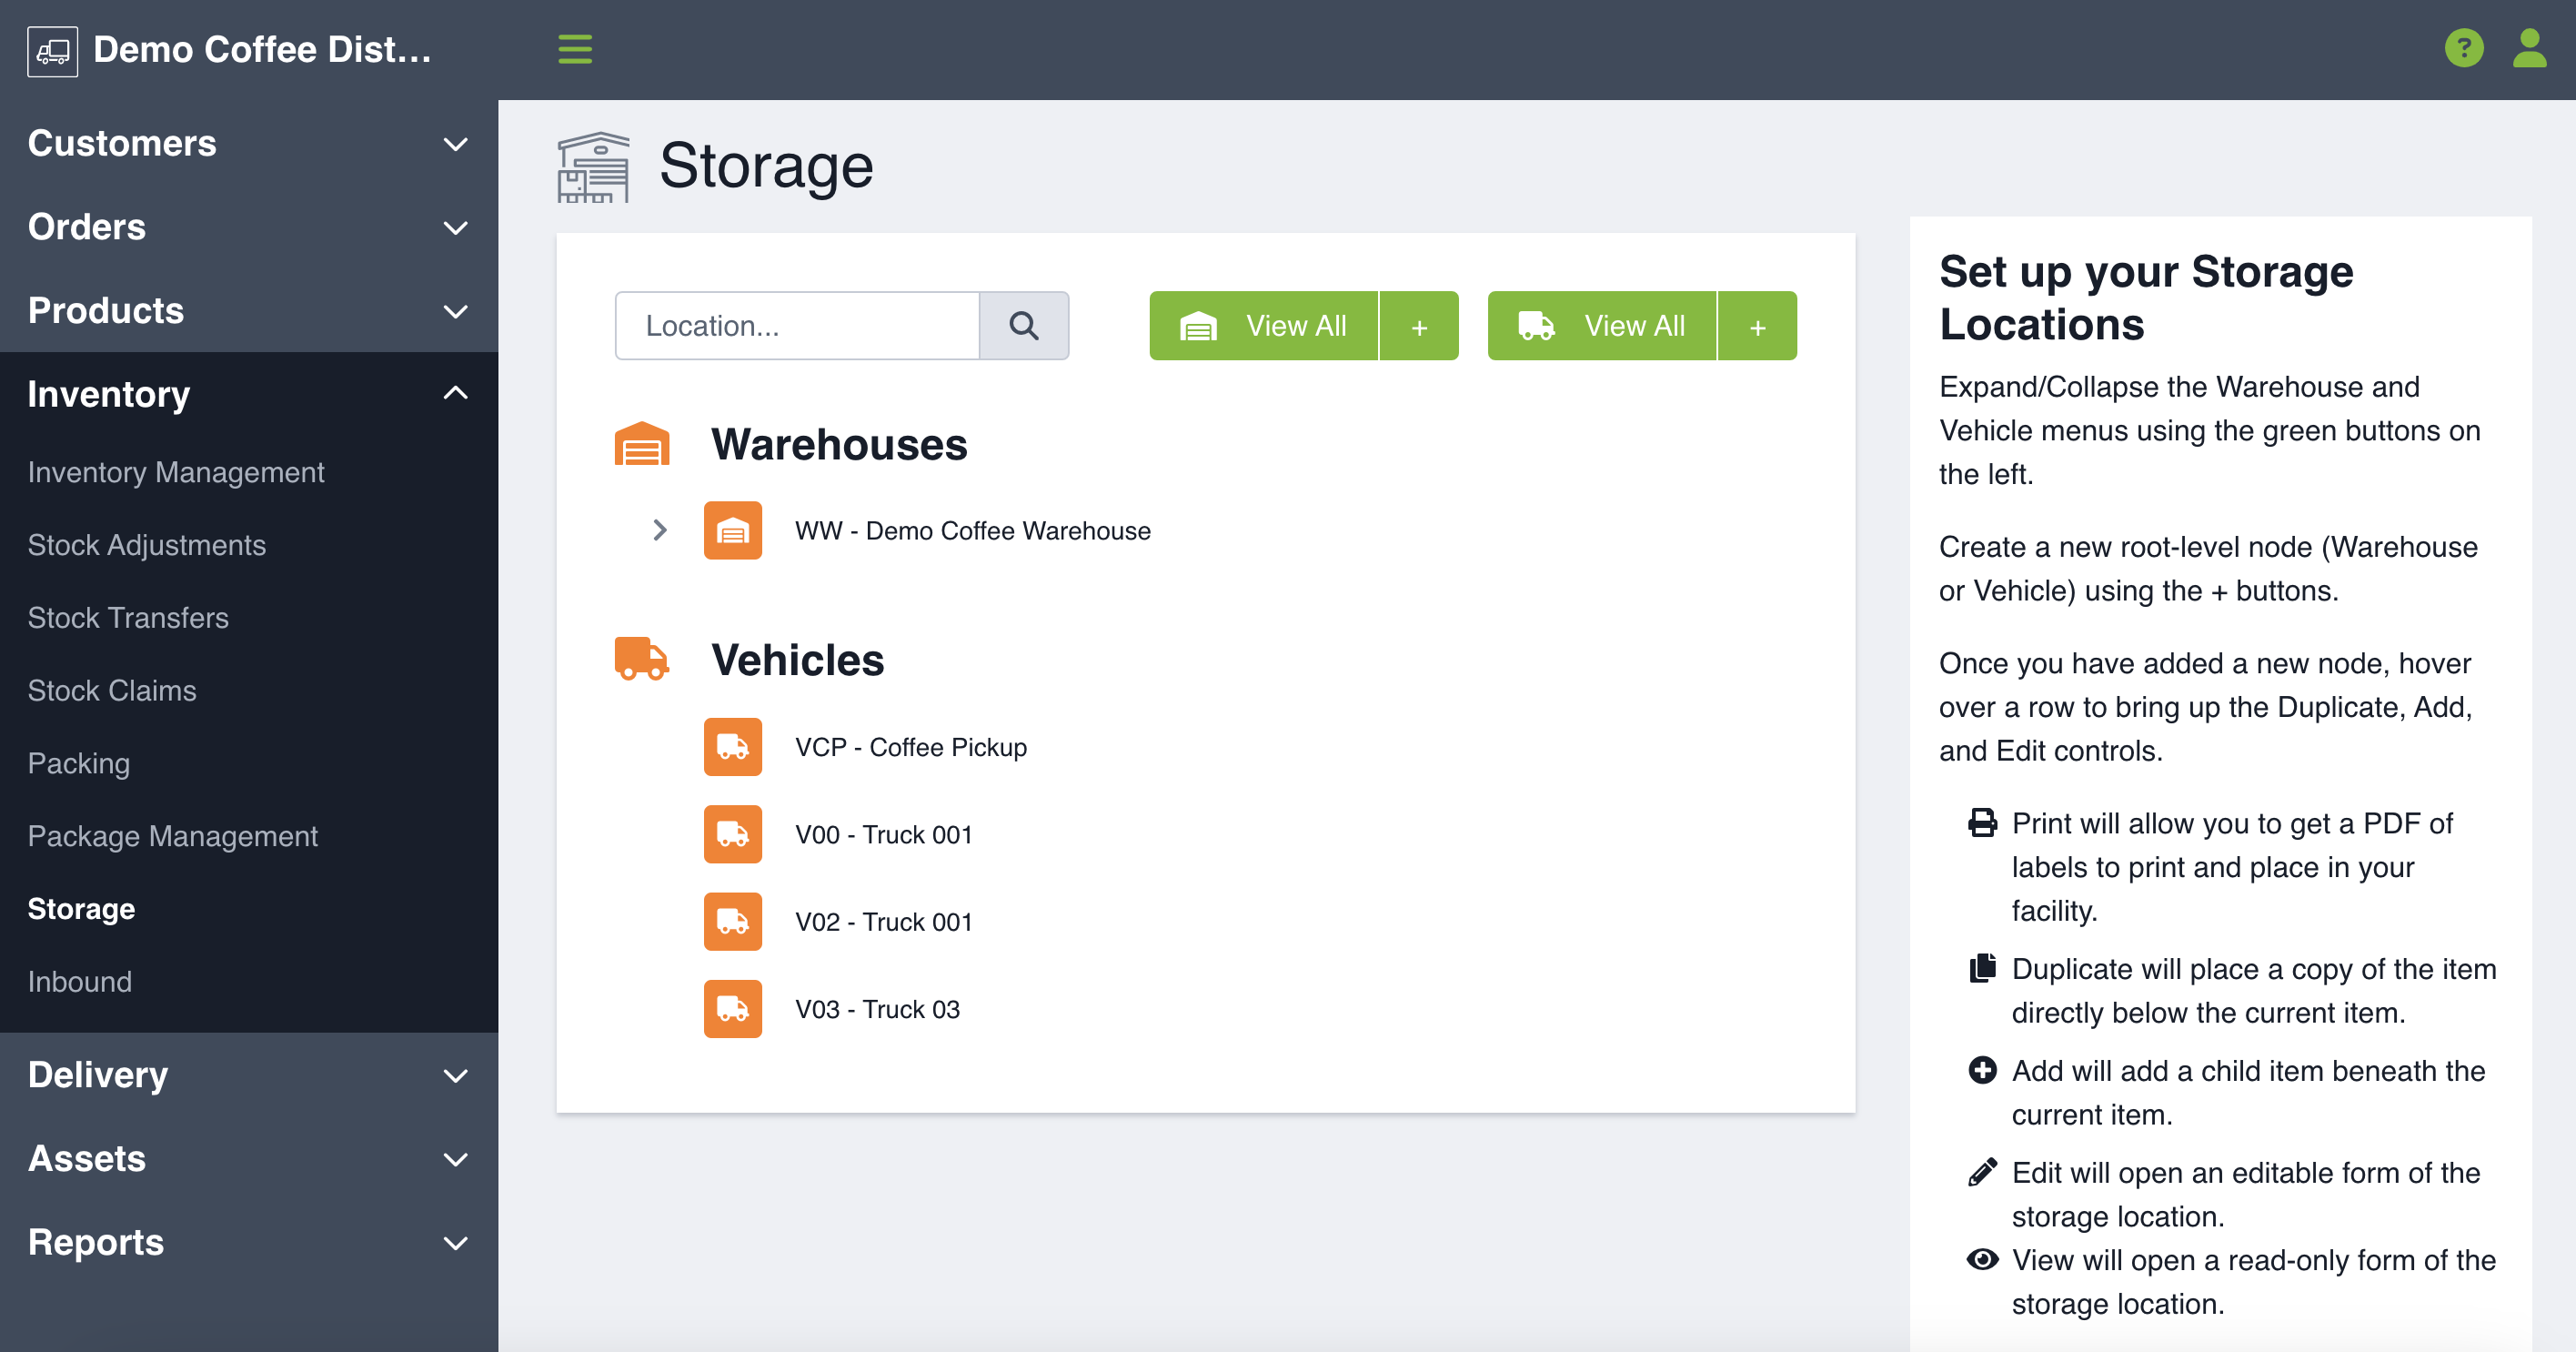
If you haven't set up any locations yet, you will see only see a default warehouse that was created on your behalf.
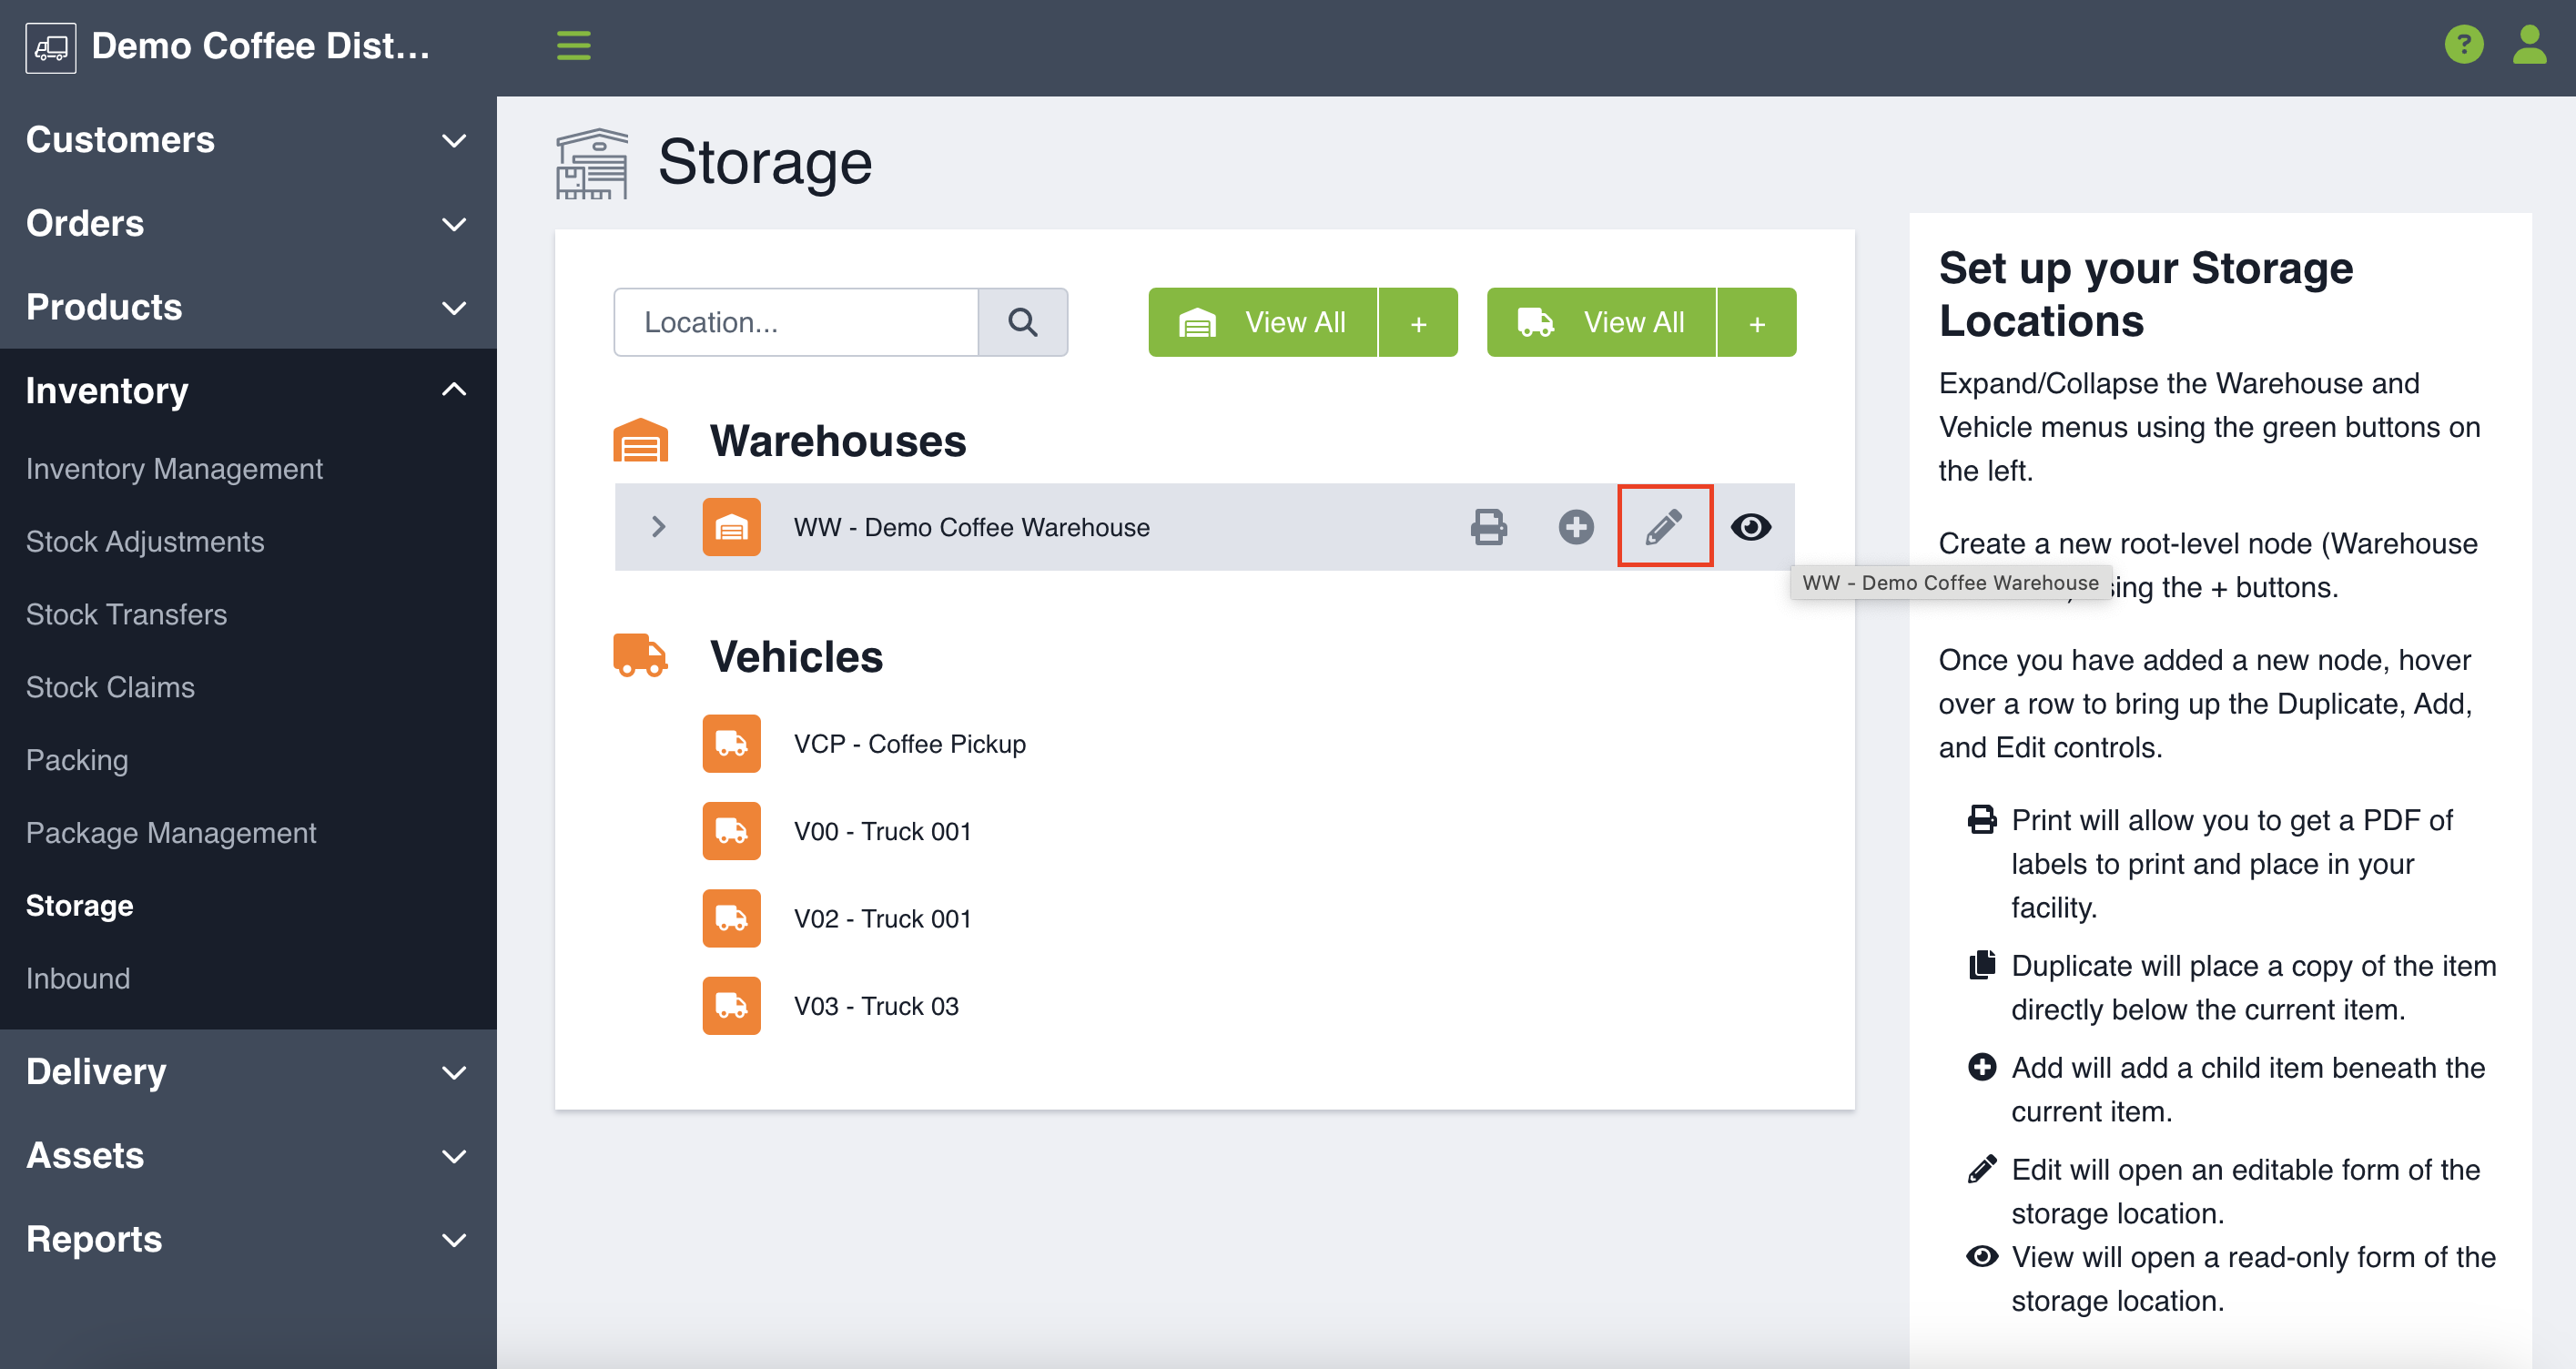
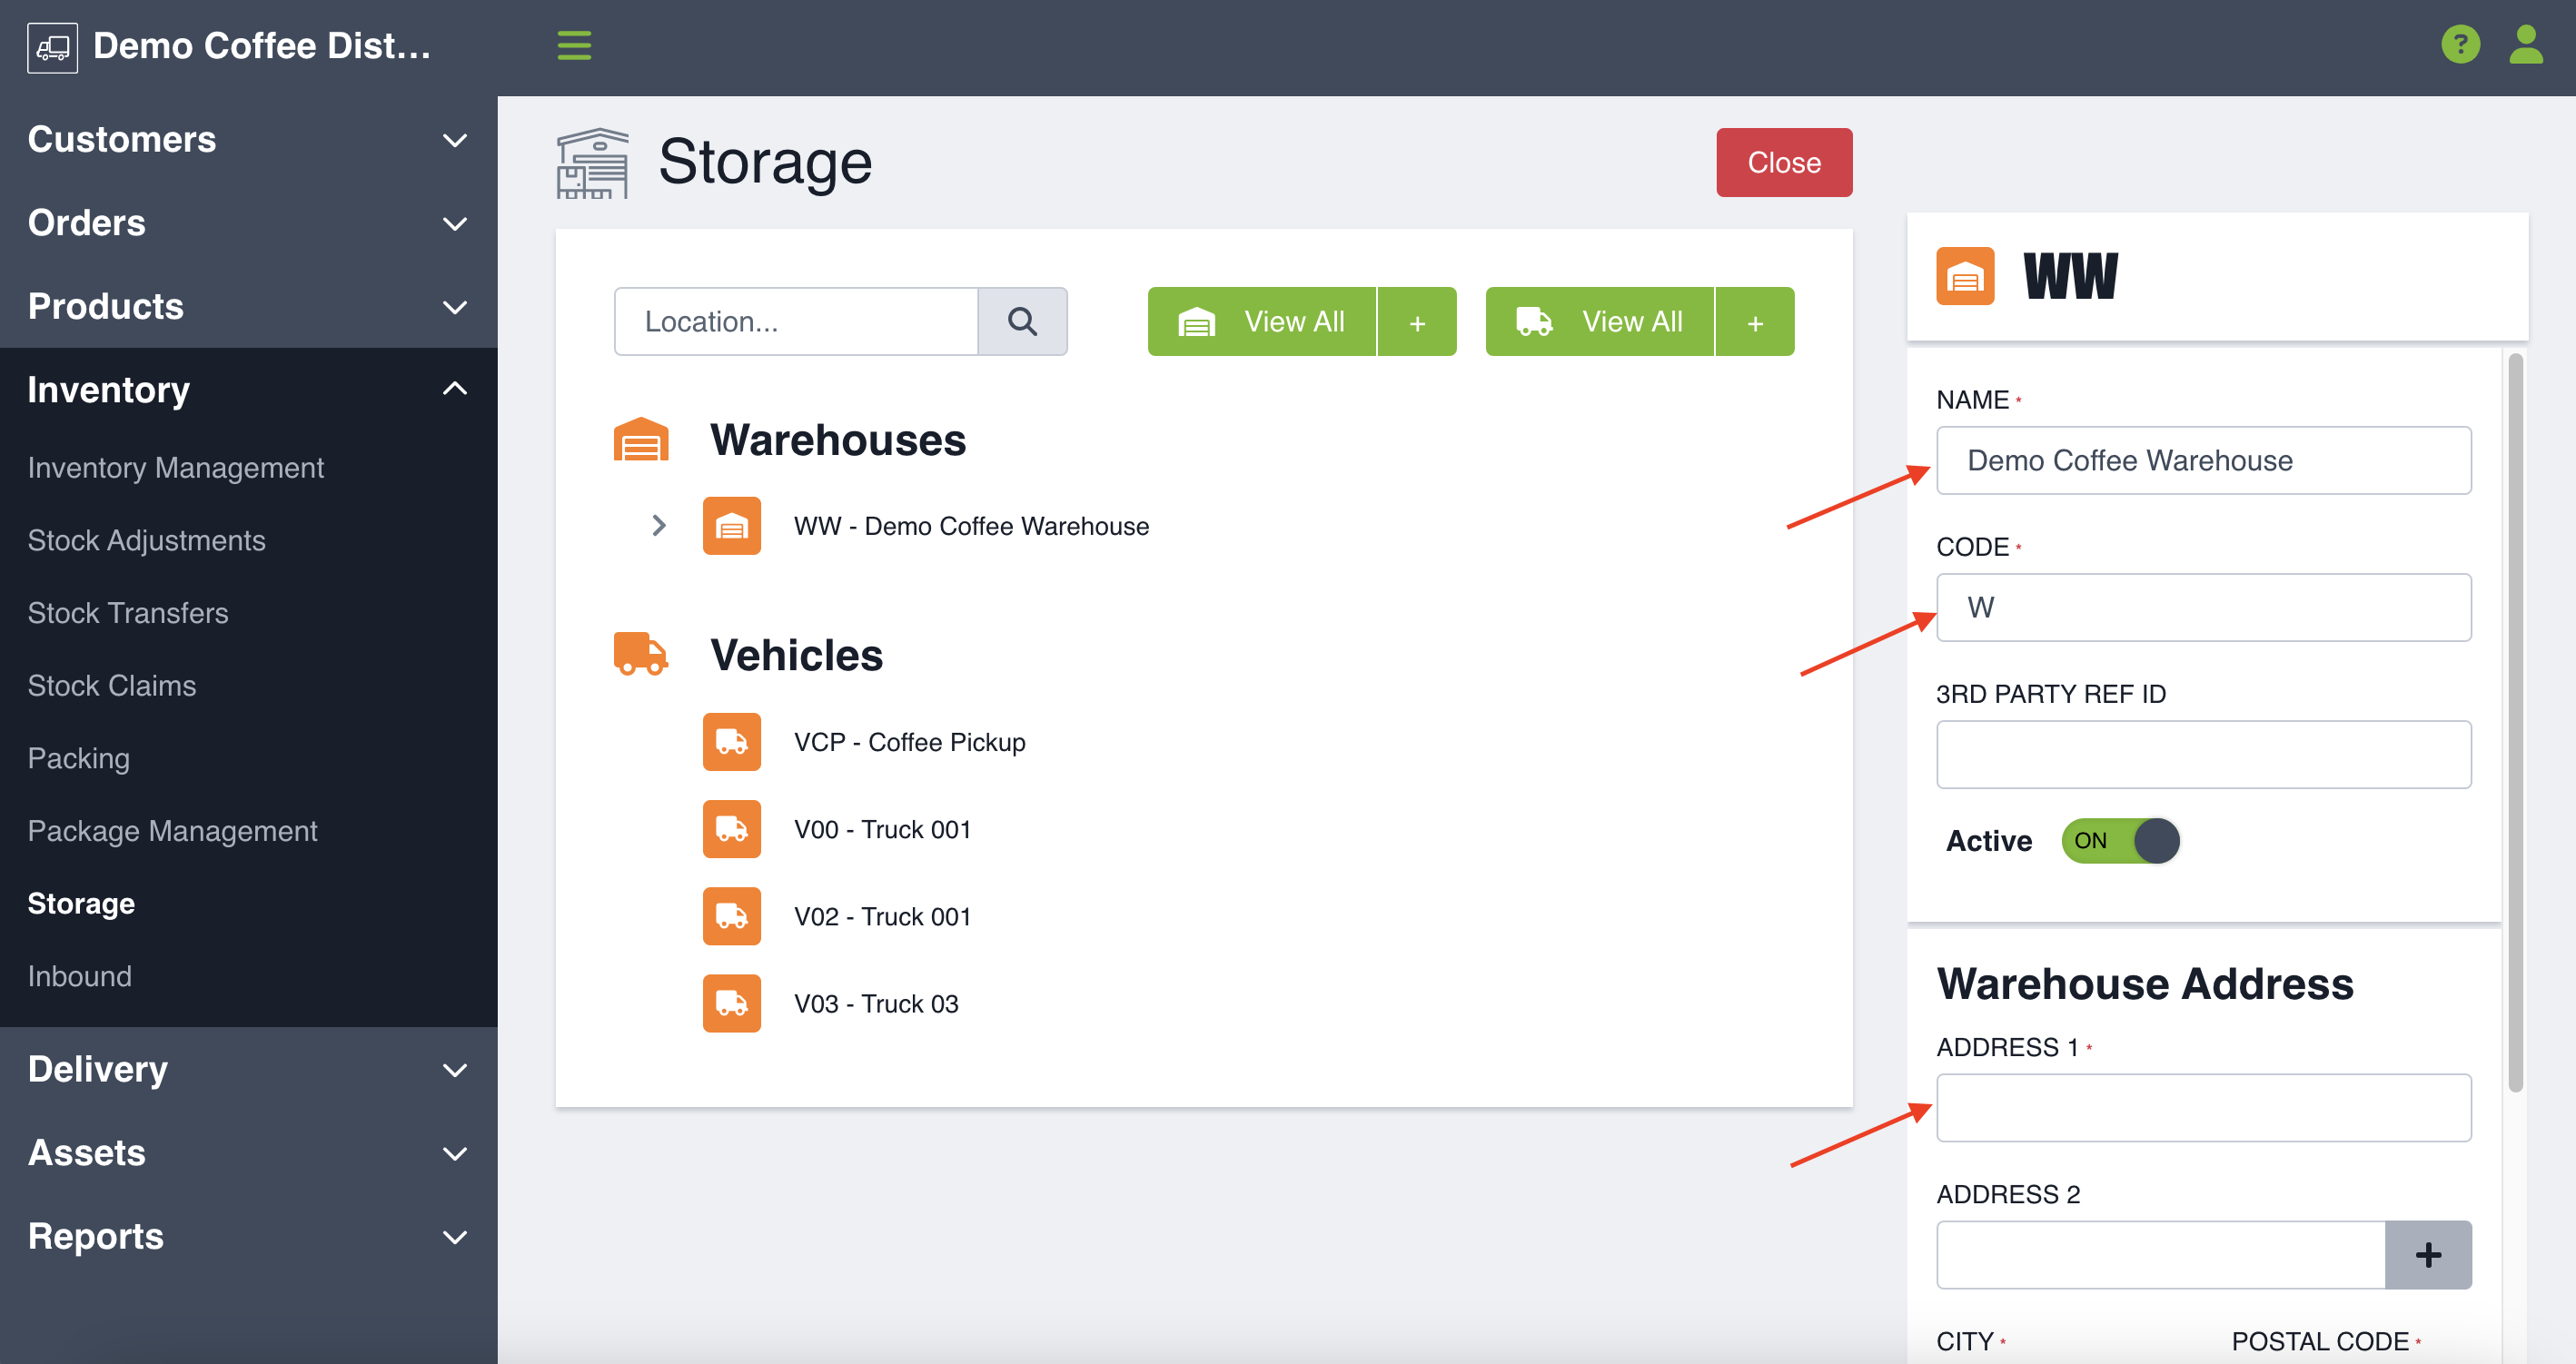
Hover over the warehouse and click on the pencil icon to edit and make any necessary changes, including to the warehouse name, code, and addressing details. Make sure you click Save. You may also choose to add vehicles.
Adding Storage Locations
You can create a warehouse or vehicle using the default types, or you can create a storage location using one of the storage locations you set up in settings.
To create a warehouse, click on the orange + button next to the warehouse icon near the top of your page. This will open up a warehouse create form, where like mentioned above, you can set characteristics including warehouse name, code, and addressing details. Click Save to create the warehouse.

To create a vehicle, click on the orange + button next to the vehicle icon near the top of your page. This will open up a vehicle create form, where you can name your vehicle, enter a code, and optionally add a description. Click Save to create the vehicle.
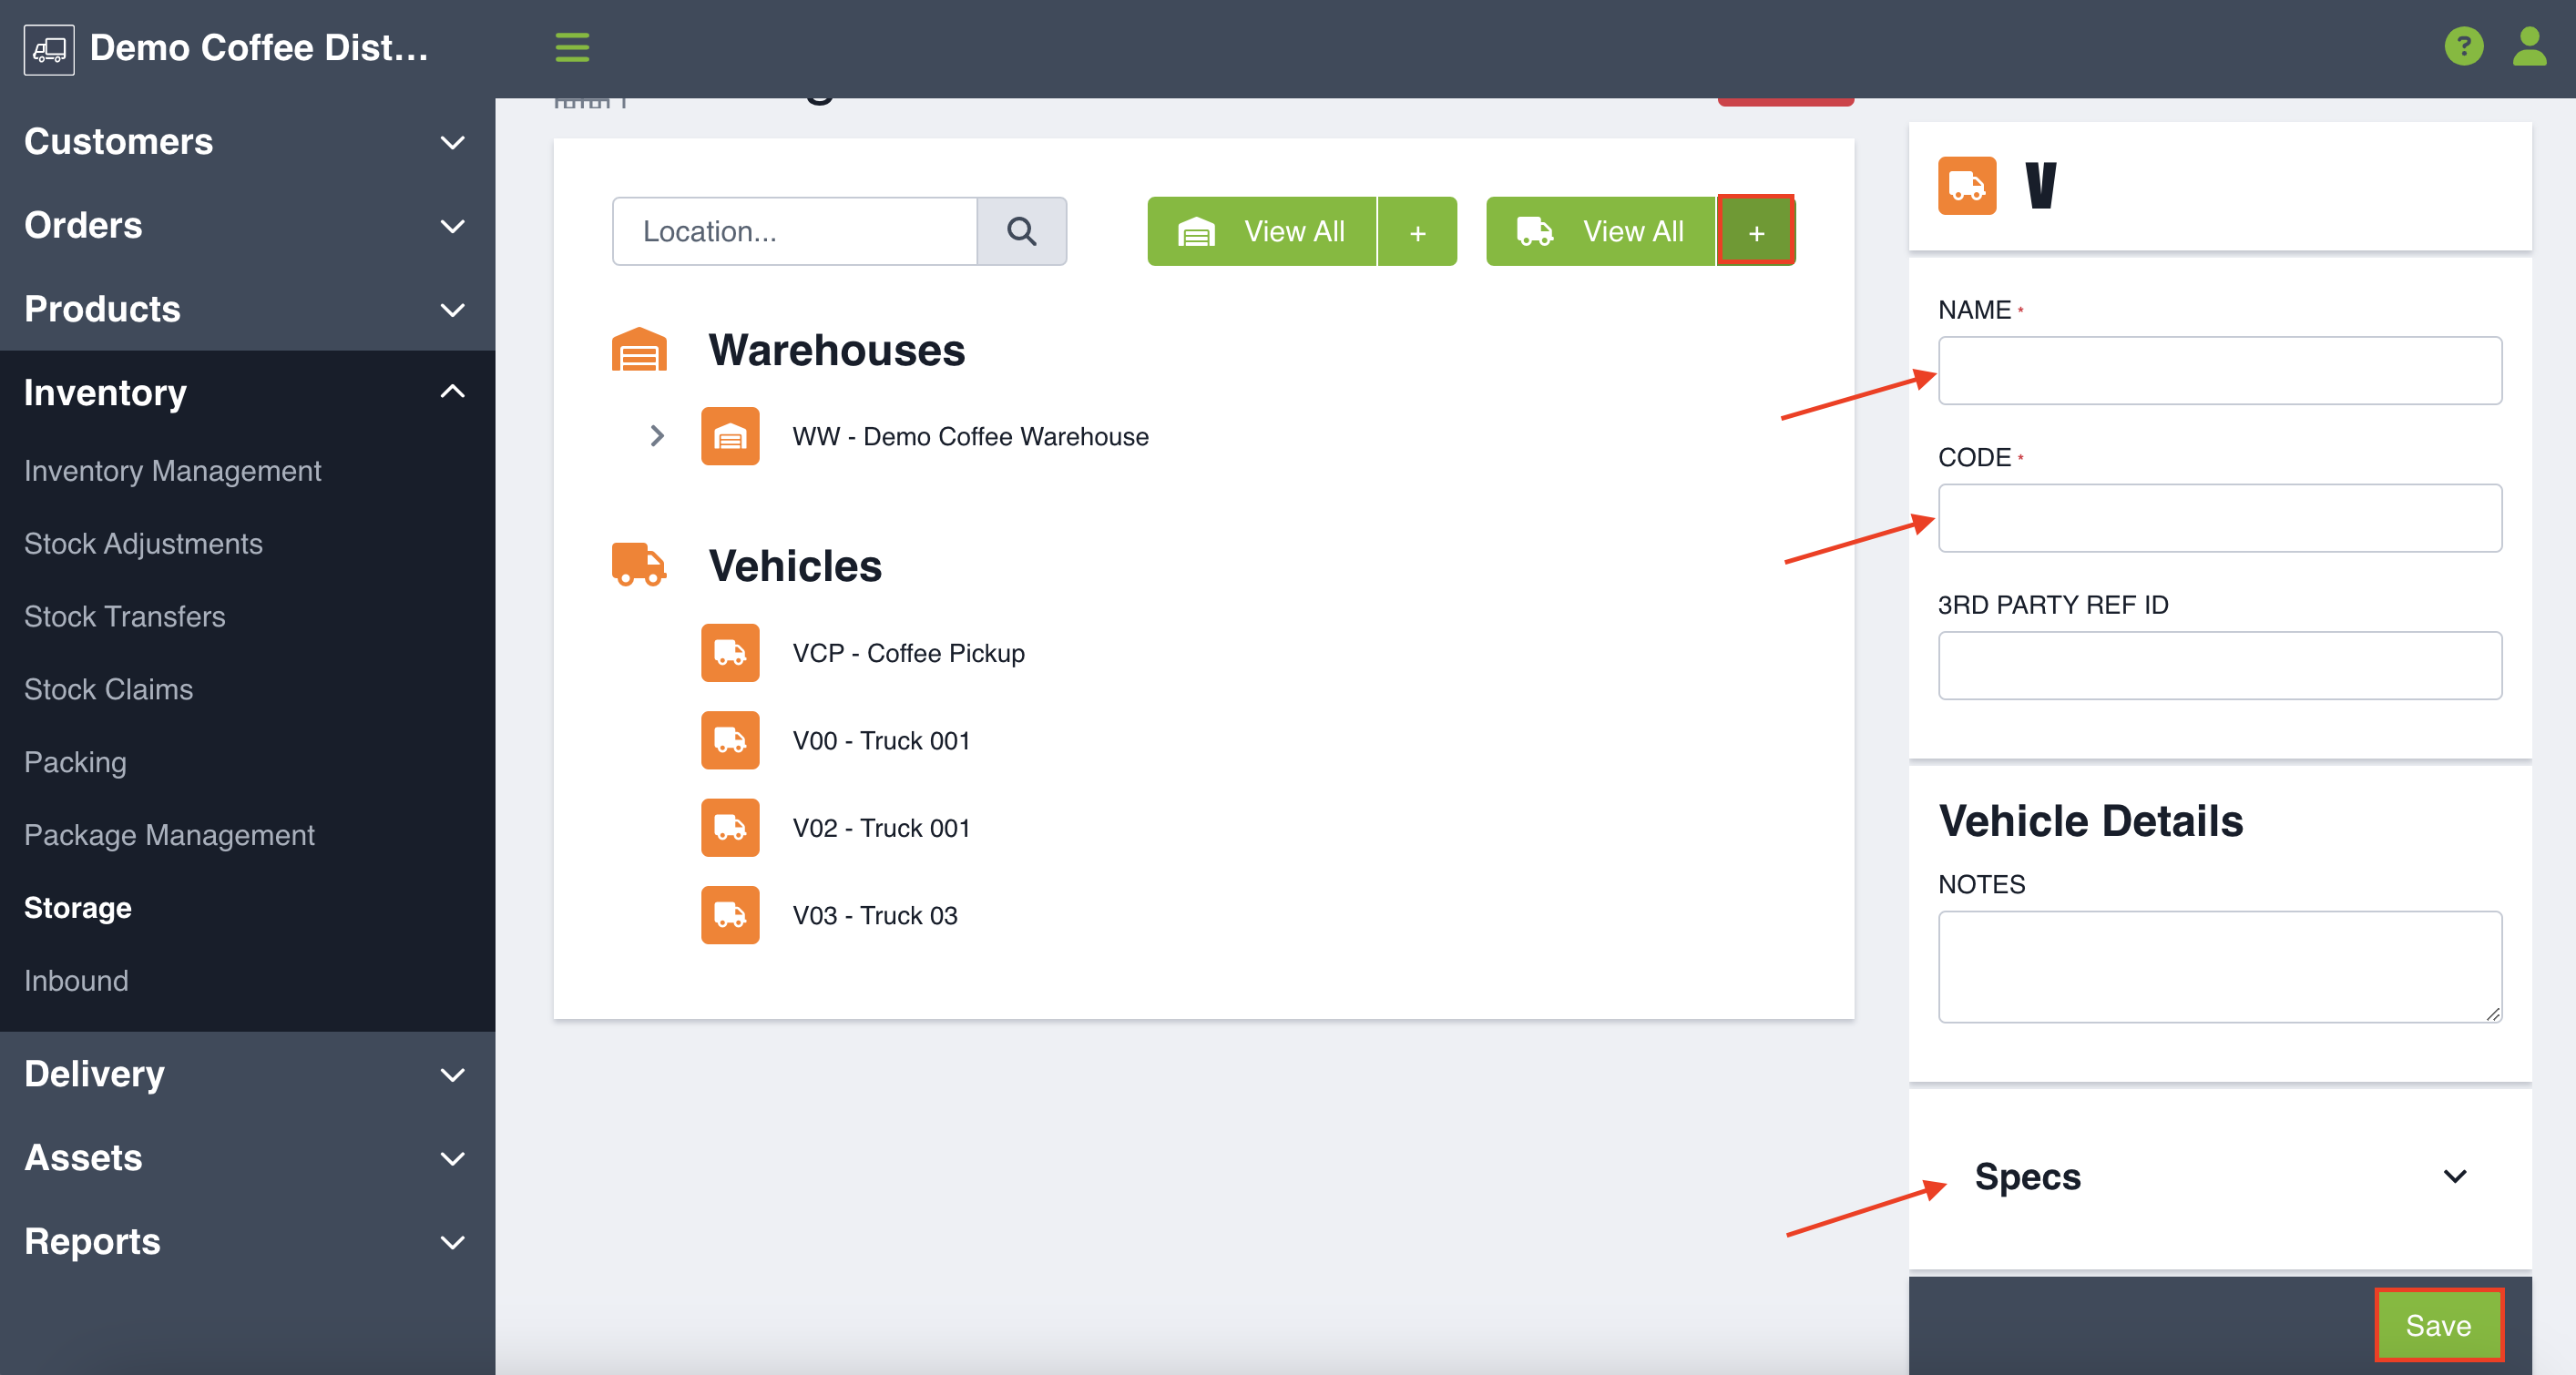
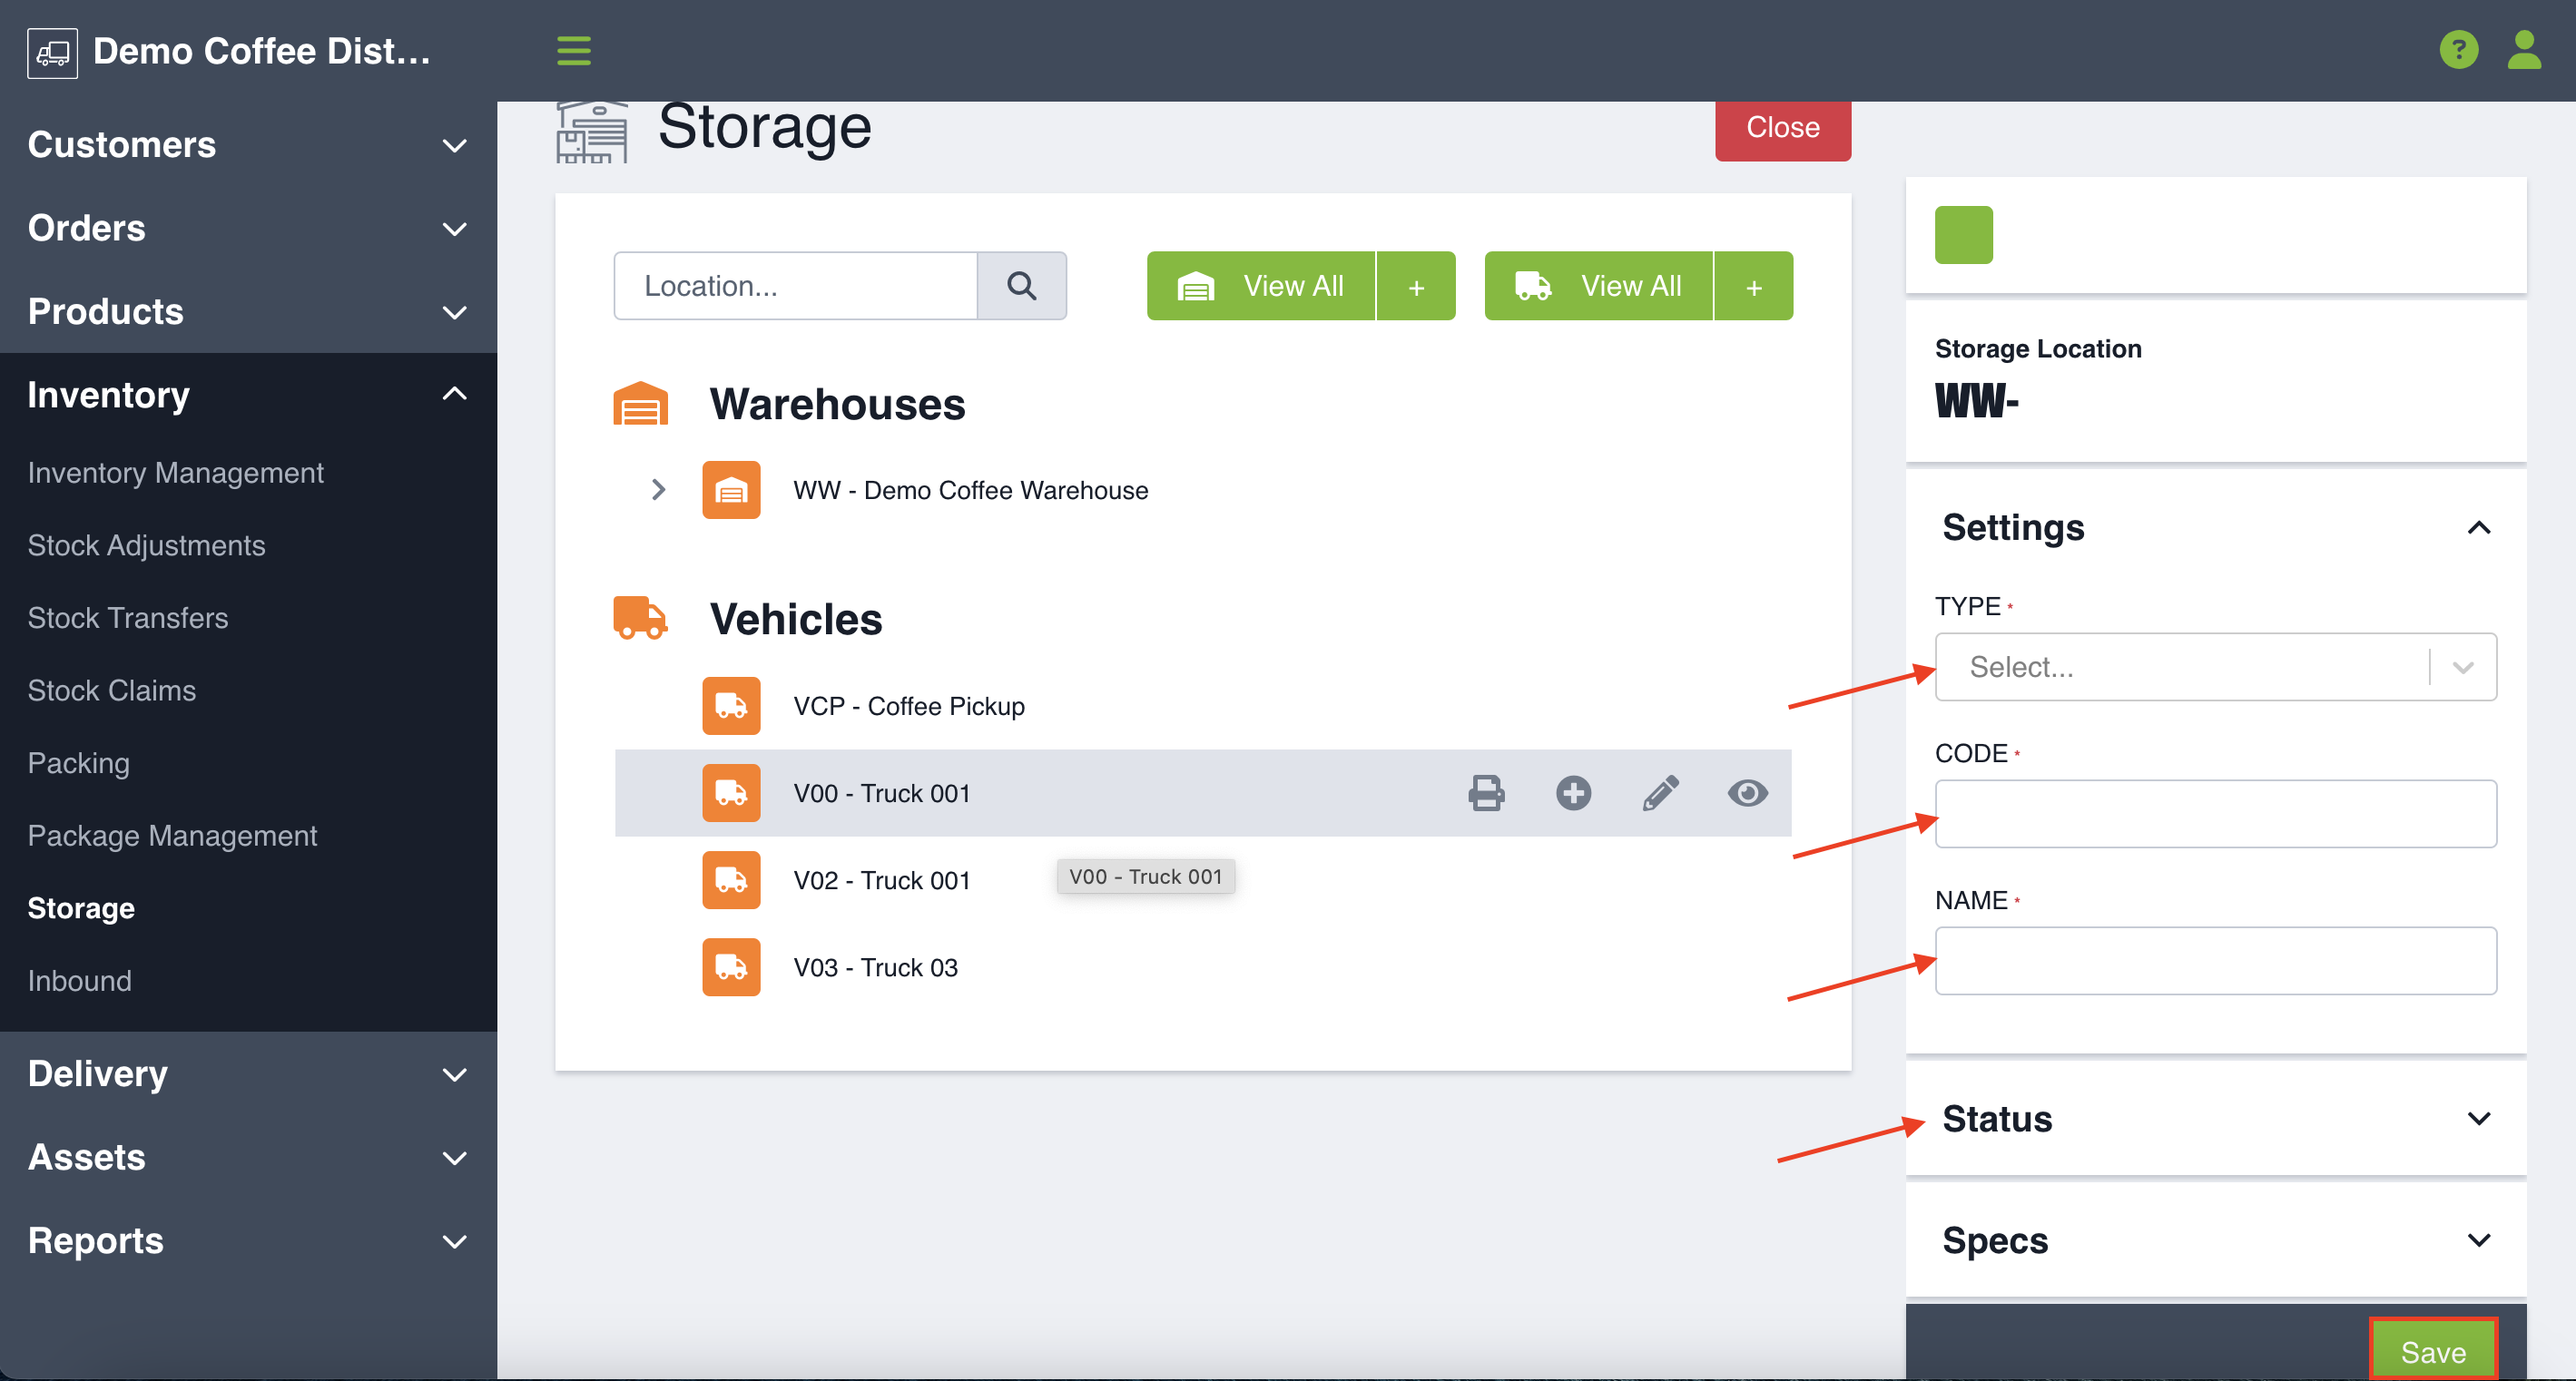
To add a new storage location, first hover over an existing warehouse, vehicle, or location that you would like to add the new one under and click the Plus icon.

You will be prompted to fill out the following information:
- Name
- Location type
- Code
- Saleability status
Make sure you click Save when you’re done.
NOTE: Your storage location is given an ID based on single character prefix you set on the storage location type in settings, plus the one or two character code you gave your location. This location ID must be unique among the location’s “siblings”. For example, if your storage structure looks like Warehouse - Zone - Aisle - Bin, all of your bins within one aisle must have a unique ID.
View/Edit Storage Locations
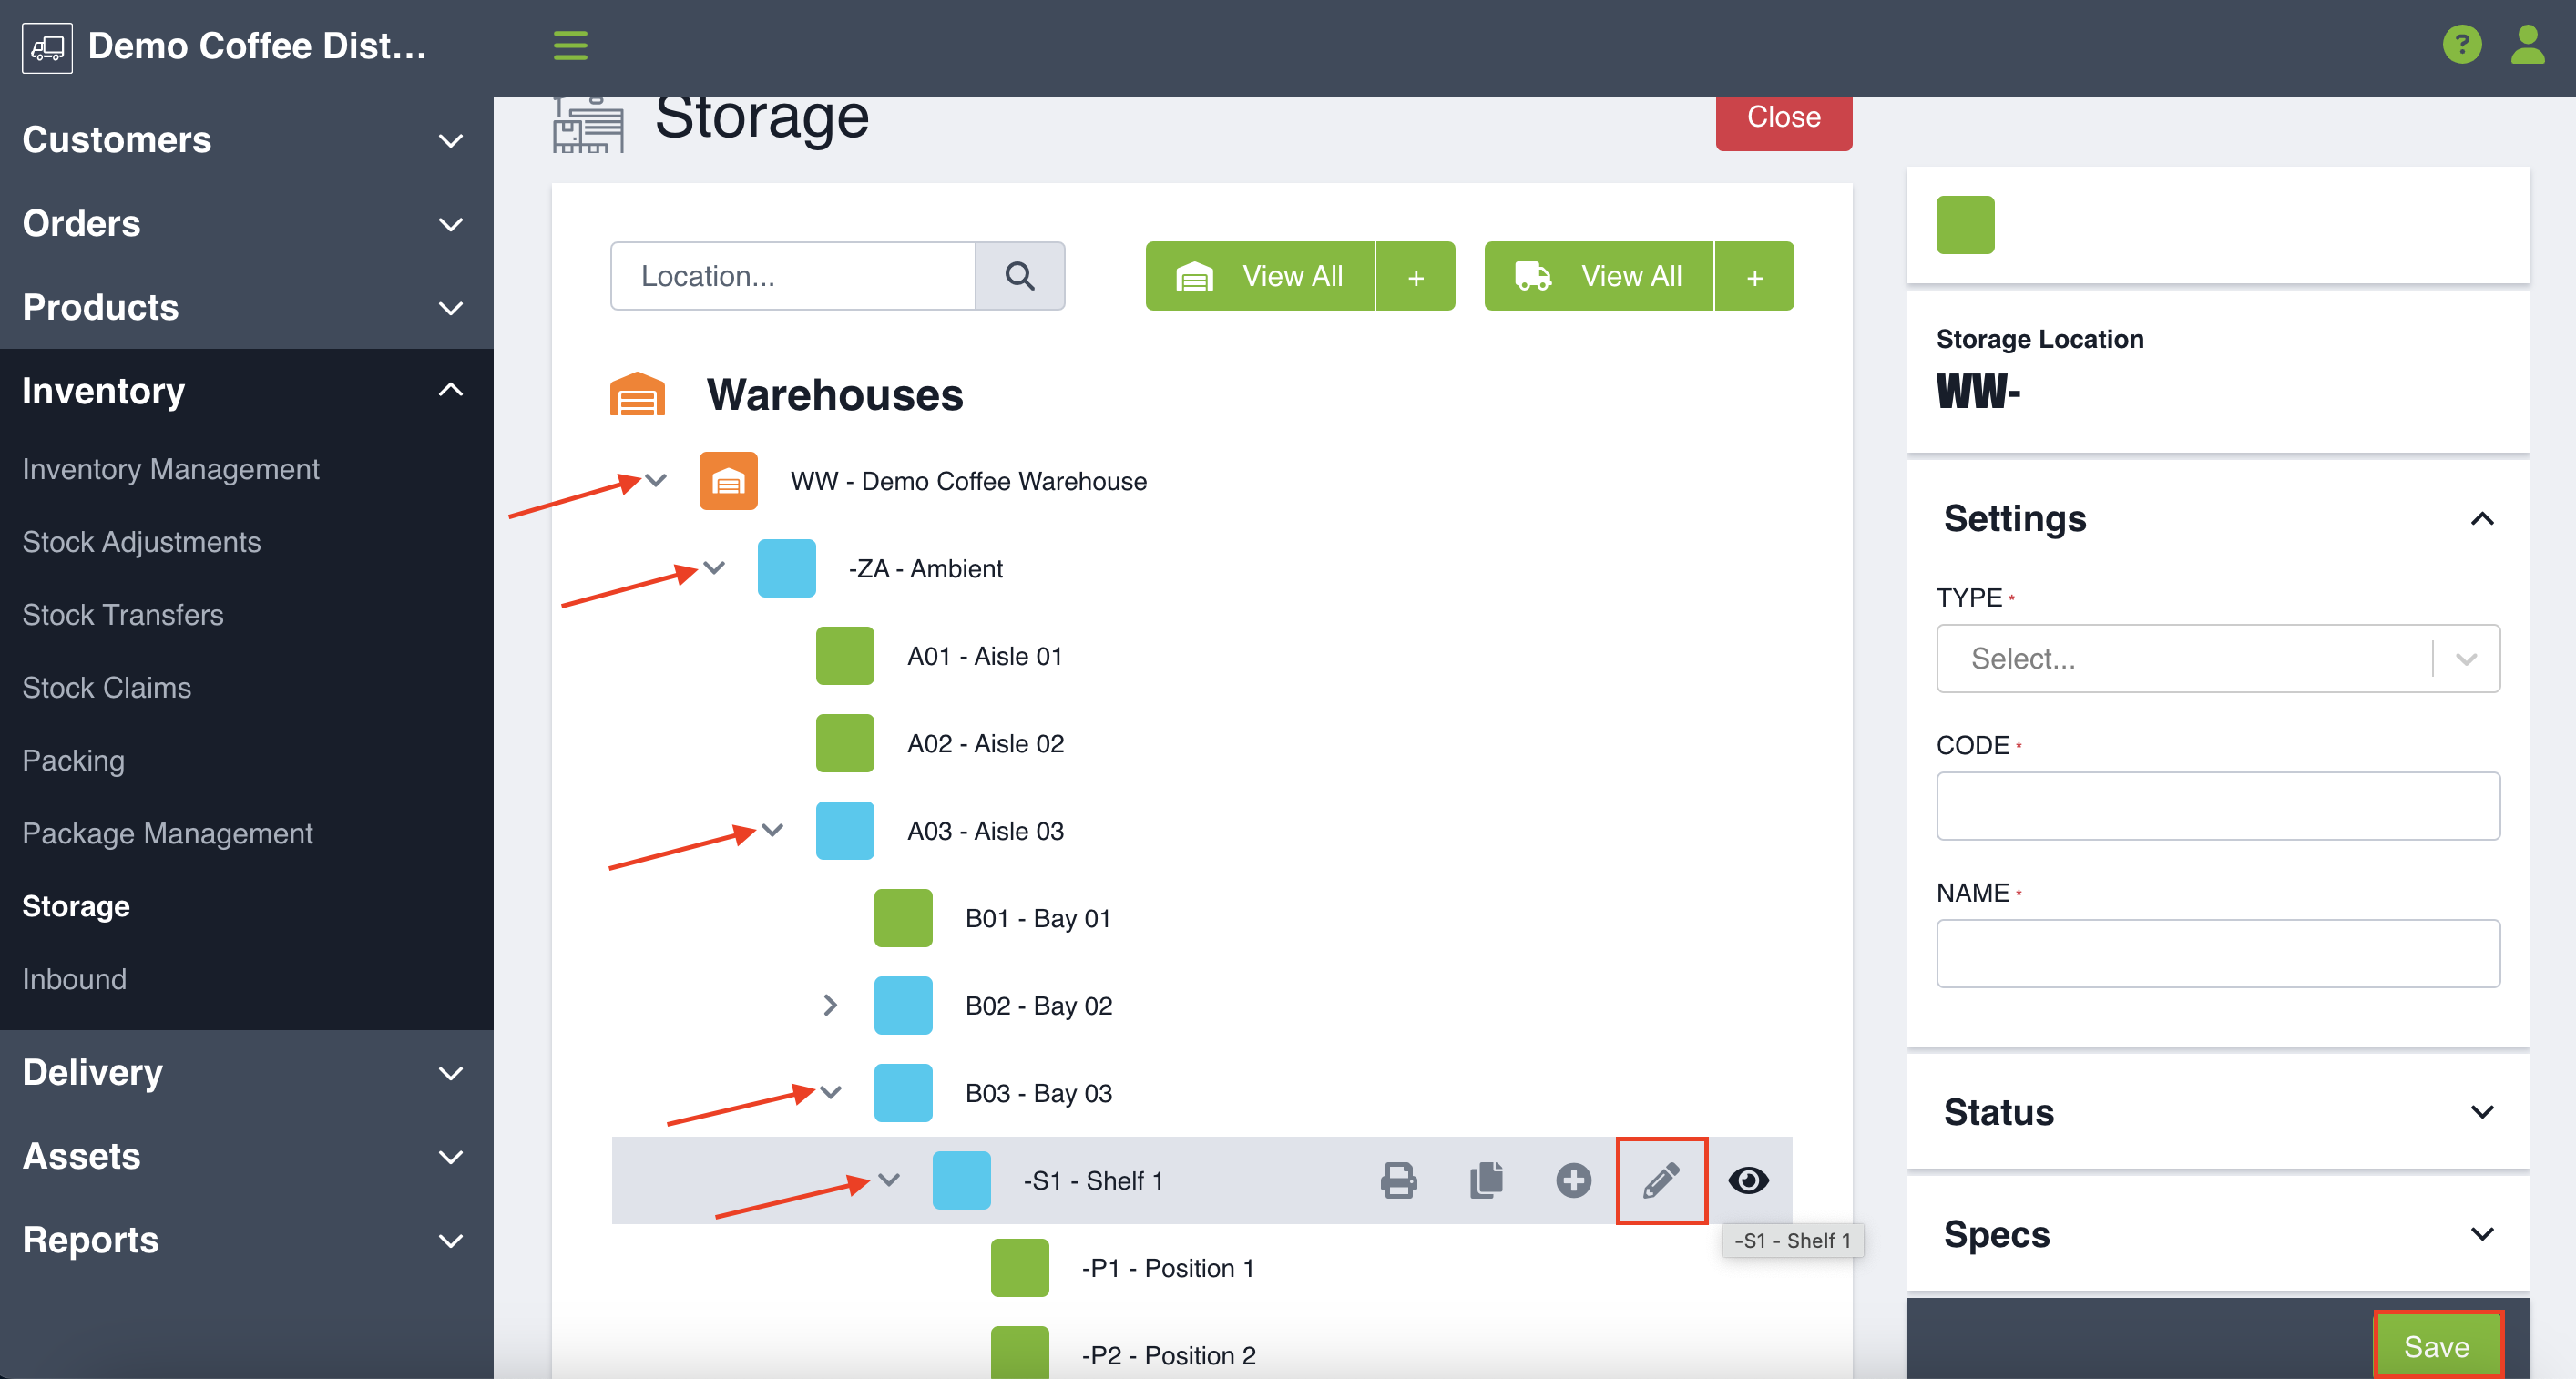
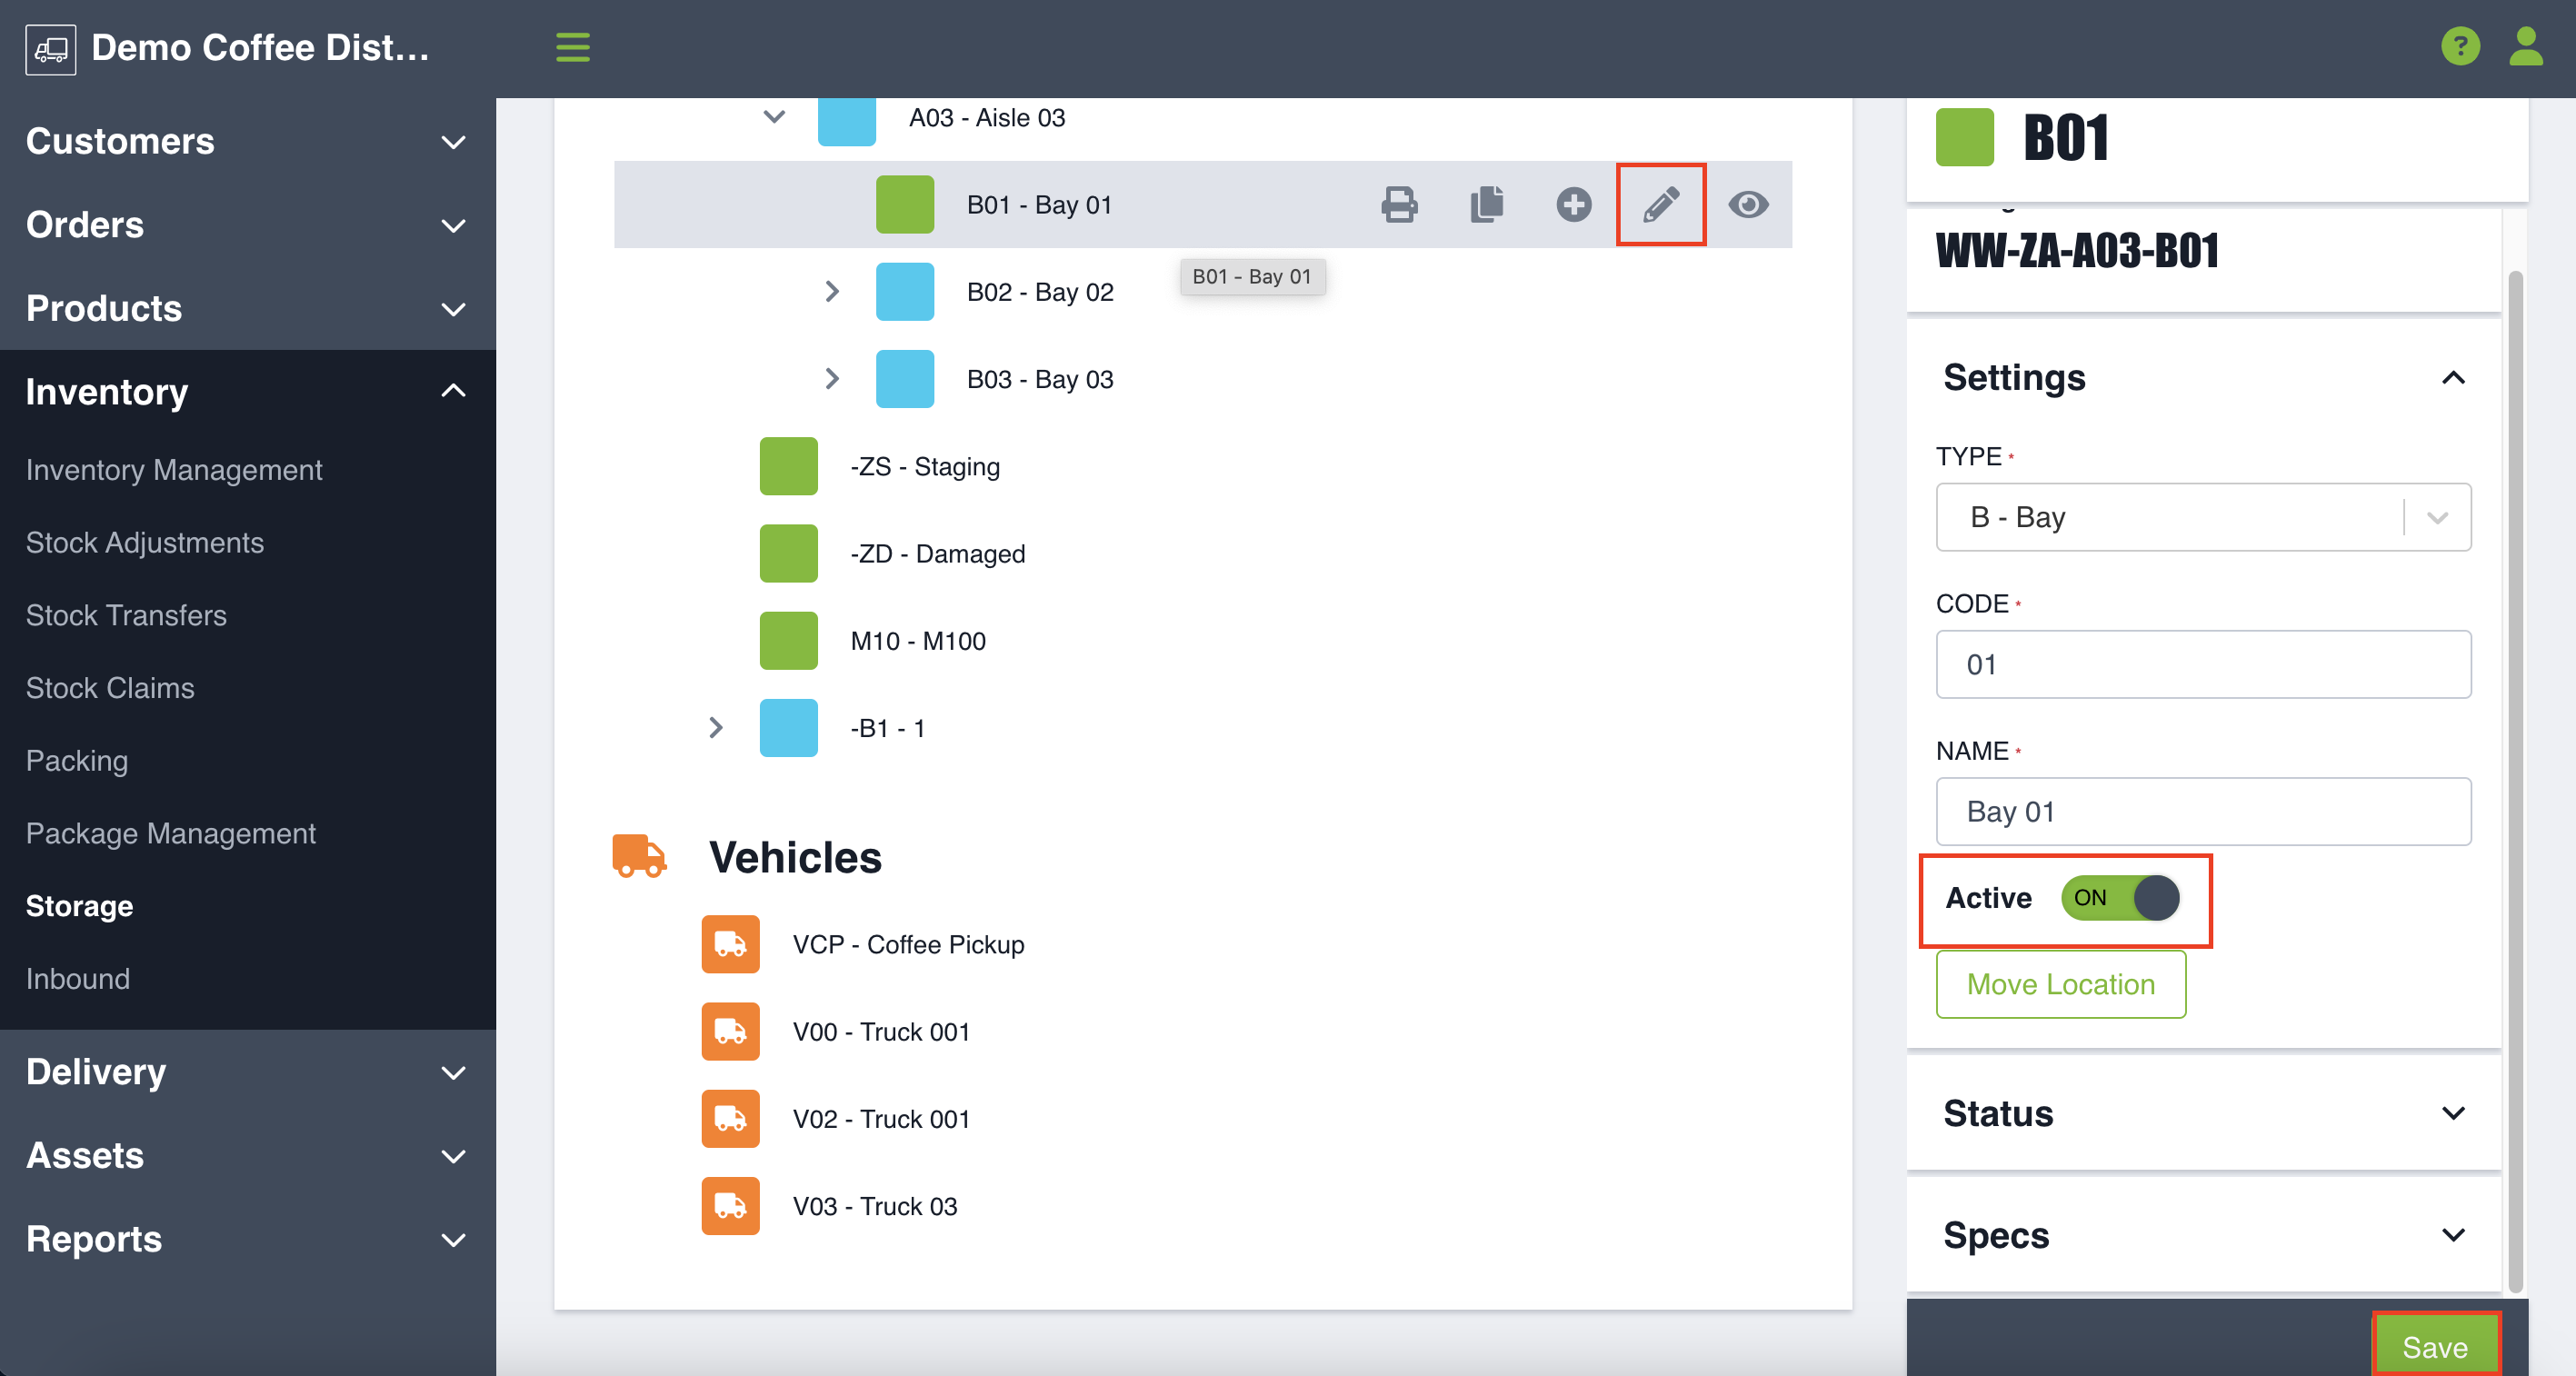
You can also view the hierarchy of your storage structure from the Storage Management page. Warehouses and vehicles are denoted by an orange box, locations in the middle of the hierarchy are denoted by a blue box, and those locations at the bottom of the hierarchy that can contain inventory are denoted by a green box. You can use the arrows to the left of these boxes to expand and collapse the storage locations. To edit a storage location, hover over a location and click the Pencil icon to open the form. Make sure you press Save when you’re done making changes.
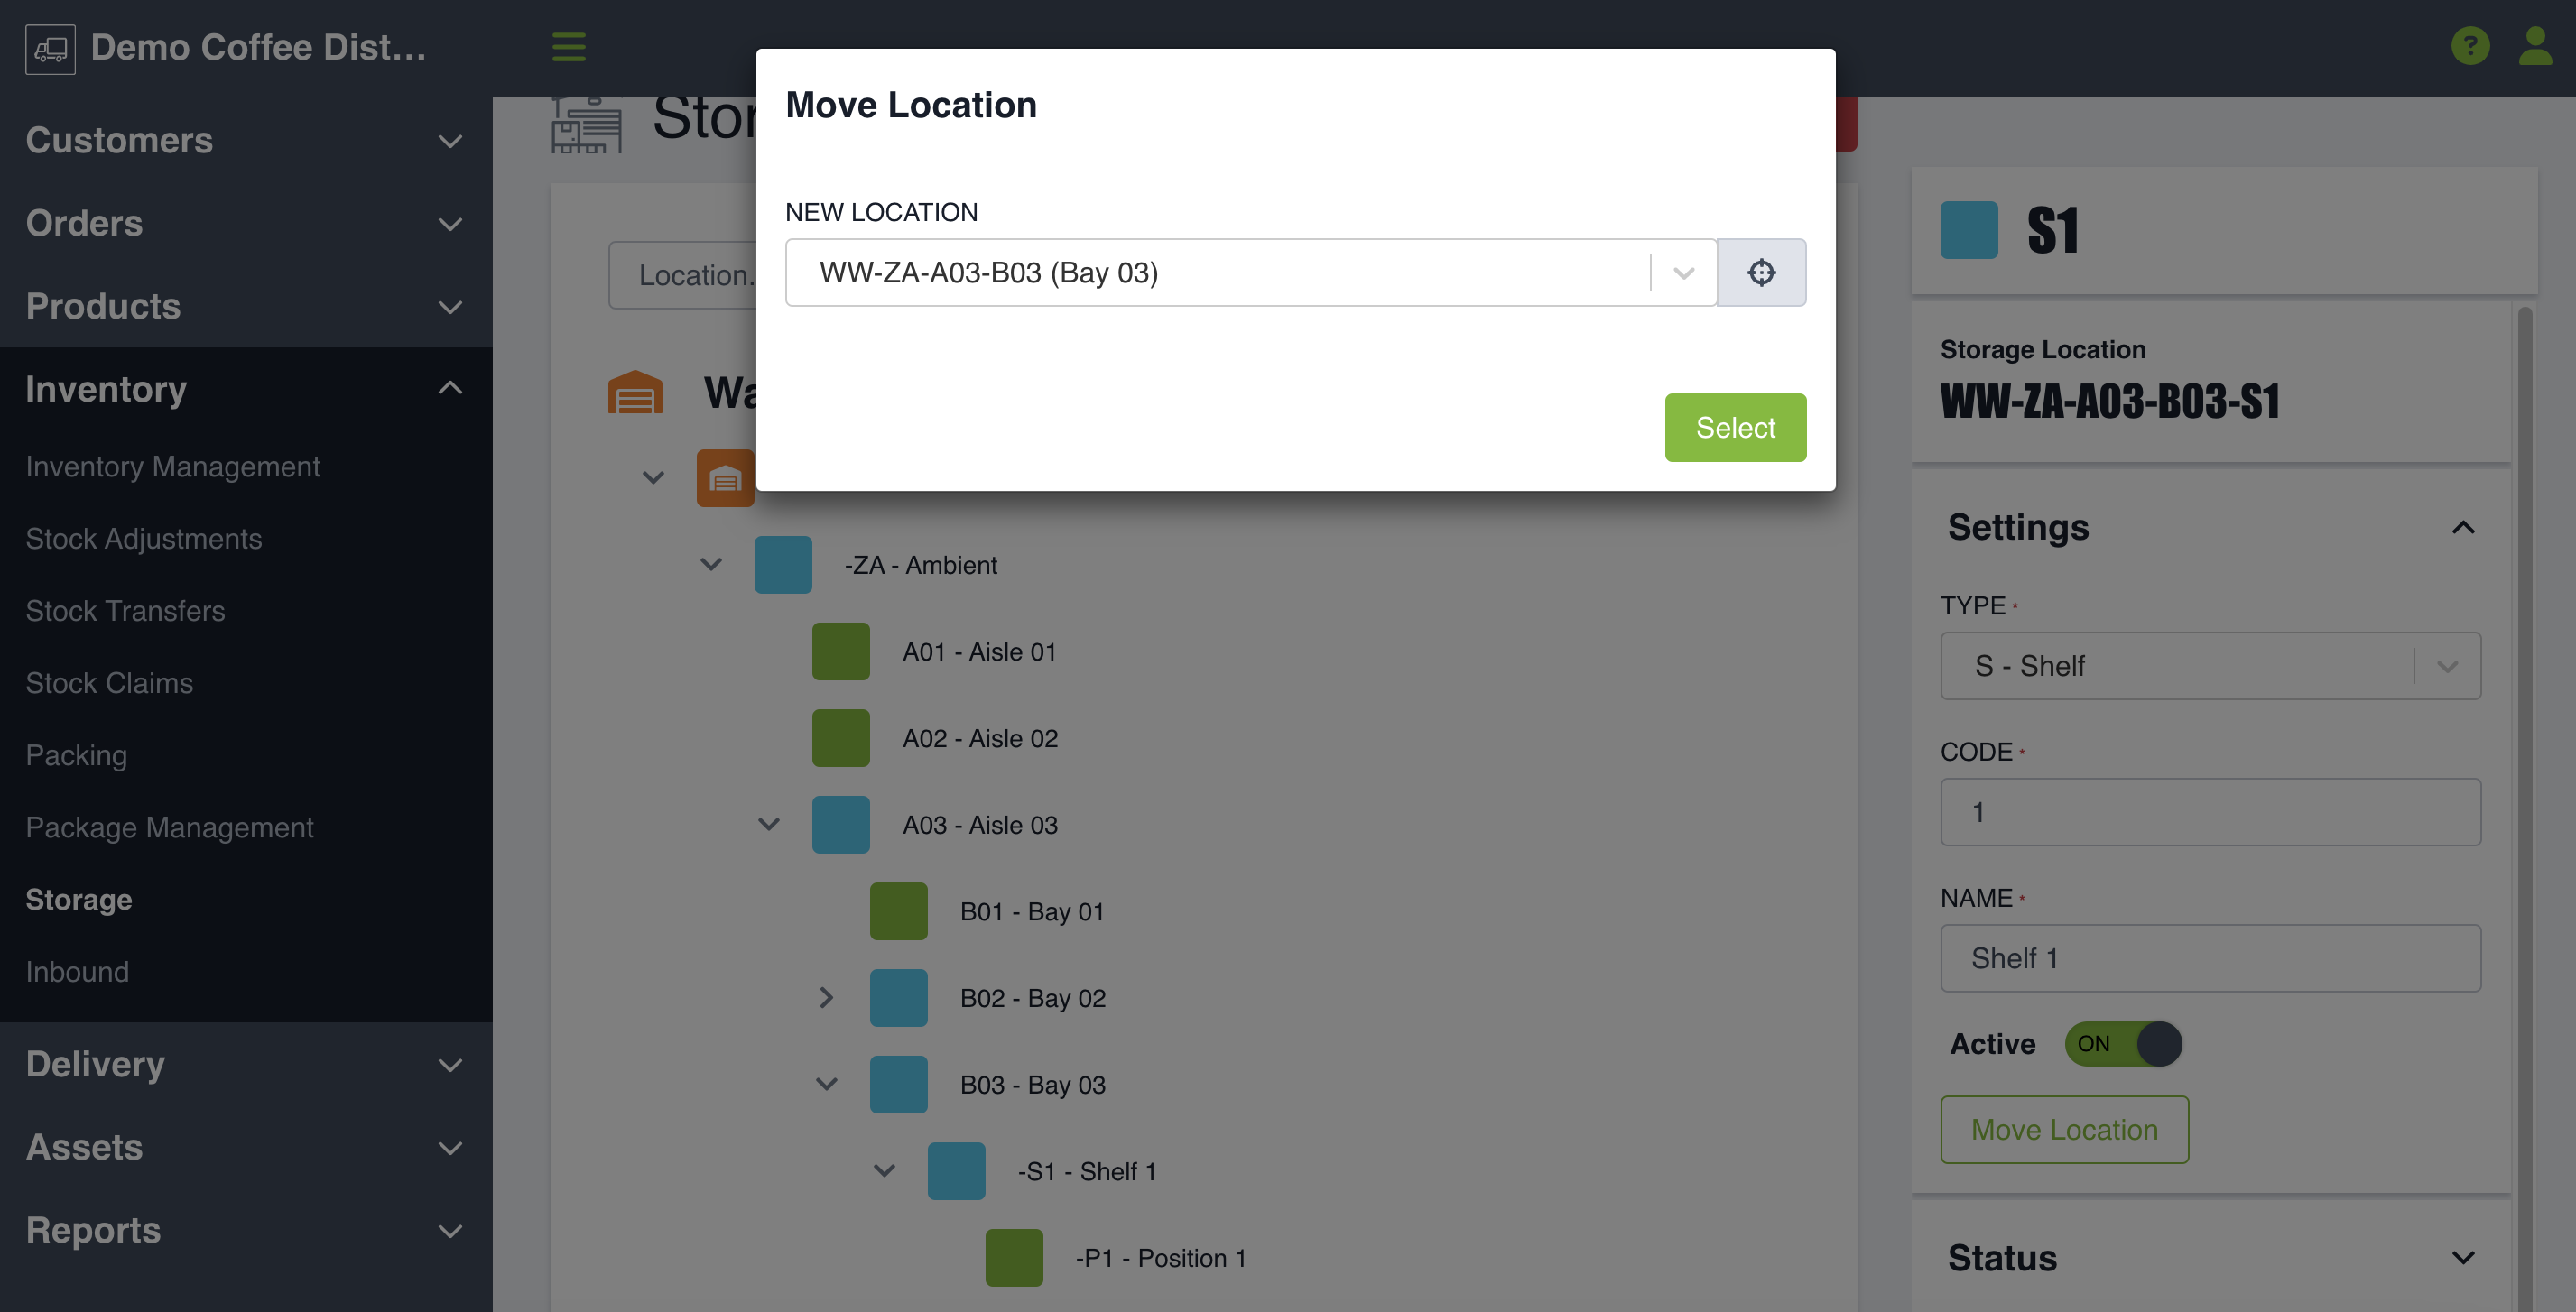
Moving Storage Locations
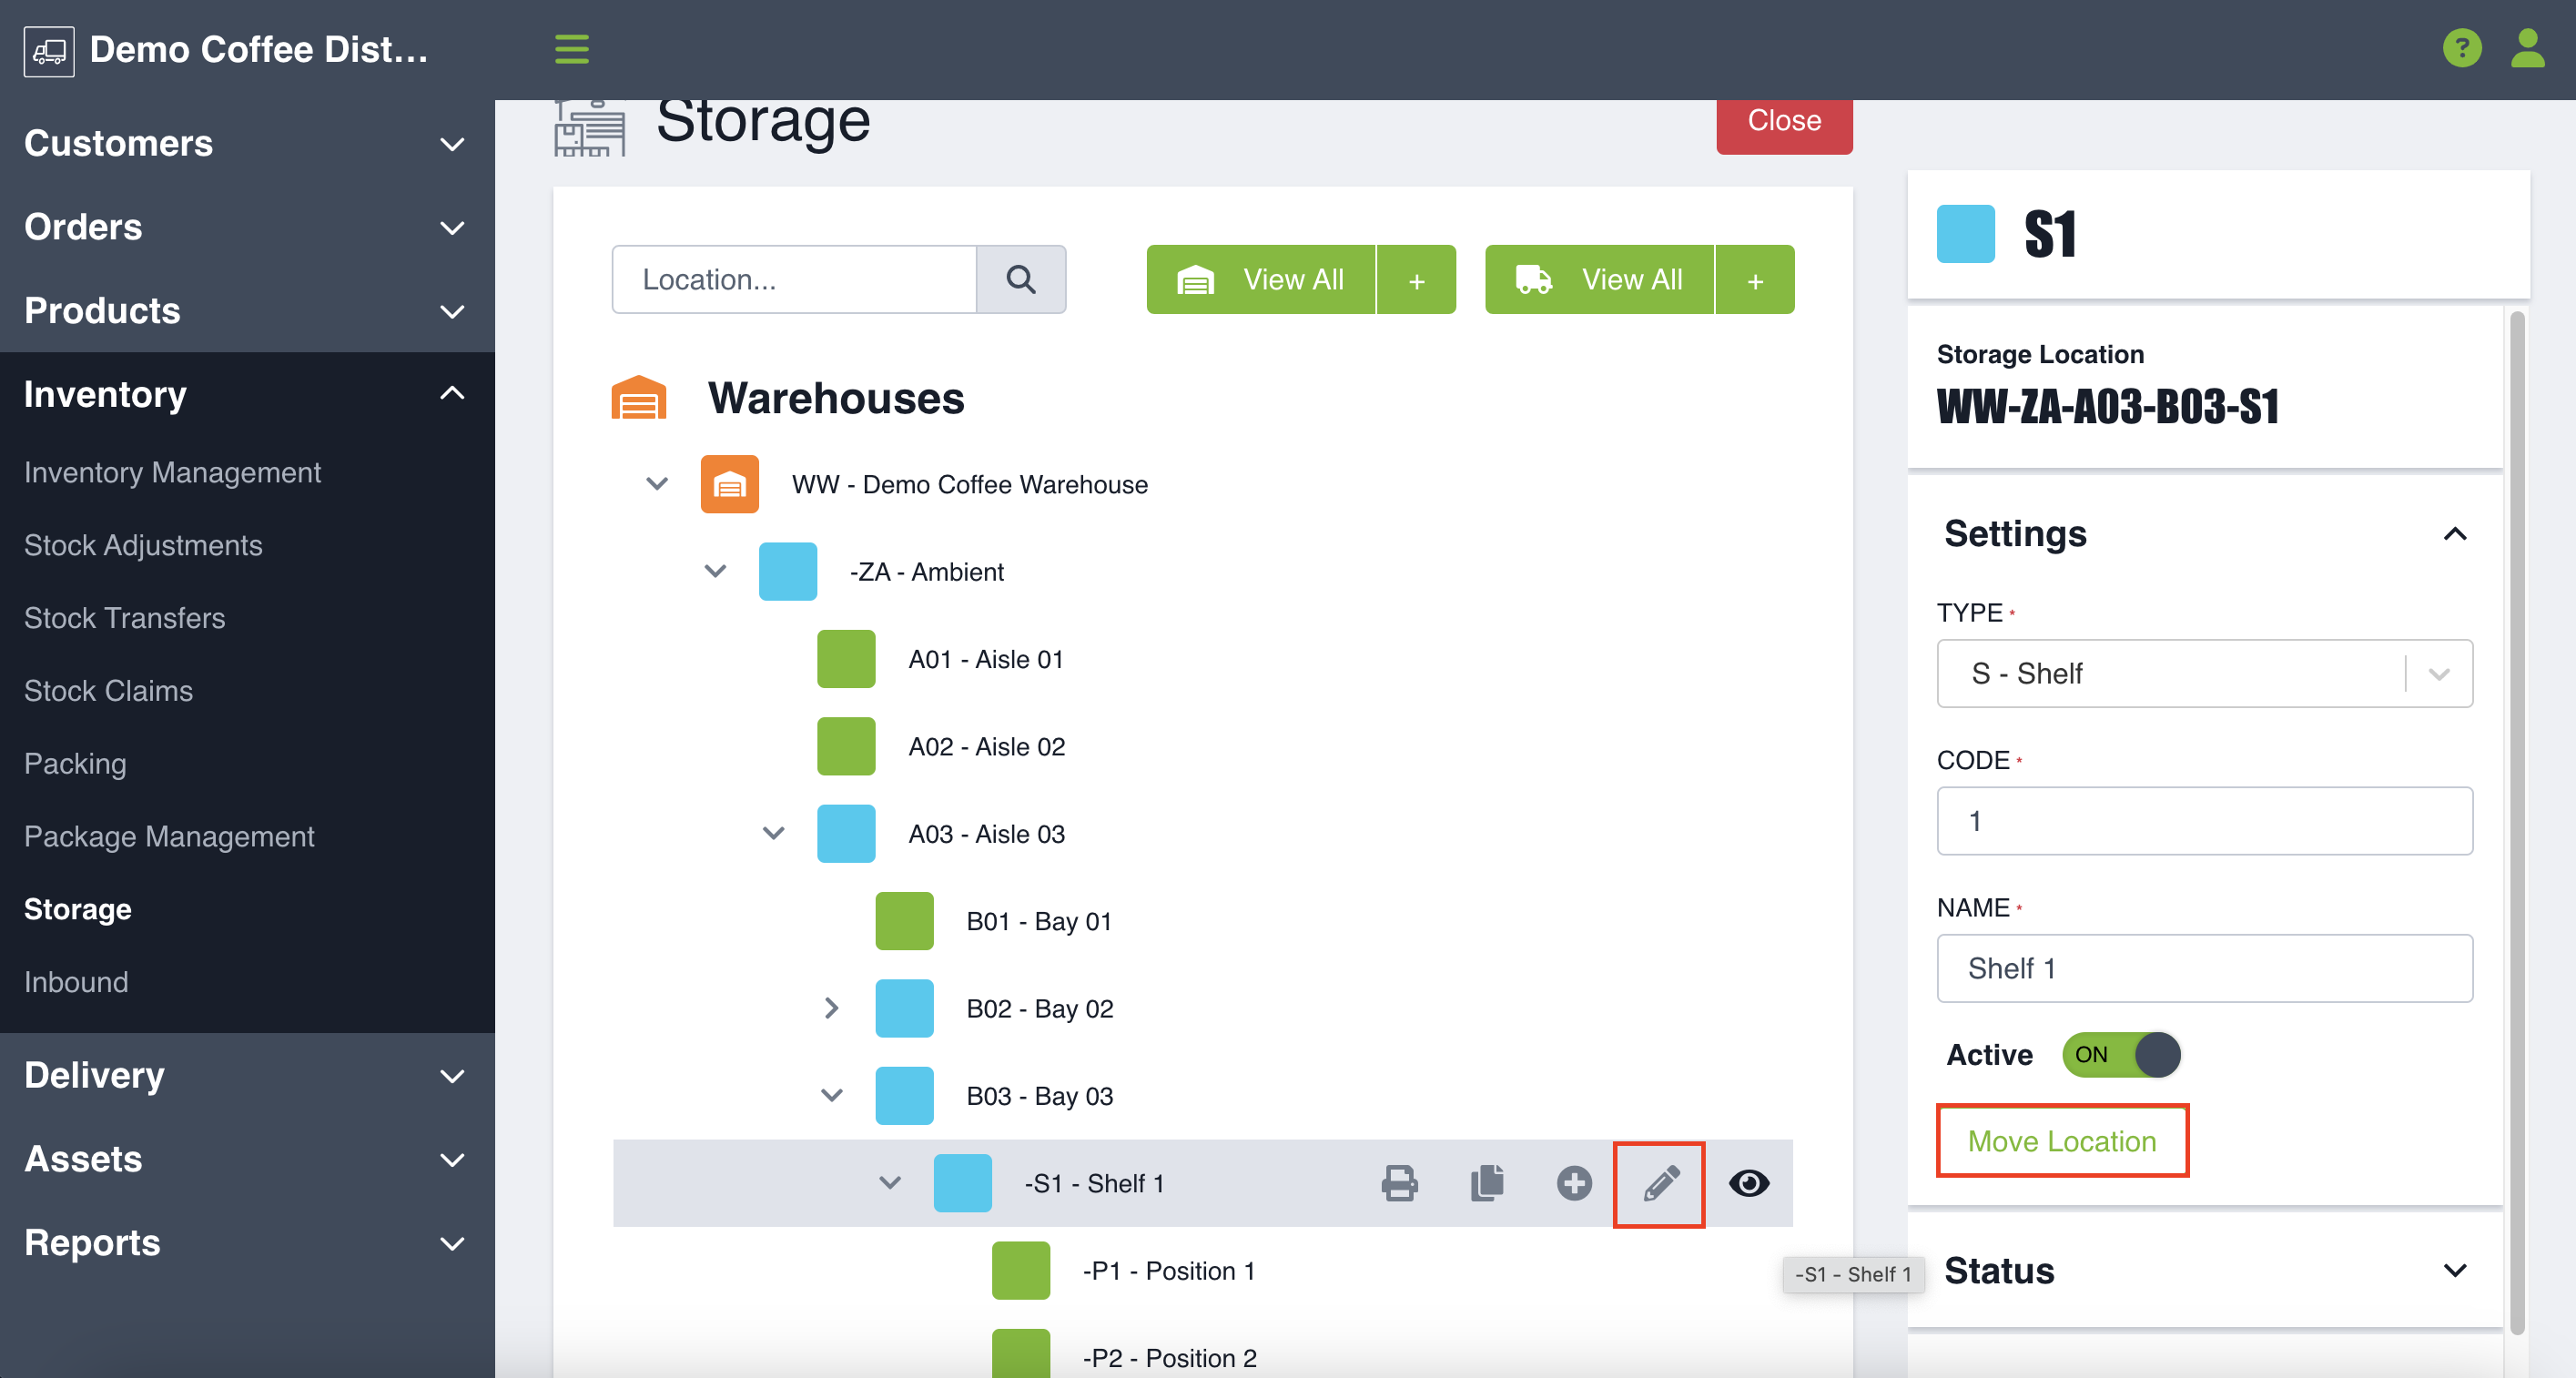
You also have the ability to move storage locations if there was a mistake made during set up, or your storage configuration has changed. Click the pencil icon to edit the storage location you’re looking to move, and press Move. This will open a modal where you can choose the storage location you are looking to move the location under. Recall above that location IDs need to be unique among sibling locations, so you may be required to change the code of your location.
Deactivating a Warehouse or Vehicle
You can deactivate a warehouse provided the following conditions are met:
- It may not be listed as a fulfillment warehouse for a customer location
- There may not be any draft or scheduled orders with that warehouse listed as the fulfillment warehouse
- No inventory or packages can be present in the warehouse
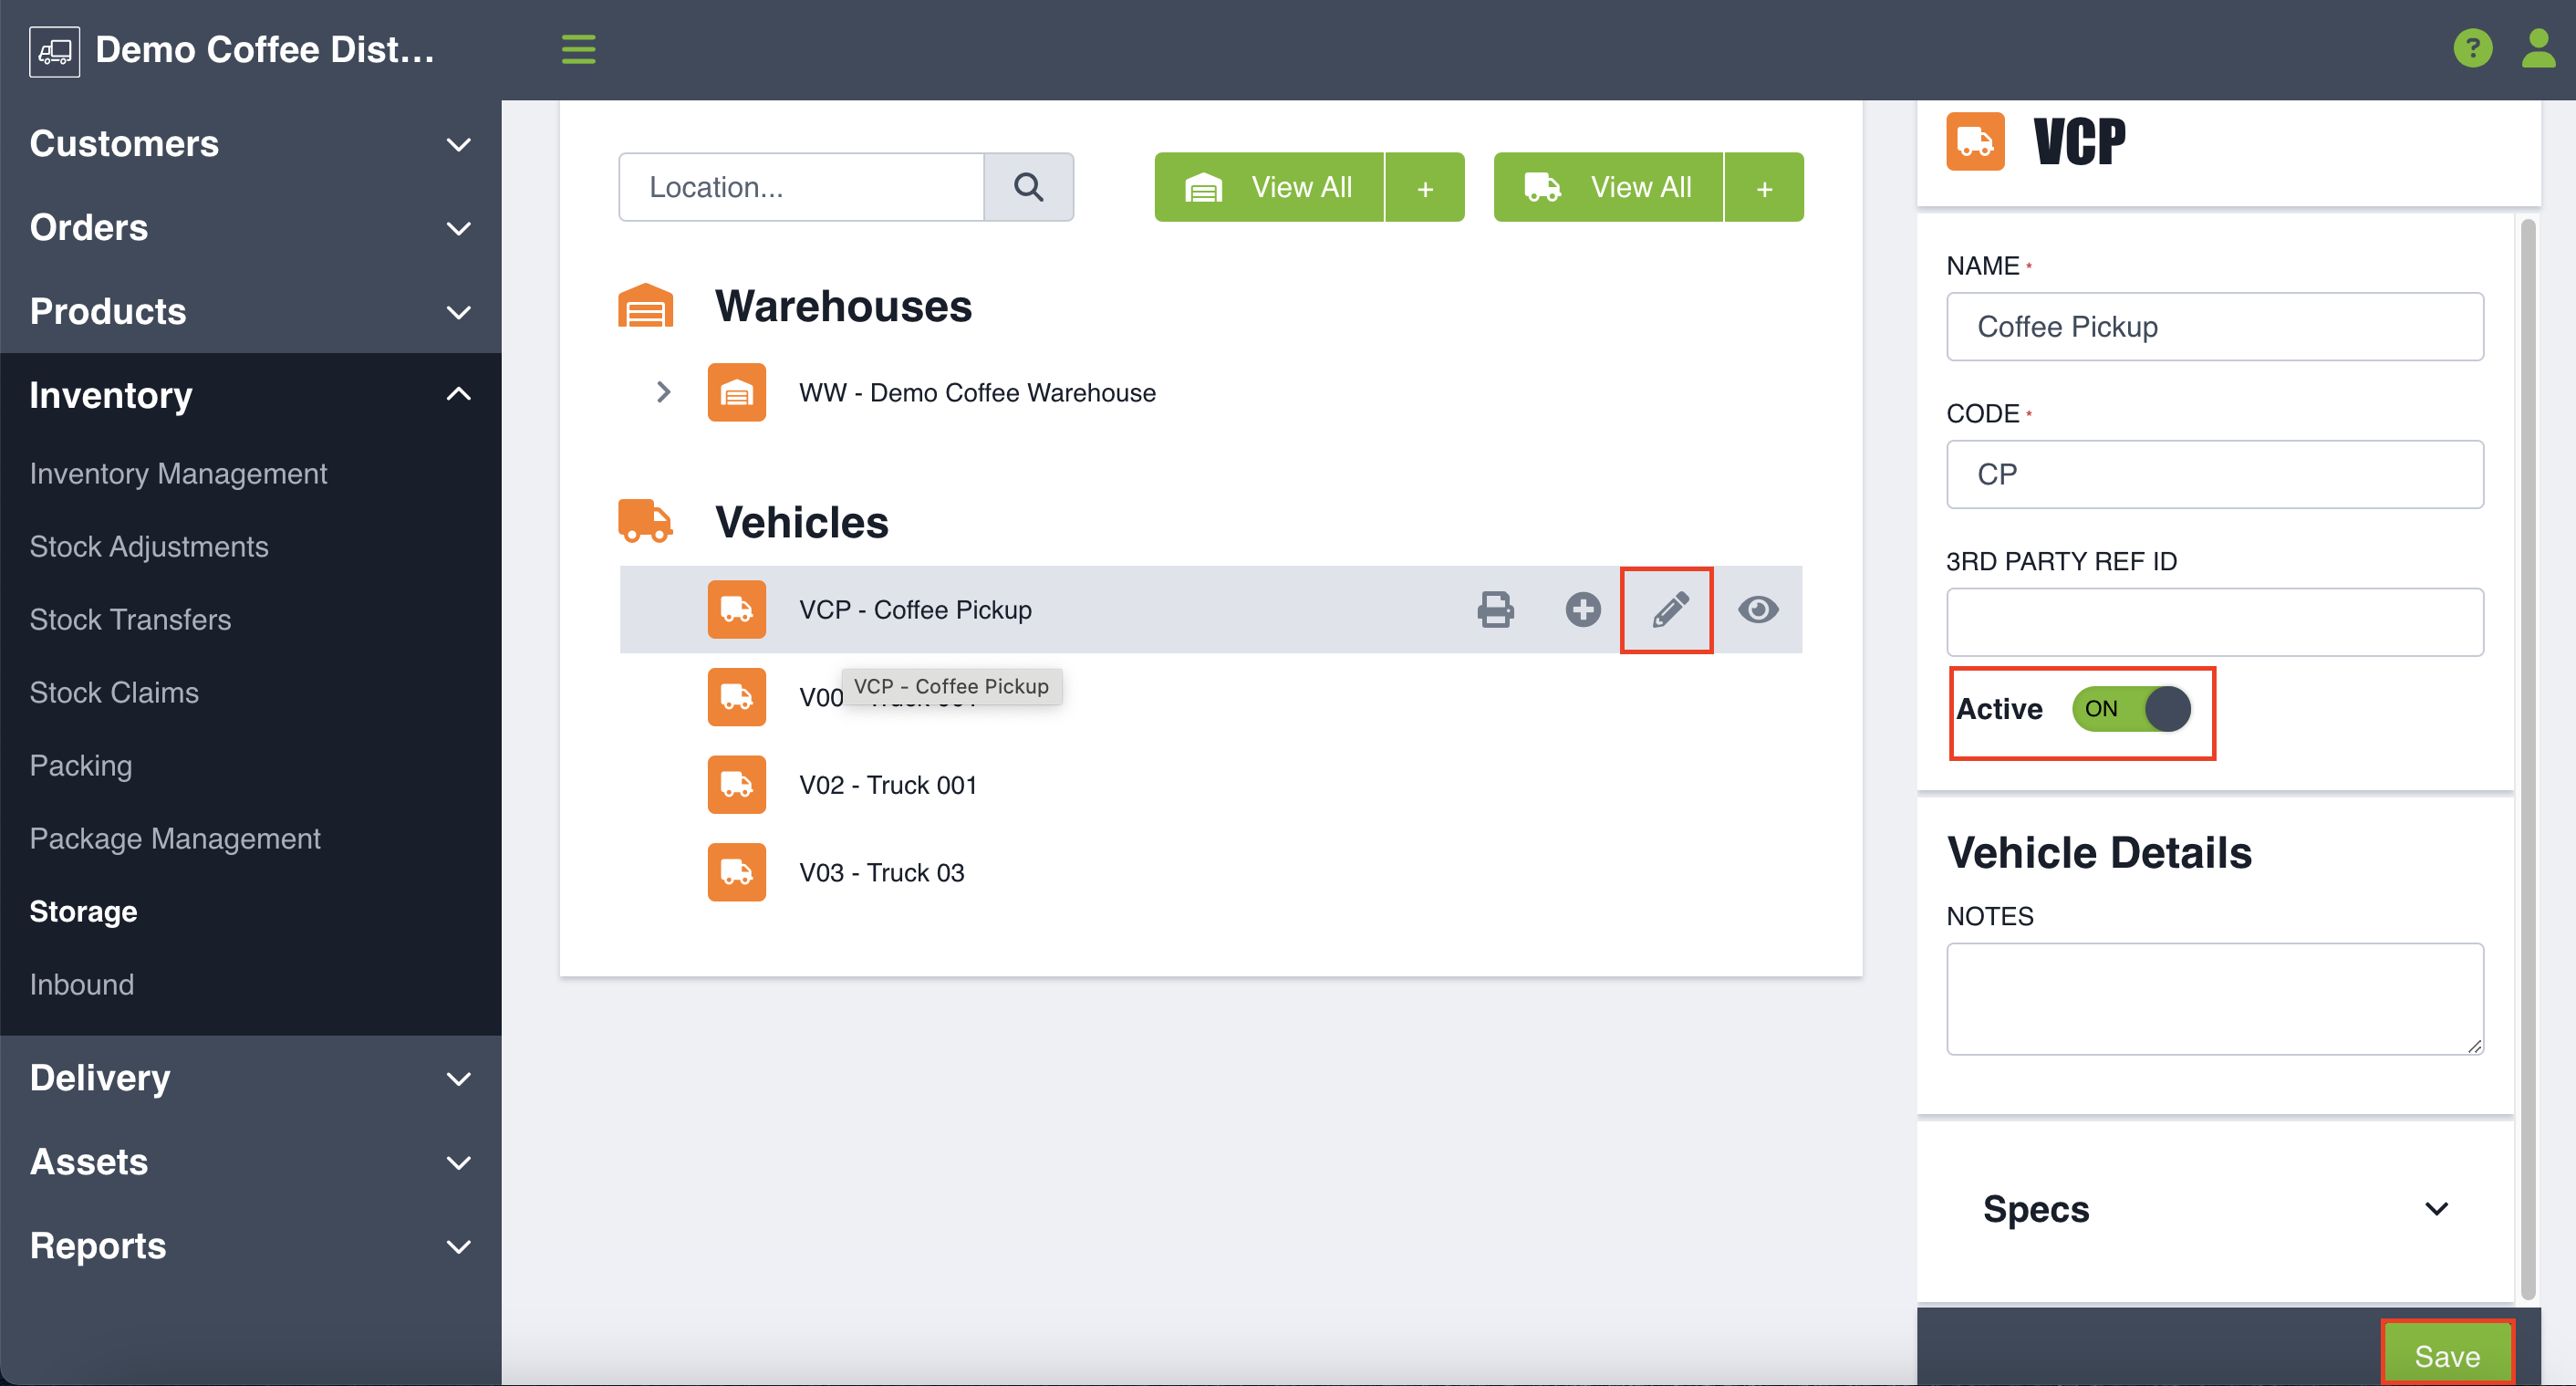
You can deactivate a vehicle provided there are no inventory or packages present in the vehicle. To deactivate a Warehouse or Vehicle, hover over the name and click the Pencil to edit, click the Active toggle to Off, and click Save.
Deactivating a Storage Location
There are two scenarios in which you can deactivate a storage location: a location on the bottom of your storage hierarchy, and a location in the middle of your storage hierarchy.
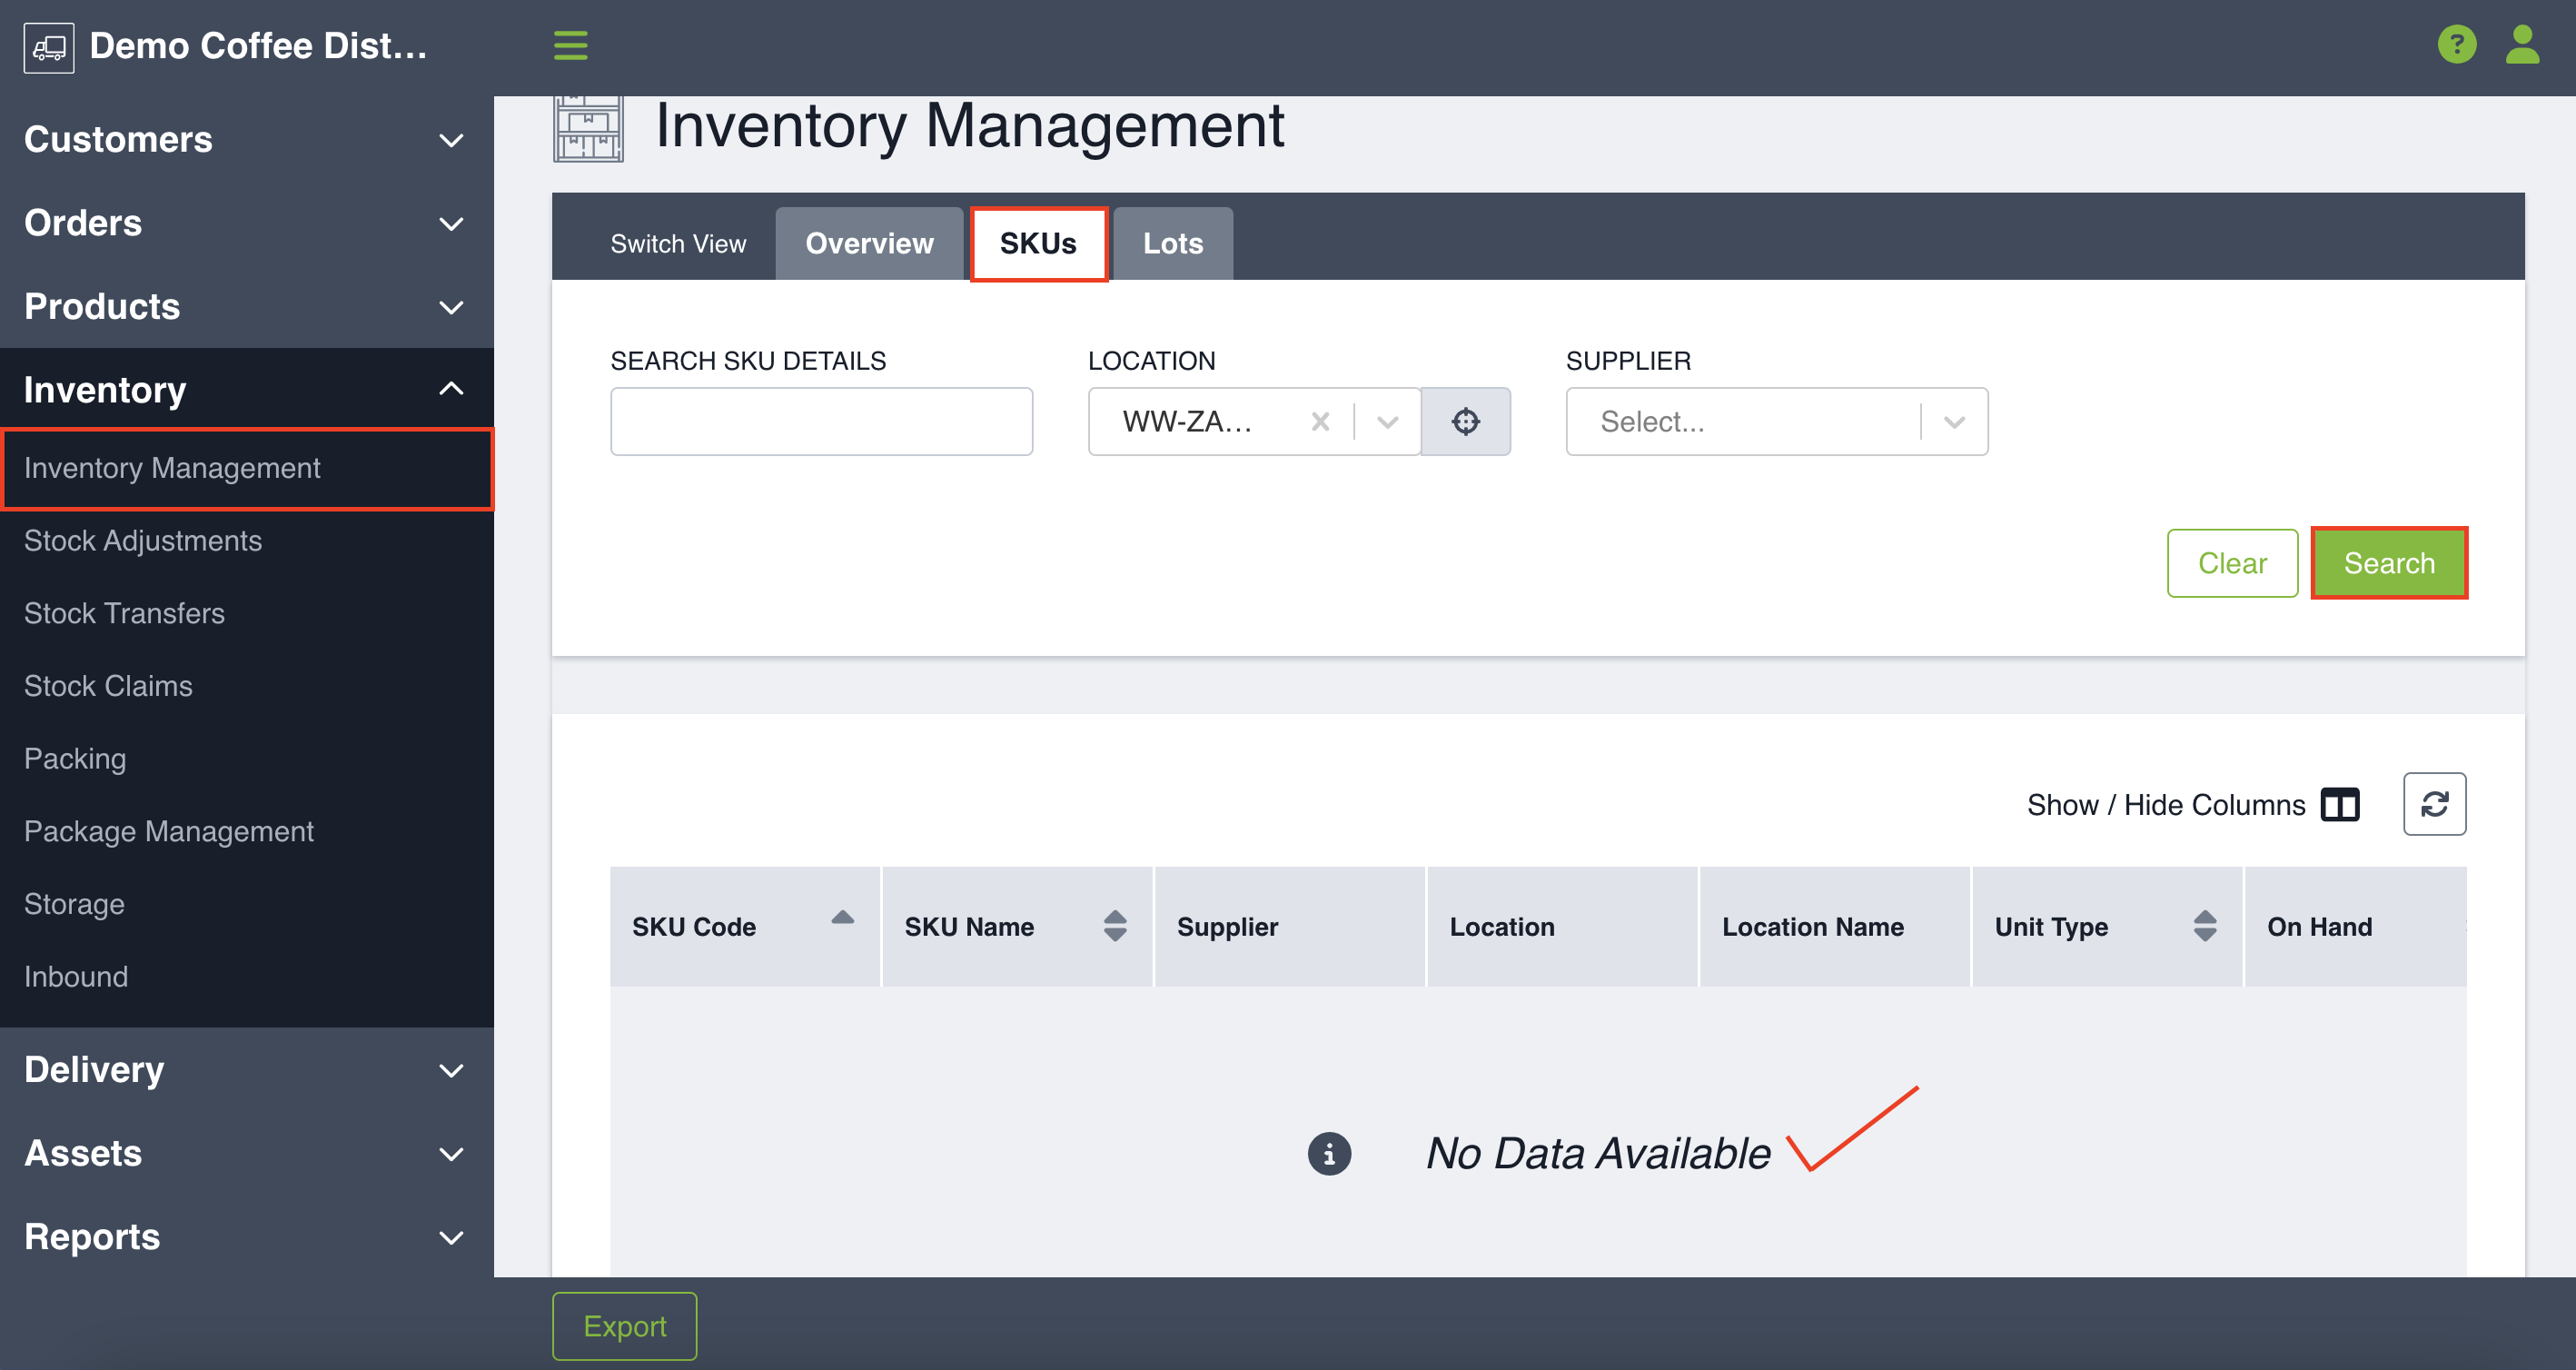
If you want to deactivate a storage location at the bottom of your storage hierarchy, it cannot contain any inventory. You can check if it has any inventory by searching for that storage location in Inventory Management SKU tab.
Ensure you transfer all inventory from that location before attempting to deactivate. Click the Pencil to edit the Storage Location and switch the active toggle to off and click Save.
If you want to deactivate a storage location in the middle of your storage hierarchy, you first need to move the locations below it (see section above) such that the location you want to deactivate is now at the bottom of the hierarchy. Once complete, this location can be deactivated.