This is the main way to add new inventory levels into your account. Learn how to do so by following these steps.
From the Stock Adjustment page, you have the option to create a new adjustment in the top-right hand corner. The button gives you two options: make a quantity adjustment to existing inventory or add new inventory. Adding inventory is used when you have more product to be added to the system - either when receiving new inventory or if you notice your counts are off.
Adding New Inventory
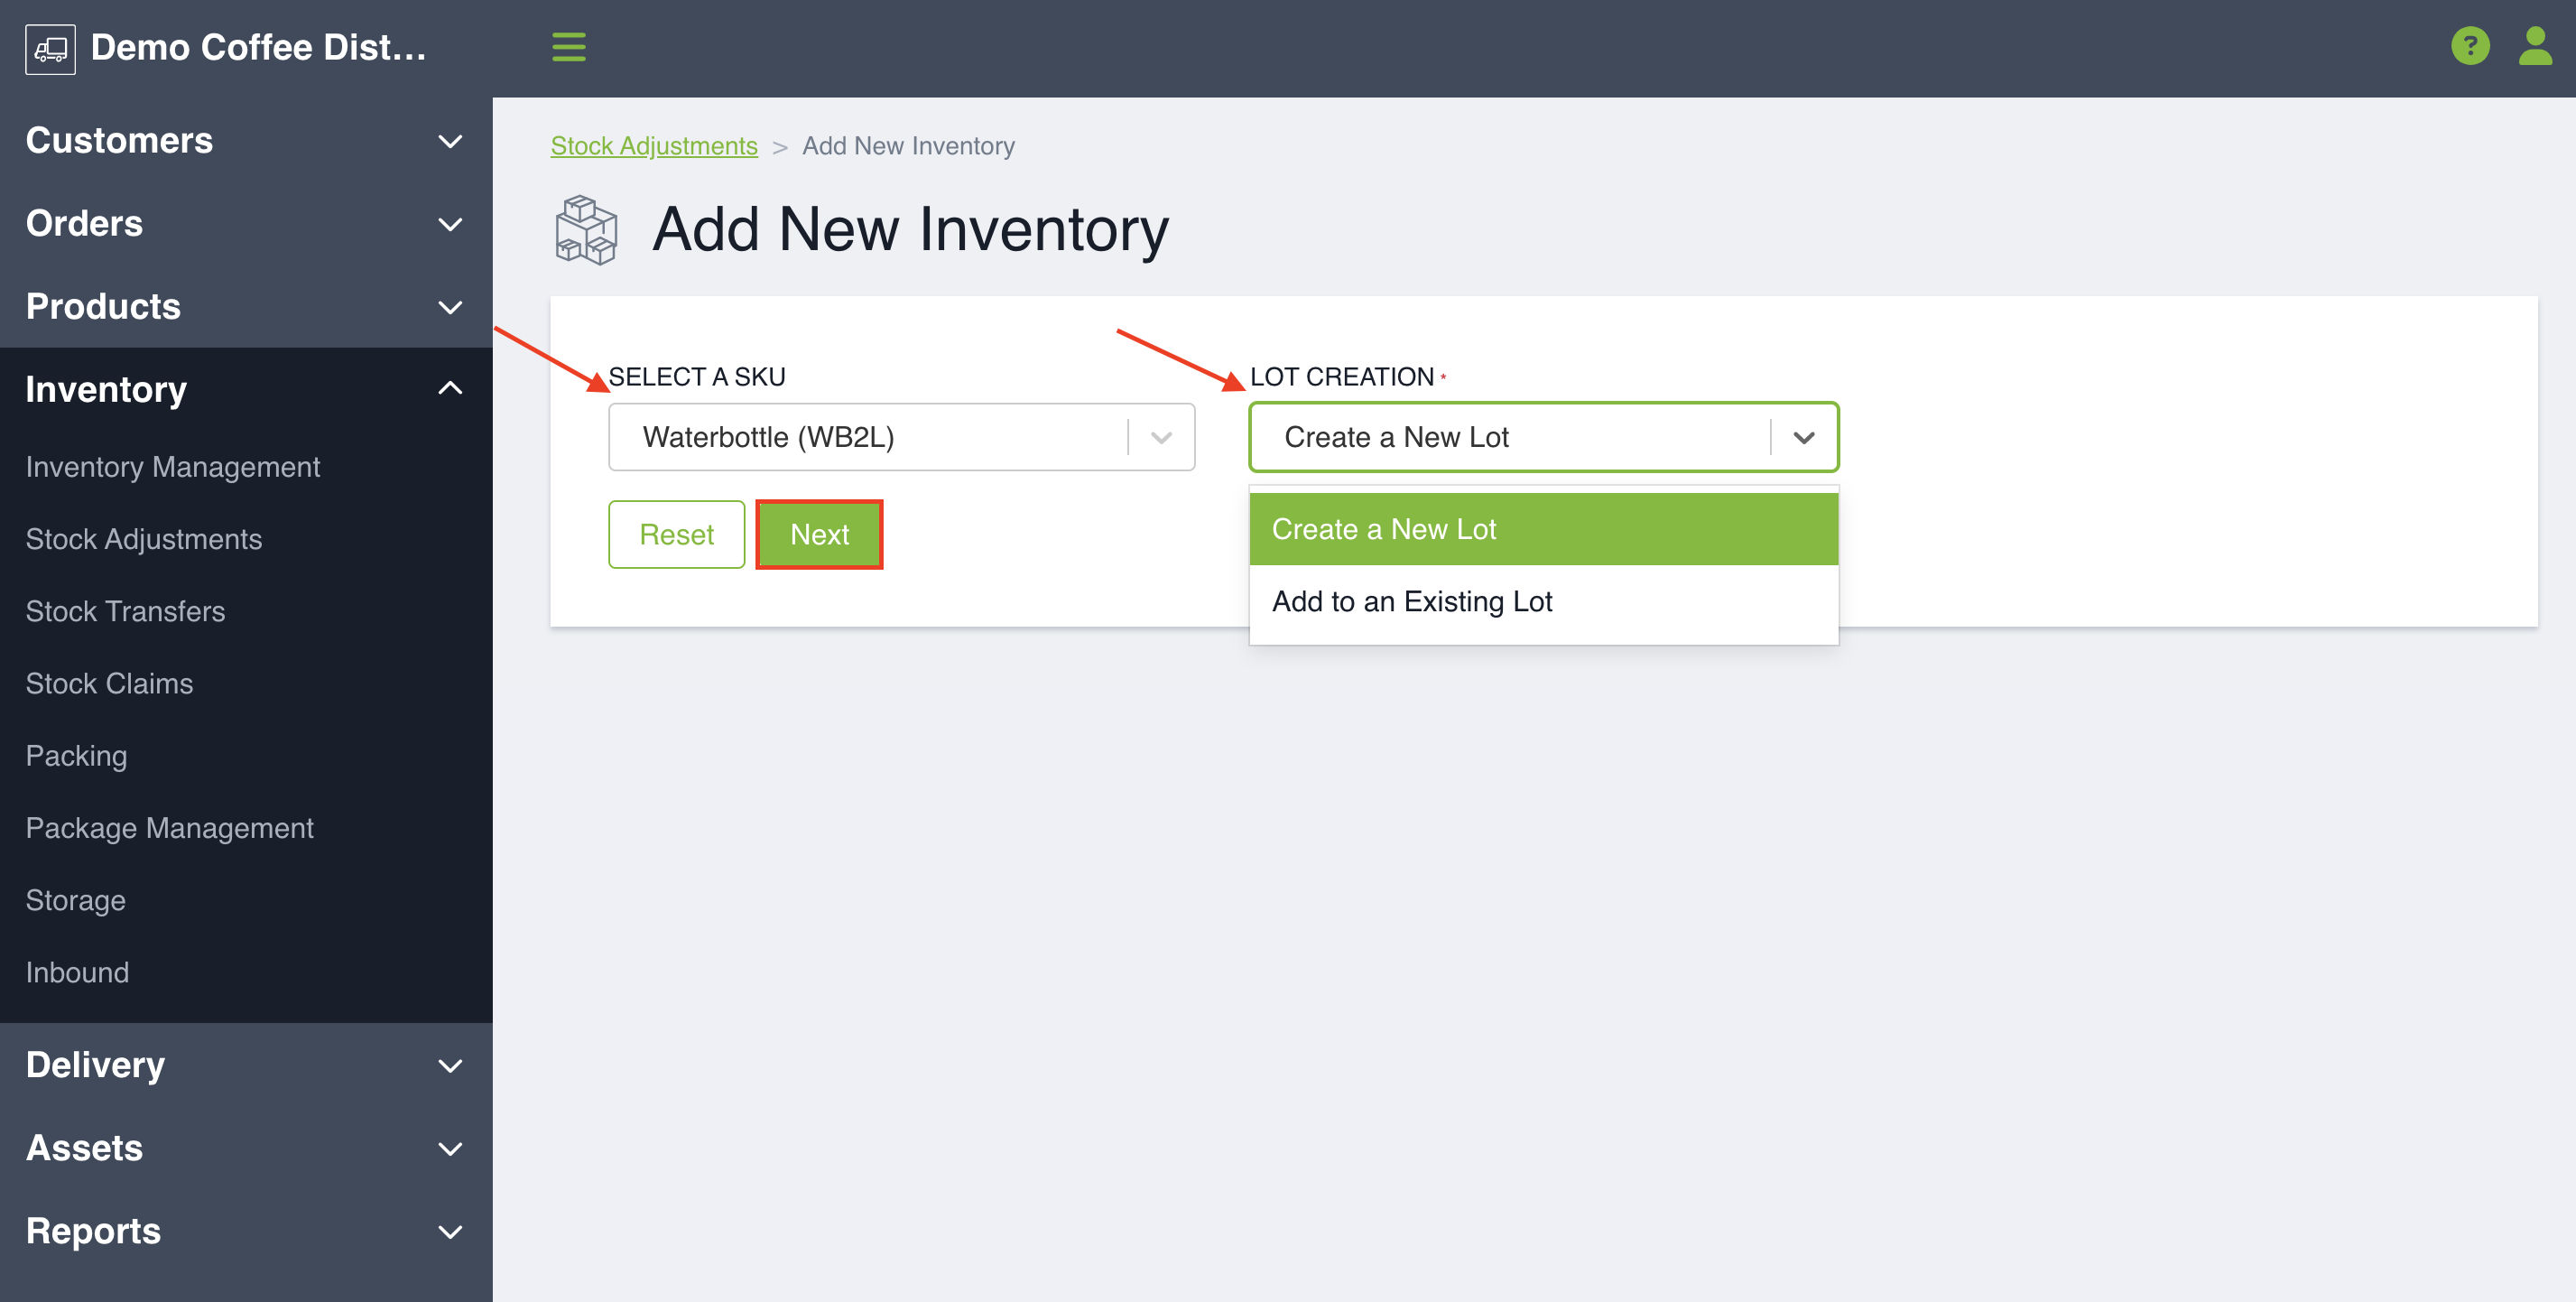
Once you Click Add New Inventory you will be brought to a new page where you will be prompted to select a SKU.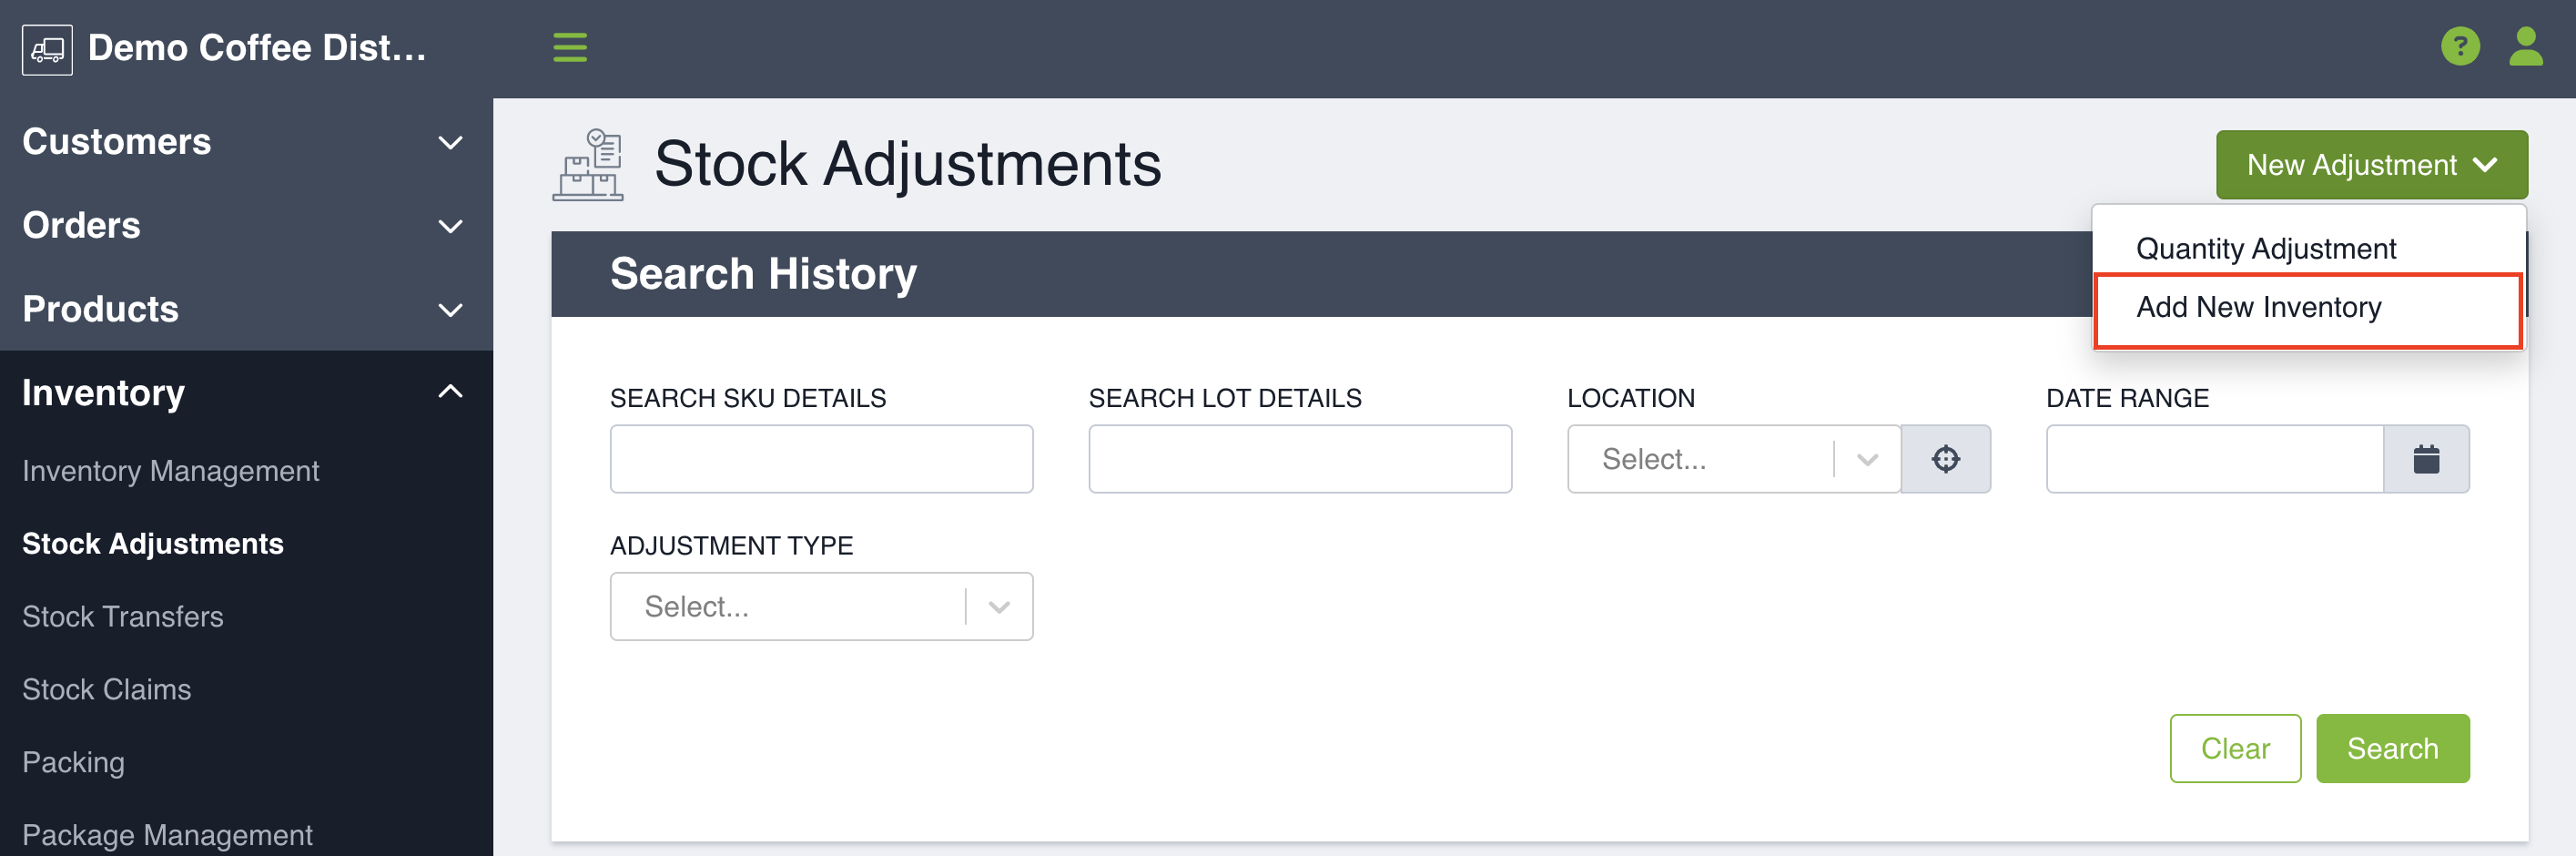 Use the drop-down to search for your SKU, or utilize the type ahead if you know what SKU you are searching for. Only inventory managed products will be shown.
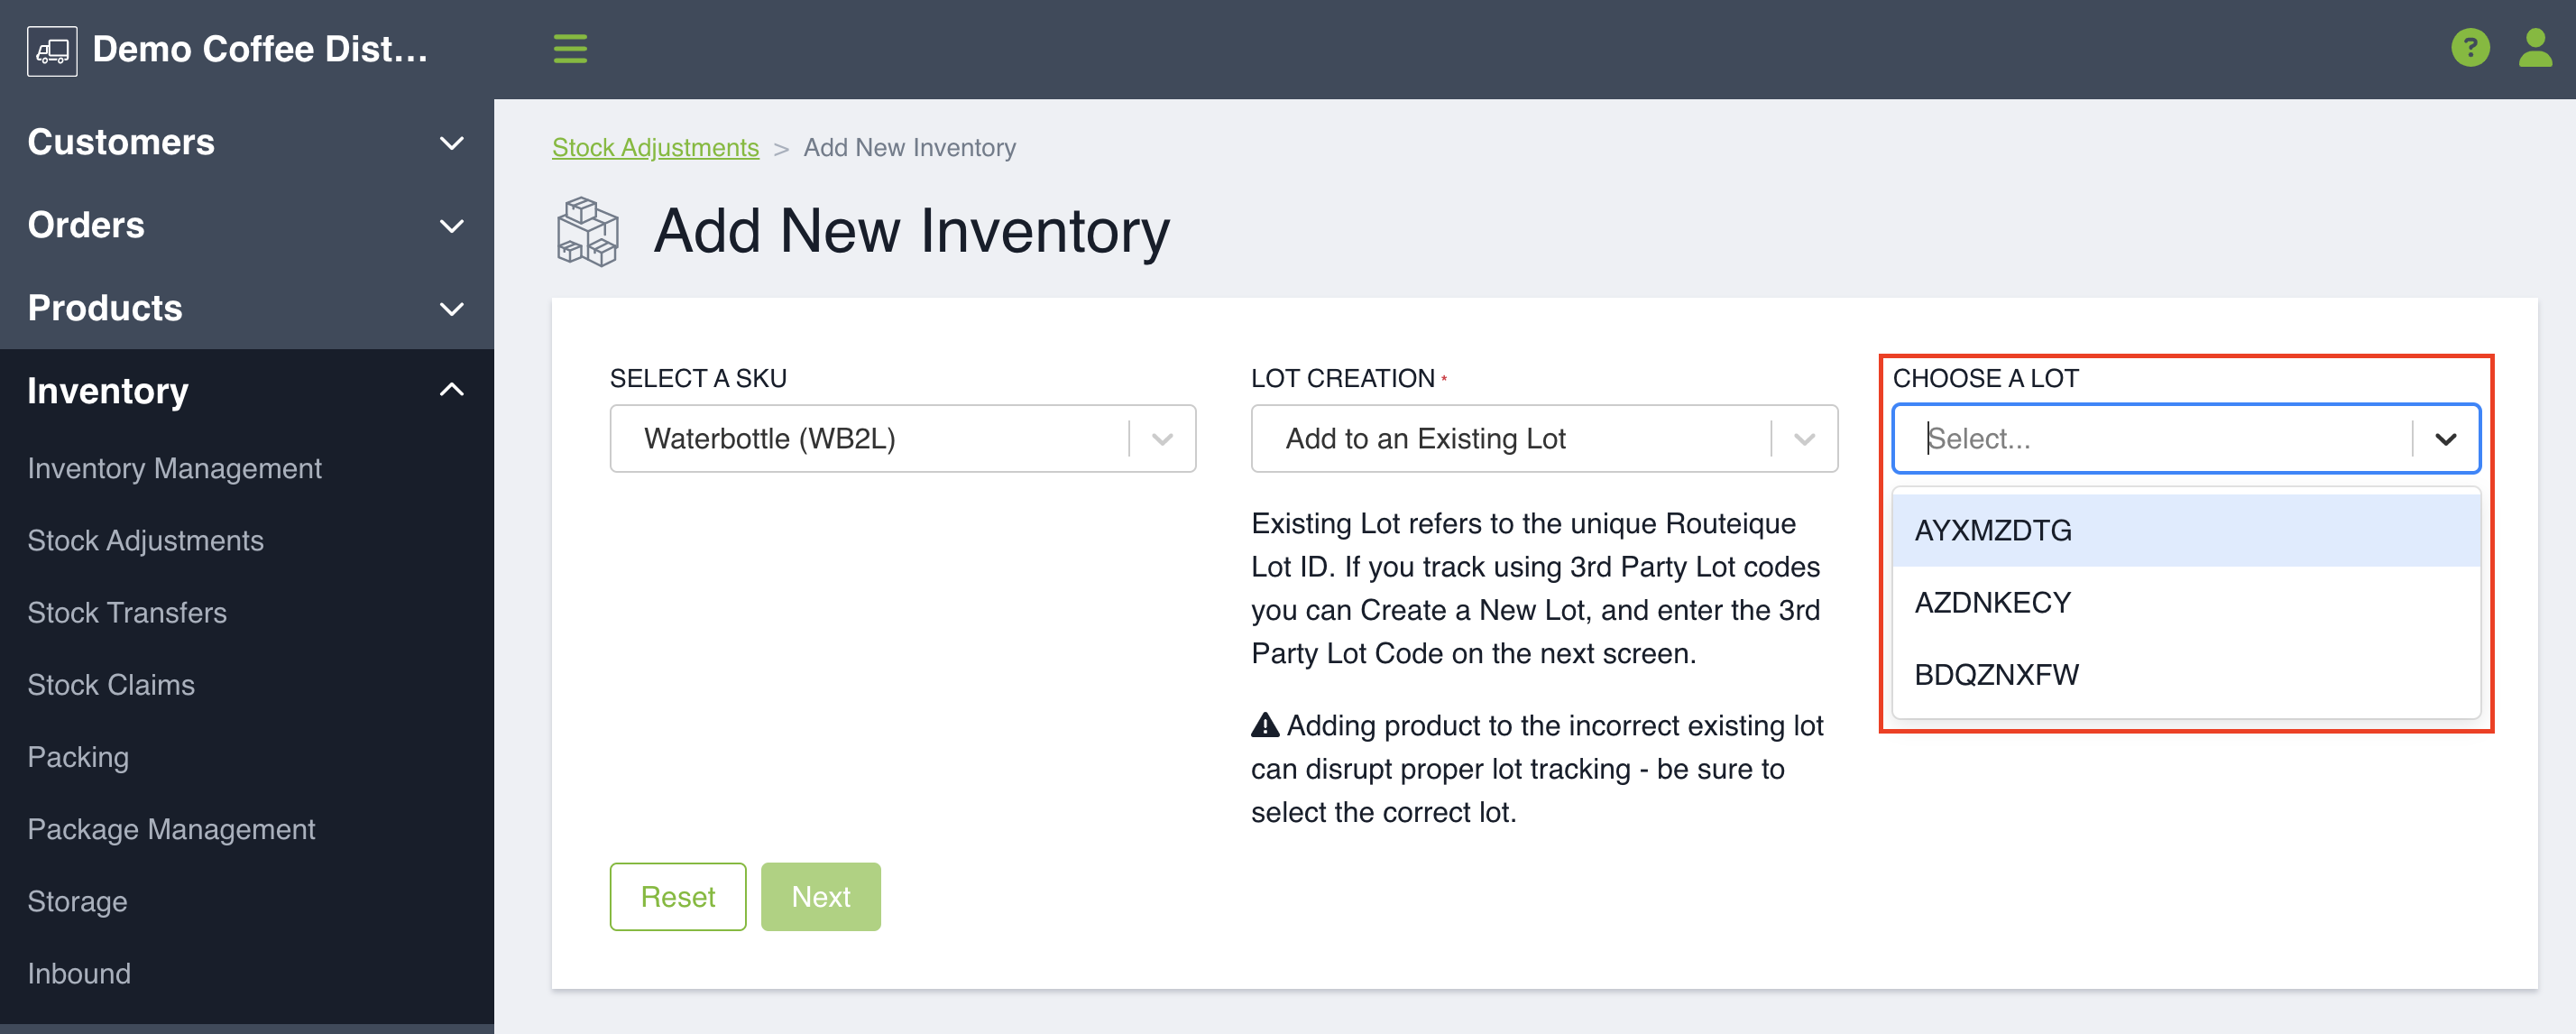
If your SKU has lot tracking enabled, creating a new lot will be selected by default. If you have the ability to add inventory into existing lots, enabled in your Inventory settings, you can also use that dropdown to add into an existing lot.
If your SKU has lot tracking disabled, you won't see an option for lot creation.
Once you have entered the required information, click Next.
 Adding Inventory to a New Lot
If you chose a SKU with lot tracking enabled and selected Create a New Lot, you will be brought to a new page where you will see your product information on the left-hand side and your Location and Quantity Information on the right-hand side. You will select which location in a warehouse or vehicle you would like to add new inventory to and then the unit type, quantity and optionally a note. If your SKU has alternate unit types, you can use those to support this process. The system will automatically calculate the sellable unit quantity that you are adding.
You can optionally fill out extra information about your lot, which includes:
- Third Party Lot Code
- Sell By Date
- Lot Notes
- Supplier
- Lot salability (defaults to ON)
Once you click Save, you will be notified that inventory has been added successfully. For more information about Lot Management, click here. 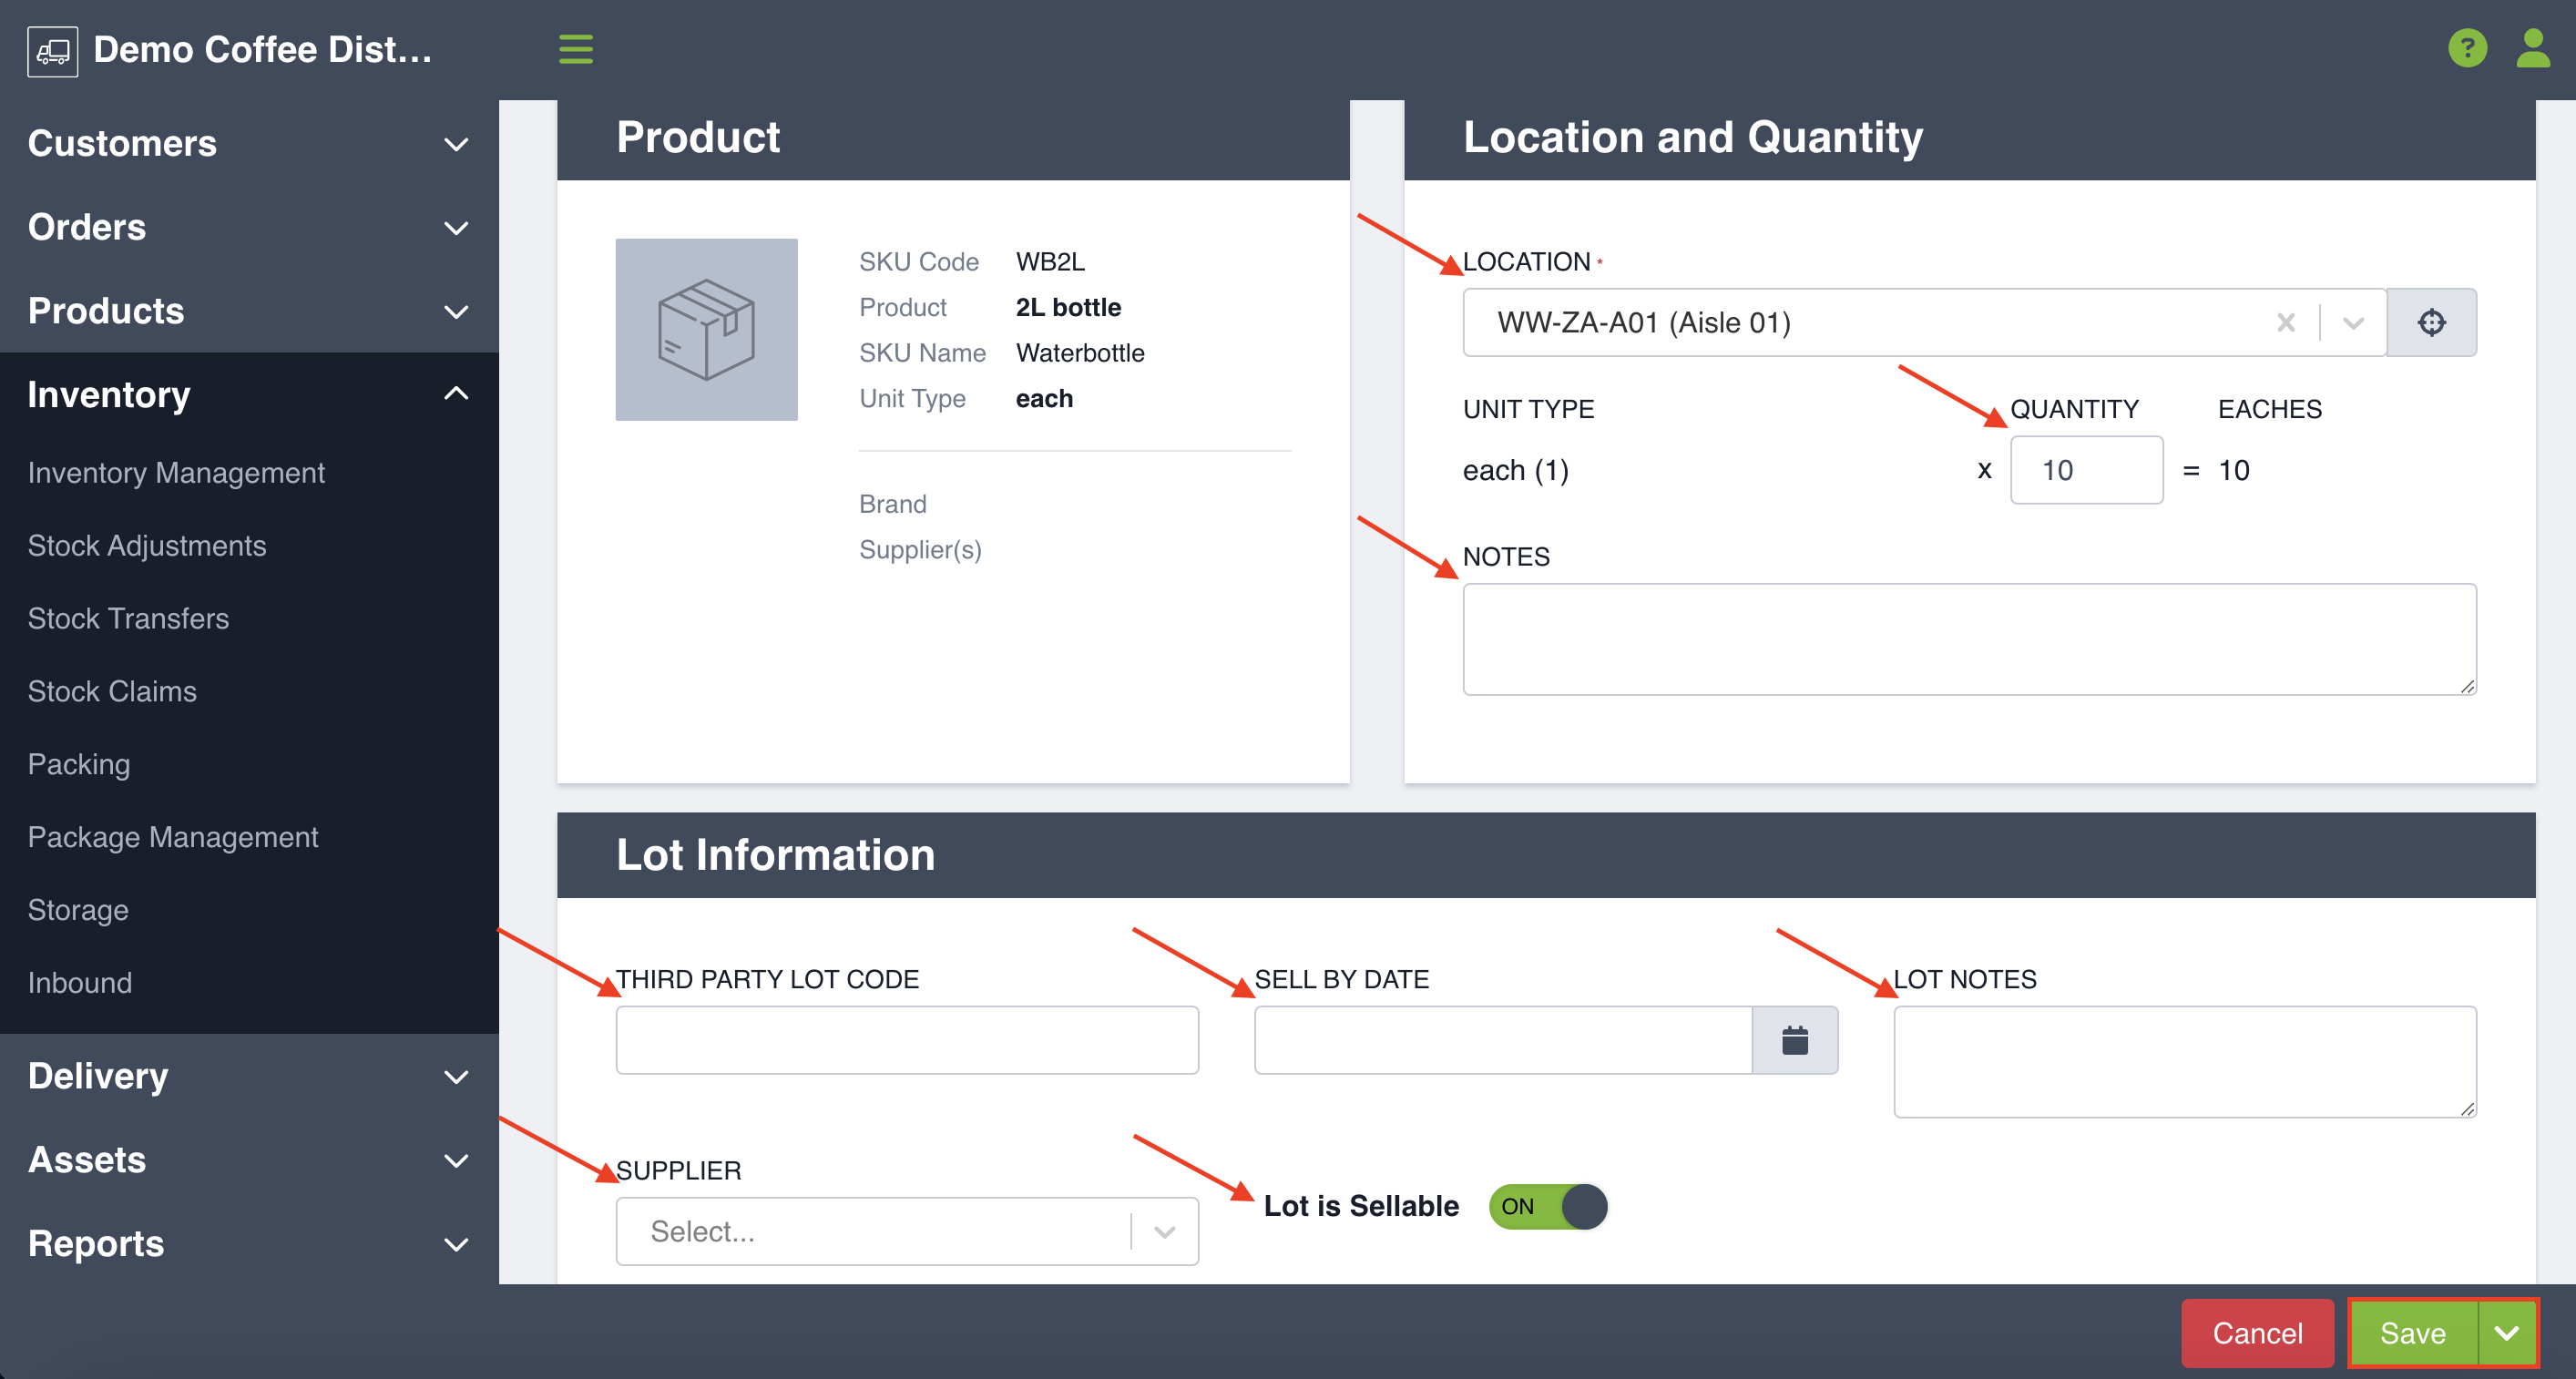 Adding Inventory to an Existing Lot
If you chose a SKU with lot tracking enabled and you selected Add to an Existing Lot, you will be prompted to choose the lot you want to add to.
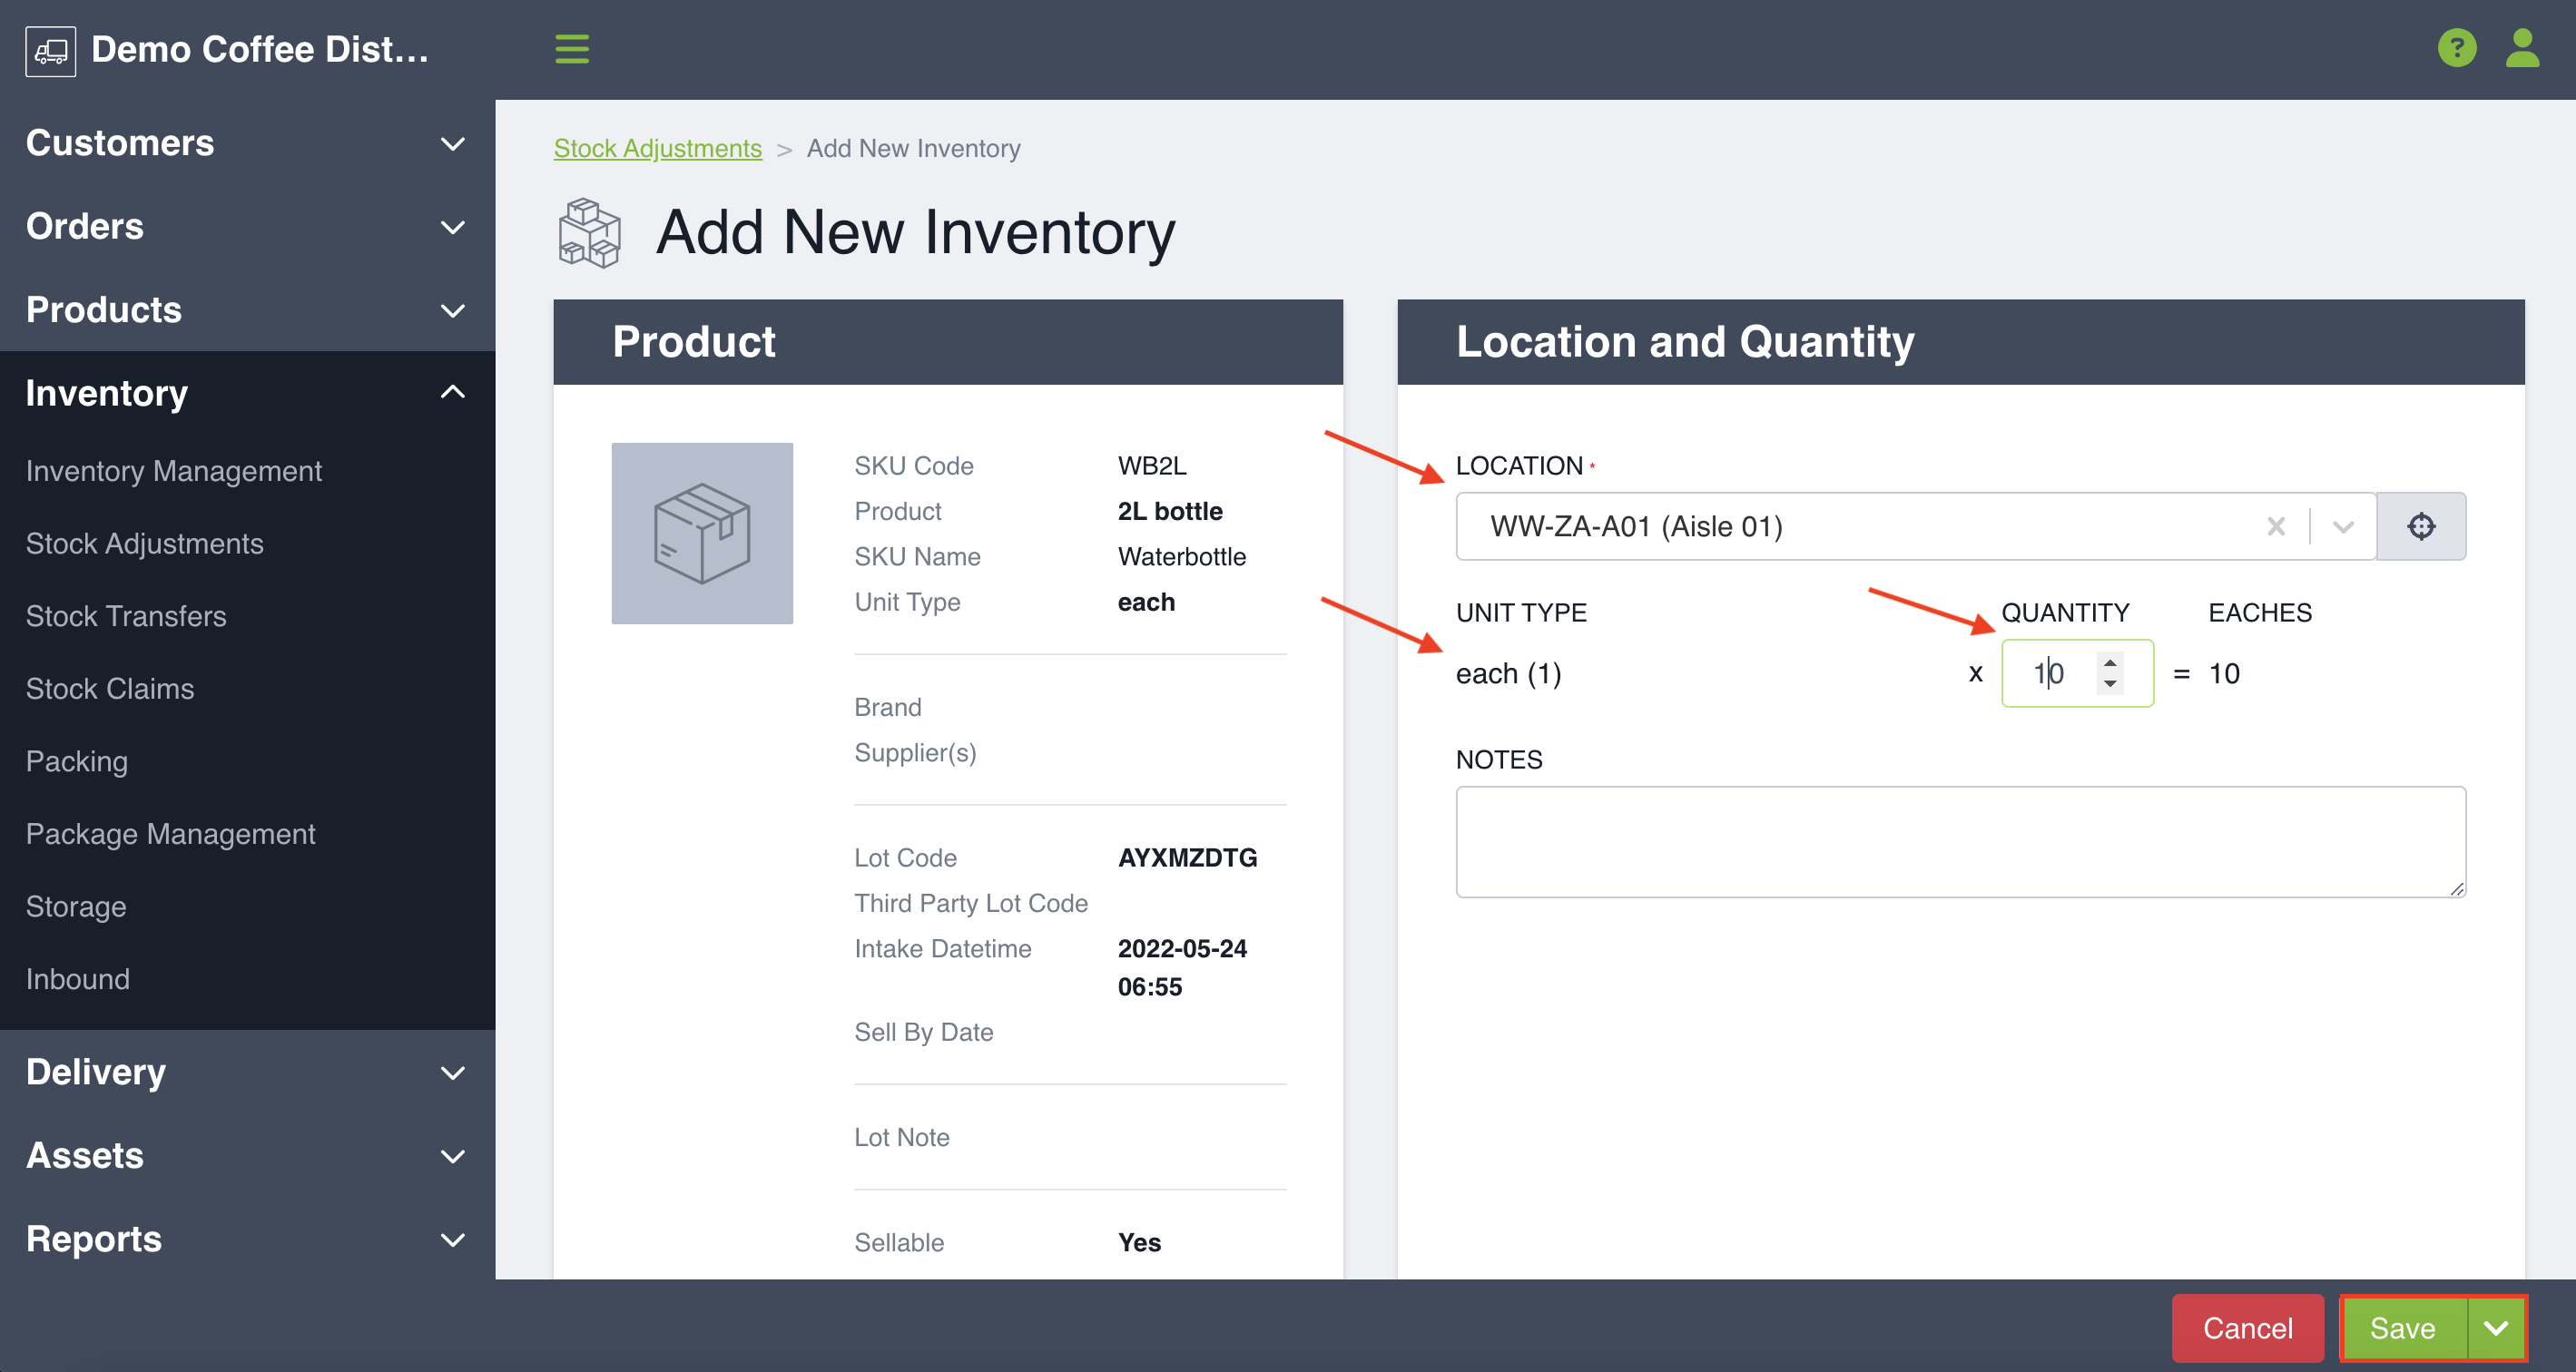
You will then be brought to a page where you will see your product information on the left-hand side and your Location and Quantity Information on the right-hand side. Select which location you would like to add new inventory to and then the unit type, quantity and optionally a note. If your SKU has alternate unit types, you can use those to support this process. The system will automatically calculate the sellable unit quantity that you are adding.
You don't have the option to add extra information about your lot since the lot already exists. Once you have entered your information click Save. You will be notified that inventory has been added successfully.
Adding product to the incorrect existing lot can disrupt proper lot tracking - be sure to select the correct lot.
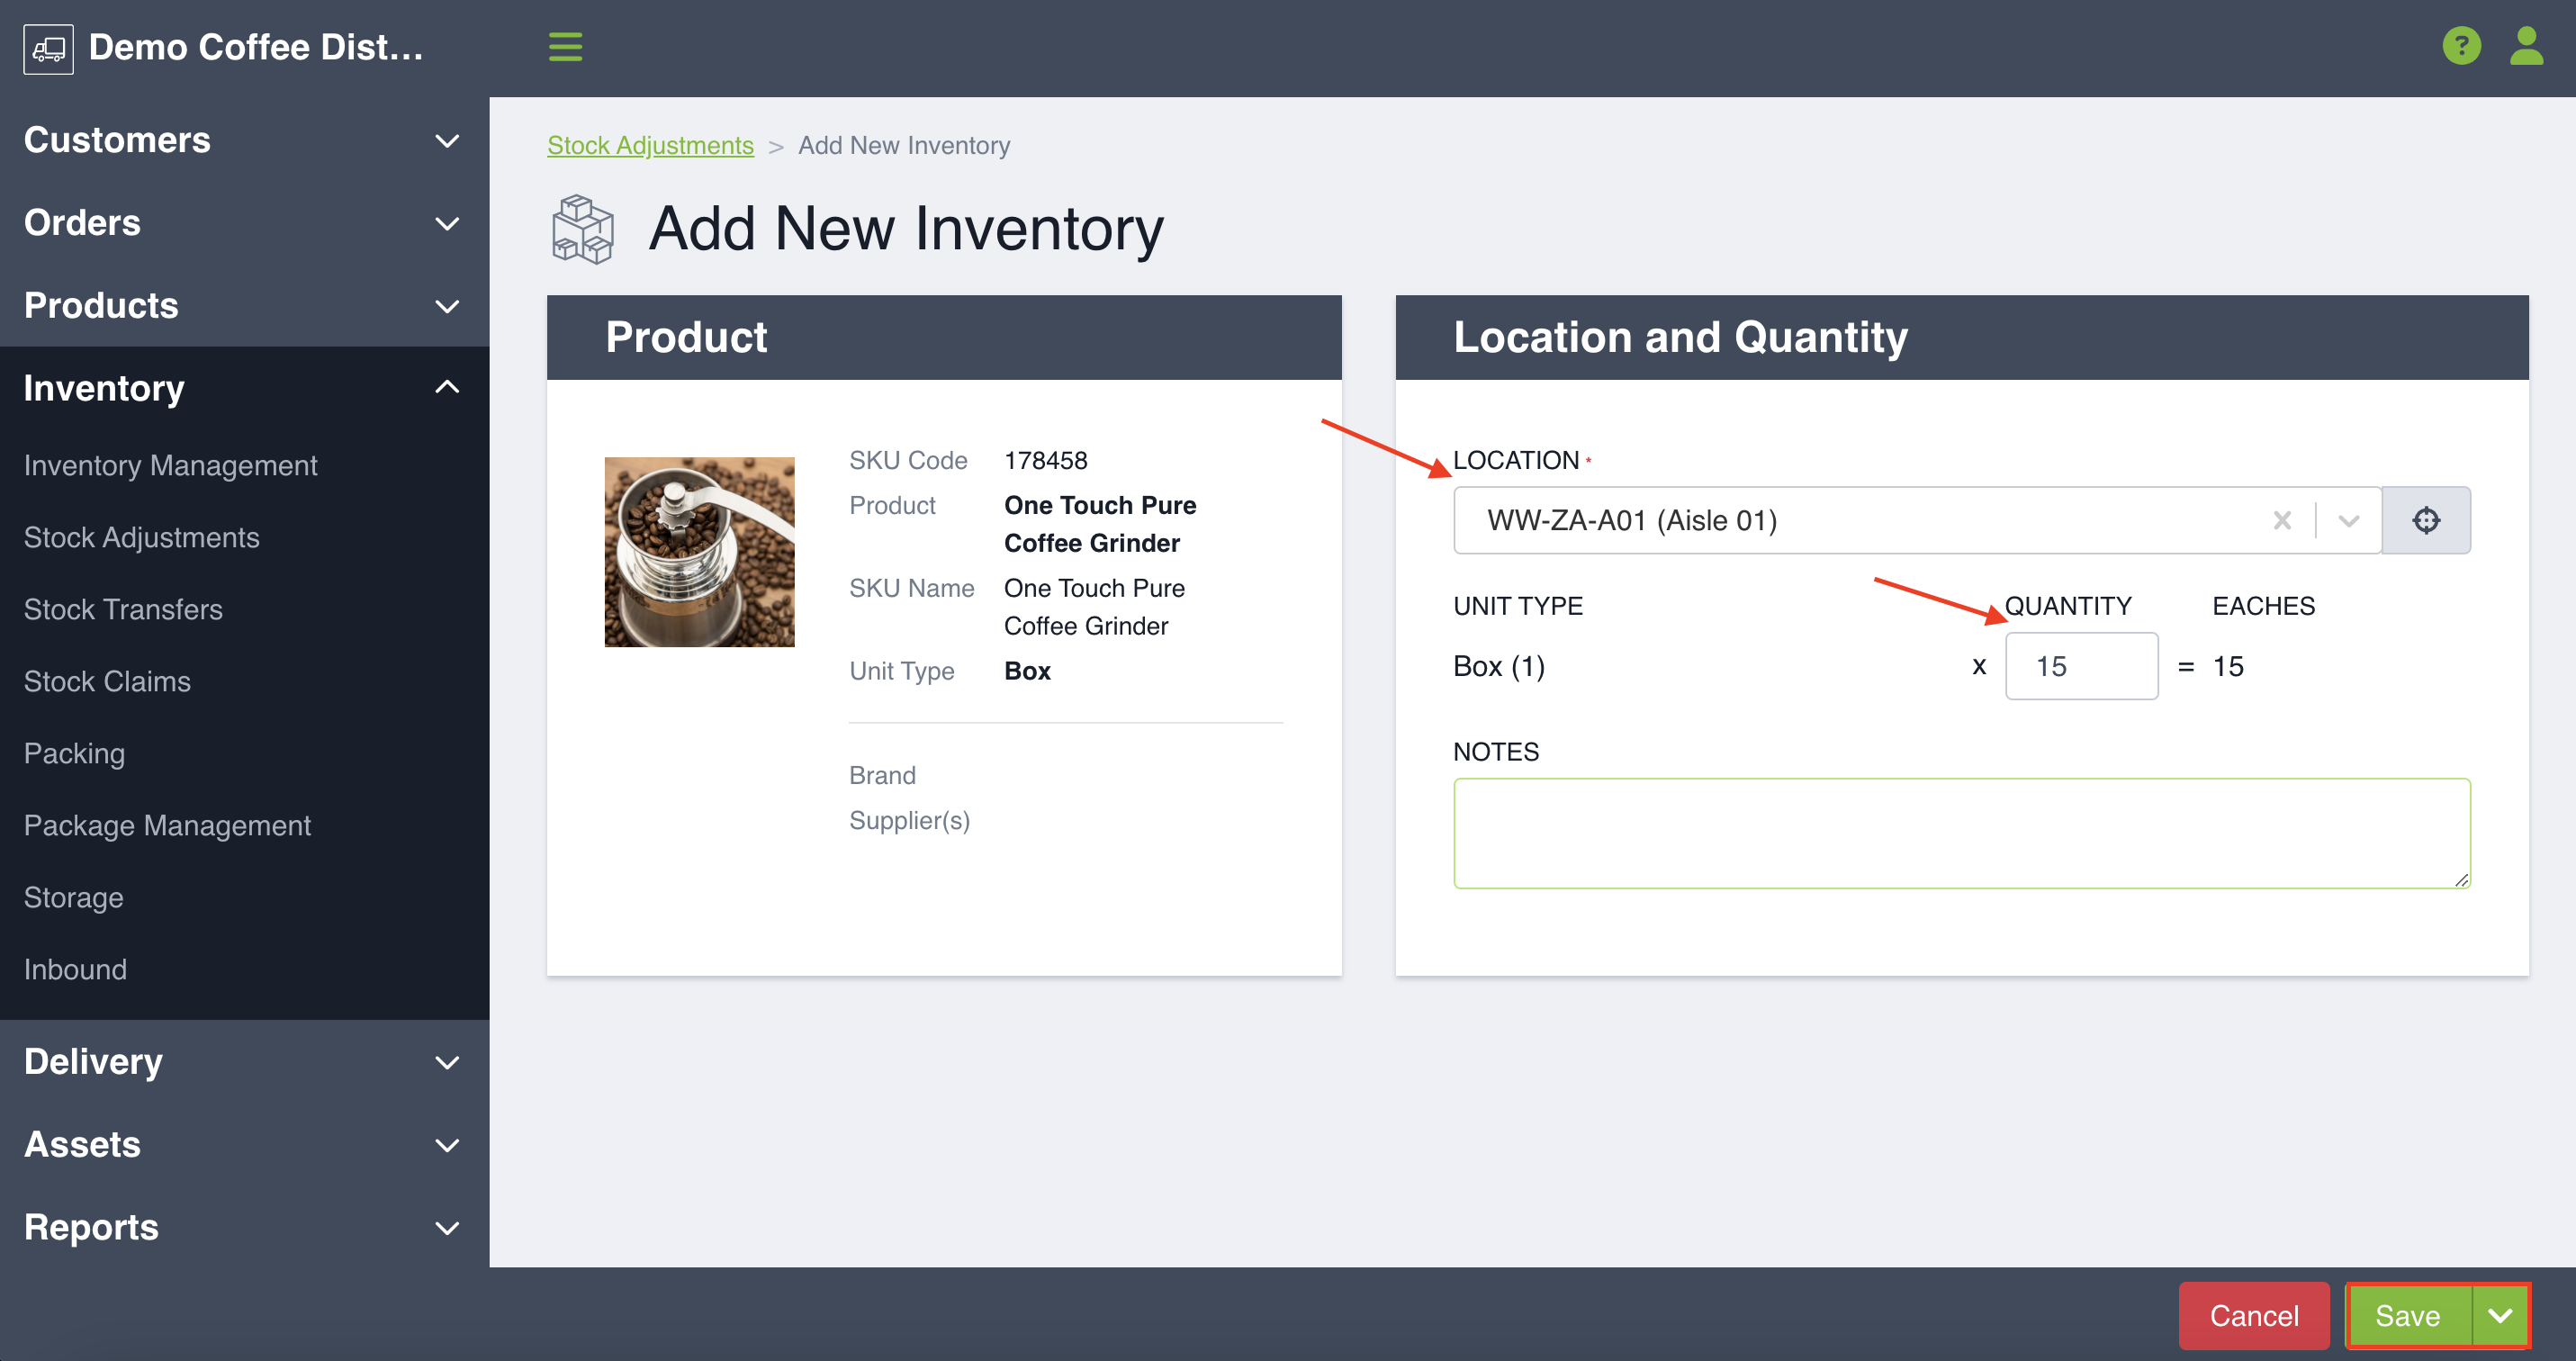
Adding Inventory without Lots
If you chose a SKU with lot tracking disabled, you will be brought to a page where you will see your product information on the left-hand side and your Location and Quantity Information on the right-hand side. You will select which location you would like to add new inventory to and then the unit type, quantity and optionally a note. Again, if your SKU has alternate unit types, you can use those to support this process. The system will automatically calculate the sellable unit quantity that you are adding.
Once you have entered your information click Save. You will be notified that inventory has been added successfully.