Create a PDF to document each instance of received product at your warehouse. Customize your Goods Receipt Note template to include the information that means the most to your business and other parties you may choose to share this with.
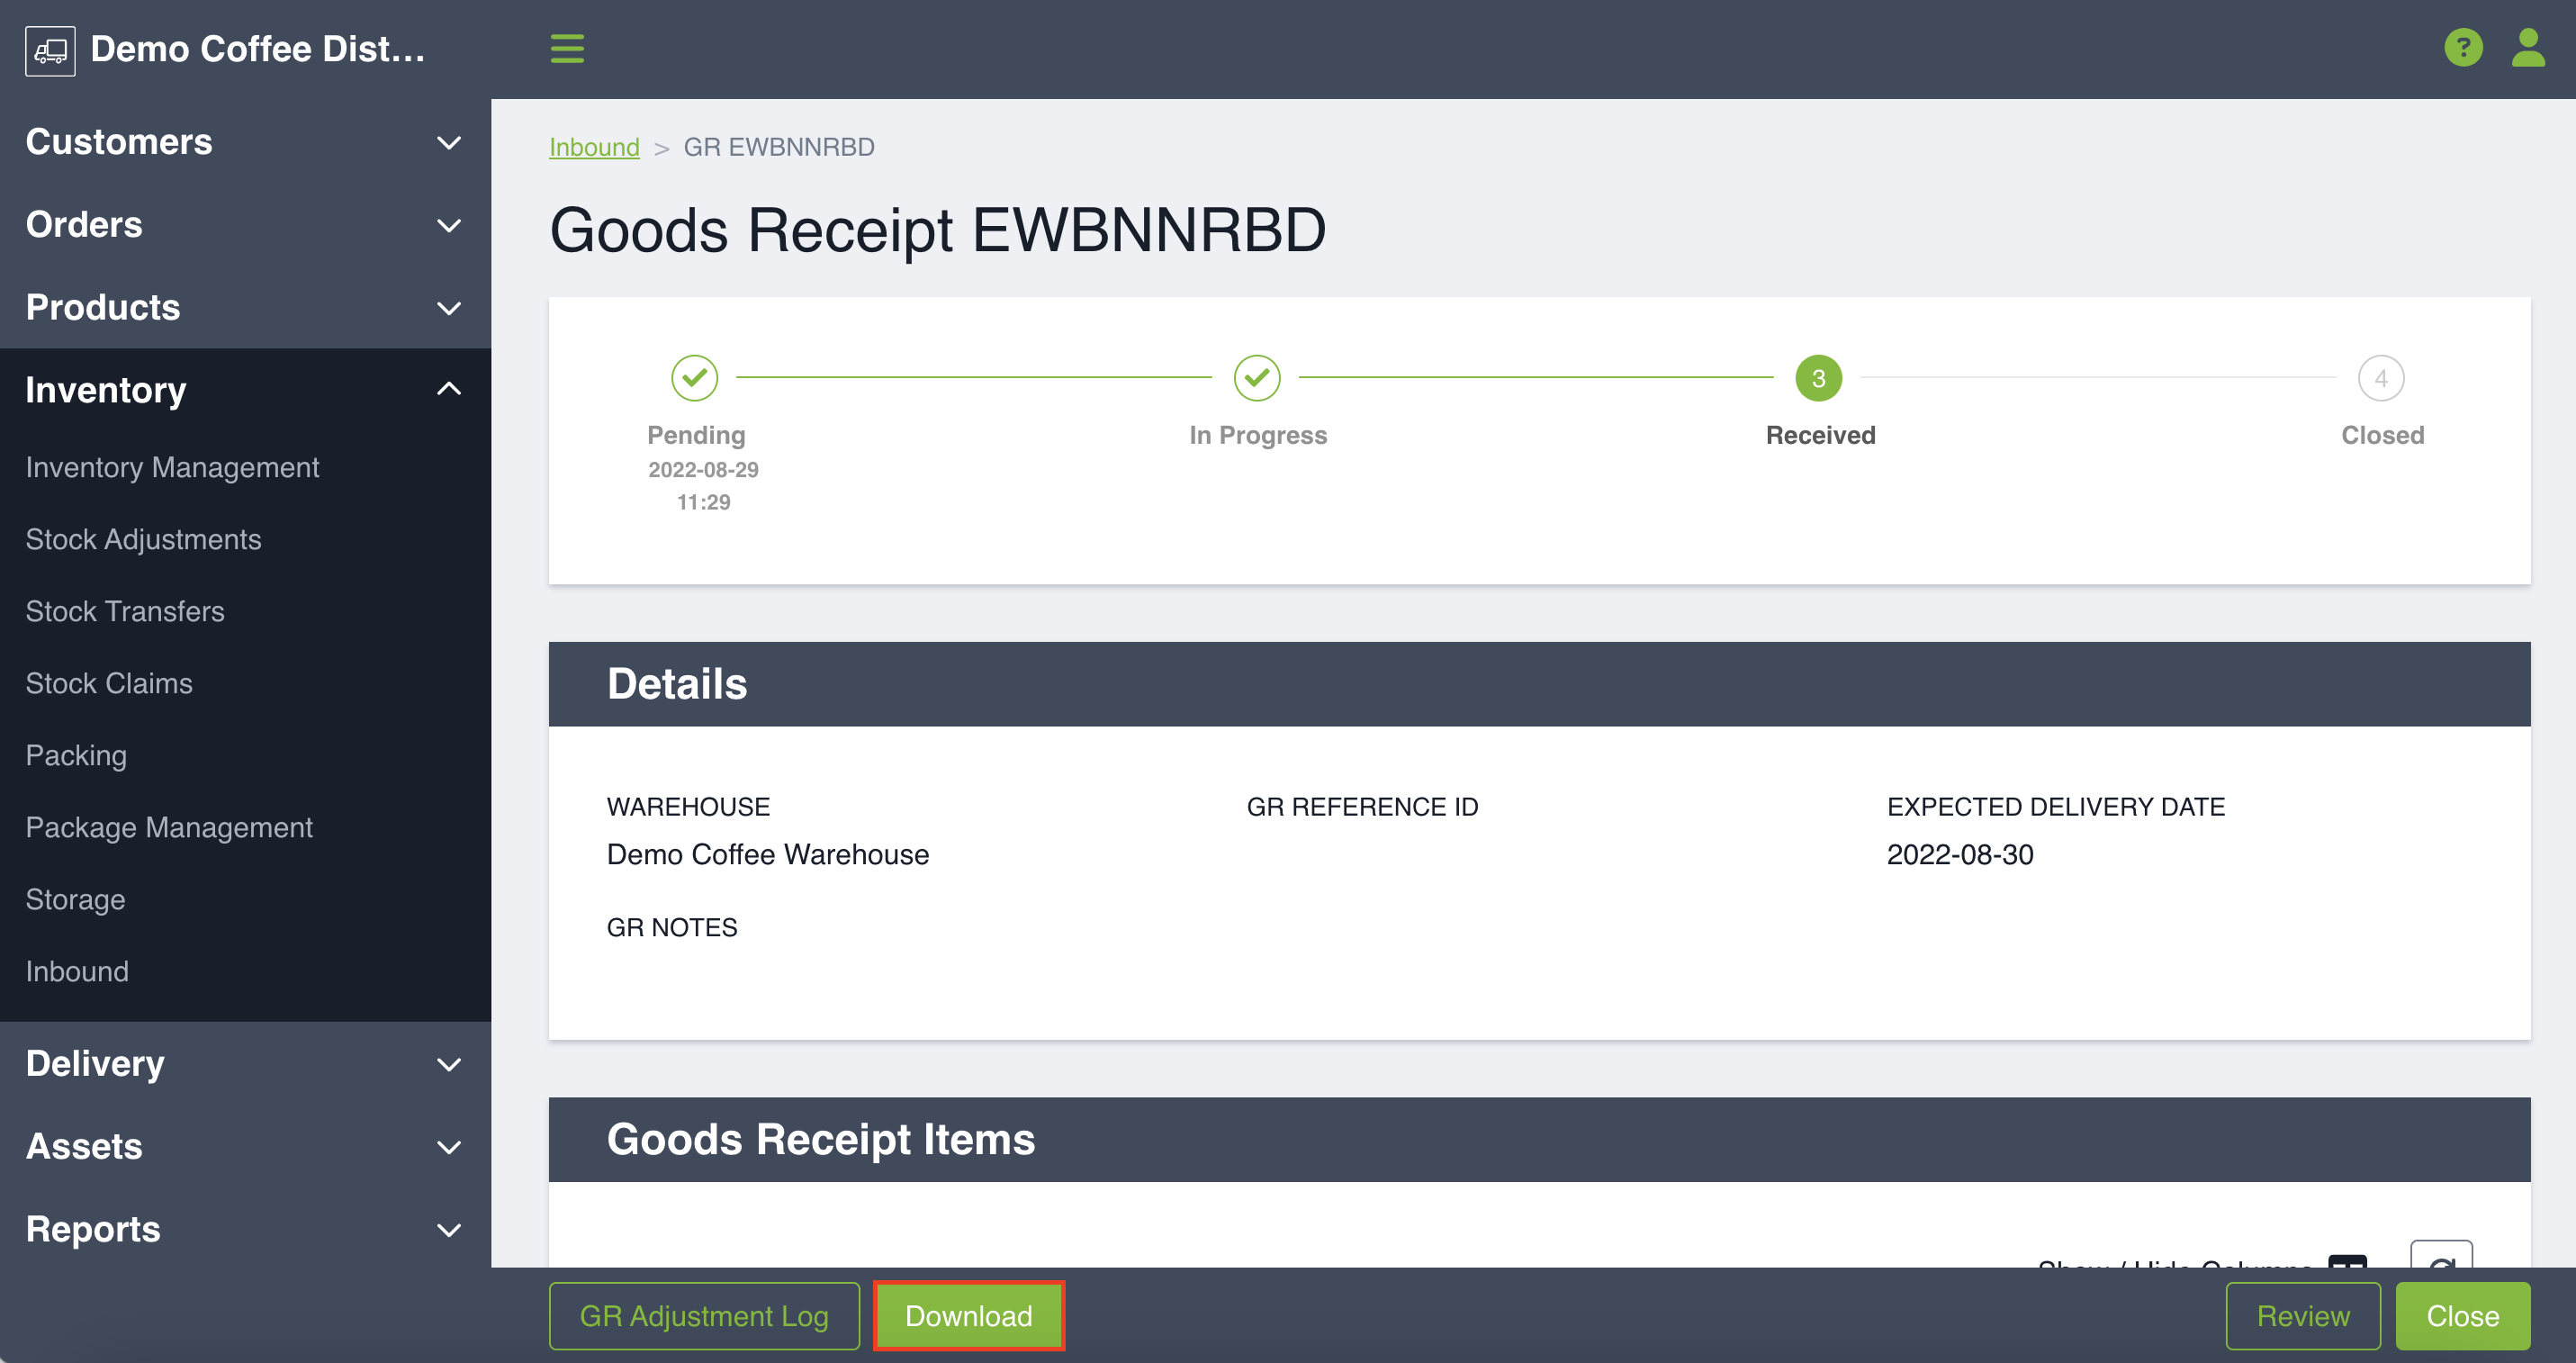
A Goods Receipt Note is a record of received inventory from either a Goods Receipt or a Purchase Order Goods Receipt. It can be generated by clicking on the Download button in the lower-left corner of your screen, when viewing the details page of your desired Goods Receipt or Purchase Order Goods Receipt.
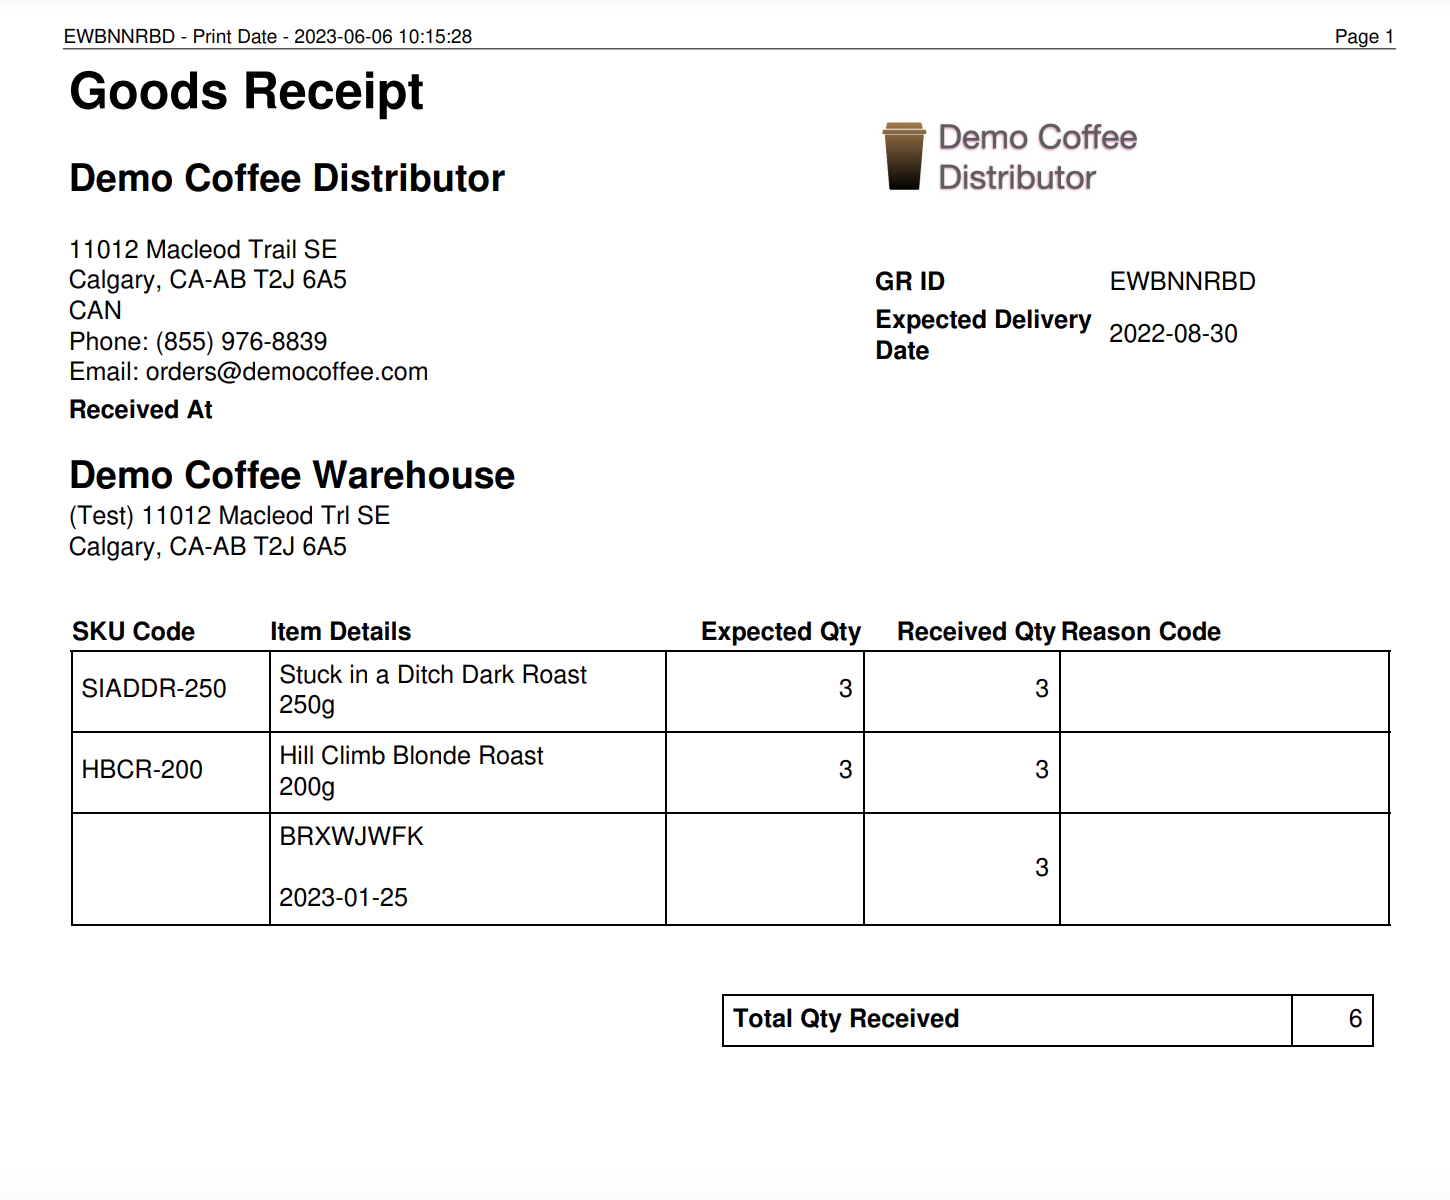
Shown is a sample Goods Received Note. This can be customized to suit your needs by following the instructions below.
Customizing a Goods Received Note
Your account will be set up with a default Goods Received Note template, but the fields and naming can be adjusted to suit your business needs.
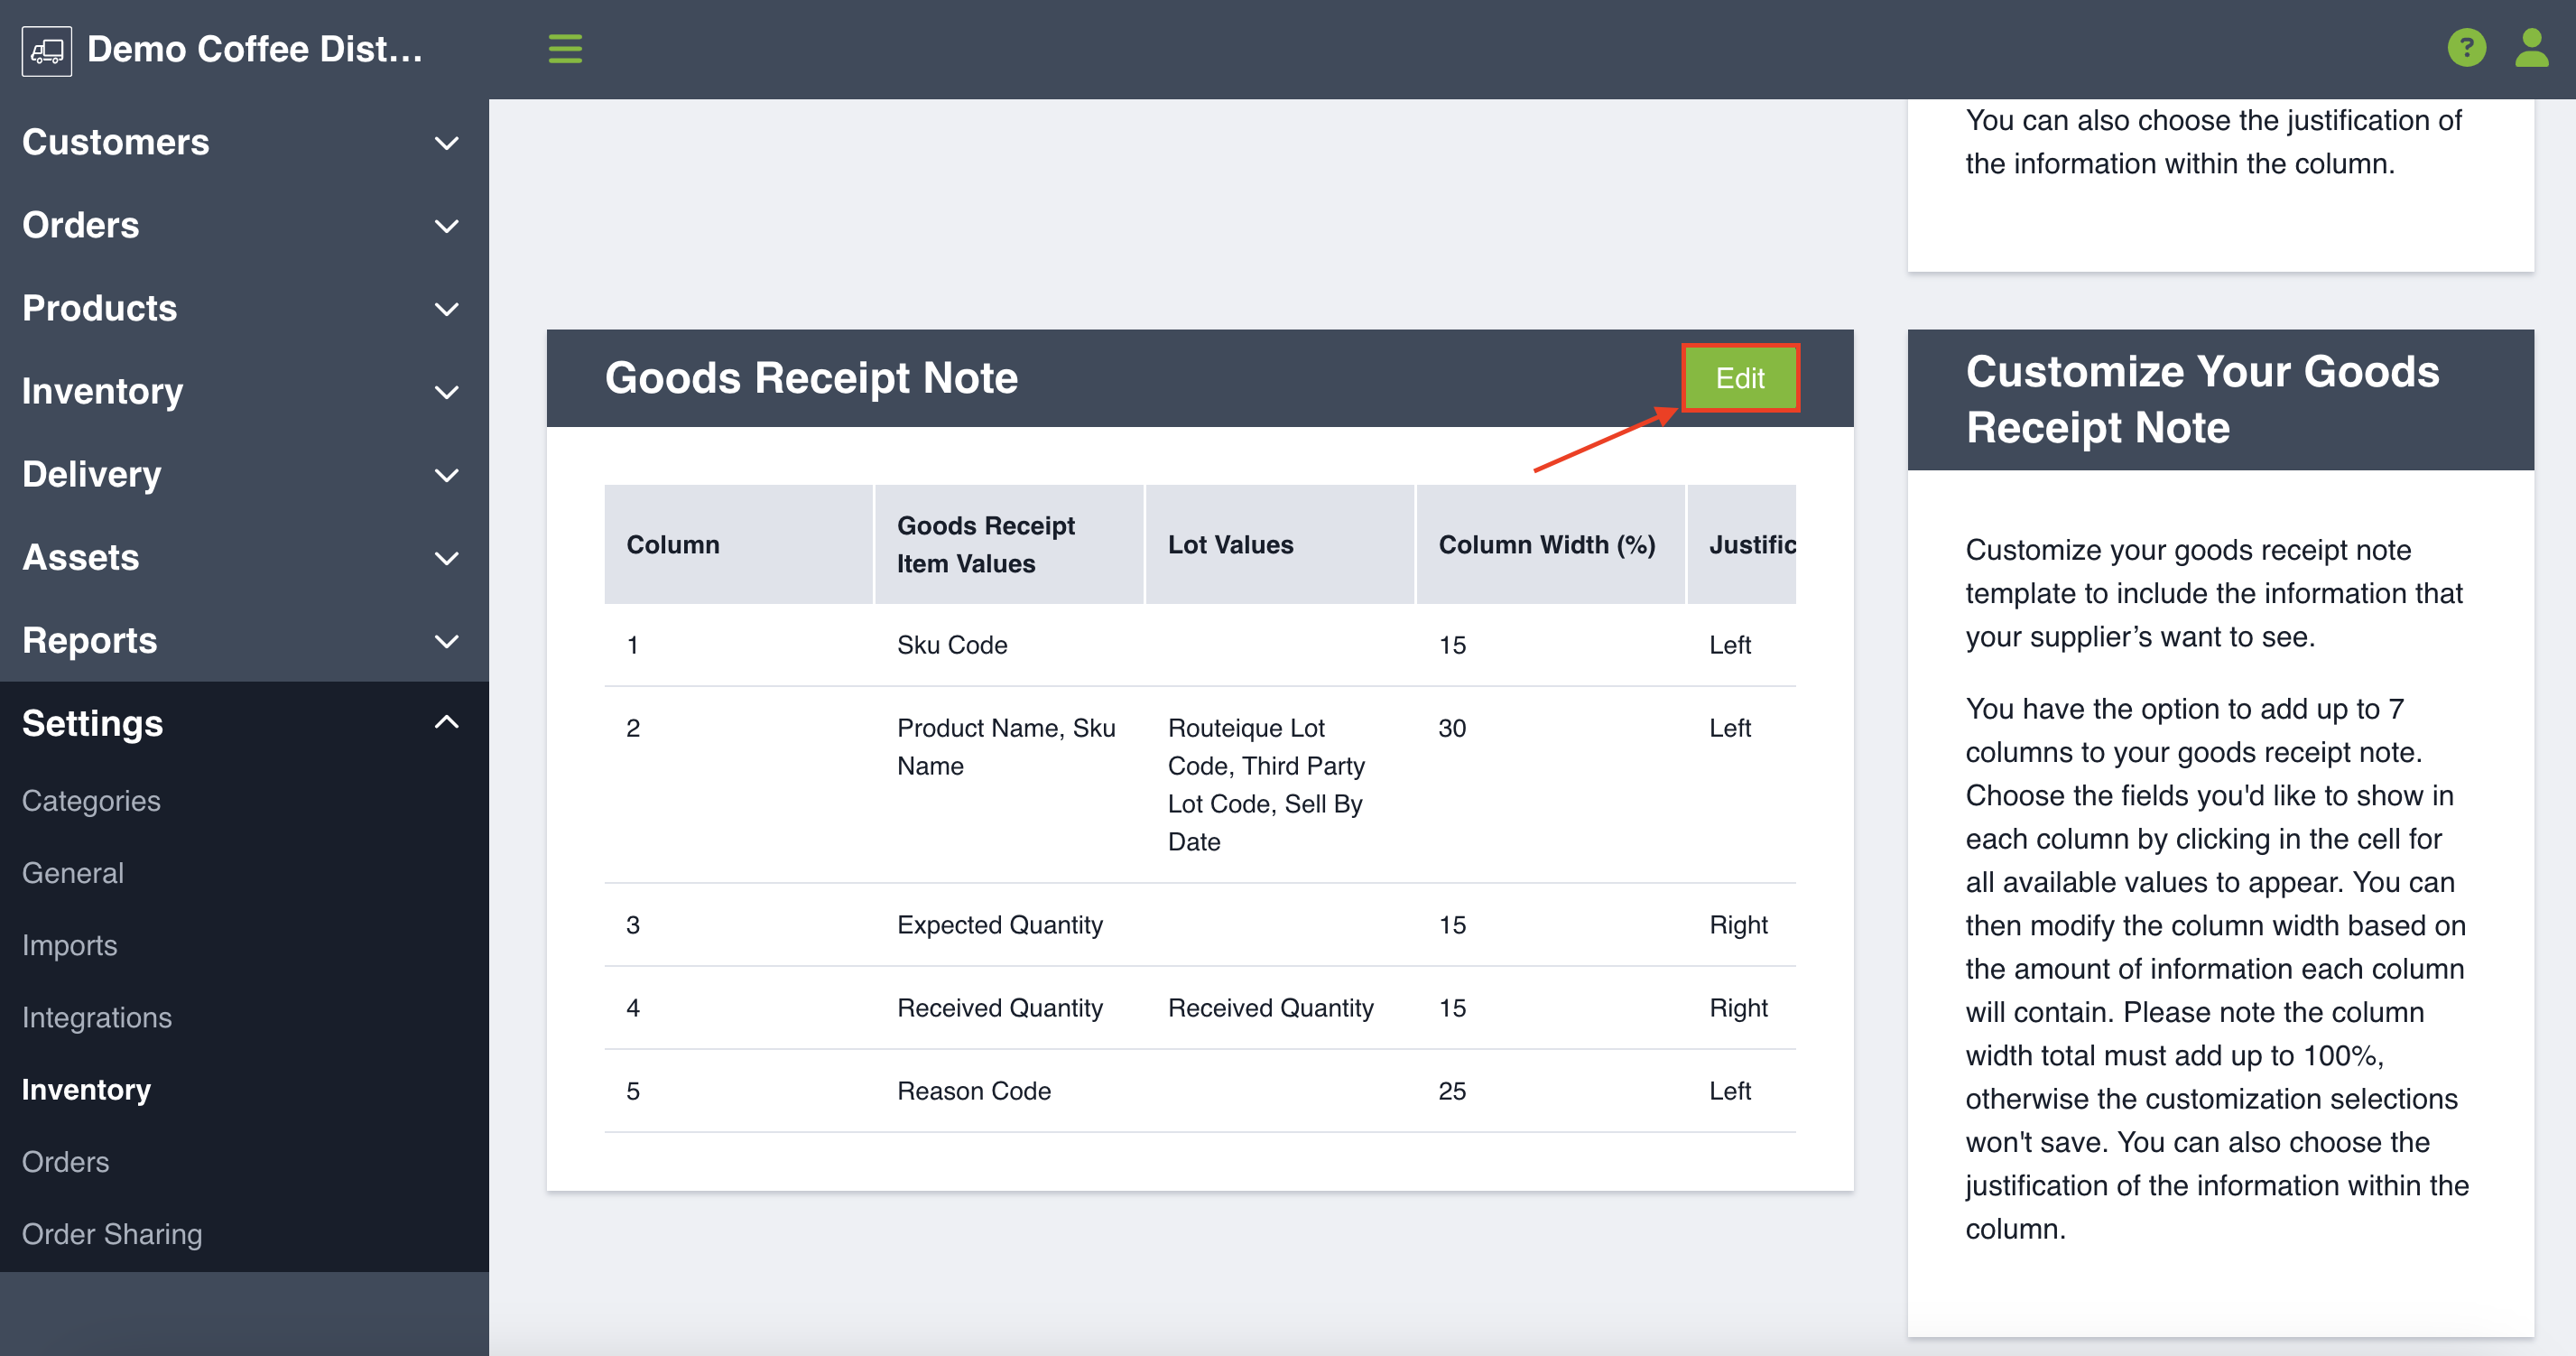
Customize your goods receipt note template by going to Settings, then clicking on Inventory. Scroll down until you reach the column customization fields for Goods Receipt Notes. And click on Edit button to customize the Goods Receipt Note.
You will notice two main sections that you can customize: Item Values and Lot Values. The Lot values are optional - you may choose to add lot fields if you receive SKUs that have lot tracking enabled. As you can see in the above example, the lot values will display below the SKU values in the column that you designate. This allows you to see the aggregated received total for a SKU, as well as a count by lot.
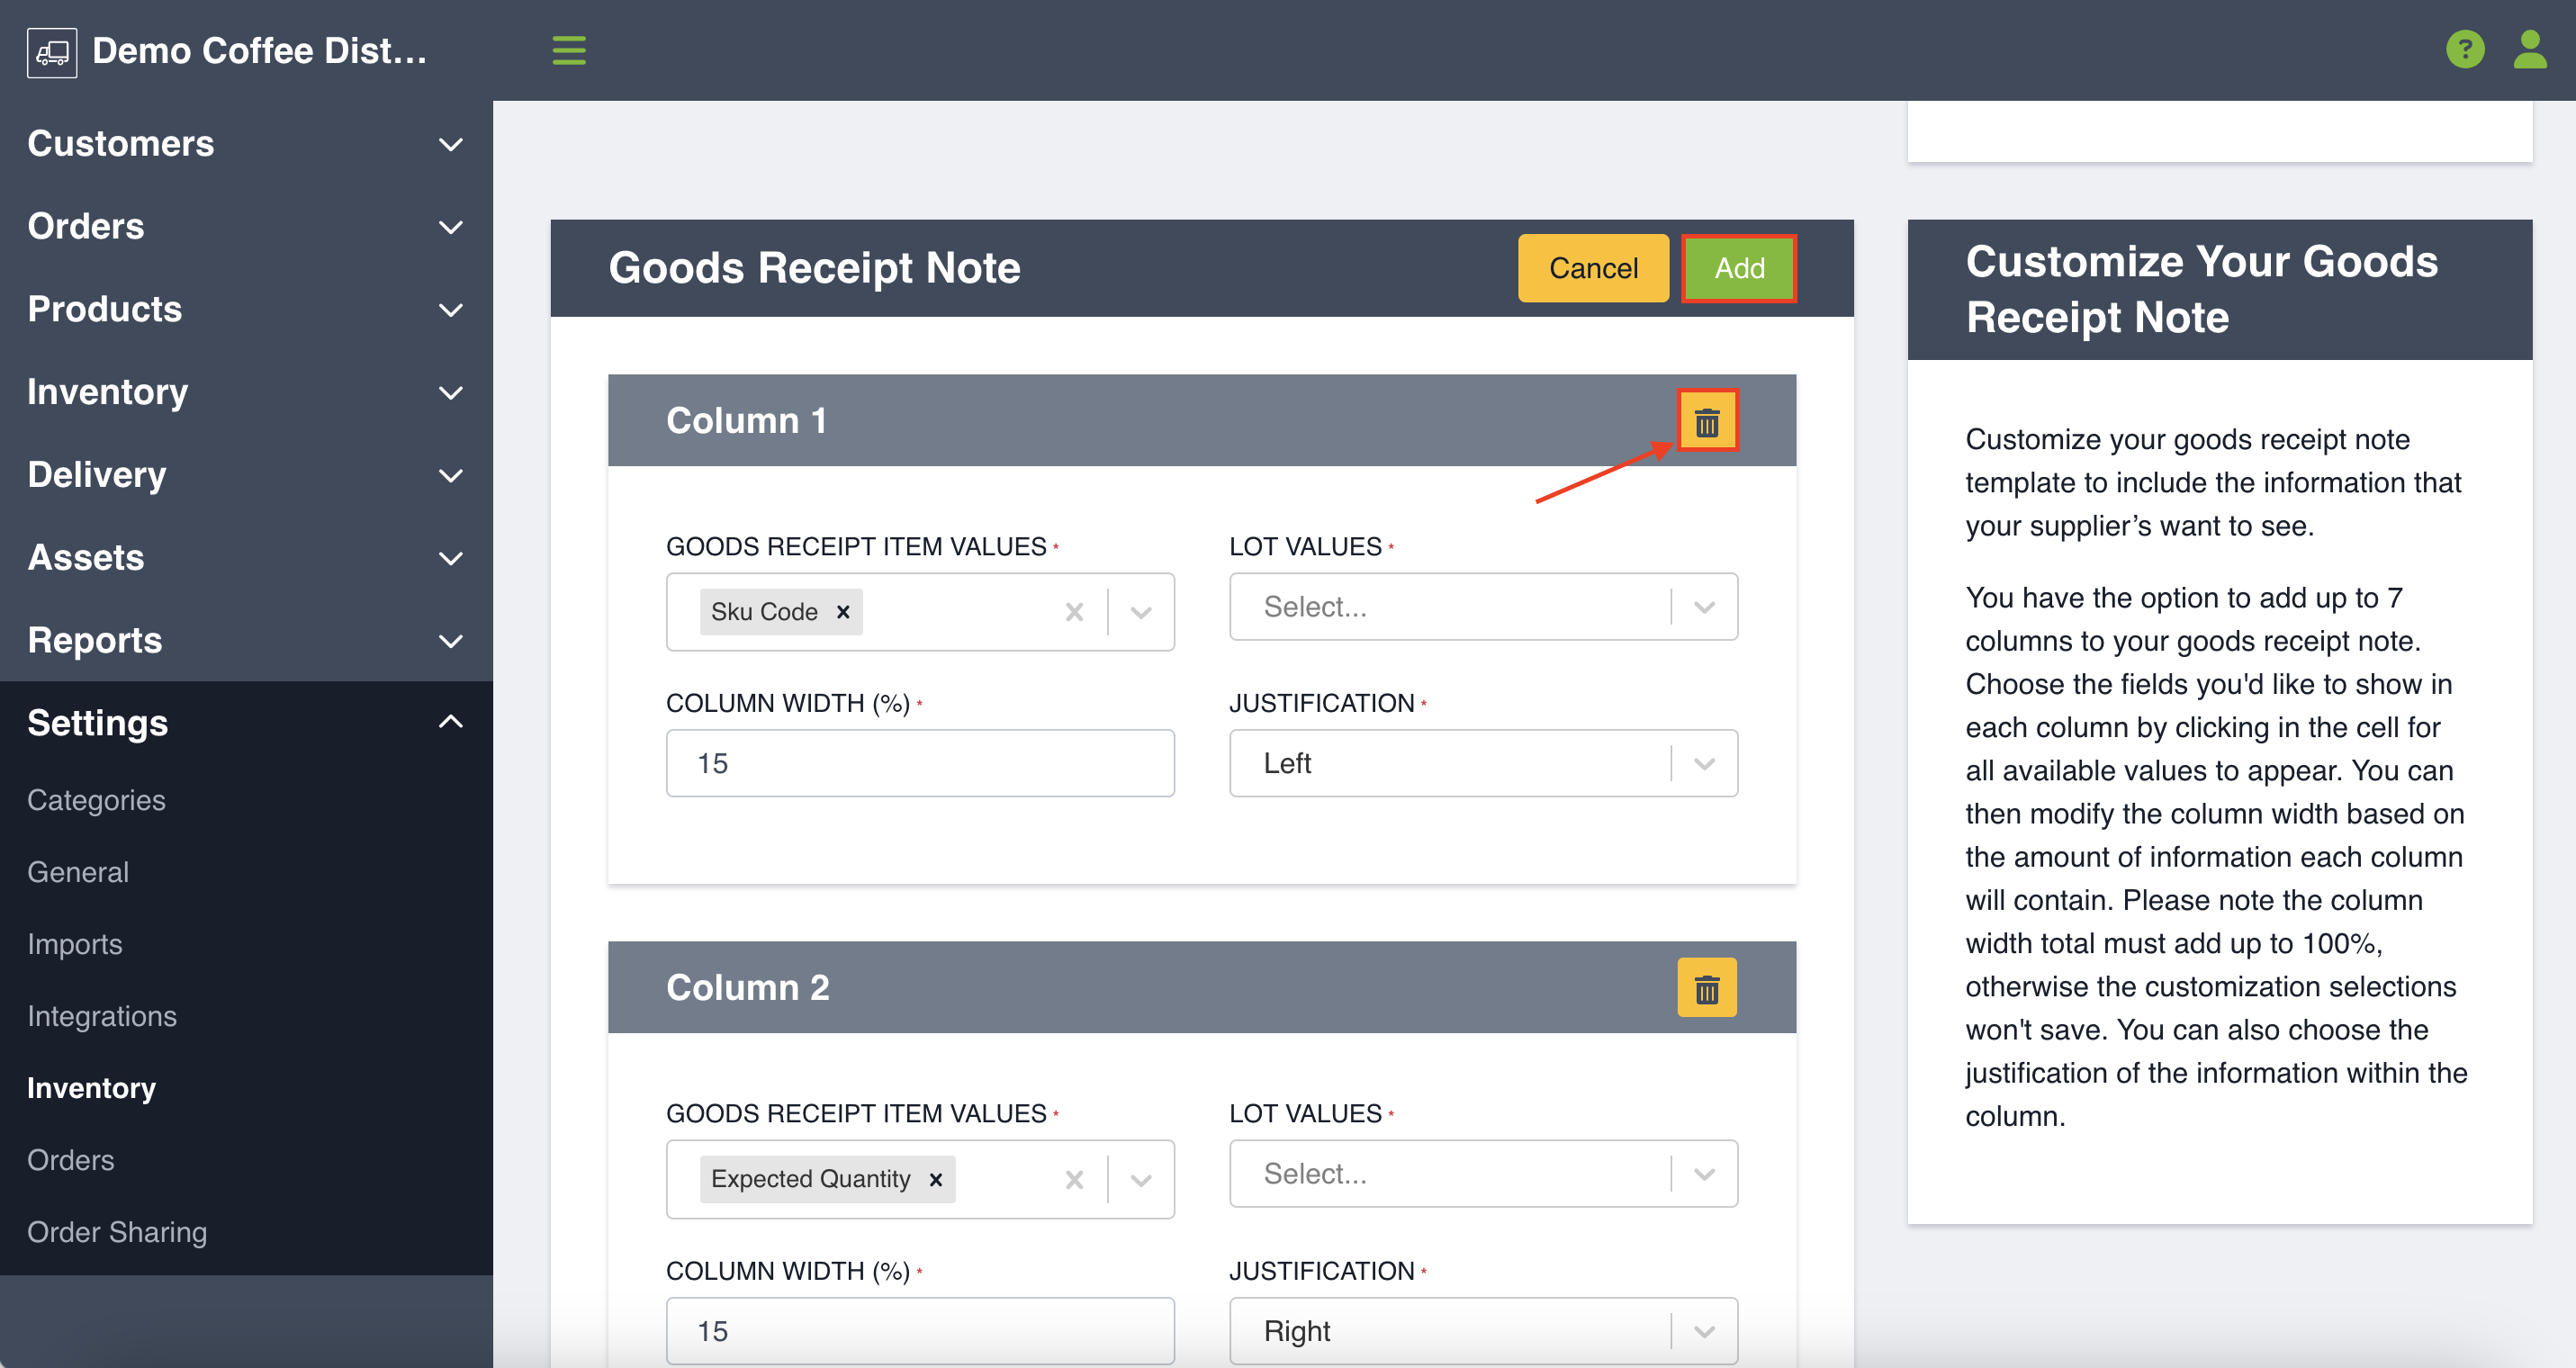
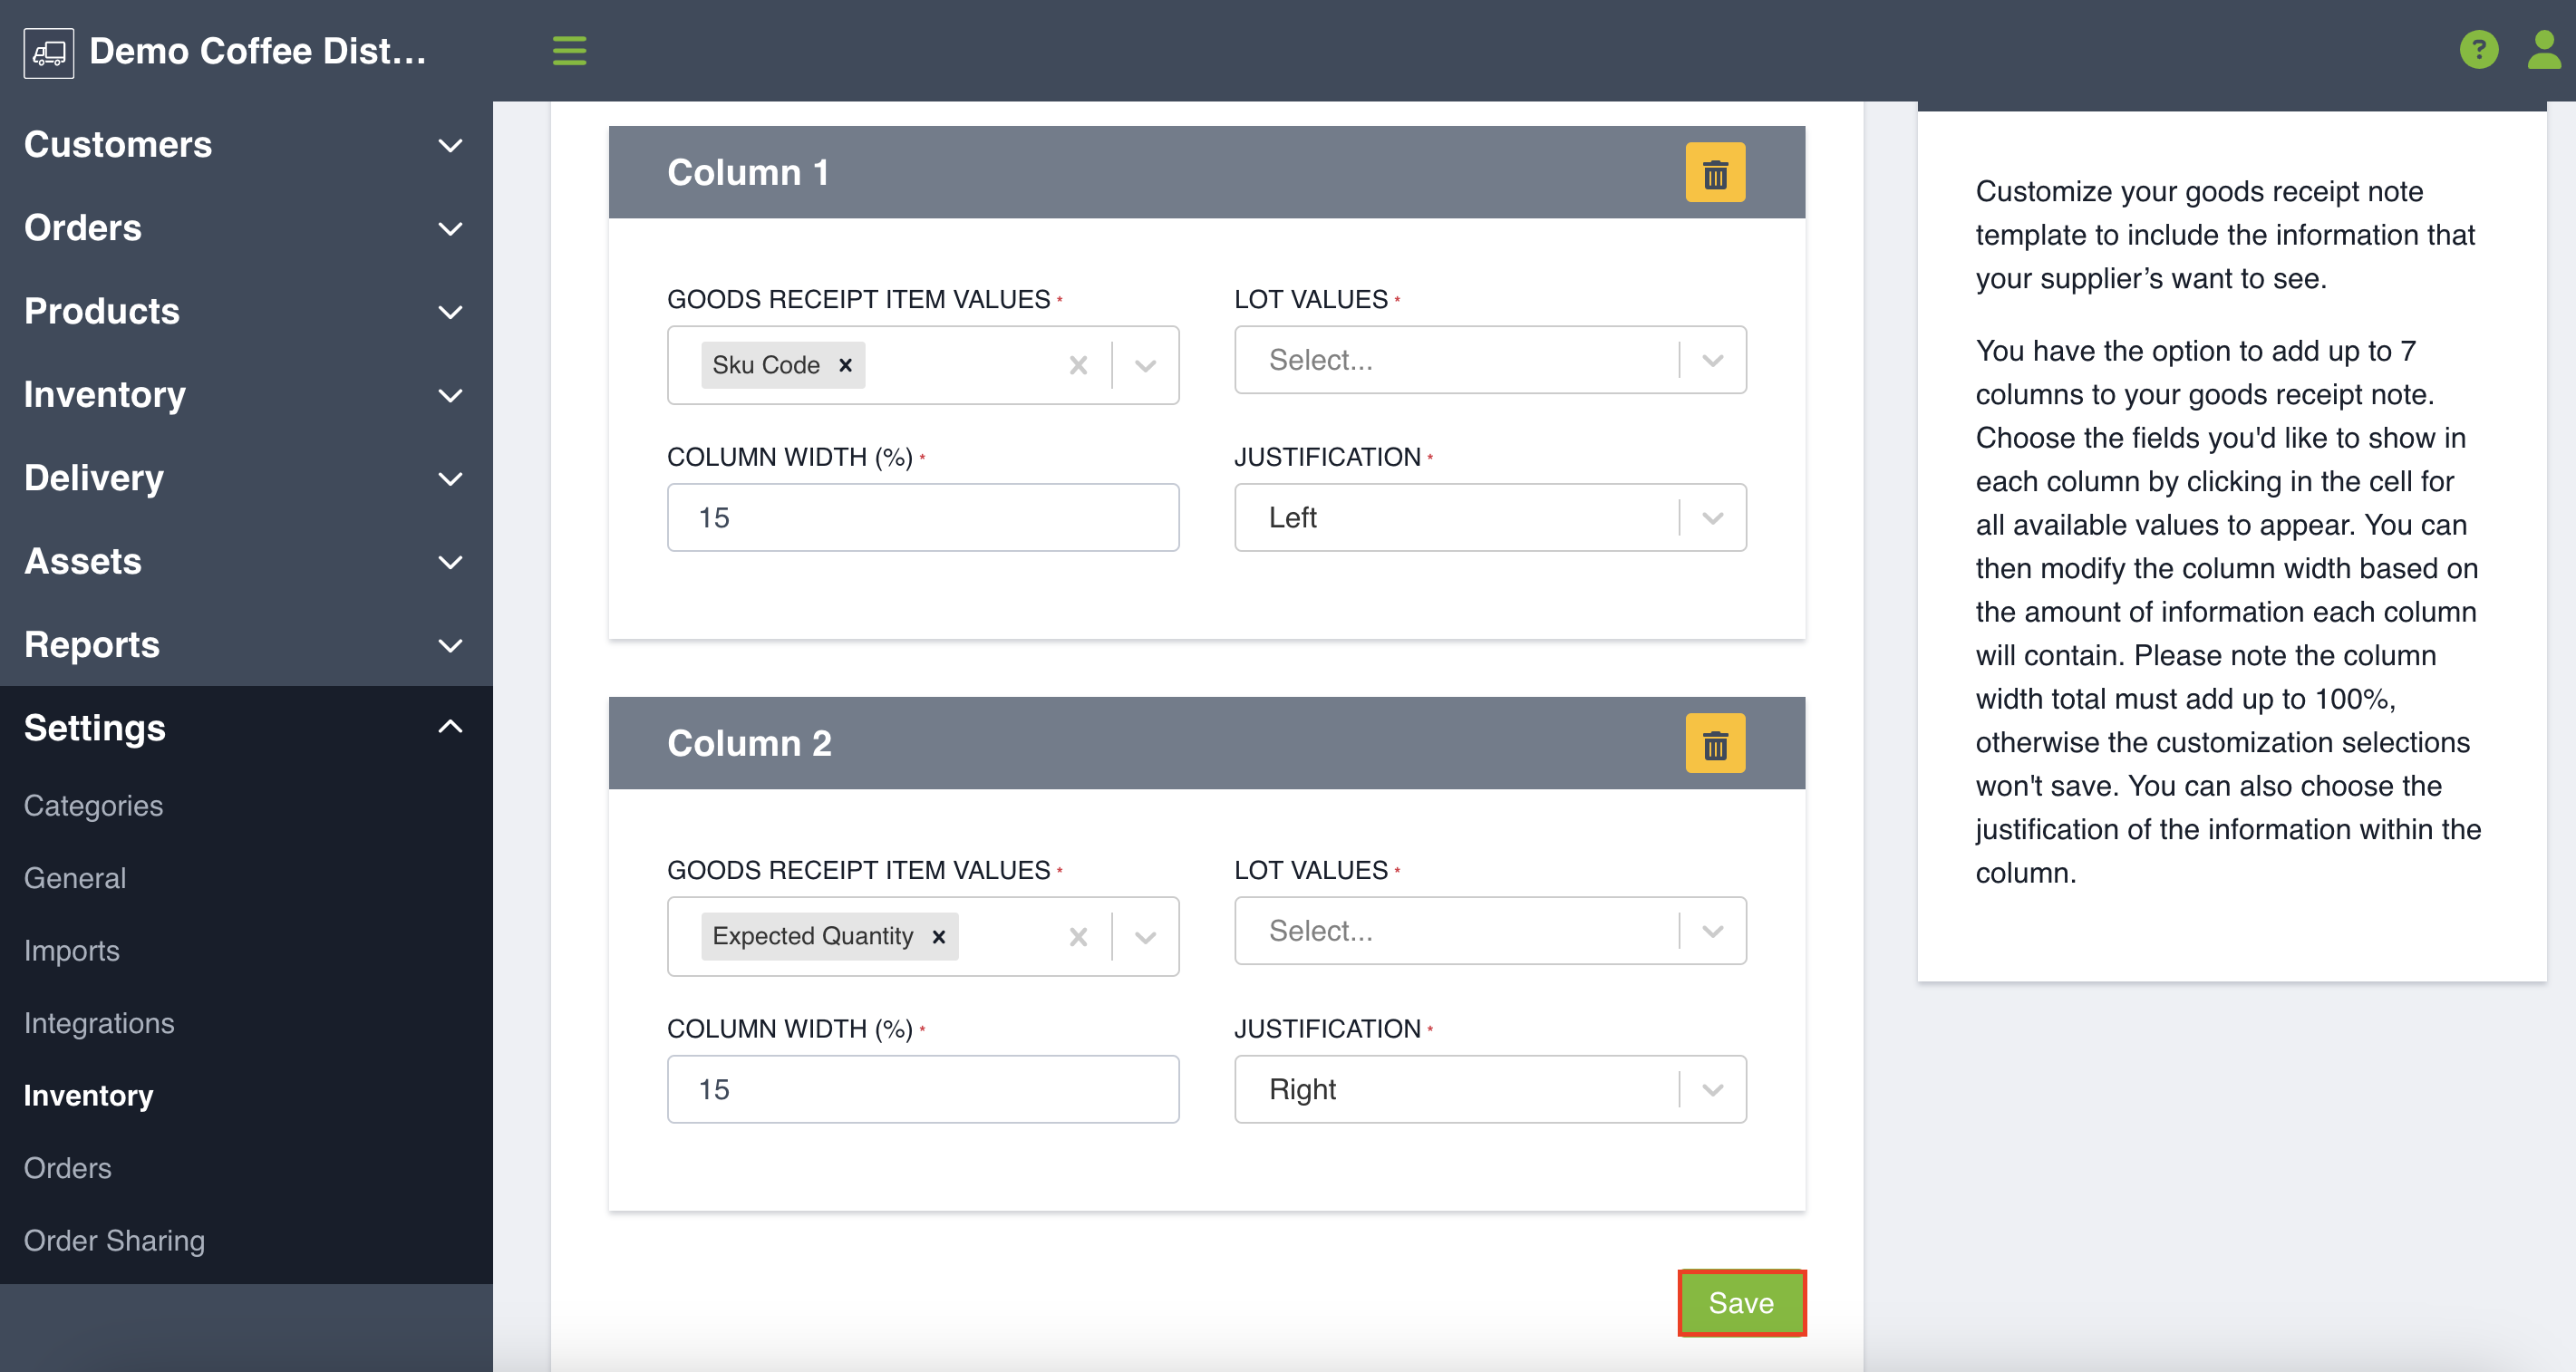
You have the option to add up to 7 columns to your goods receipt note. To add more than four columns to your Goods Receipt Note, click the Add button on the upper-right corner. To remove columns, simply click the trash can icon on the right-hand side. Choose the fields you'd like to show in each column by clicking in the cell for all available values to appear. You can then modify the column width based on the amount of information each column will contain. Please note the column width total must add up to 100%, otherwise the customization selections won't save. You can also choose the justification of the information within the column. Click Save in the bottom-right corner to preserve your customizations.
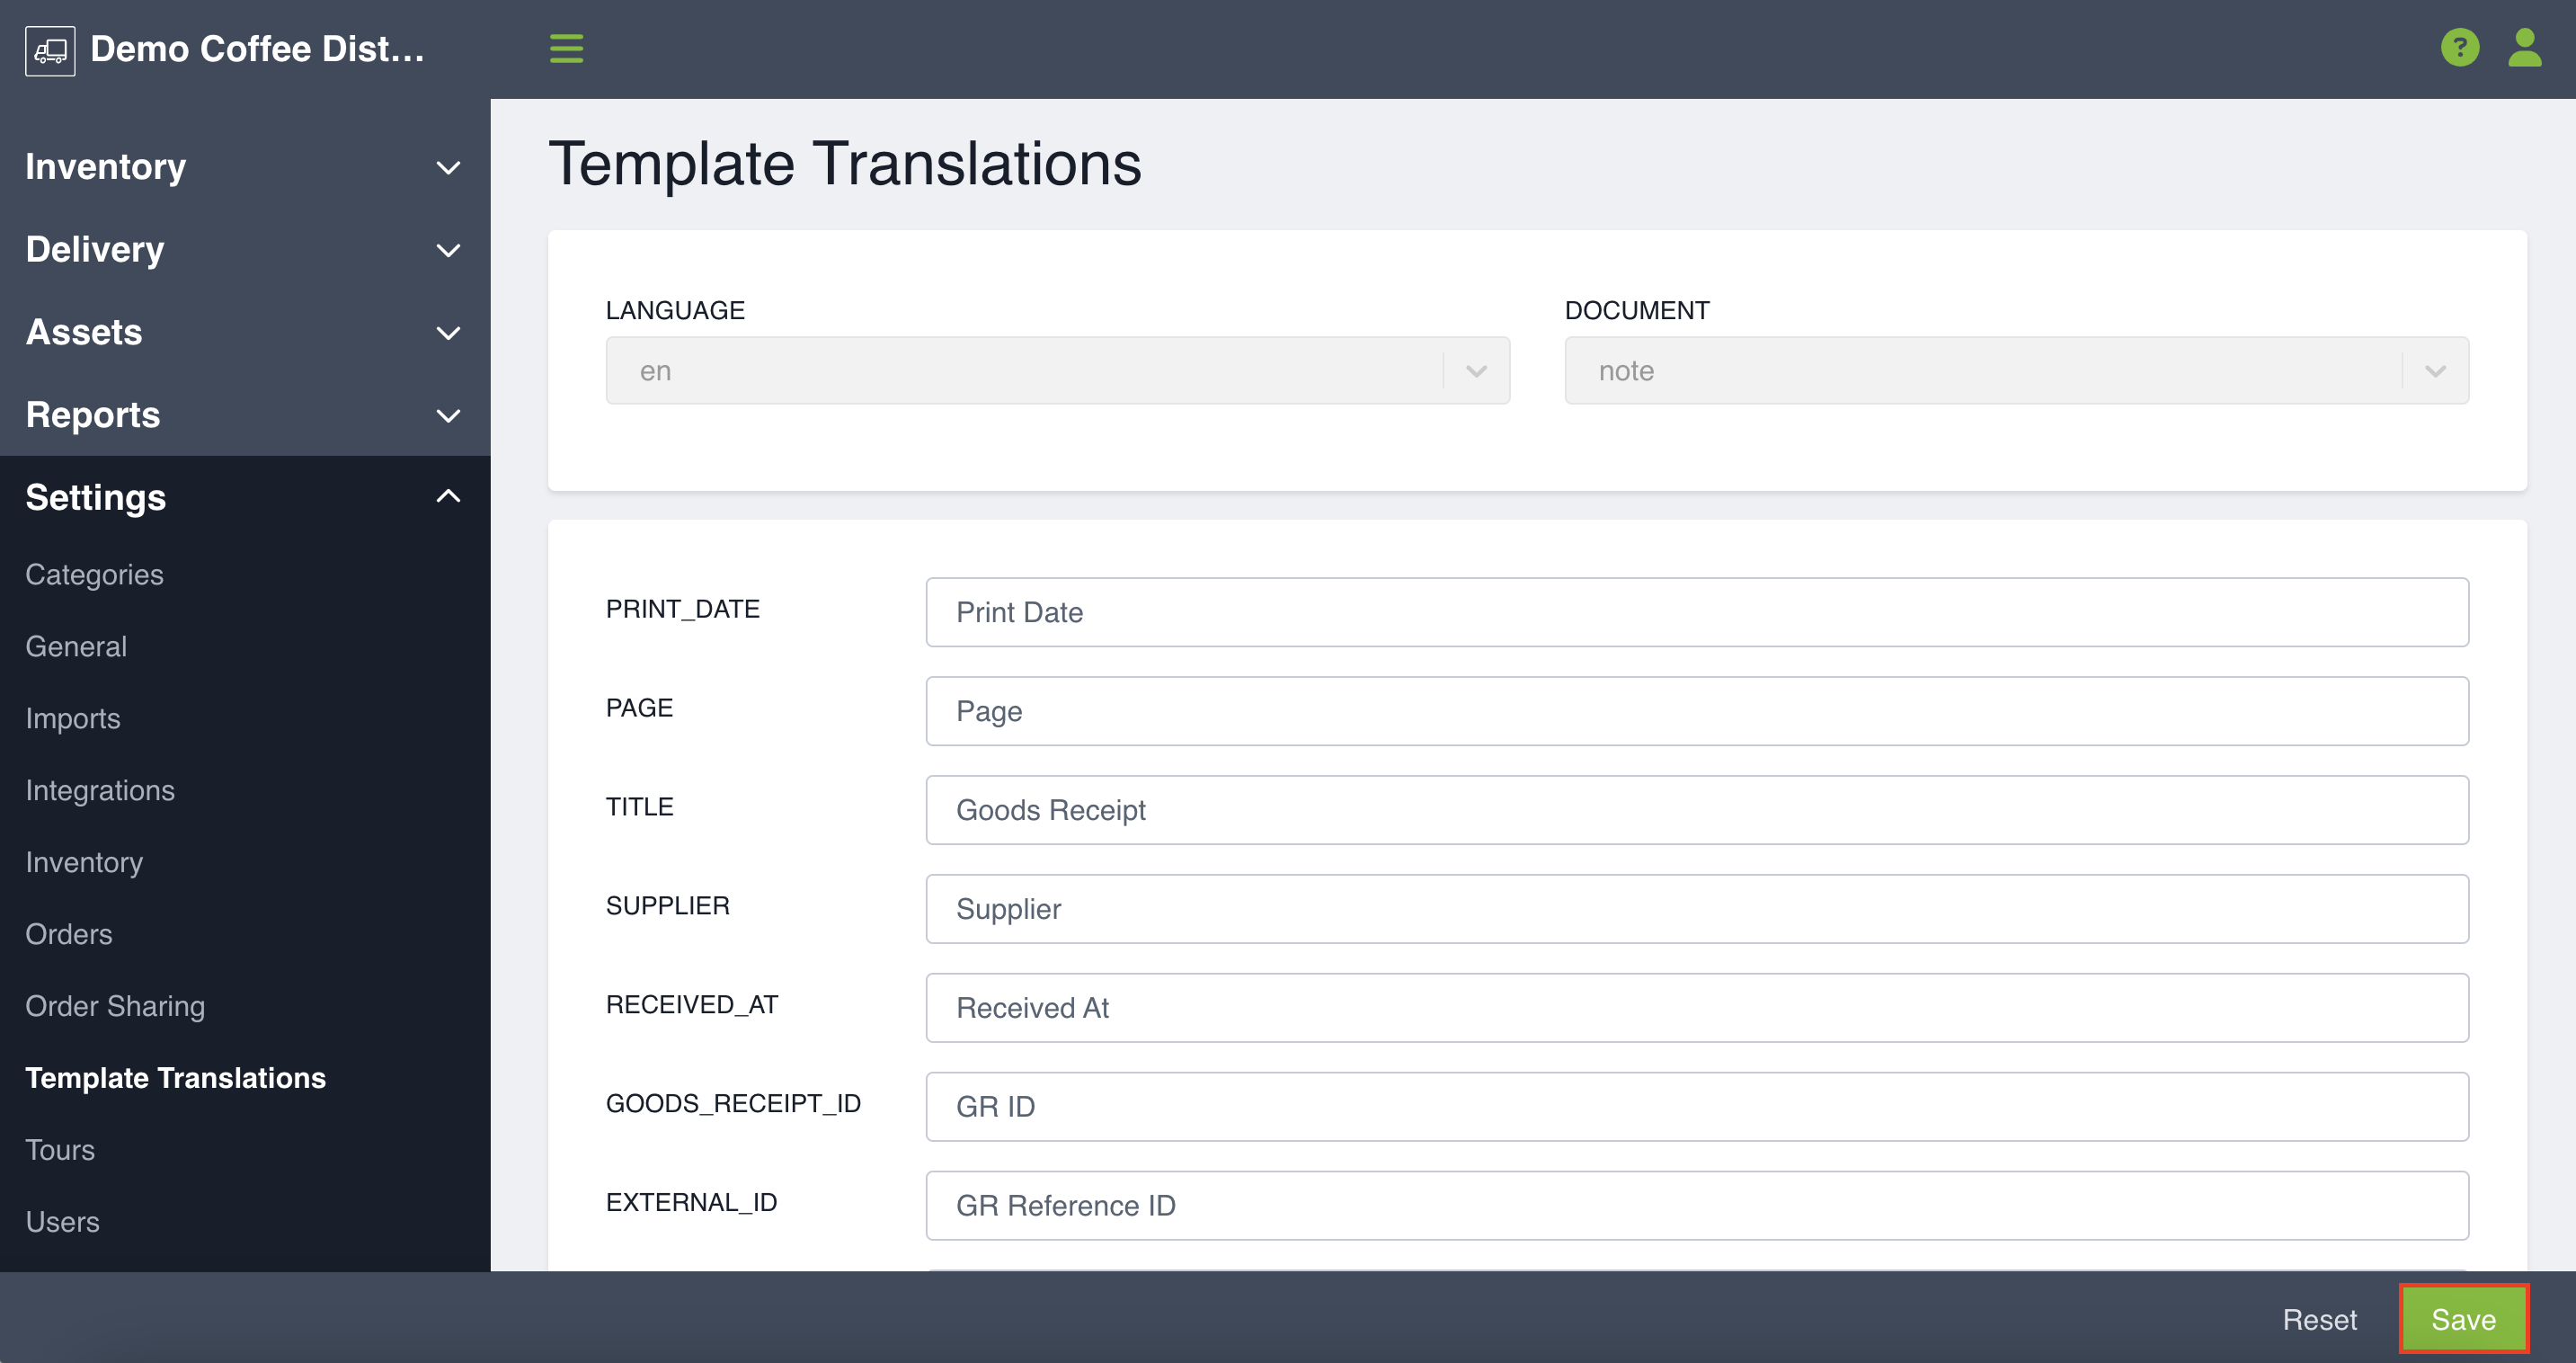
Next, navigate back to Settings, then Template Translations. Select your language of choice from the Language drop-down menu, then select Goods Received Note from the Document drop-down menu.
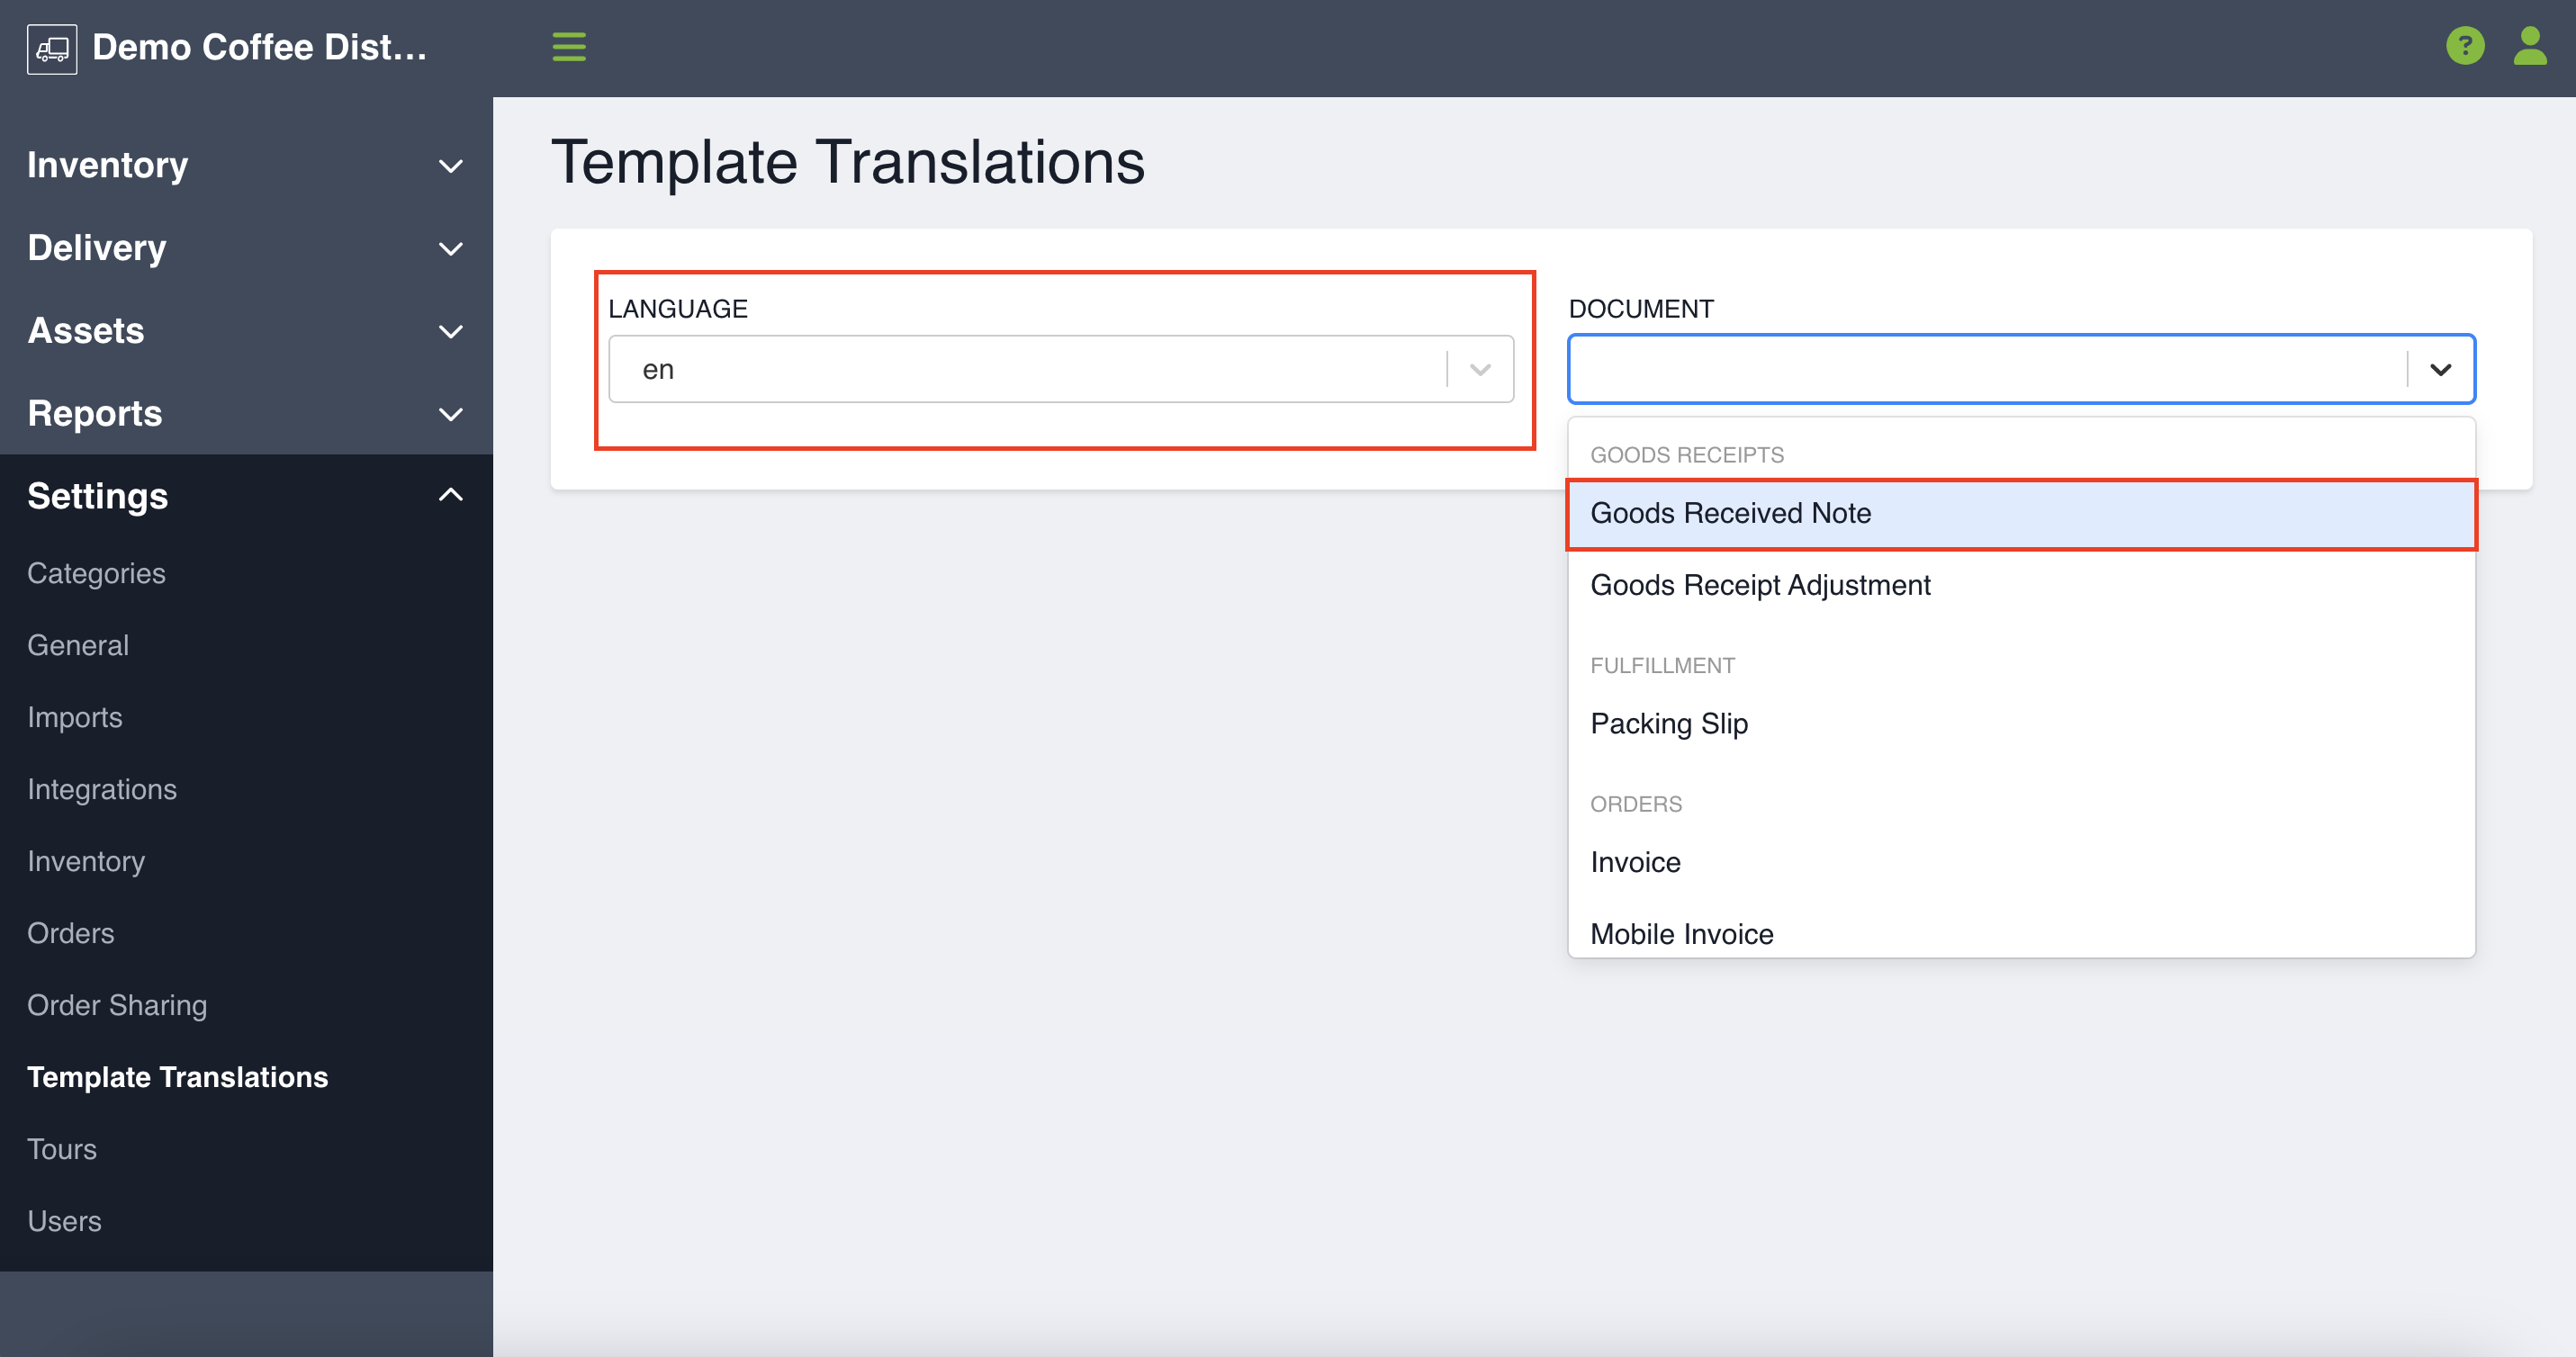
A table will then appear with customizable fields. Default titles will appear in most fields, but you may rename them as desired. The columns outlined in Inventory Settings will all require a more specific title (default is Column 1, Column 2, etc.). Once complete, click on the Save button in the bottom-right hand corner. This will save the template and your customized titles will populate for all future Goods Received Notes. This template can be revised as needed by returning to this page, editing the titles and clicking Save once again.