Add customers to one or more assigned route schedules and edit individual customer schedules.
Viewing Customers on an Assigned Route
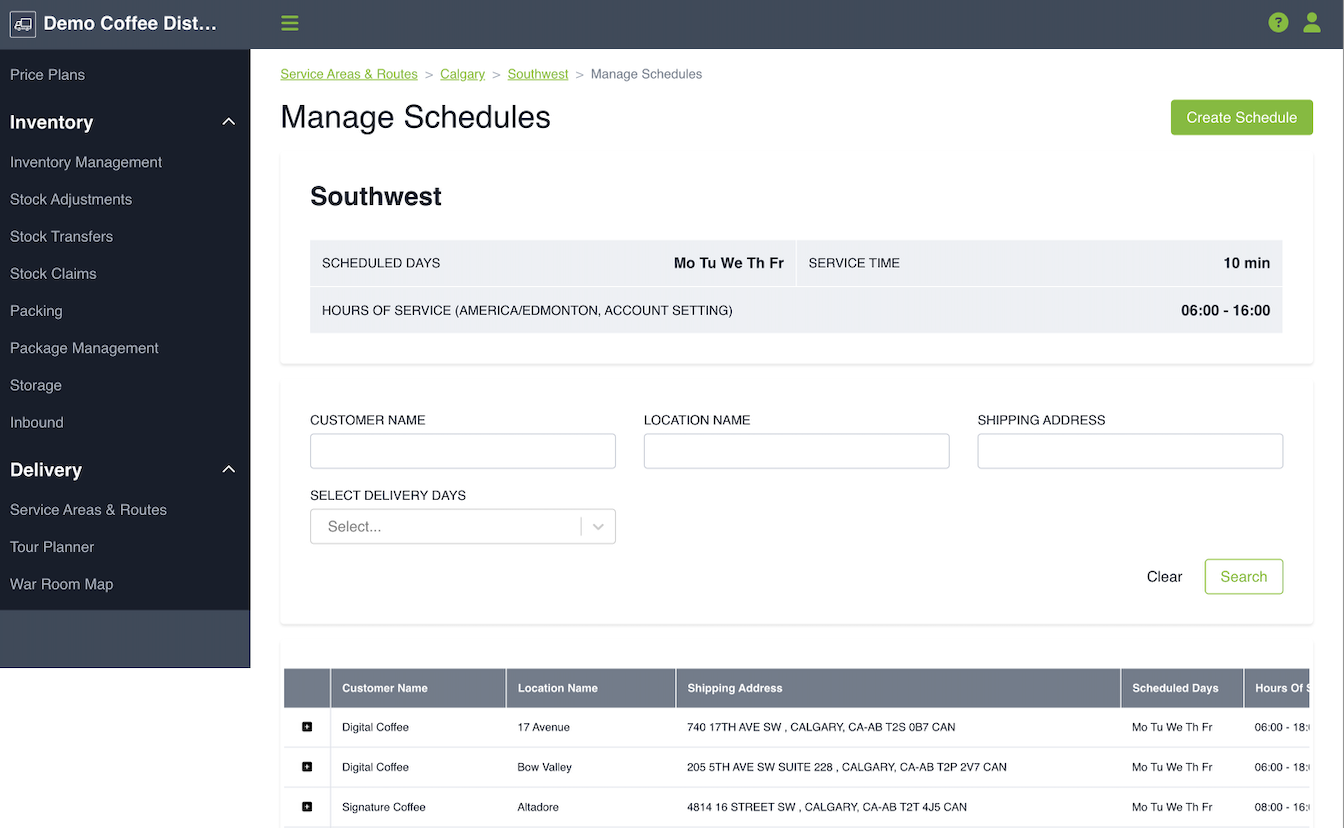
To view the customers that are currently on a specific assigned route, click on the Service Areas & Routes link under Delivery Options in the side navigation. You will then be presented with a page that shows all your service areas and assigned routes. Click on the dropdown arrow beside the assigned route and select Manage Assigned Route Schedules.

The schedule for the assigned route page will show you a list of all the customer locations that are currently on that assigned route. At the top of the page you will see the schedule details for the assigned route, including scheduled days, hours of service and service time. Each customer can automatically inherit the assigned route the details to the assigned route schedule or you can also set their own unique schedule. The table will show you the service details set for each customer.
Edit a Customer Schedule
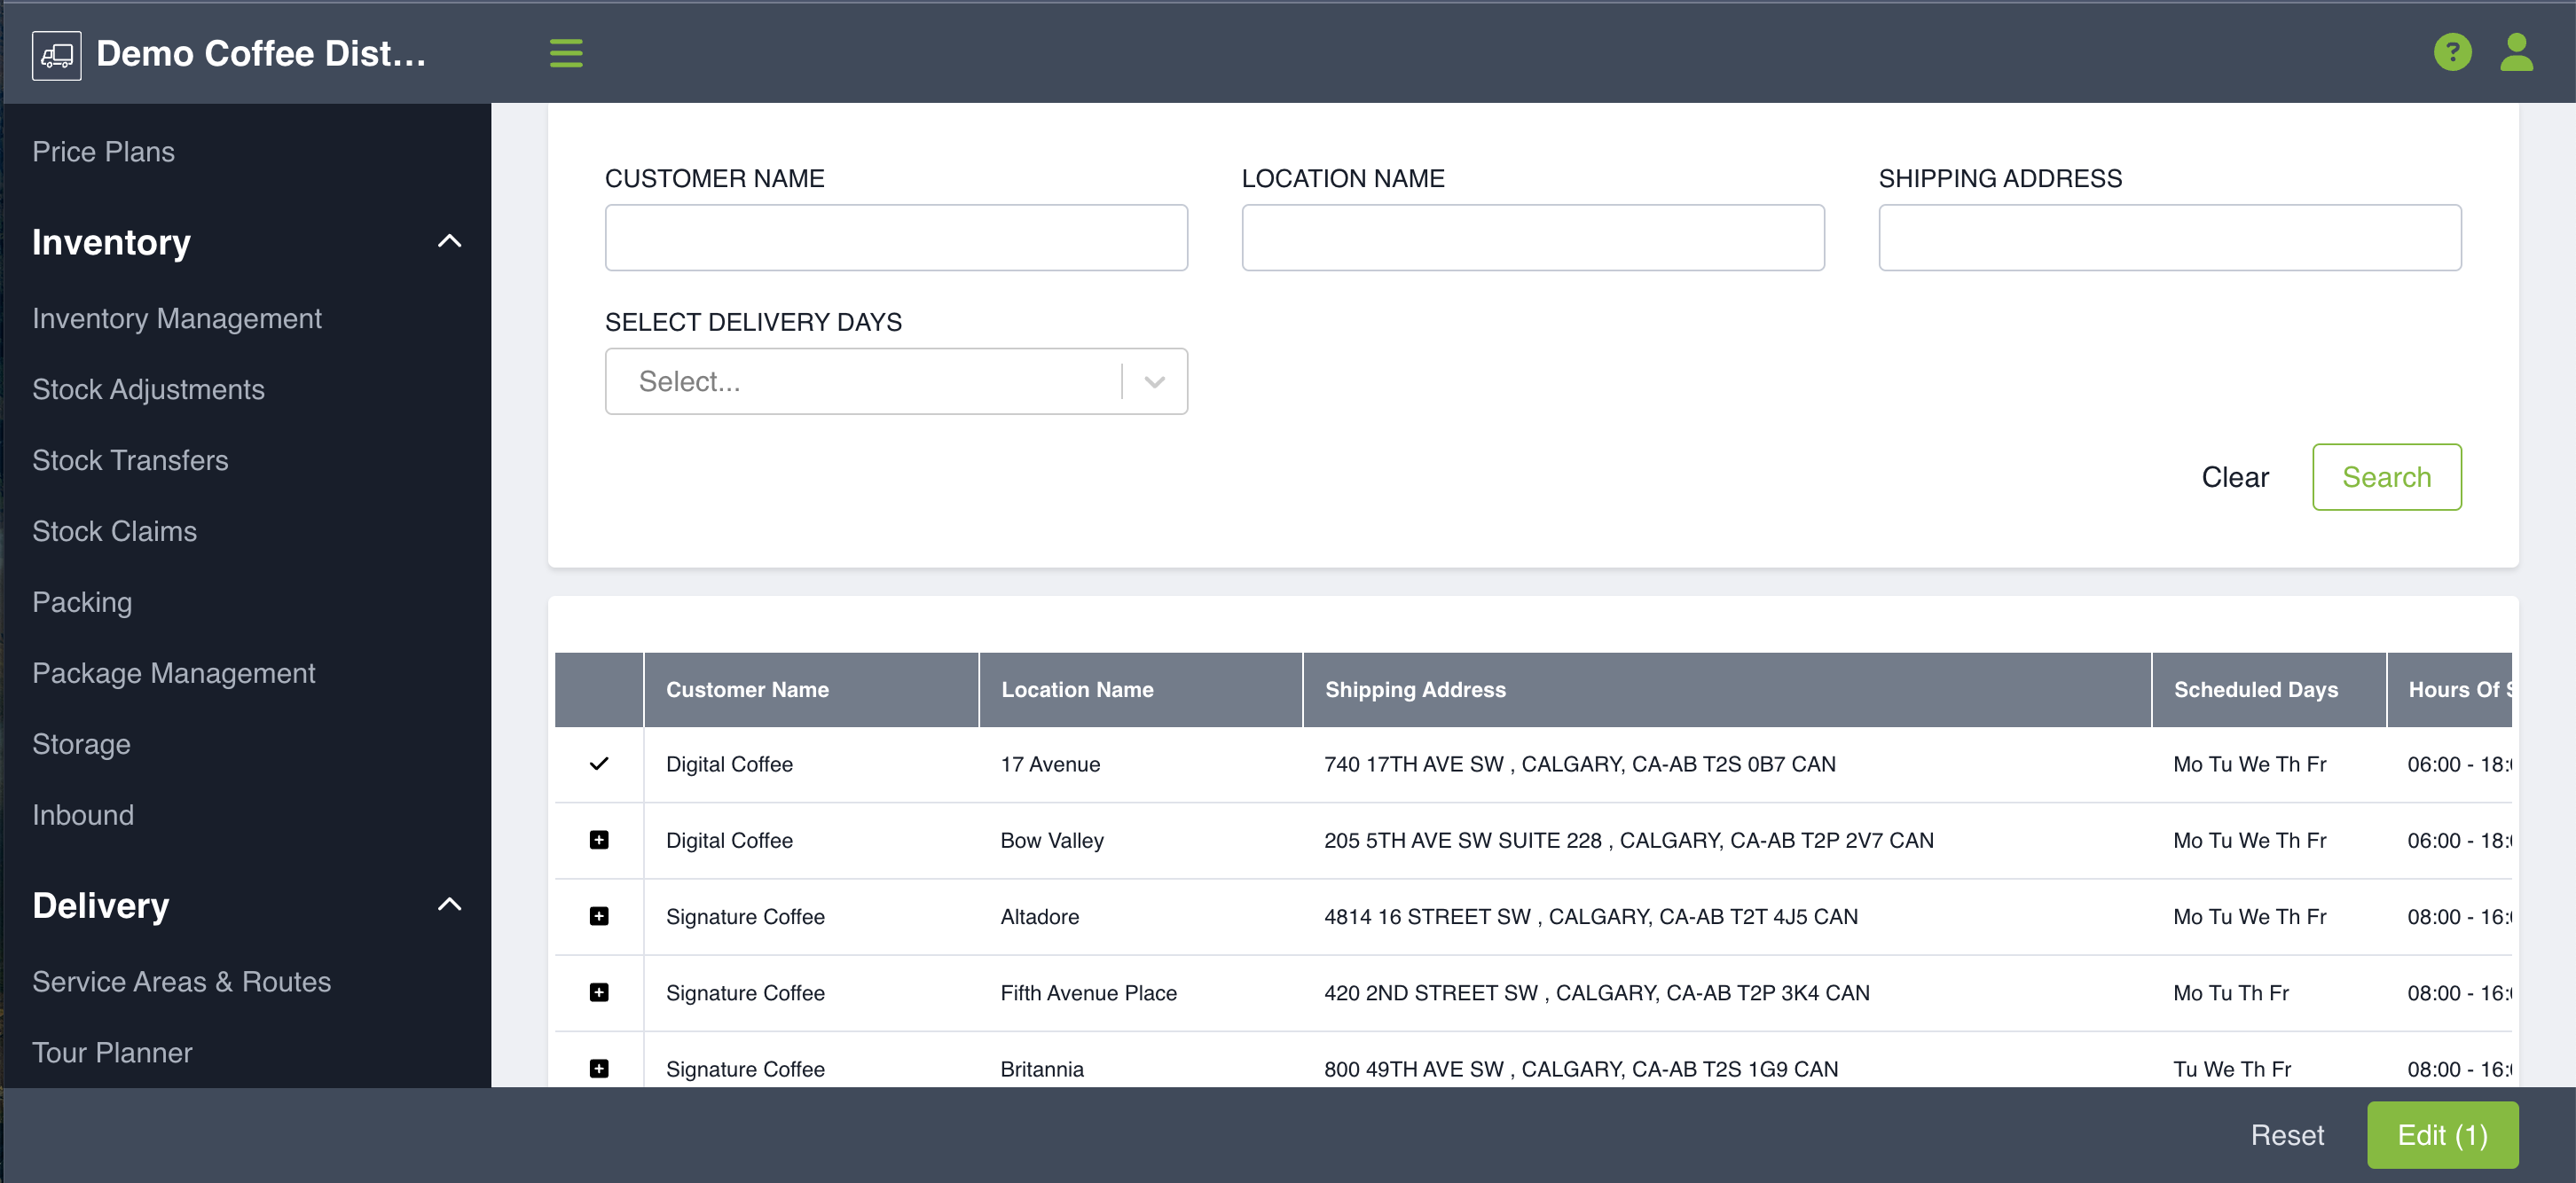
To edit the schedule for a customer that is already on the assigned route, click on the plus symbol beside the customer name. You can choose as many customers as you need at once. Then click on the Edit button in the bottom right corner.
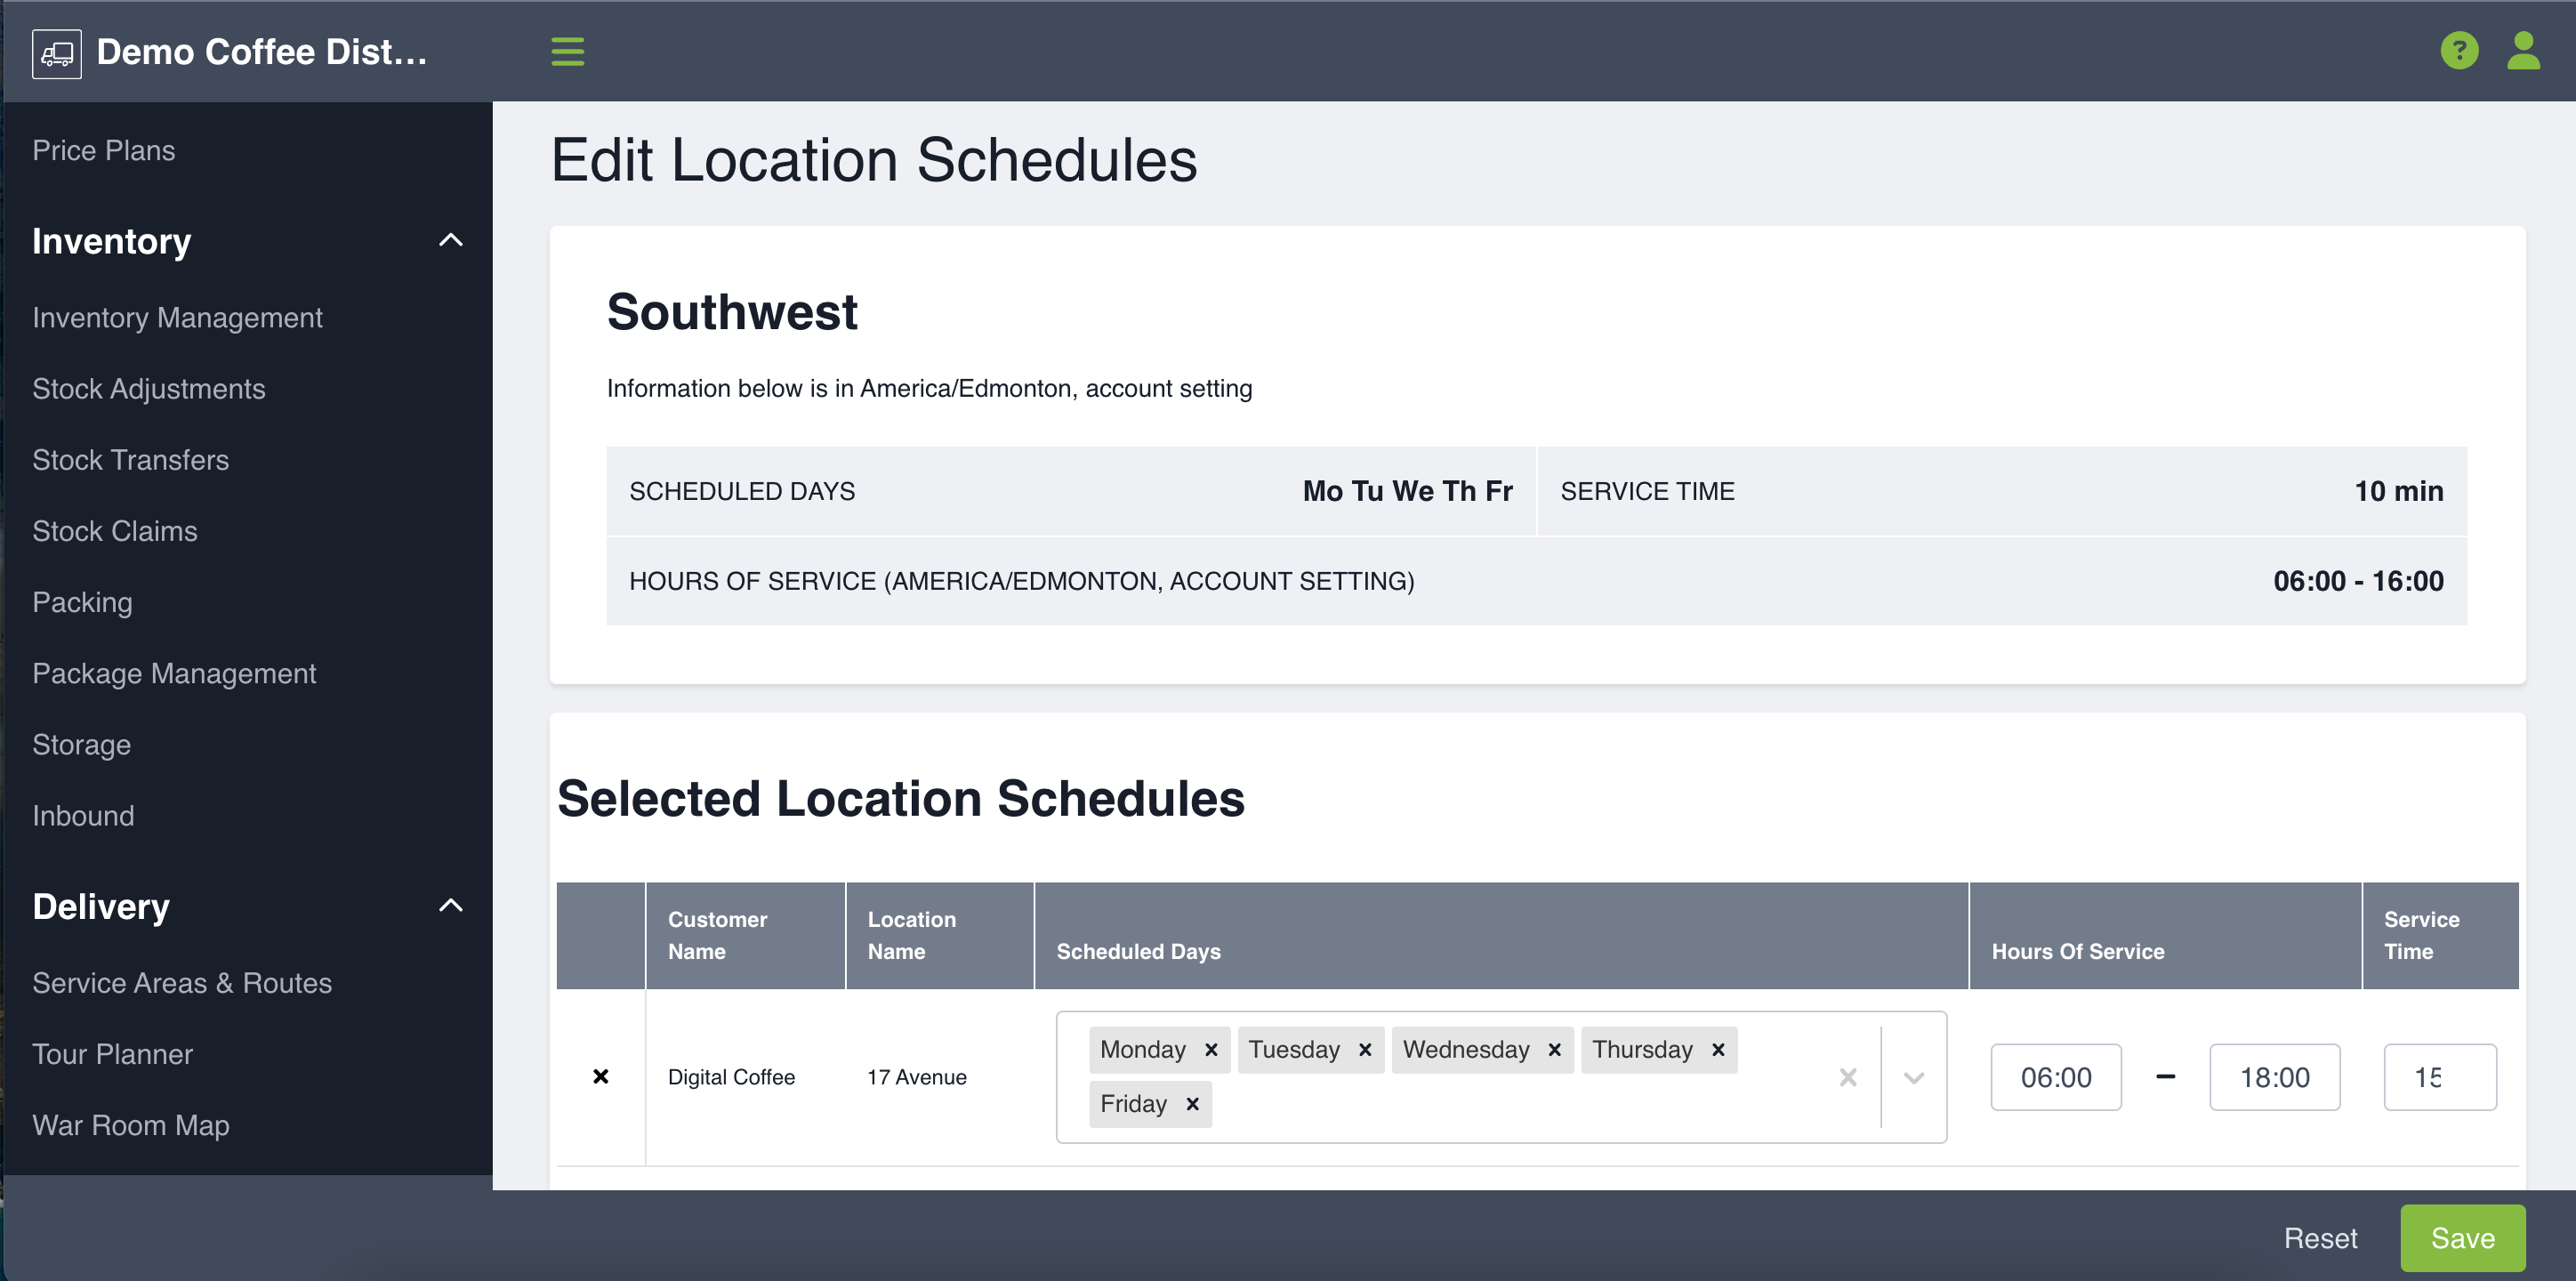
From here you can add or remove scheduled days for the customer or adjust their hours of service and service windows. Click Save in the bottom right corner to complete your changes.
A customer can be added to an assigned route schedule as many times as you need, if they have different service details for different days of the week.
Remove a Customer from an Existing Schedule
To remove a customer already on an assigned schedule, simply click the x beside their name when you are on the edit page. Click Save and this will remove them from the assigned route.
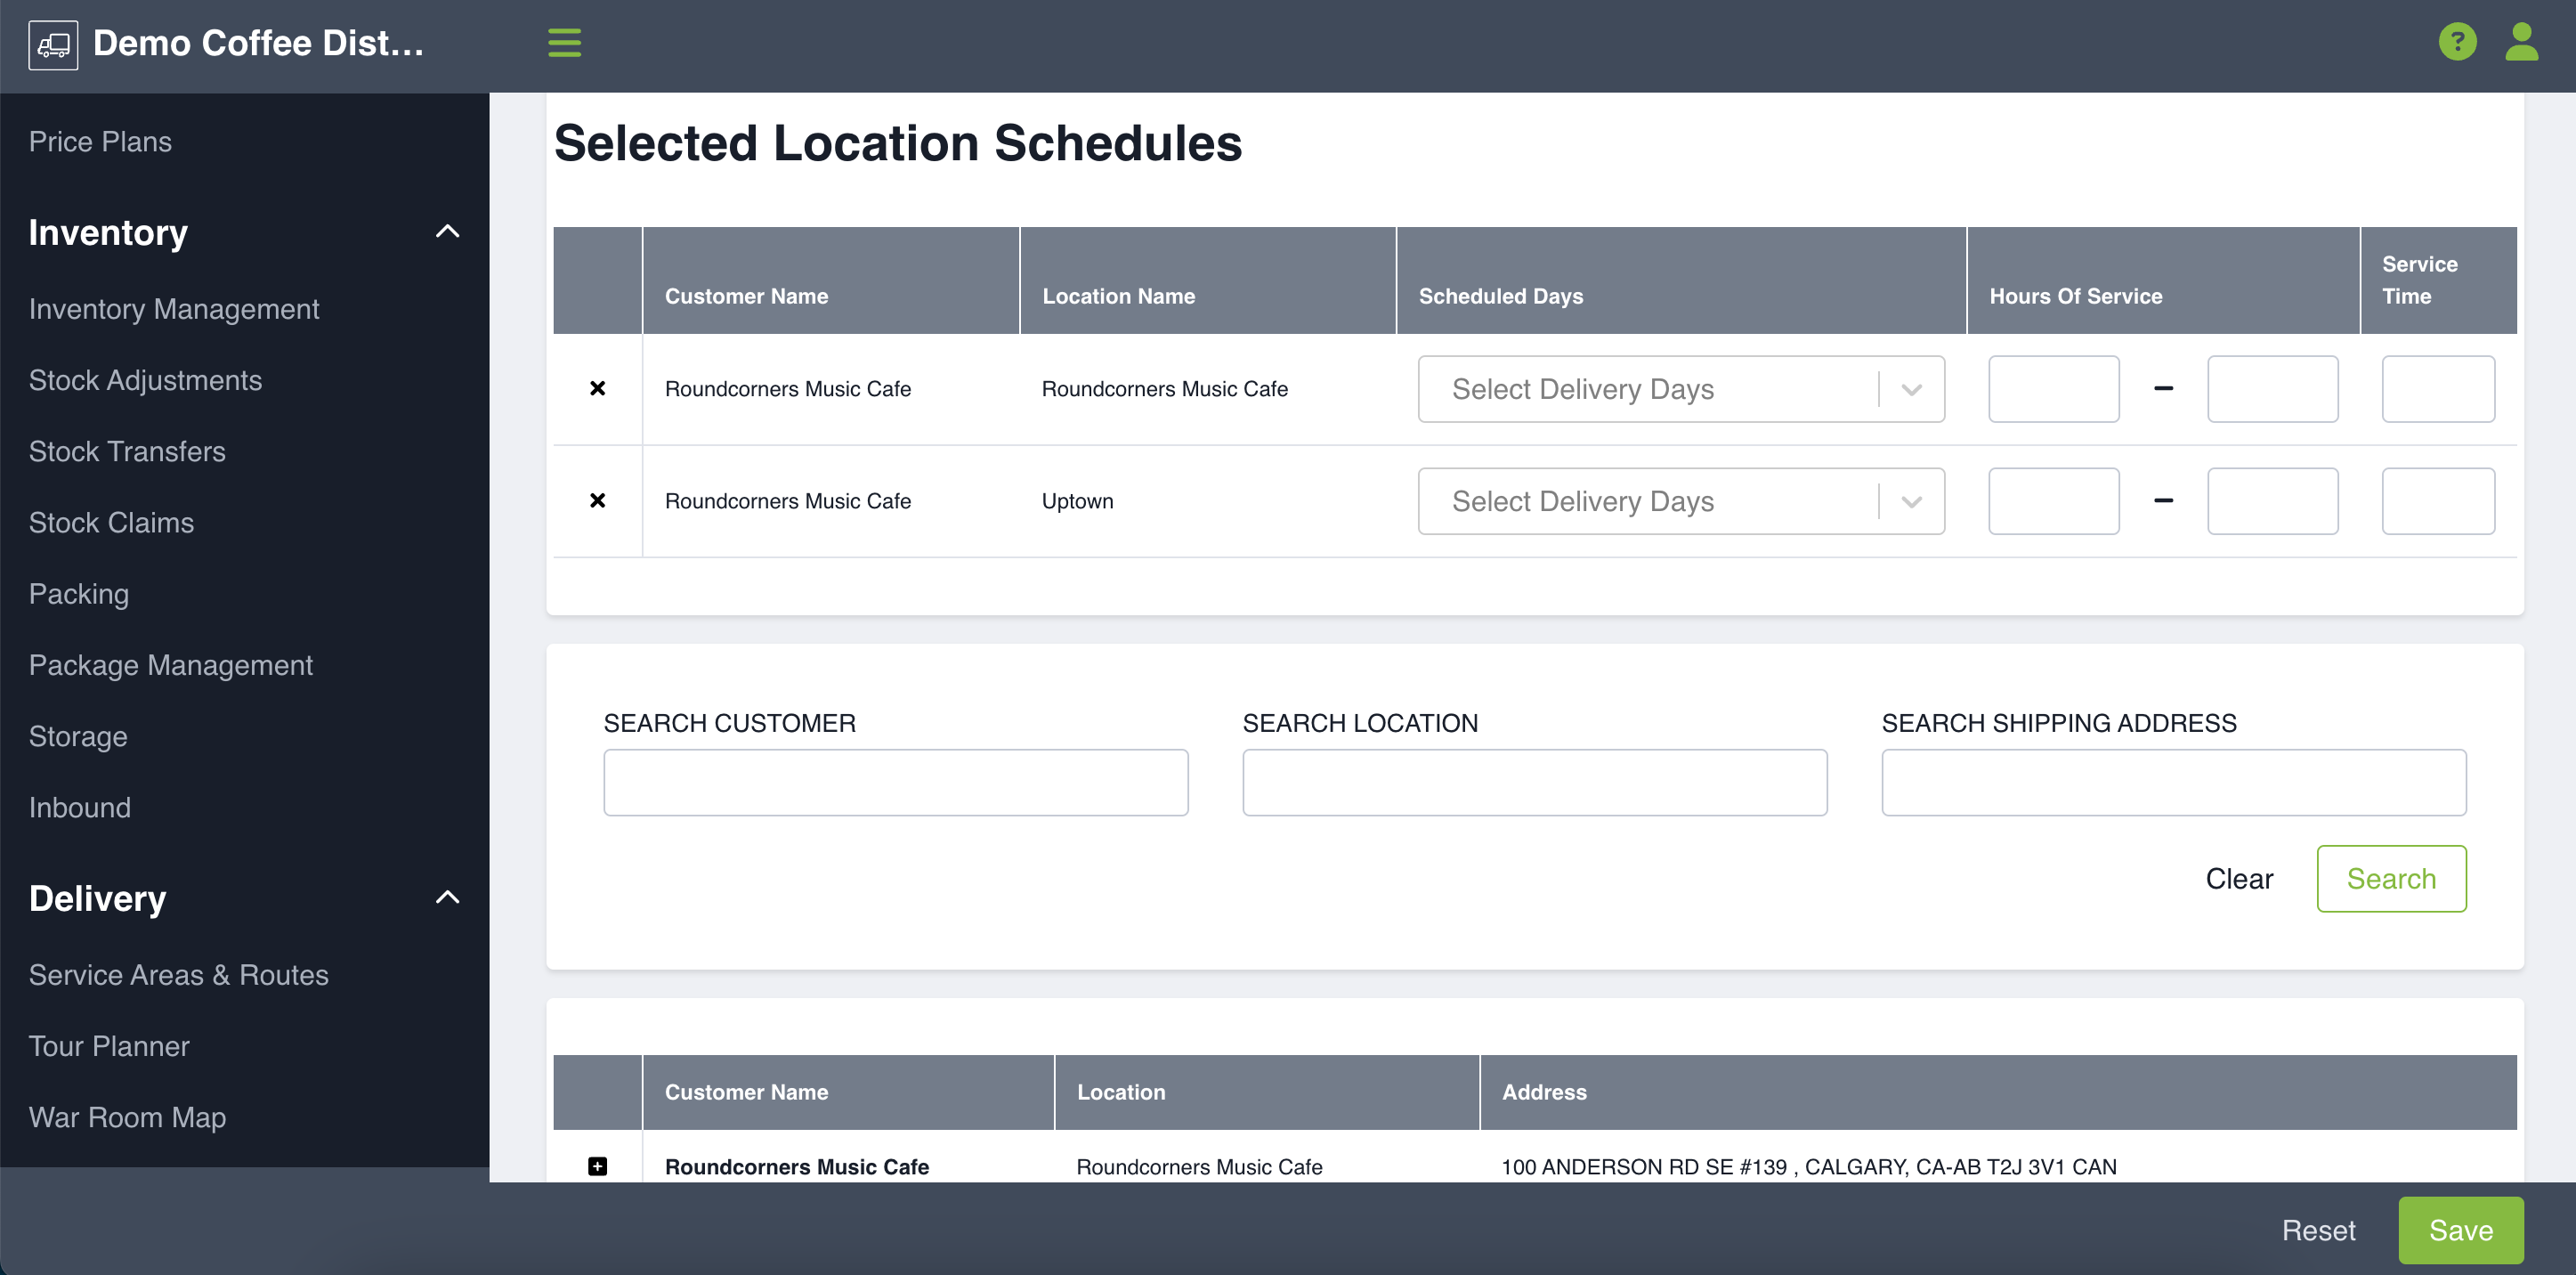
Adding a Customer to a Schedule
To add a customer to an assigned route schedule, from the Manage Assigned Routes page, click on the Create Schedule button in the top right corner. You will then see a list of all available customer locations to add to the schedule. Simply click on the '+' button beside the customer name and they will appear under the Selected Location Schedules table. Select the delivery days and fill in the service window information specific to the customer. If you leave it blank, the customer service details will default to those set for the assigned route - which are shown in bold at the top of the page. If you accidentally add a customer that shouldn't be on the route, click the 'x' button beside their name and they will be removed. Click the Save button and your customers will be successfully added.