Create a Purchase Order (PO) to send to your supplier to outline the SKUs and quantities that you require to fulfill your orders. Review how to create and manage a purchase order from the Digital Control Tower!
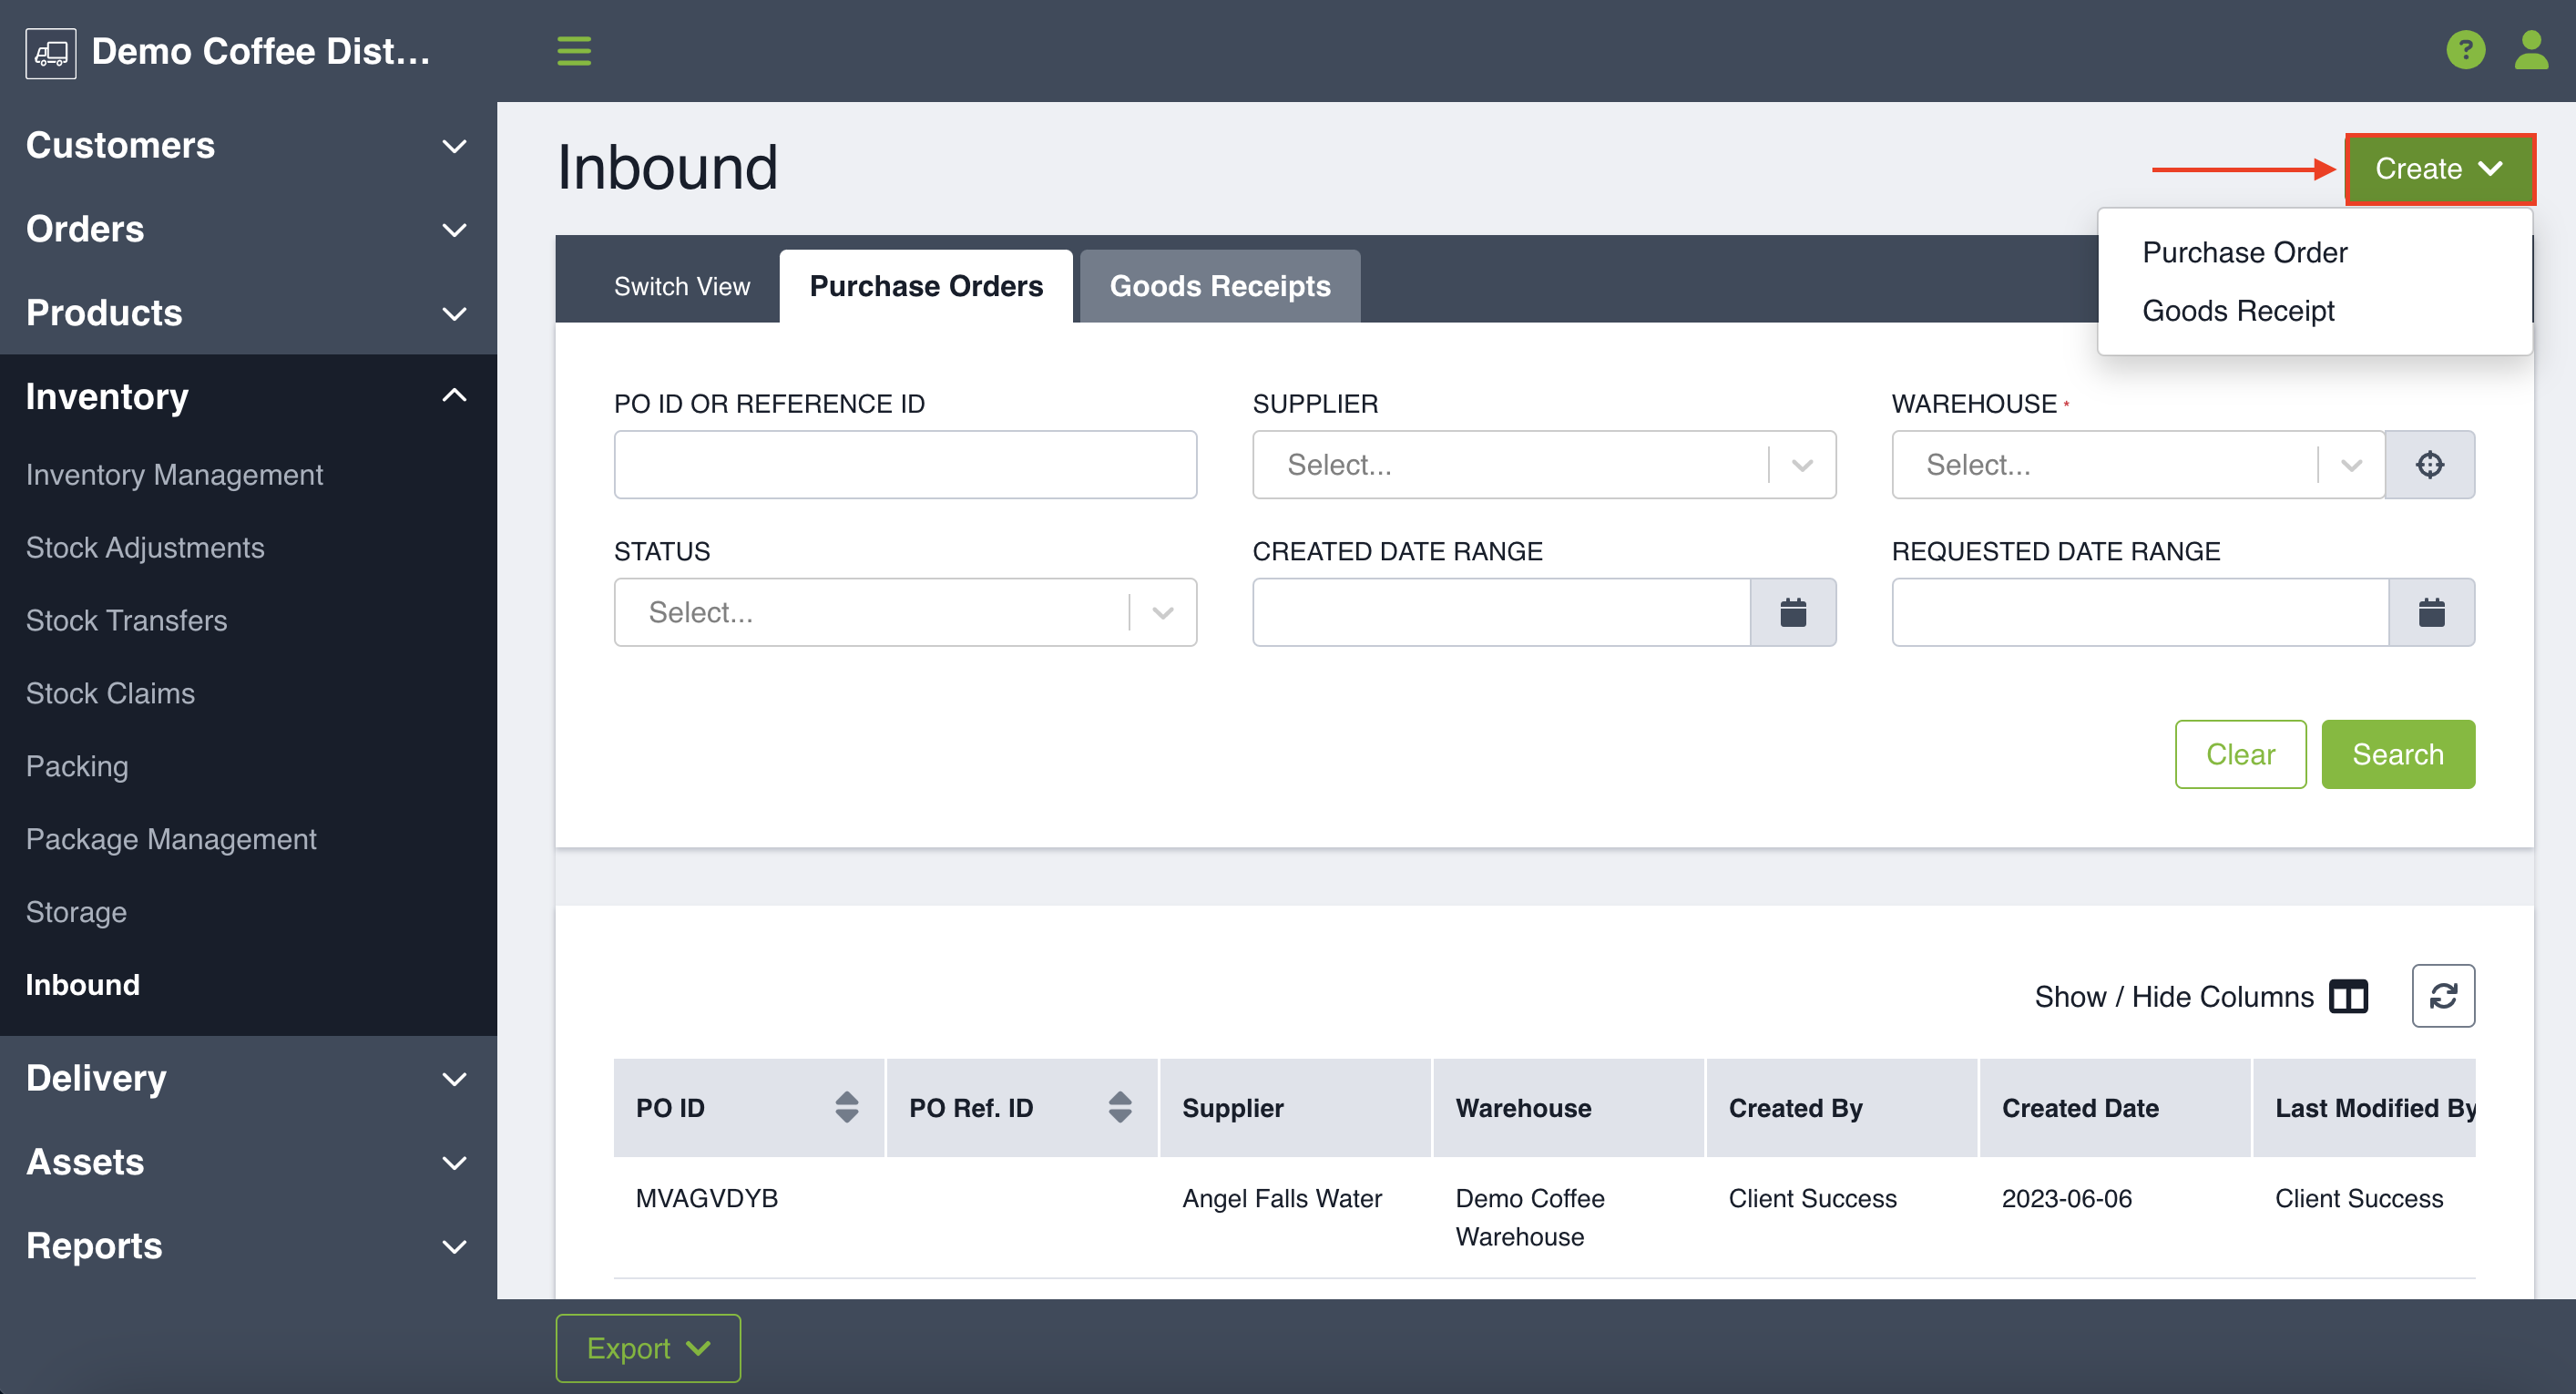
To create a Purchase Order, navigate to the Inbound page by clicking Inventory and then Inbound in the left-hand side menu.
You will then land on the Purchase Orders tab. You can easily switch between viewing Purchase Orders and Goods Receipts using the tabs. Click Create in the upper-right corner from the main Inbound page then select Purchase Order.
Creating a Purchase Order
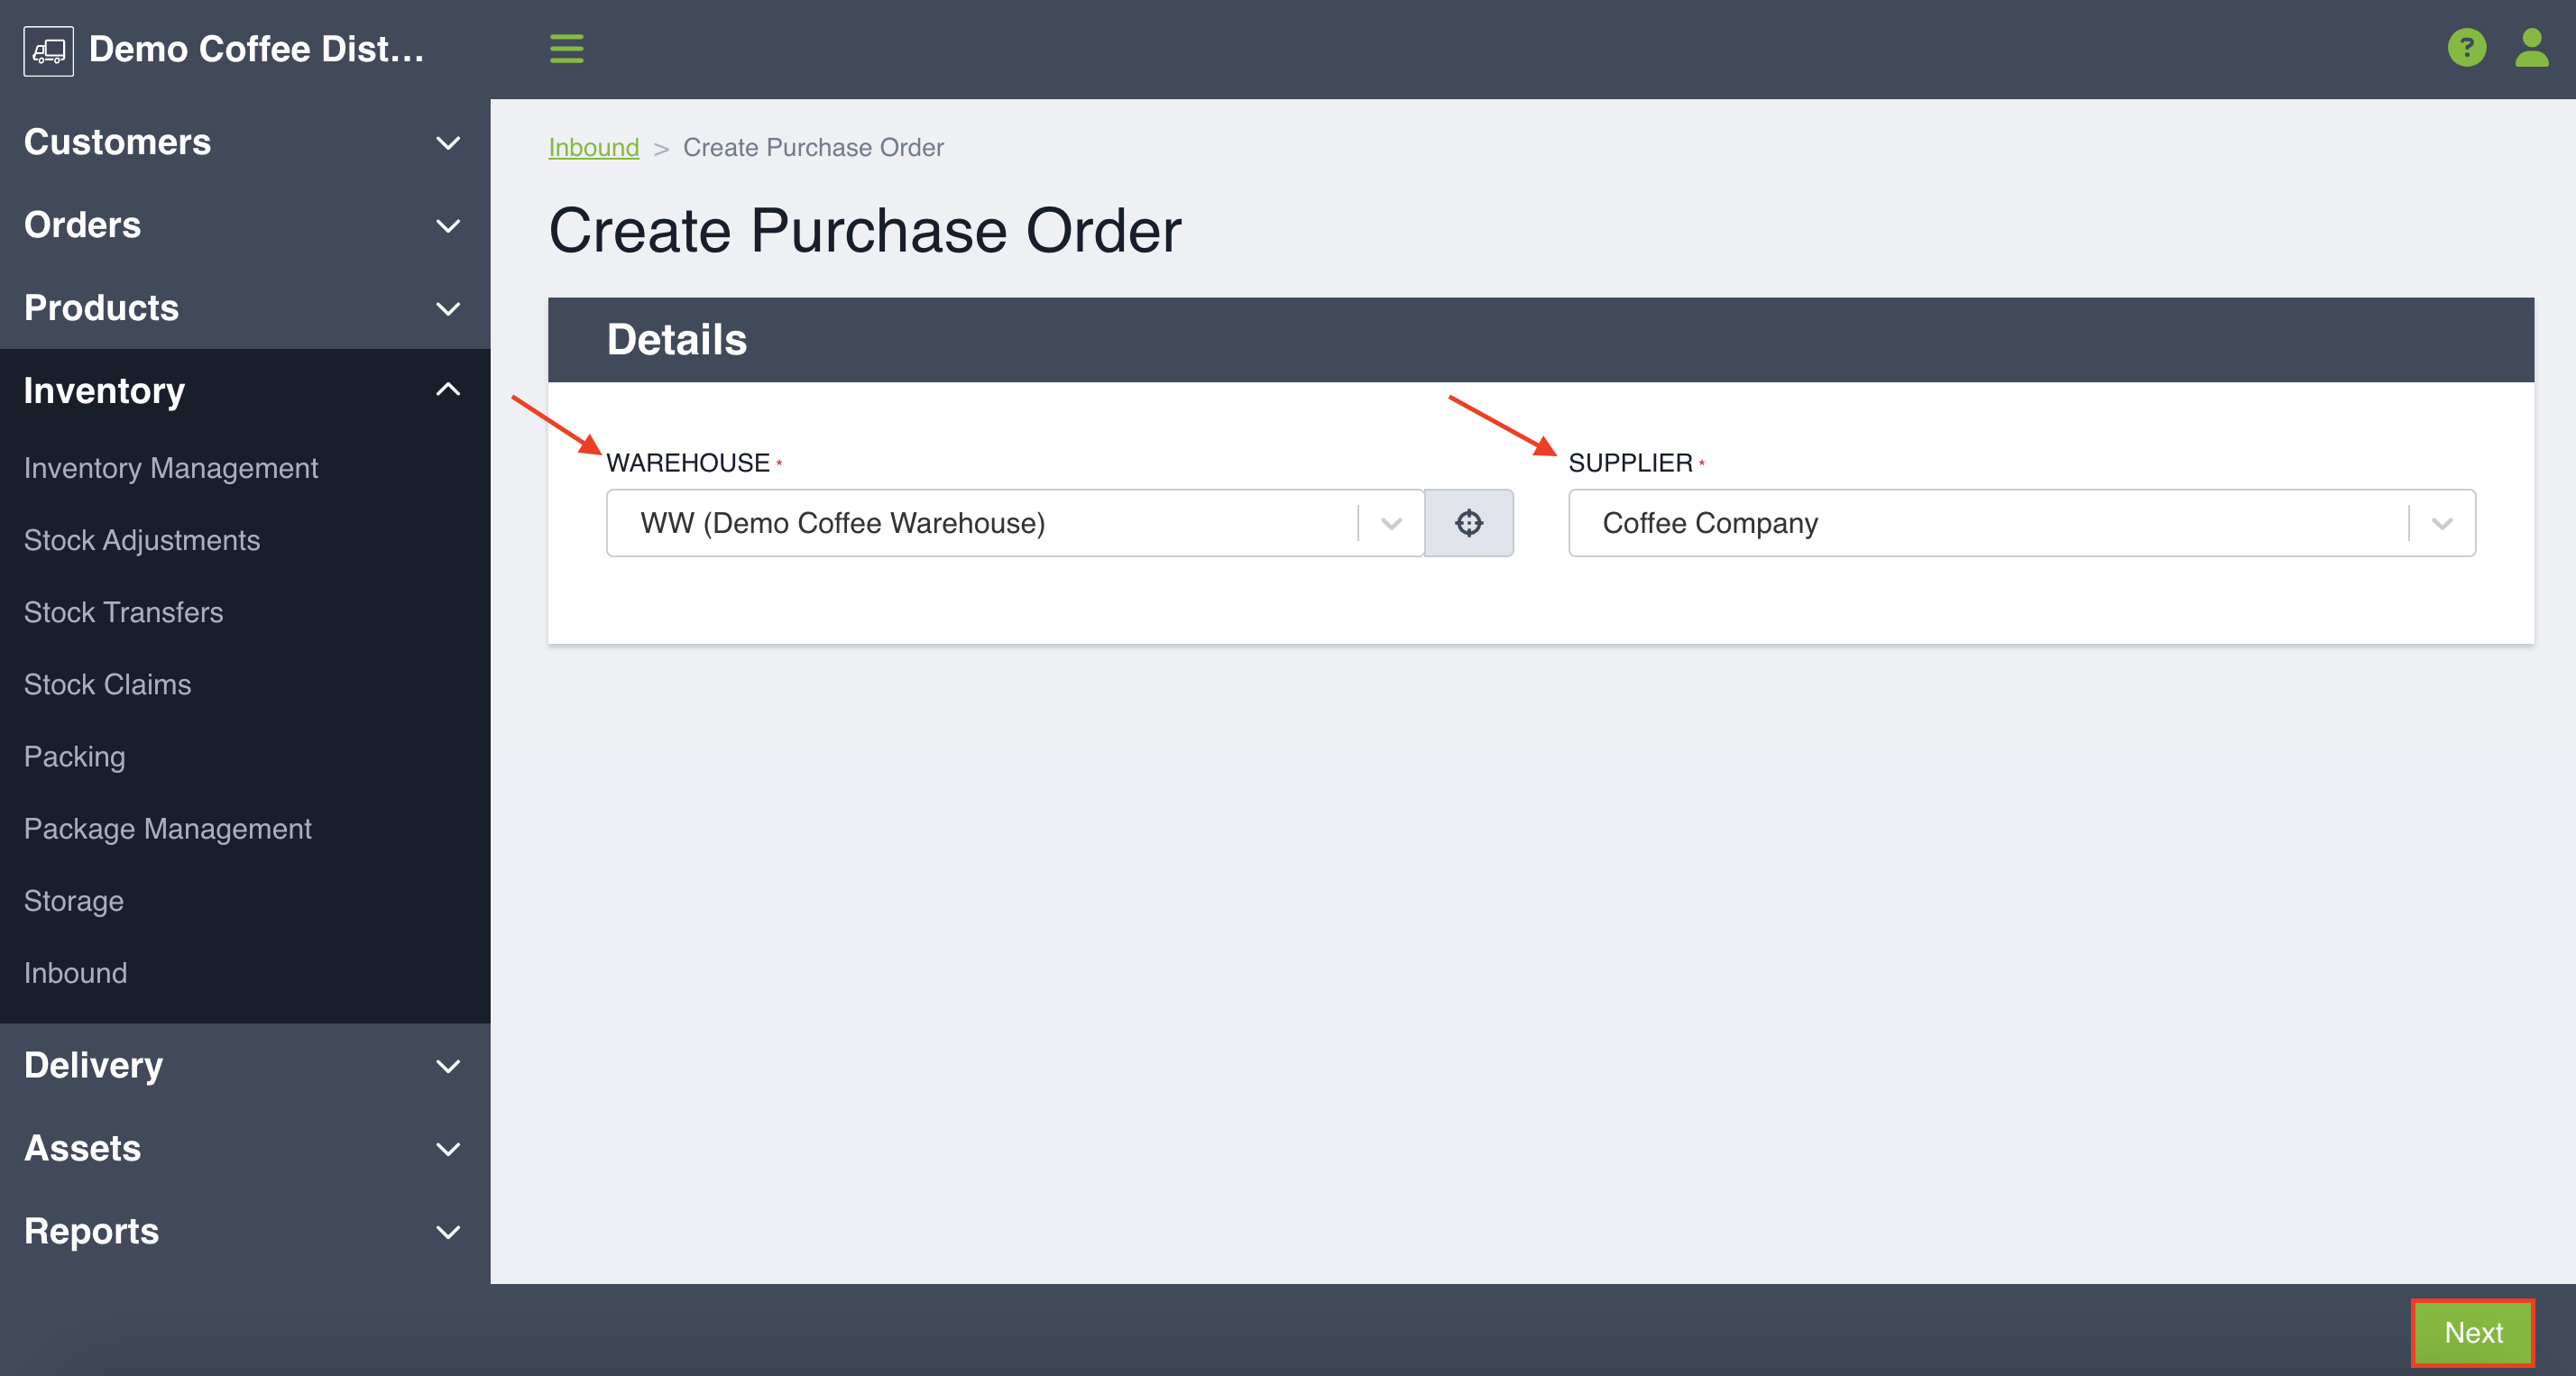
To begin, you will be asked to select your warehouse and supplier. Both are required fields. Once you have filled those in click Next.
You will be brought to a page outlining your Purchase Order Details. Your previous warehouse and supplier selections are locked in, and you can fill out the following fields to add additional context:

- Requested Payment Terms (Optional): Use the dropdown to select your payment terms negotiated between you and your supplier. If you select a payment term, it will be displayed on the PO Document. Options include: Cheque, COD, EFT, Due on Receipt, NET 7, NET 14, NET 15, NET 21, NET 30, NET 45, Credit Card, NET 7 EFT, NET 7 CC, NET 14 EFT, NET 14 CC.
- Requested Delivery Date (Mandatory Field): Use the calendar to select the requested delivery date for your Purchase Order.
- PO Reference ID (Optional): Input a reference code using letters, numbers or any special characters. This ID does not need to be unique.
- Notes (Optional): Any accompanying notes you would like added. These are internal and won't display on the PO Document.
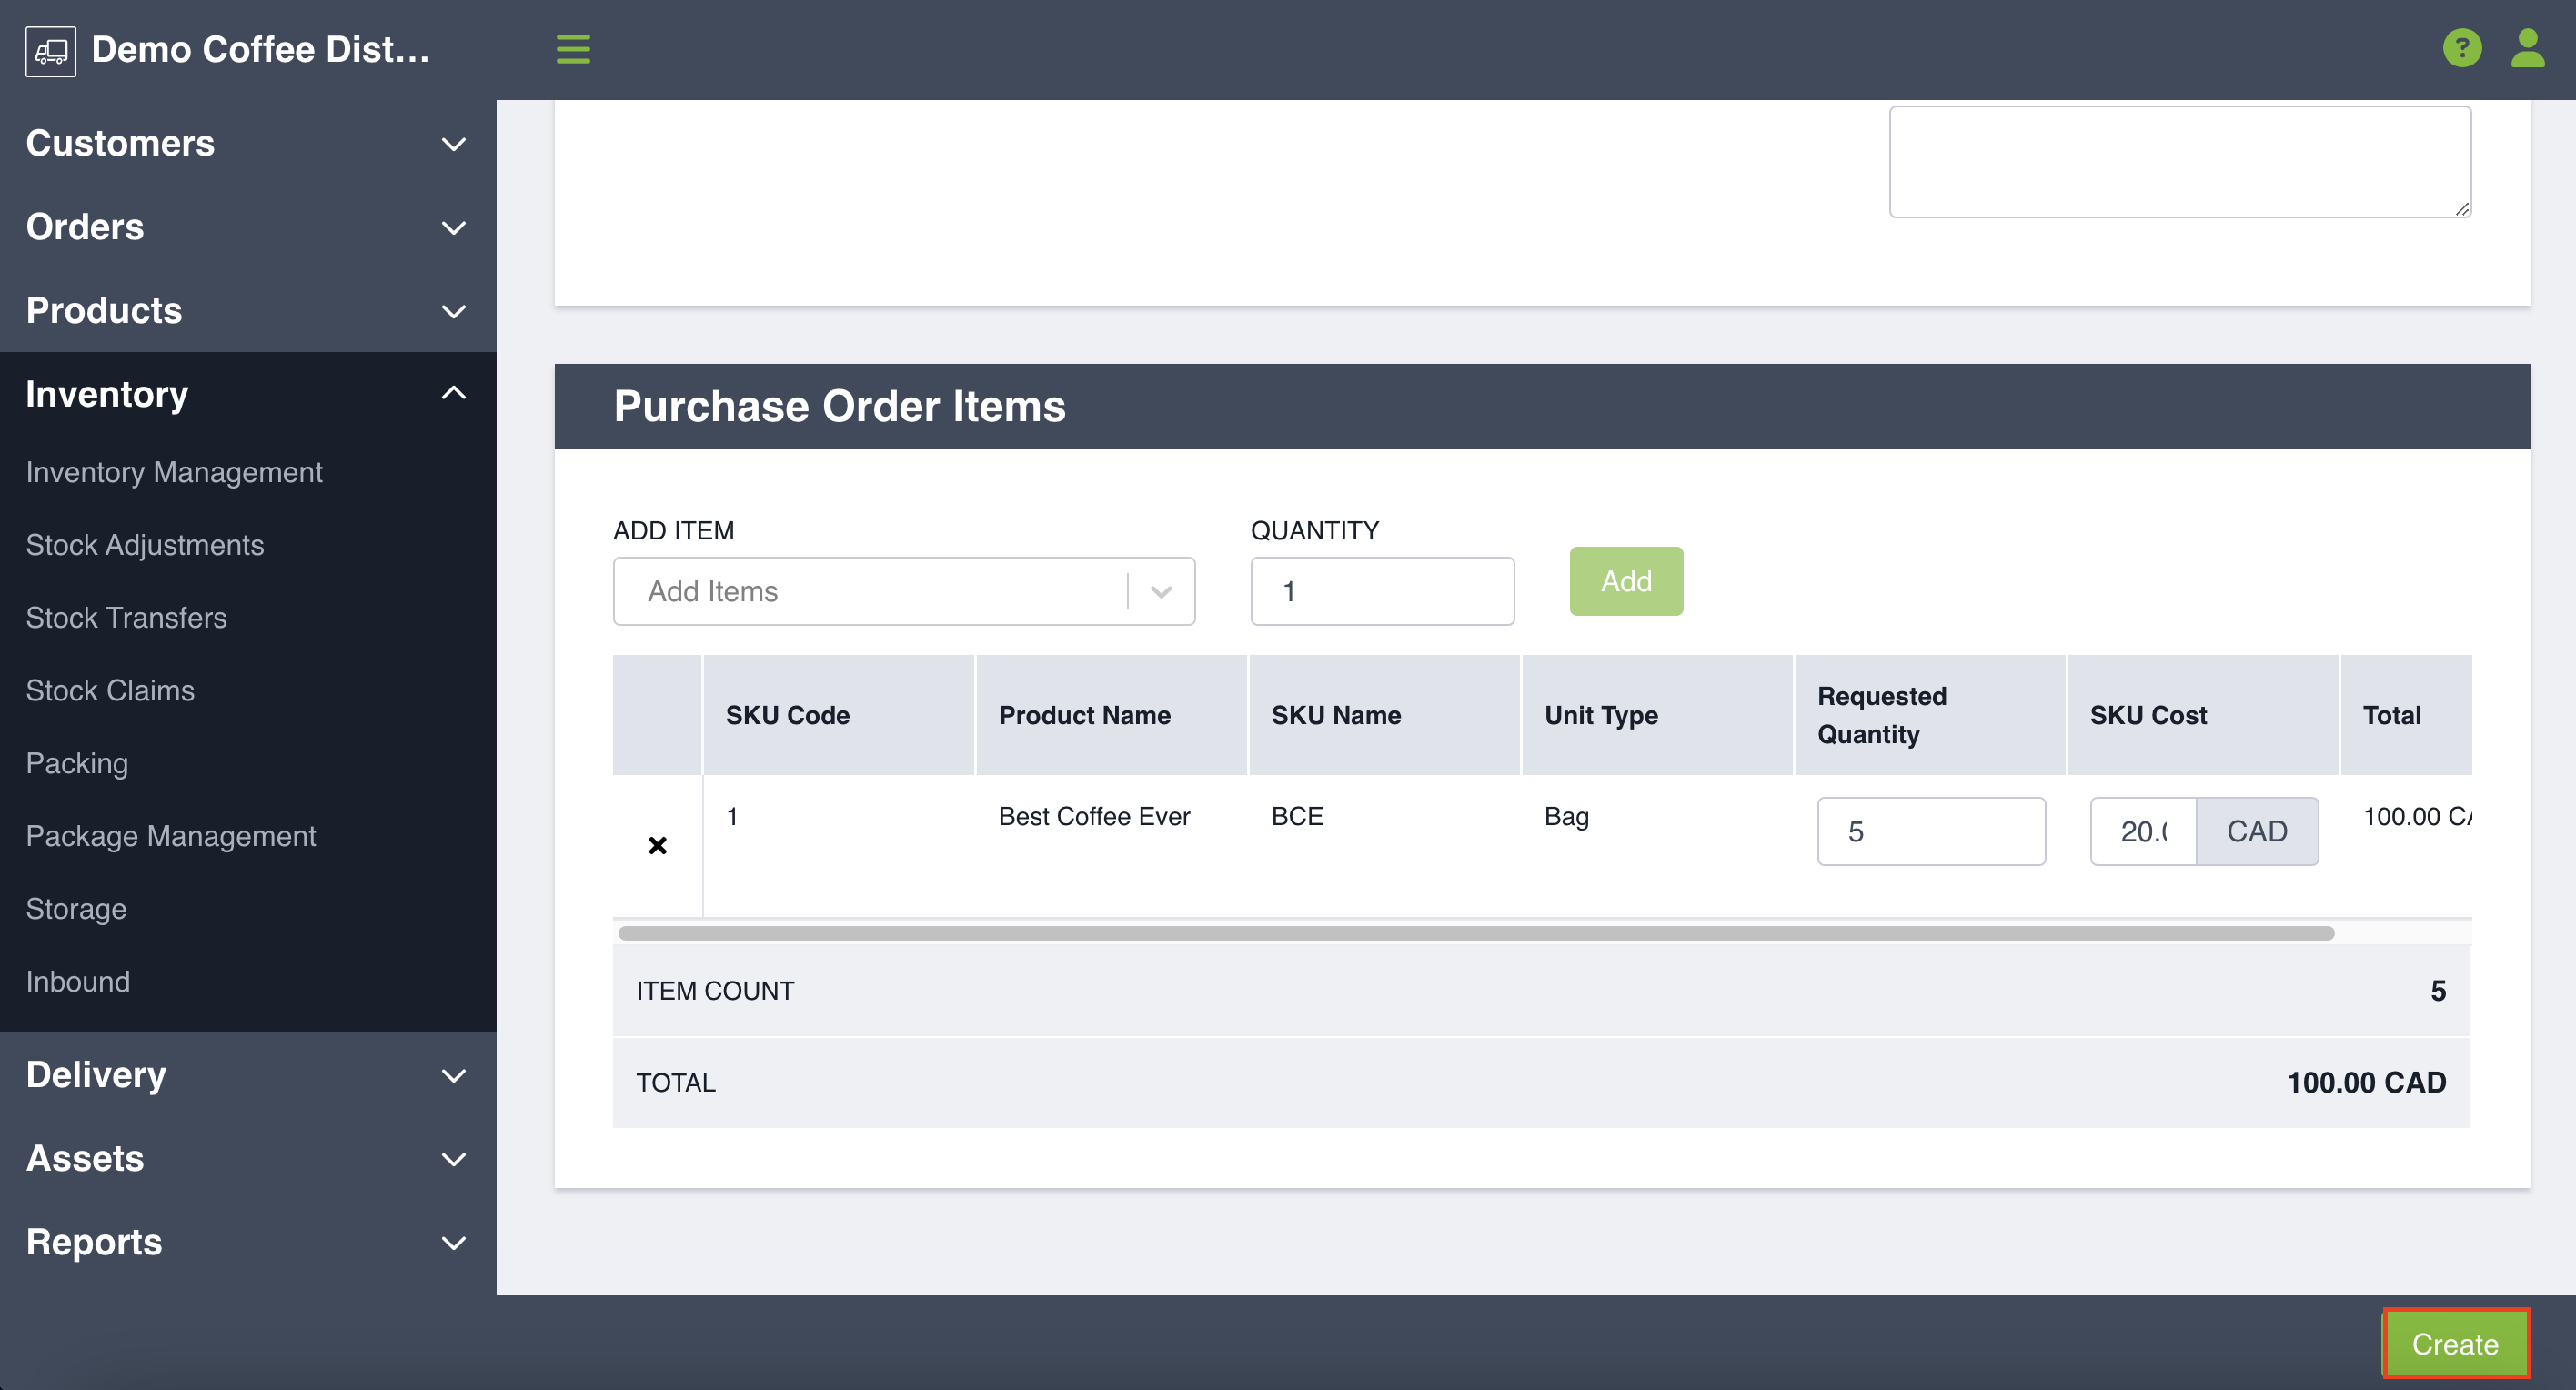
From there you will can add SKUs to your Purchase Order. Use the dropdown or typeahead to select the SKU. You can only add SKUs that are for your the supplier you selected, and you can add SKUs that are services, non-inventory managed SKUs, and inventory managed SKUs. You will then enter the quantity requested and then you will click Add. You are unable to enter a negative quantity or a quantity of zero. You can also adjust the cost for the SKU. If you choose to adjust the cost, it will only effect this purchase order - SKU cost on other purchase orders or the cost on the SKU are not affected.
Once you are satisfied with items added click Create in the bottom right hand corner. Your Purchase Order will then be marked as Pending and will be in the your search table on the main Inbound page.
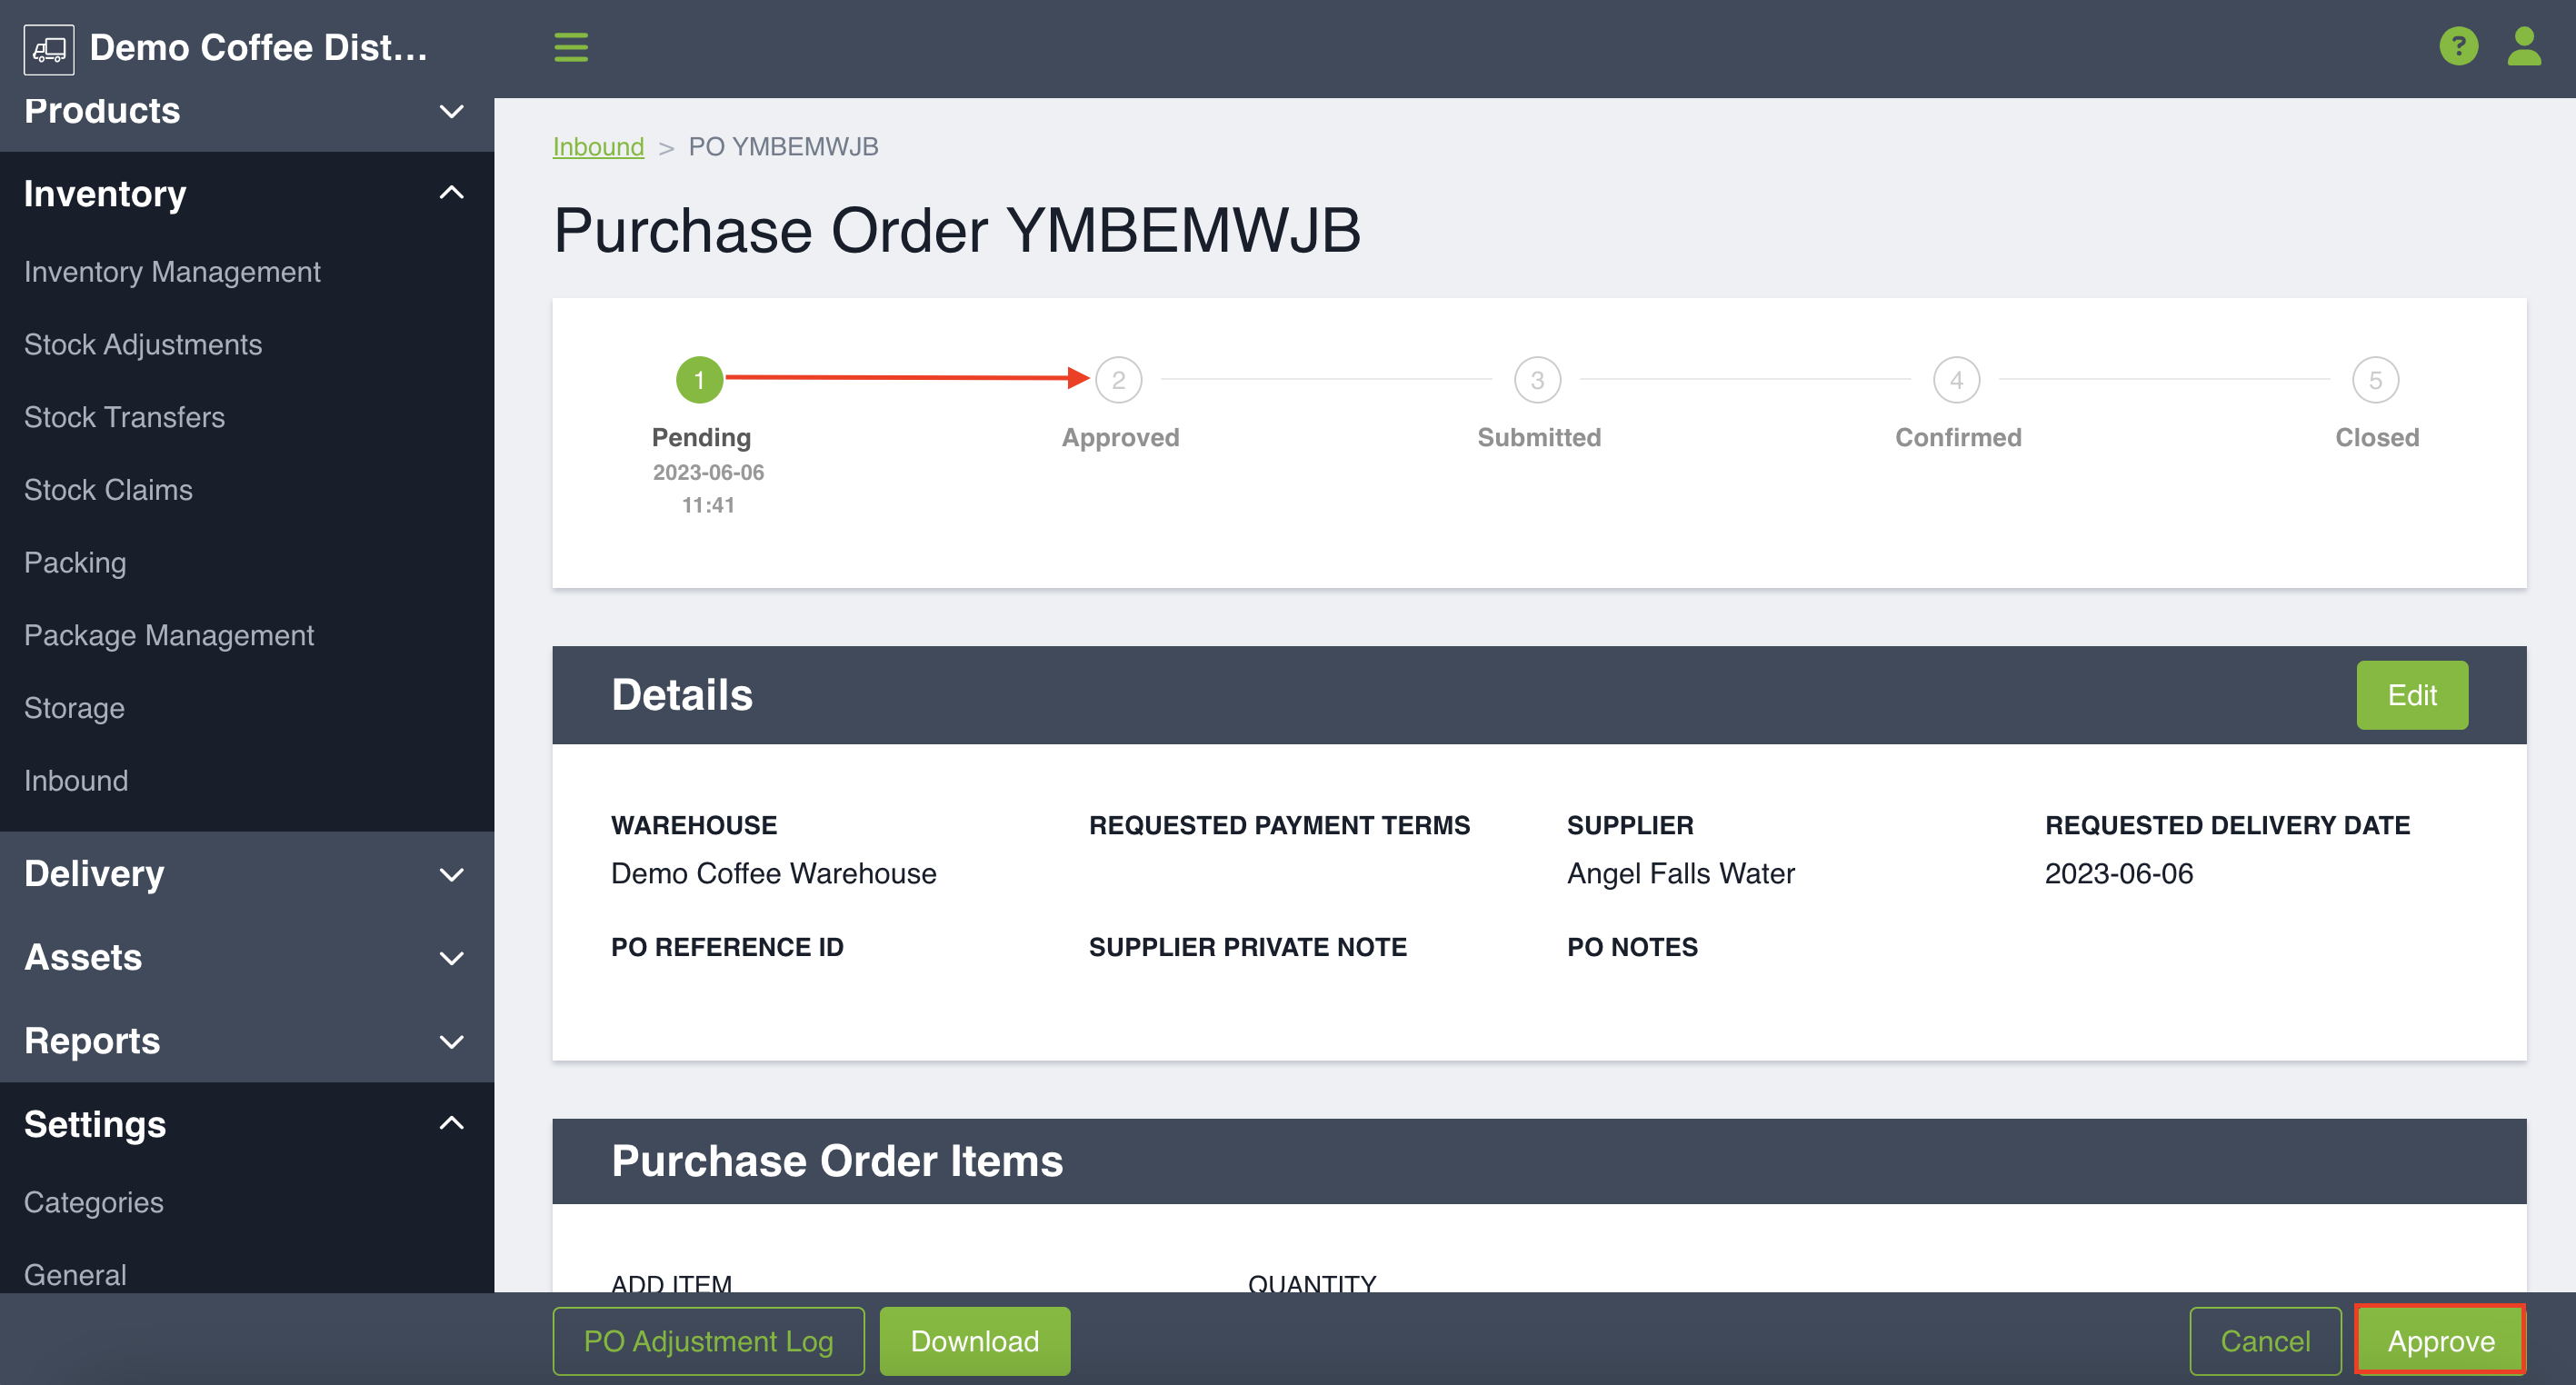
A typical Purchase Order will move through 5 different states including: Pending, Approved, Submitted, Confirmed and Closed. Purchase Orders can also be Cancelled. We will review the various states. Once a purchase order has been created you can edit it to add any supporting documents which are required.
Approving a Purchase Order
Depending on your business process, you have the option to have your Purchase Orders auto-approve or require manual approval.
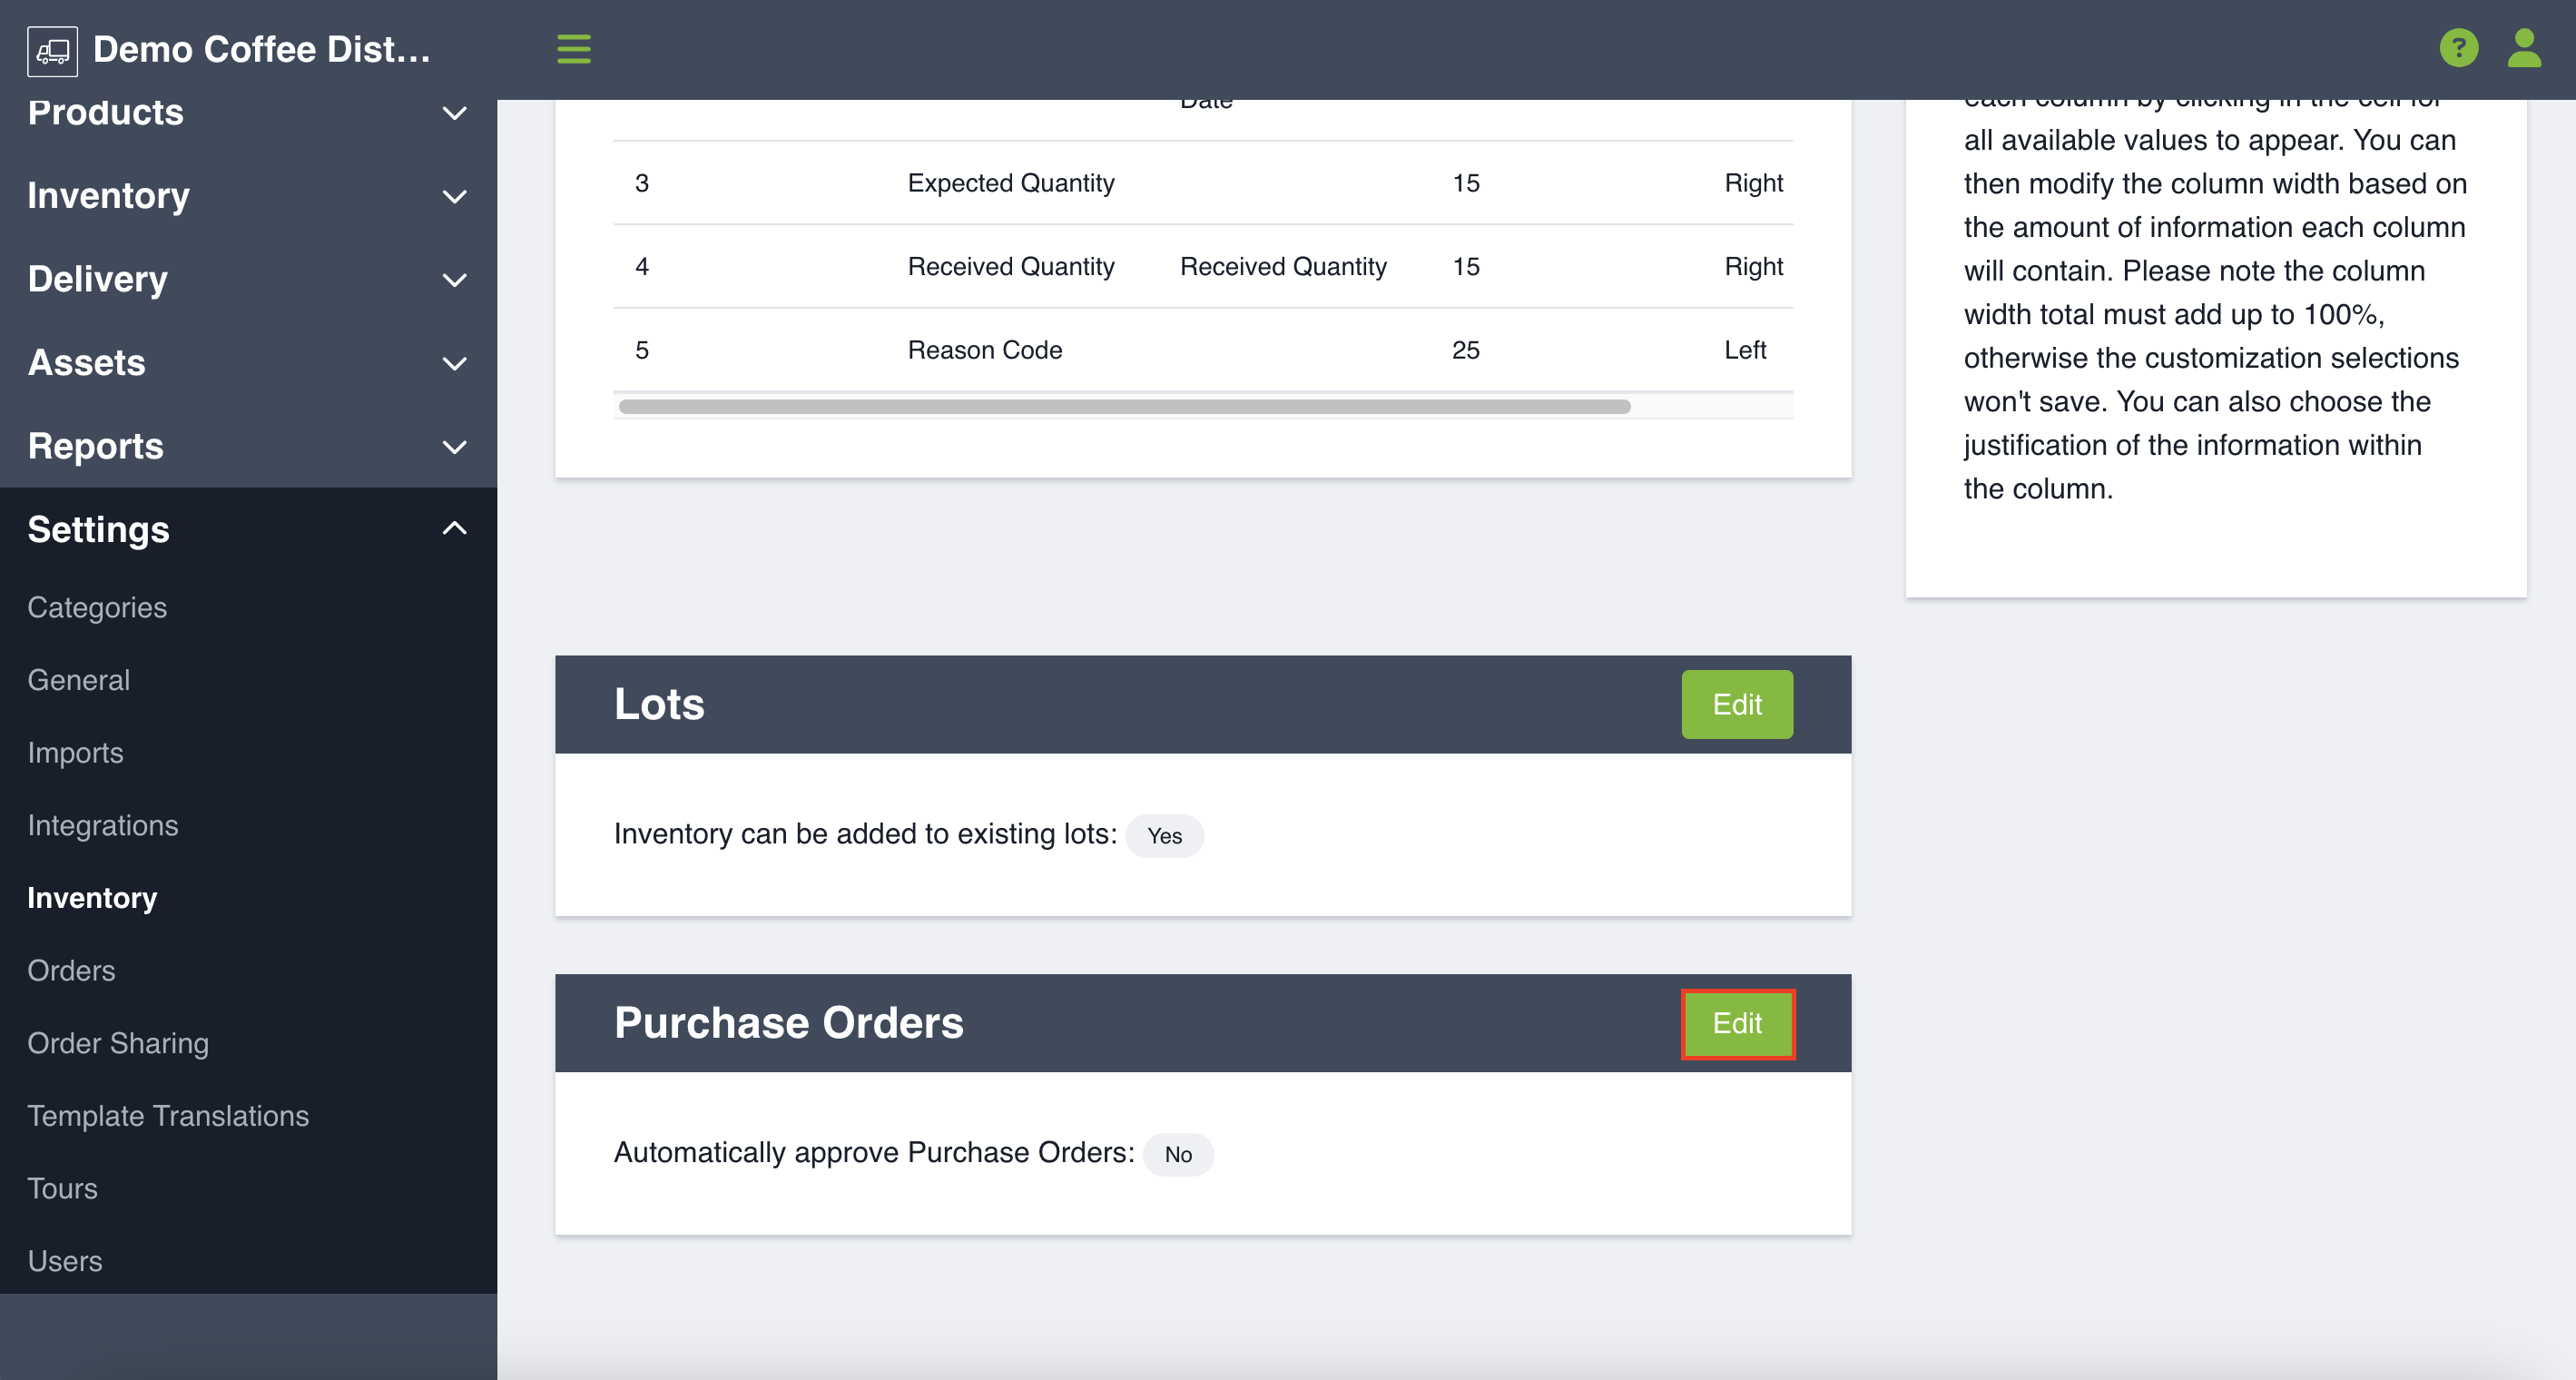
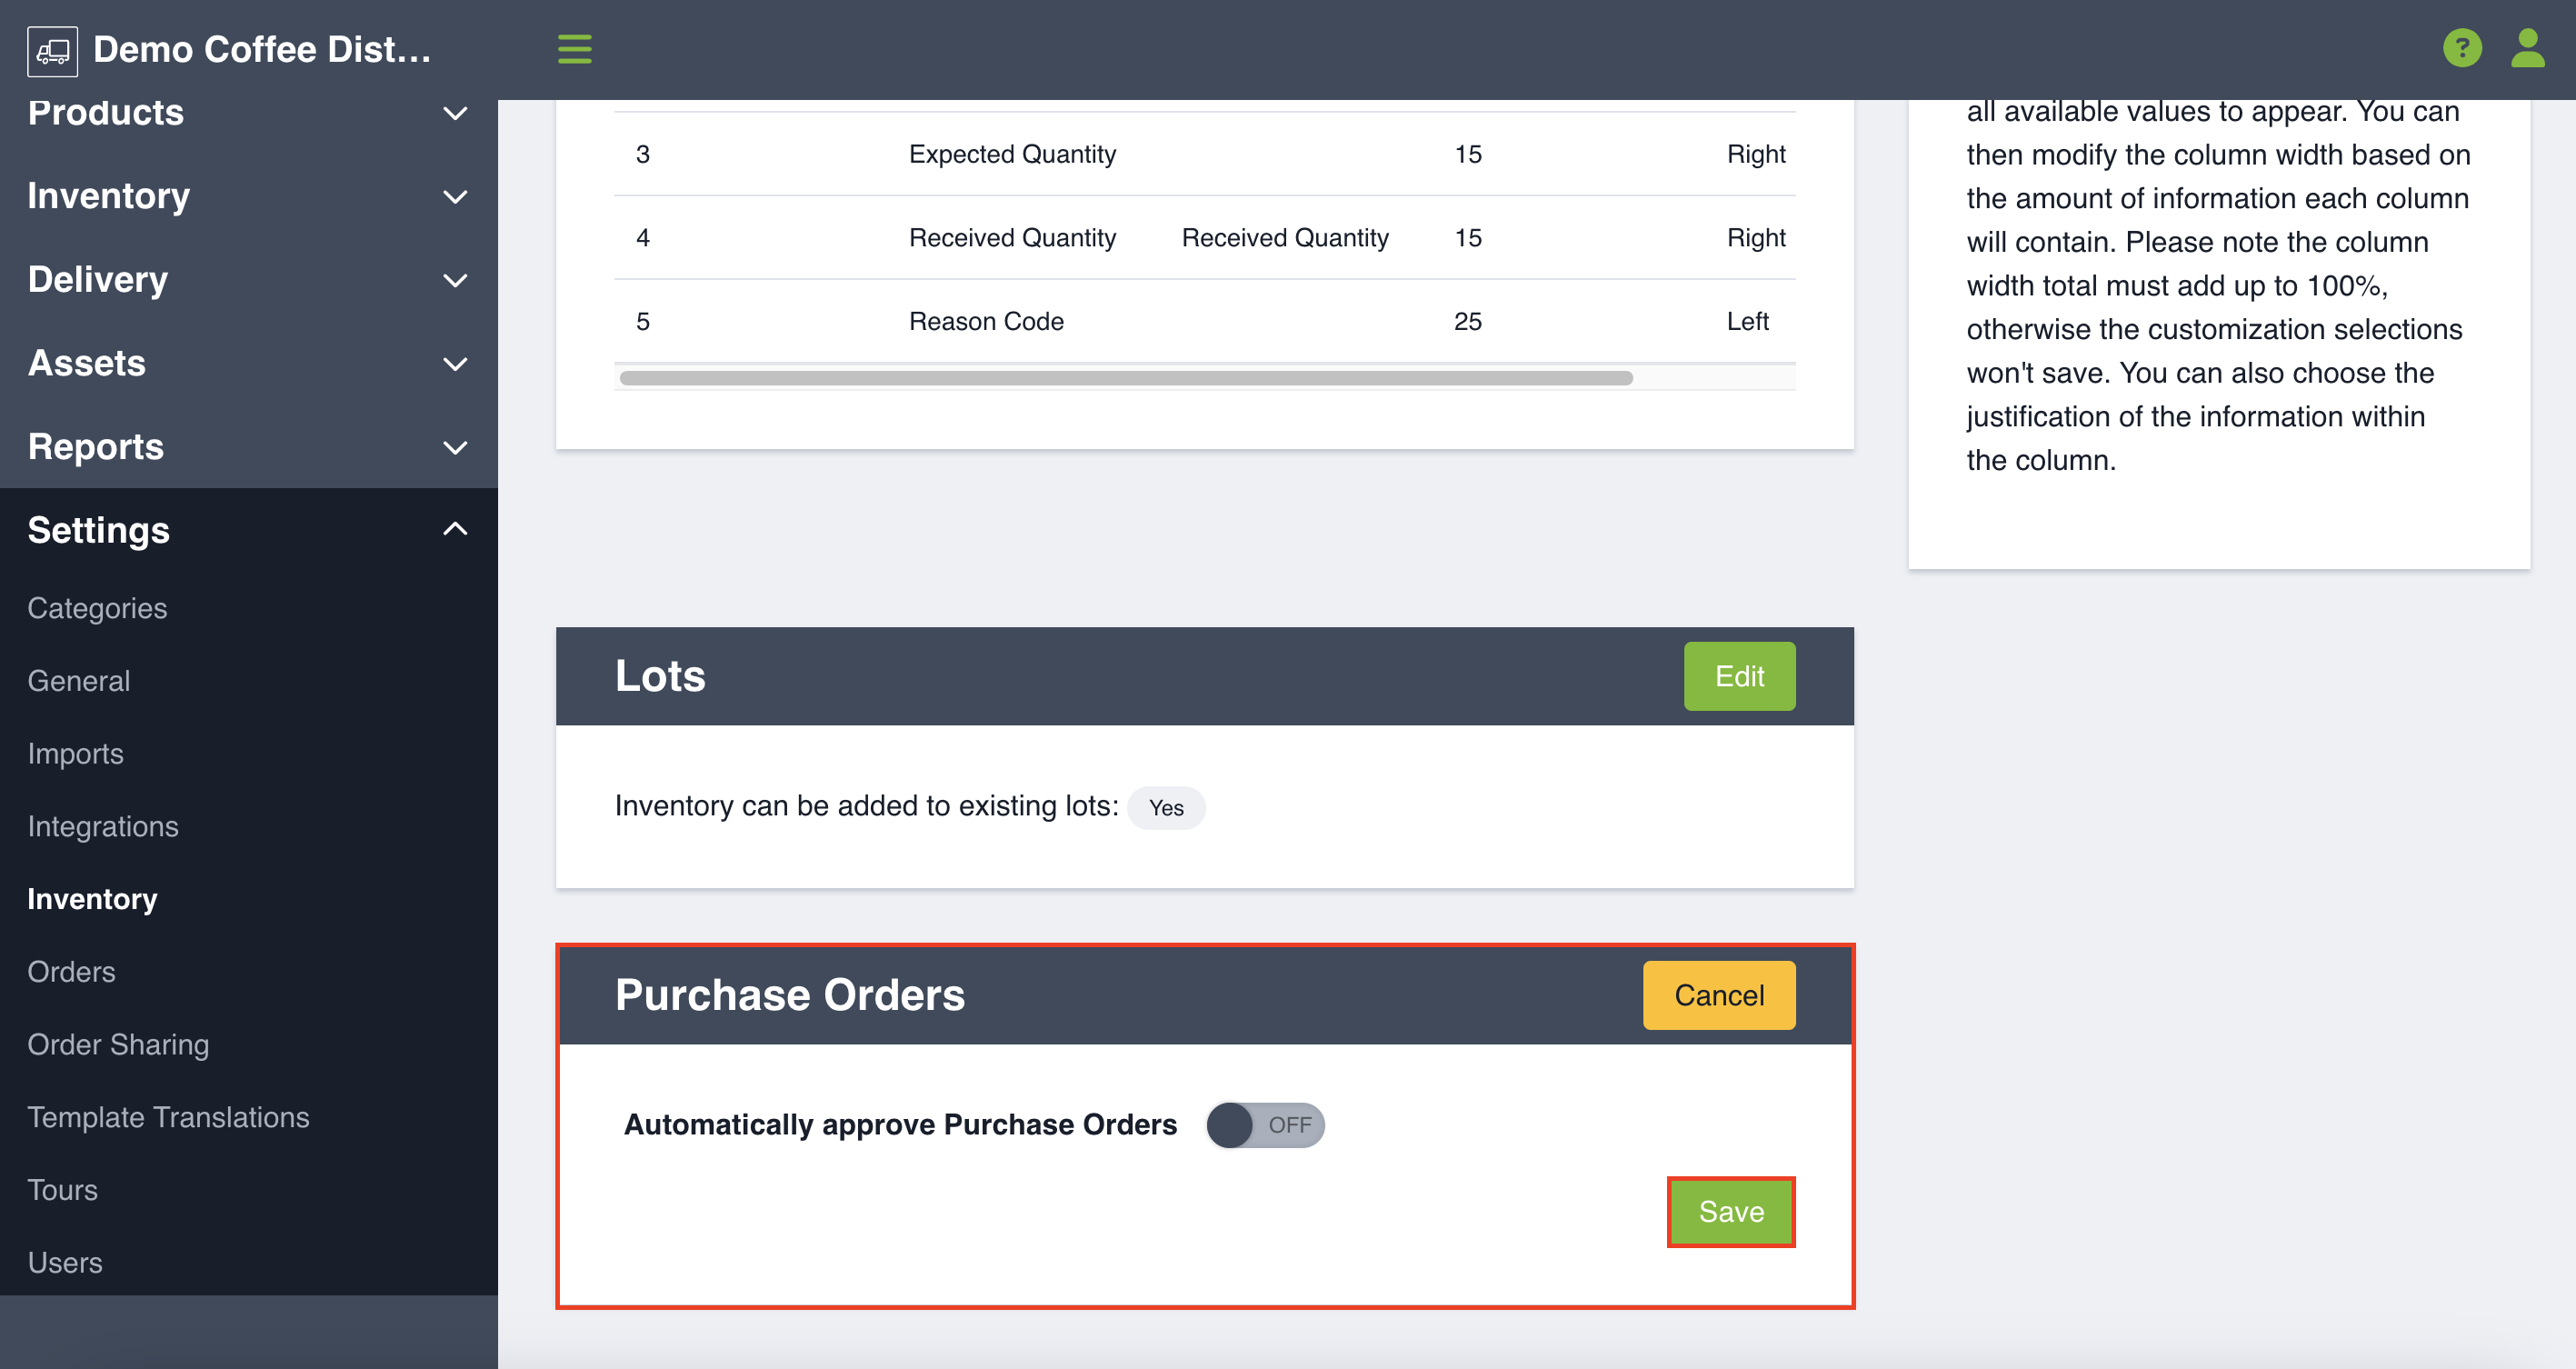
By default, the auto-approve toggle is set to OFF. This means that a user with Back Office permission is required to approve the purchase order. To turn auto-approve on, you will navigate to Settings in the left hand side menu and then click Inventory. You will scroll down to the bottom of the page and will find Purchase Orders, click on Edit button, and you will see a toggle that says "Automatically Approve Purchase Orders." Toggle ON or OFF based on what your process is and click Save.
If the toggle in ON, your Purchase orders will automatically move from a Pending to an Approved status.
If the toggle is OFF, you will need to manually approve your purchase orders by viewing the purchase order and clicking Approve.
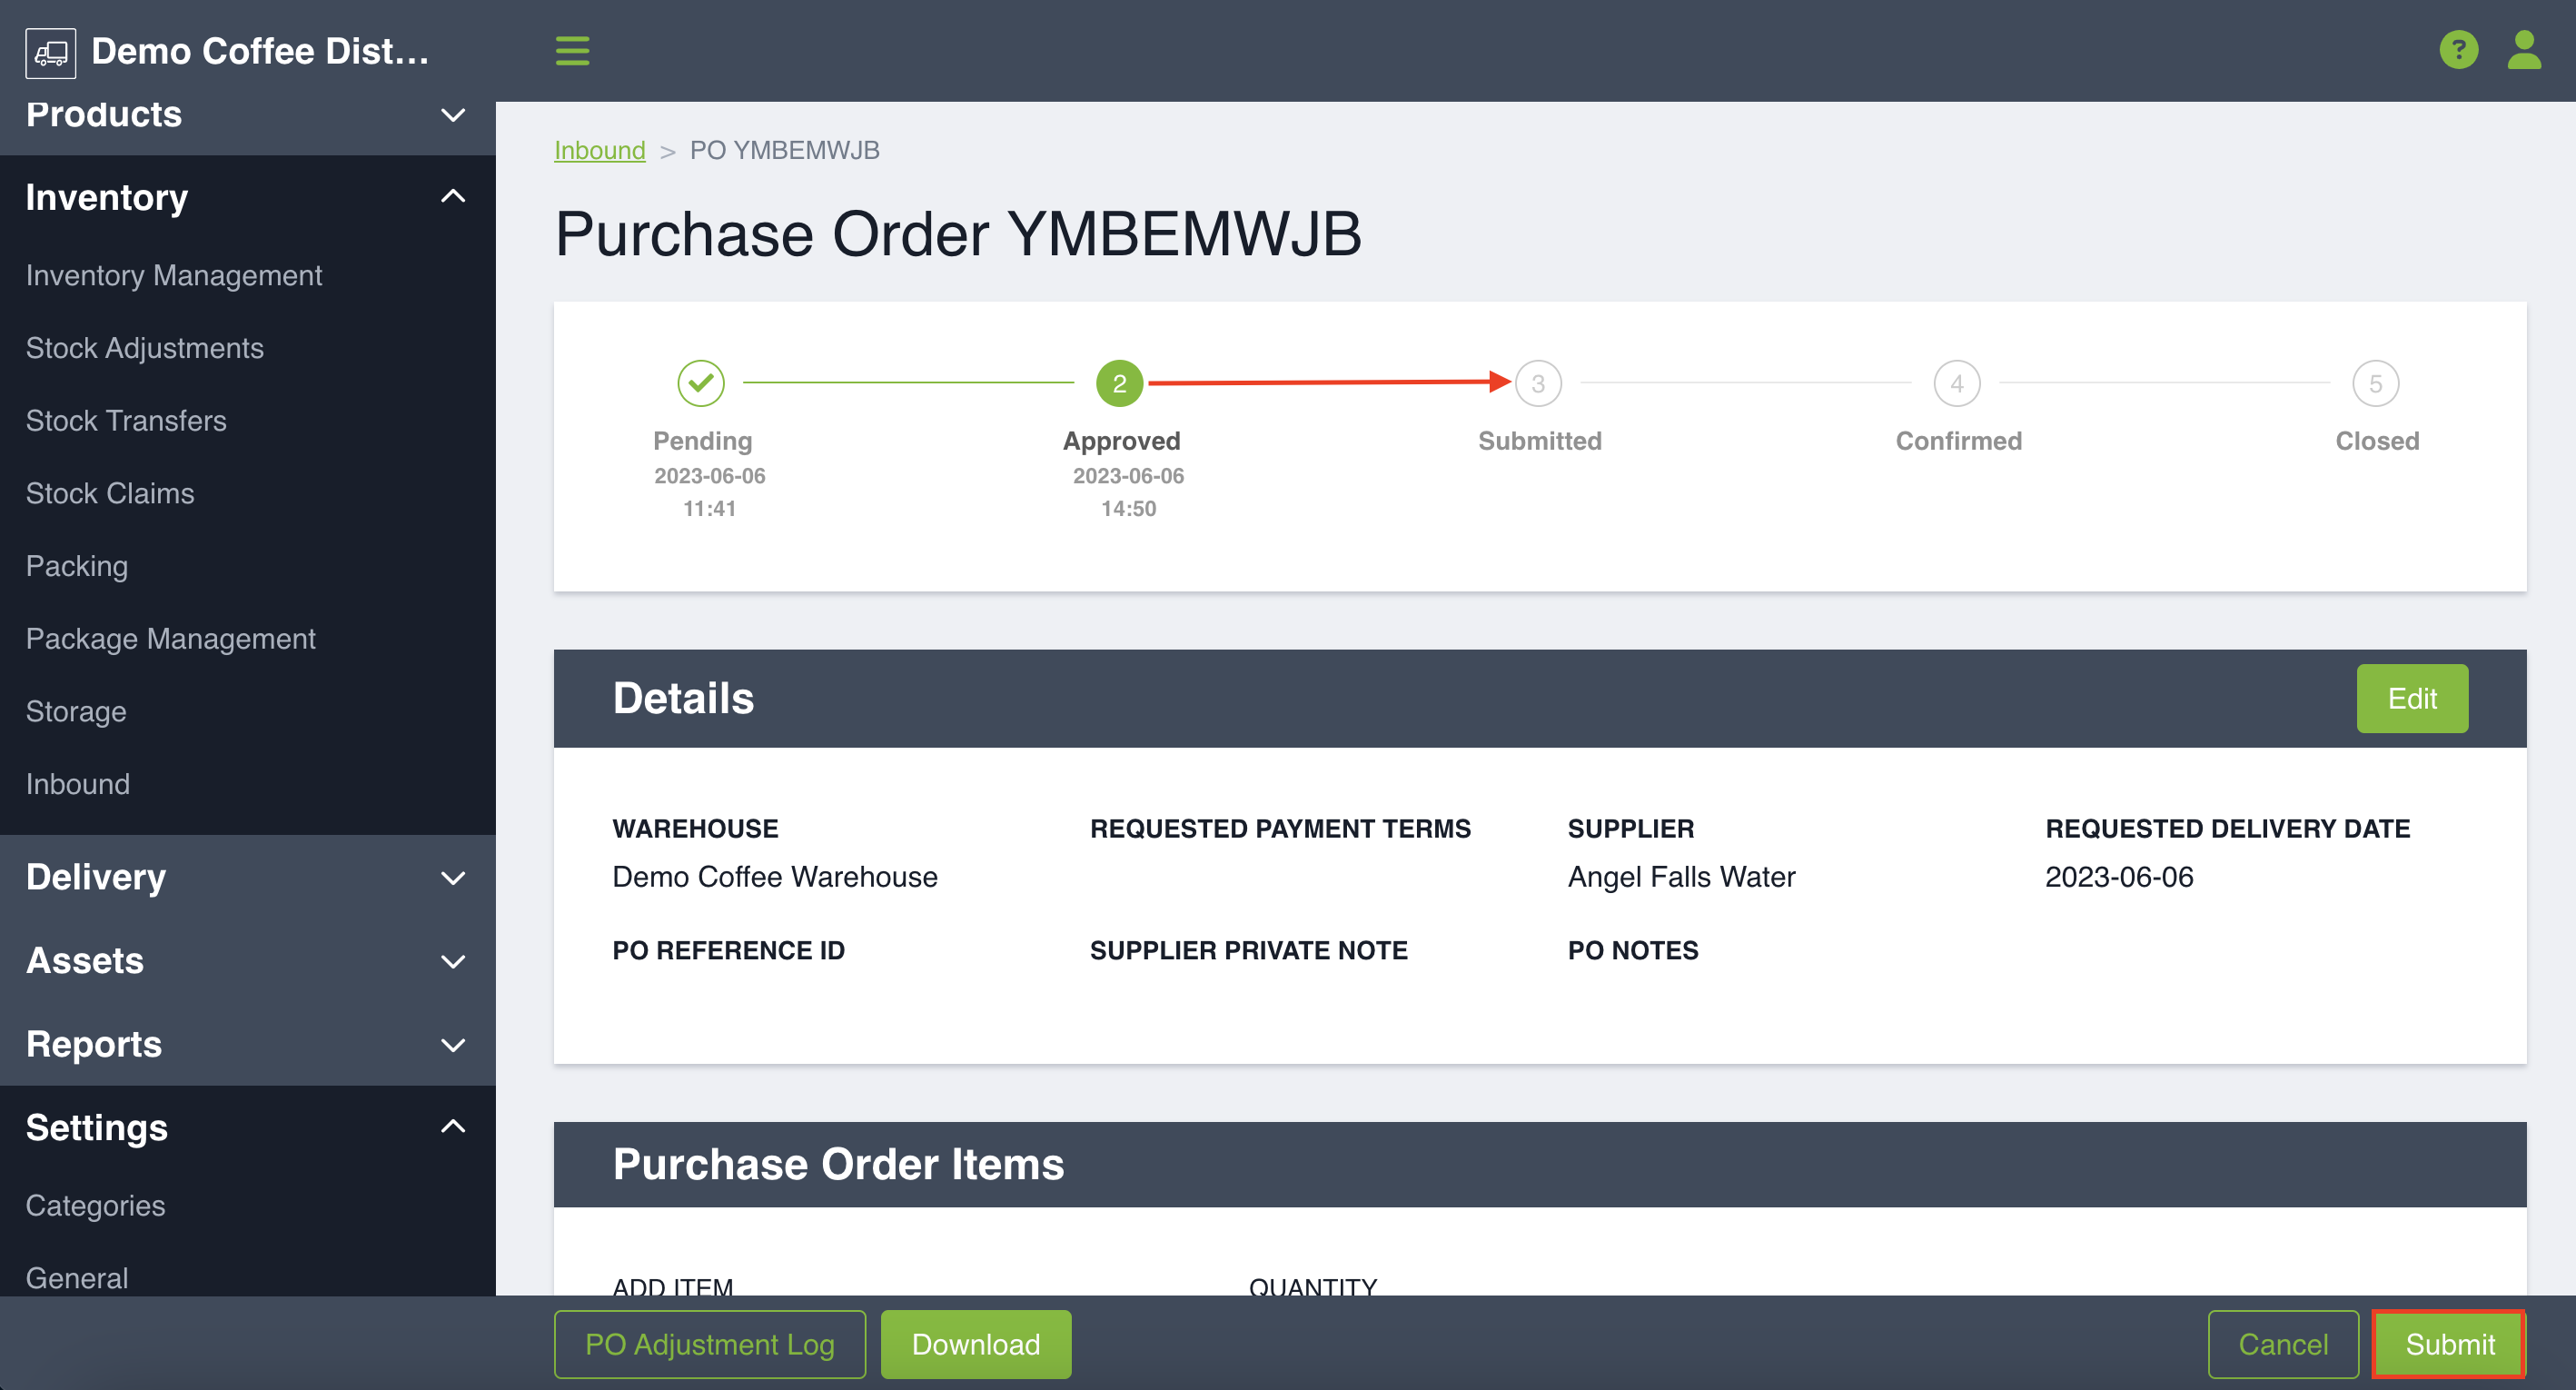
Submitting a Purchase Order
Once you have submitted the purchase order to your supplier, make sure you mark it as digitally submitted, too. Click into the purchase order to Submit.
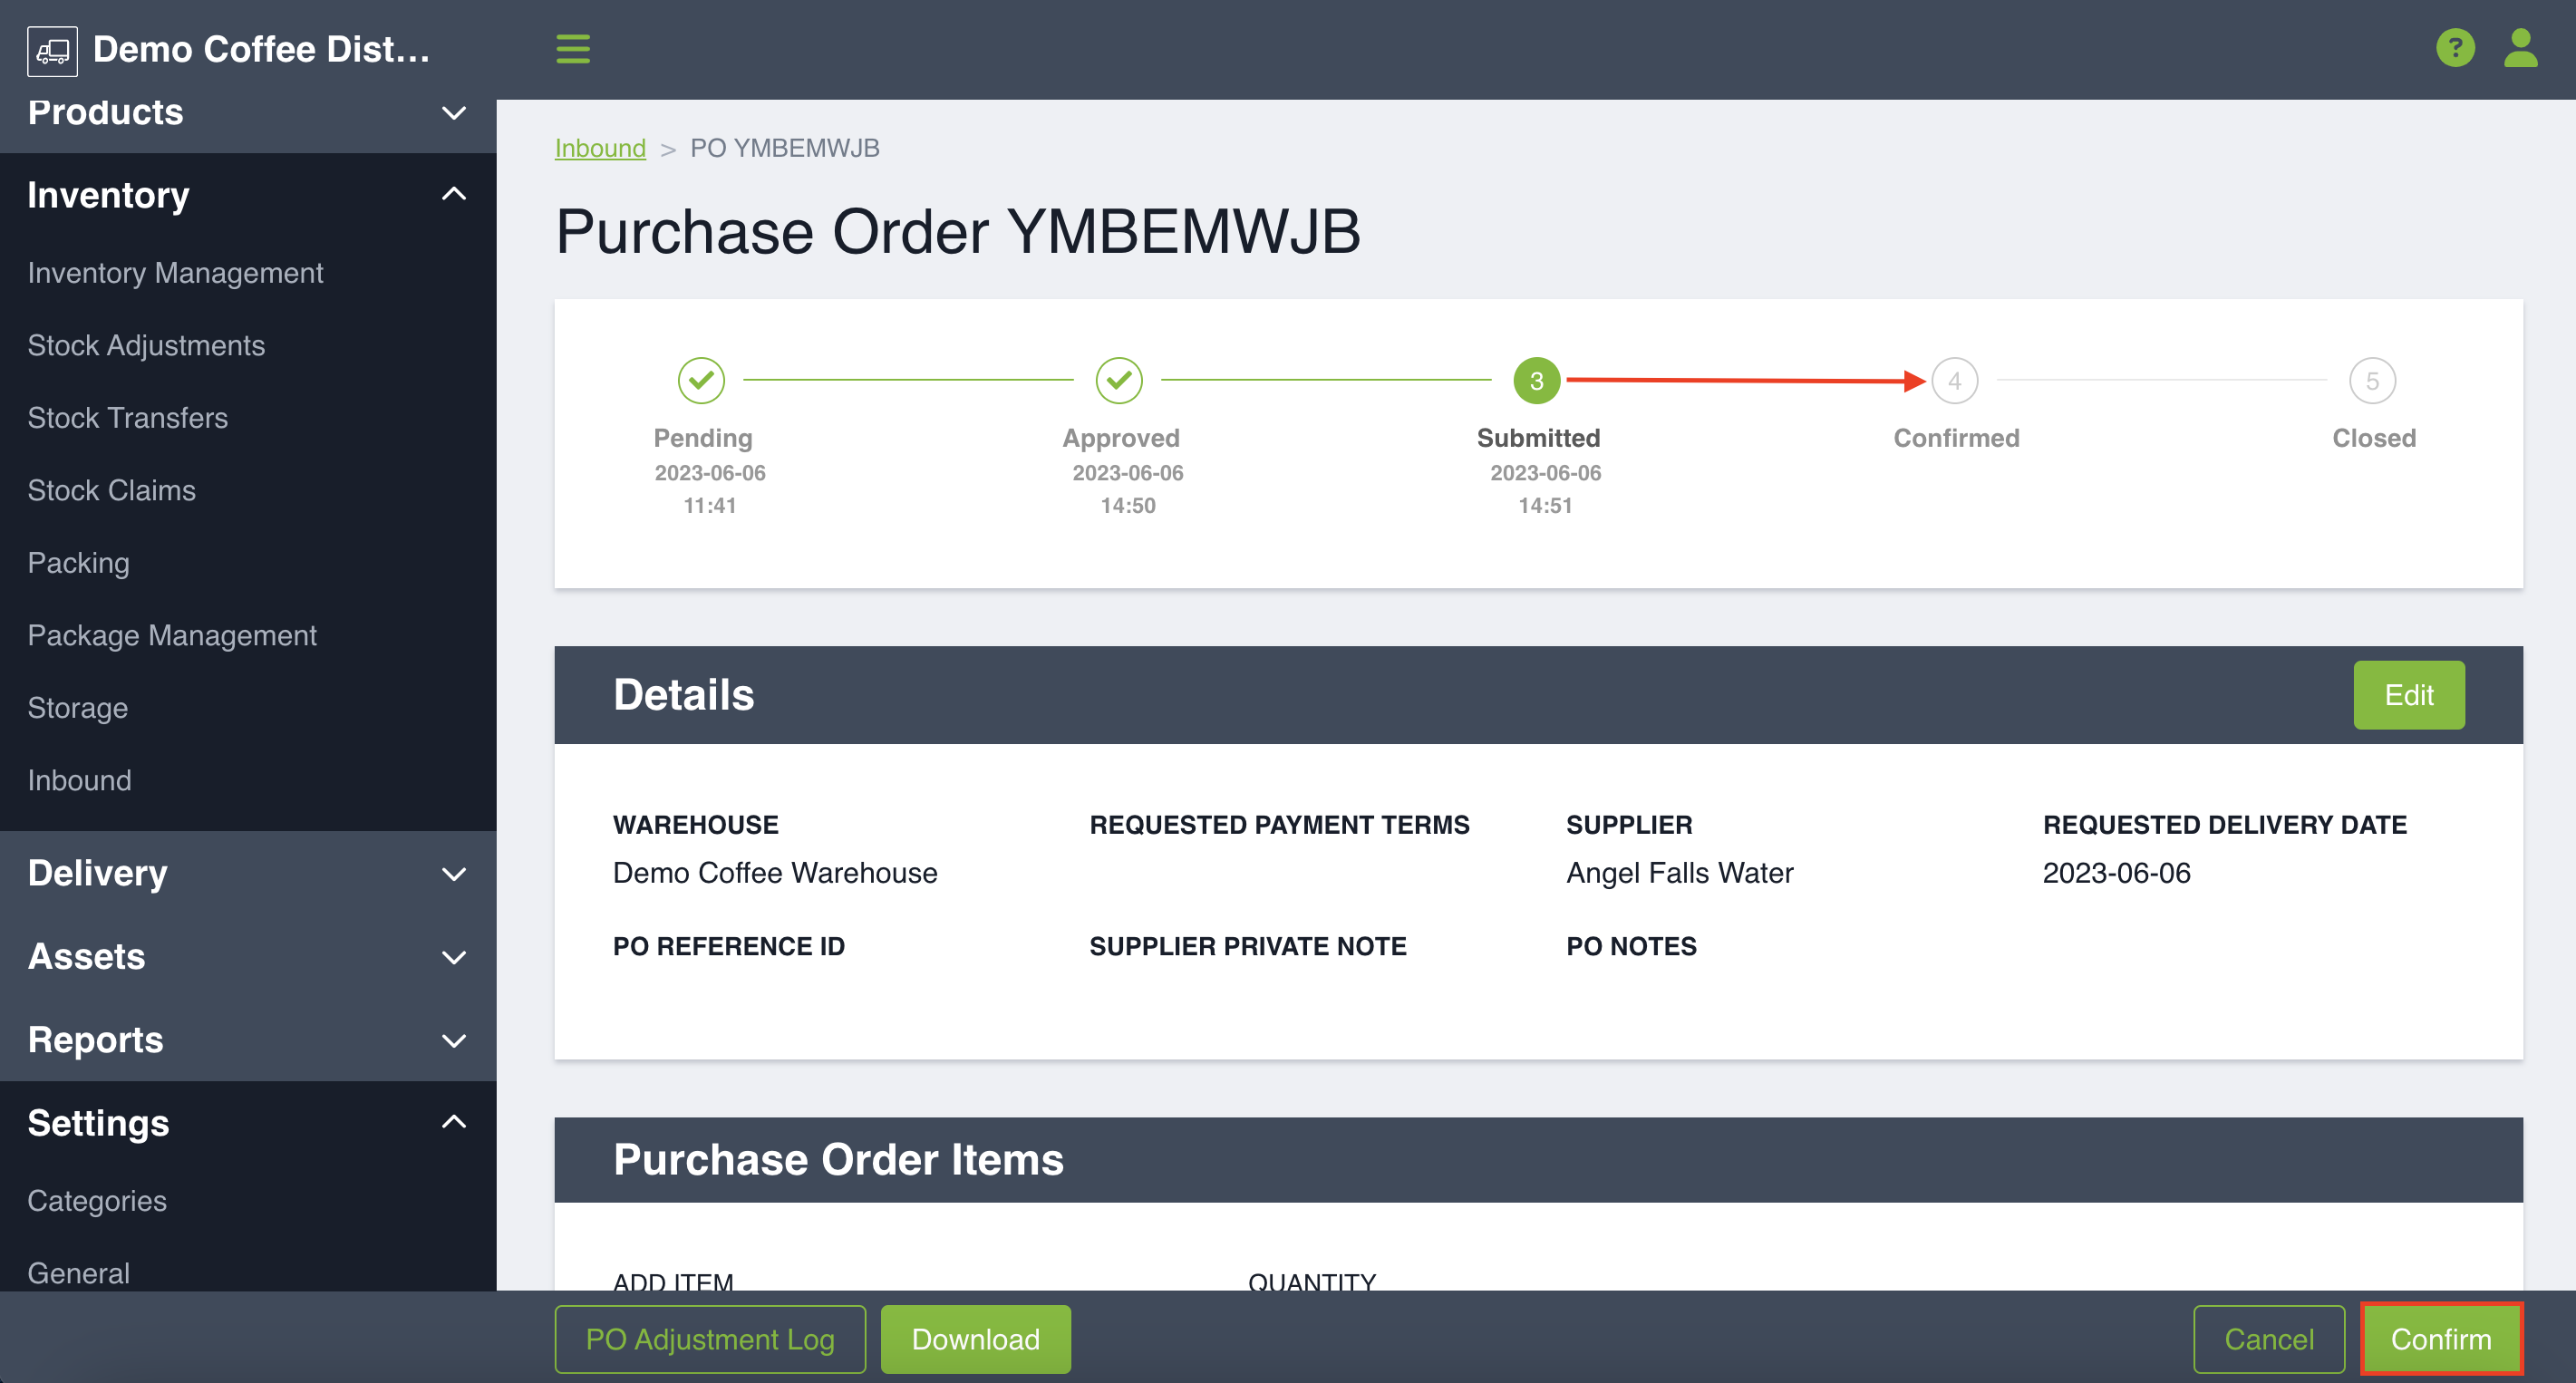
Confirming a Purchase Order
You will then mark your order as Confirmed once you hear from the supplier that they have accepted the Purchase order. Once your Purchase Order is Confirmed, no values can be edited. Upon Confirmation, a Goods Receipt will automatically be created for your purchase order.
To read more about Goods Receipts, click here:
Closing a Purchase Order
You will close a Purchase Order once all associated Purchase Order Goods Receipts are either Received or Refused.
Cancelling a Purchase Order
You may need to cancel a purchase order if you find out that your supplier cannot fulfill it or purchasing plans changed. You can Cancel your purchase order at any point before it's Confirmed.
Editing a Purchase Order
You may find yourself needing to edit your purchase order based on supplier feedback or changing plans.
Once your purchase order is created and in a Pending status, the supplier and destination warehouse cannot be changed.
The remaining purchase order details and SKUs can be edited at any point before the purchase order is Confirmed. Please note that editing an approved or submitted purchase order will bring it back to a pending state (and if your auto-approve toggle is on, it will be brought back to the Approved state).
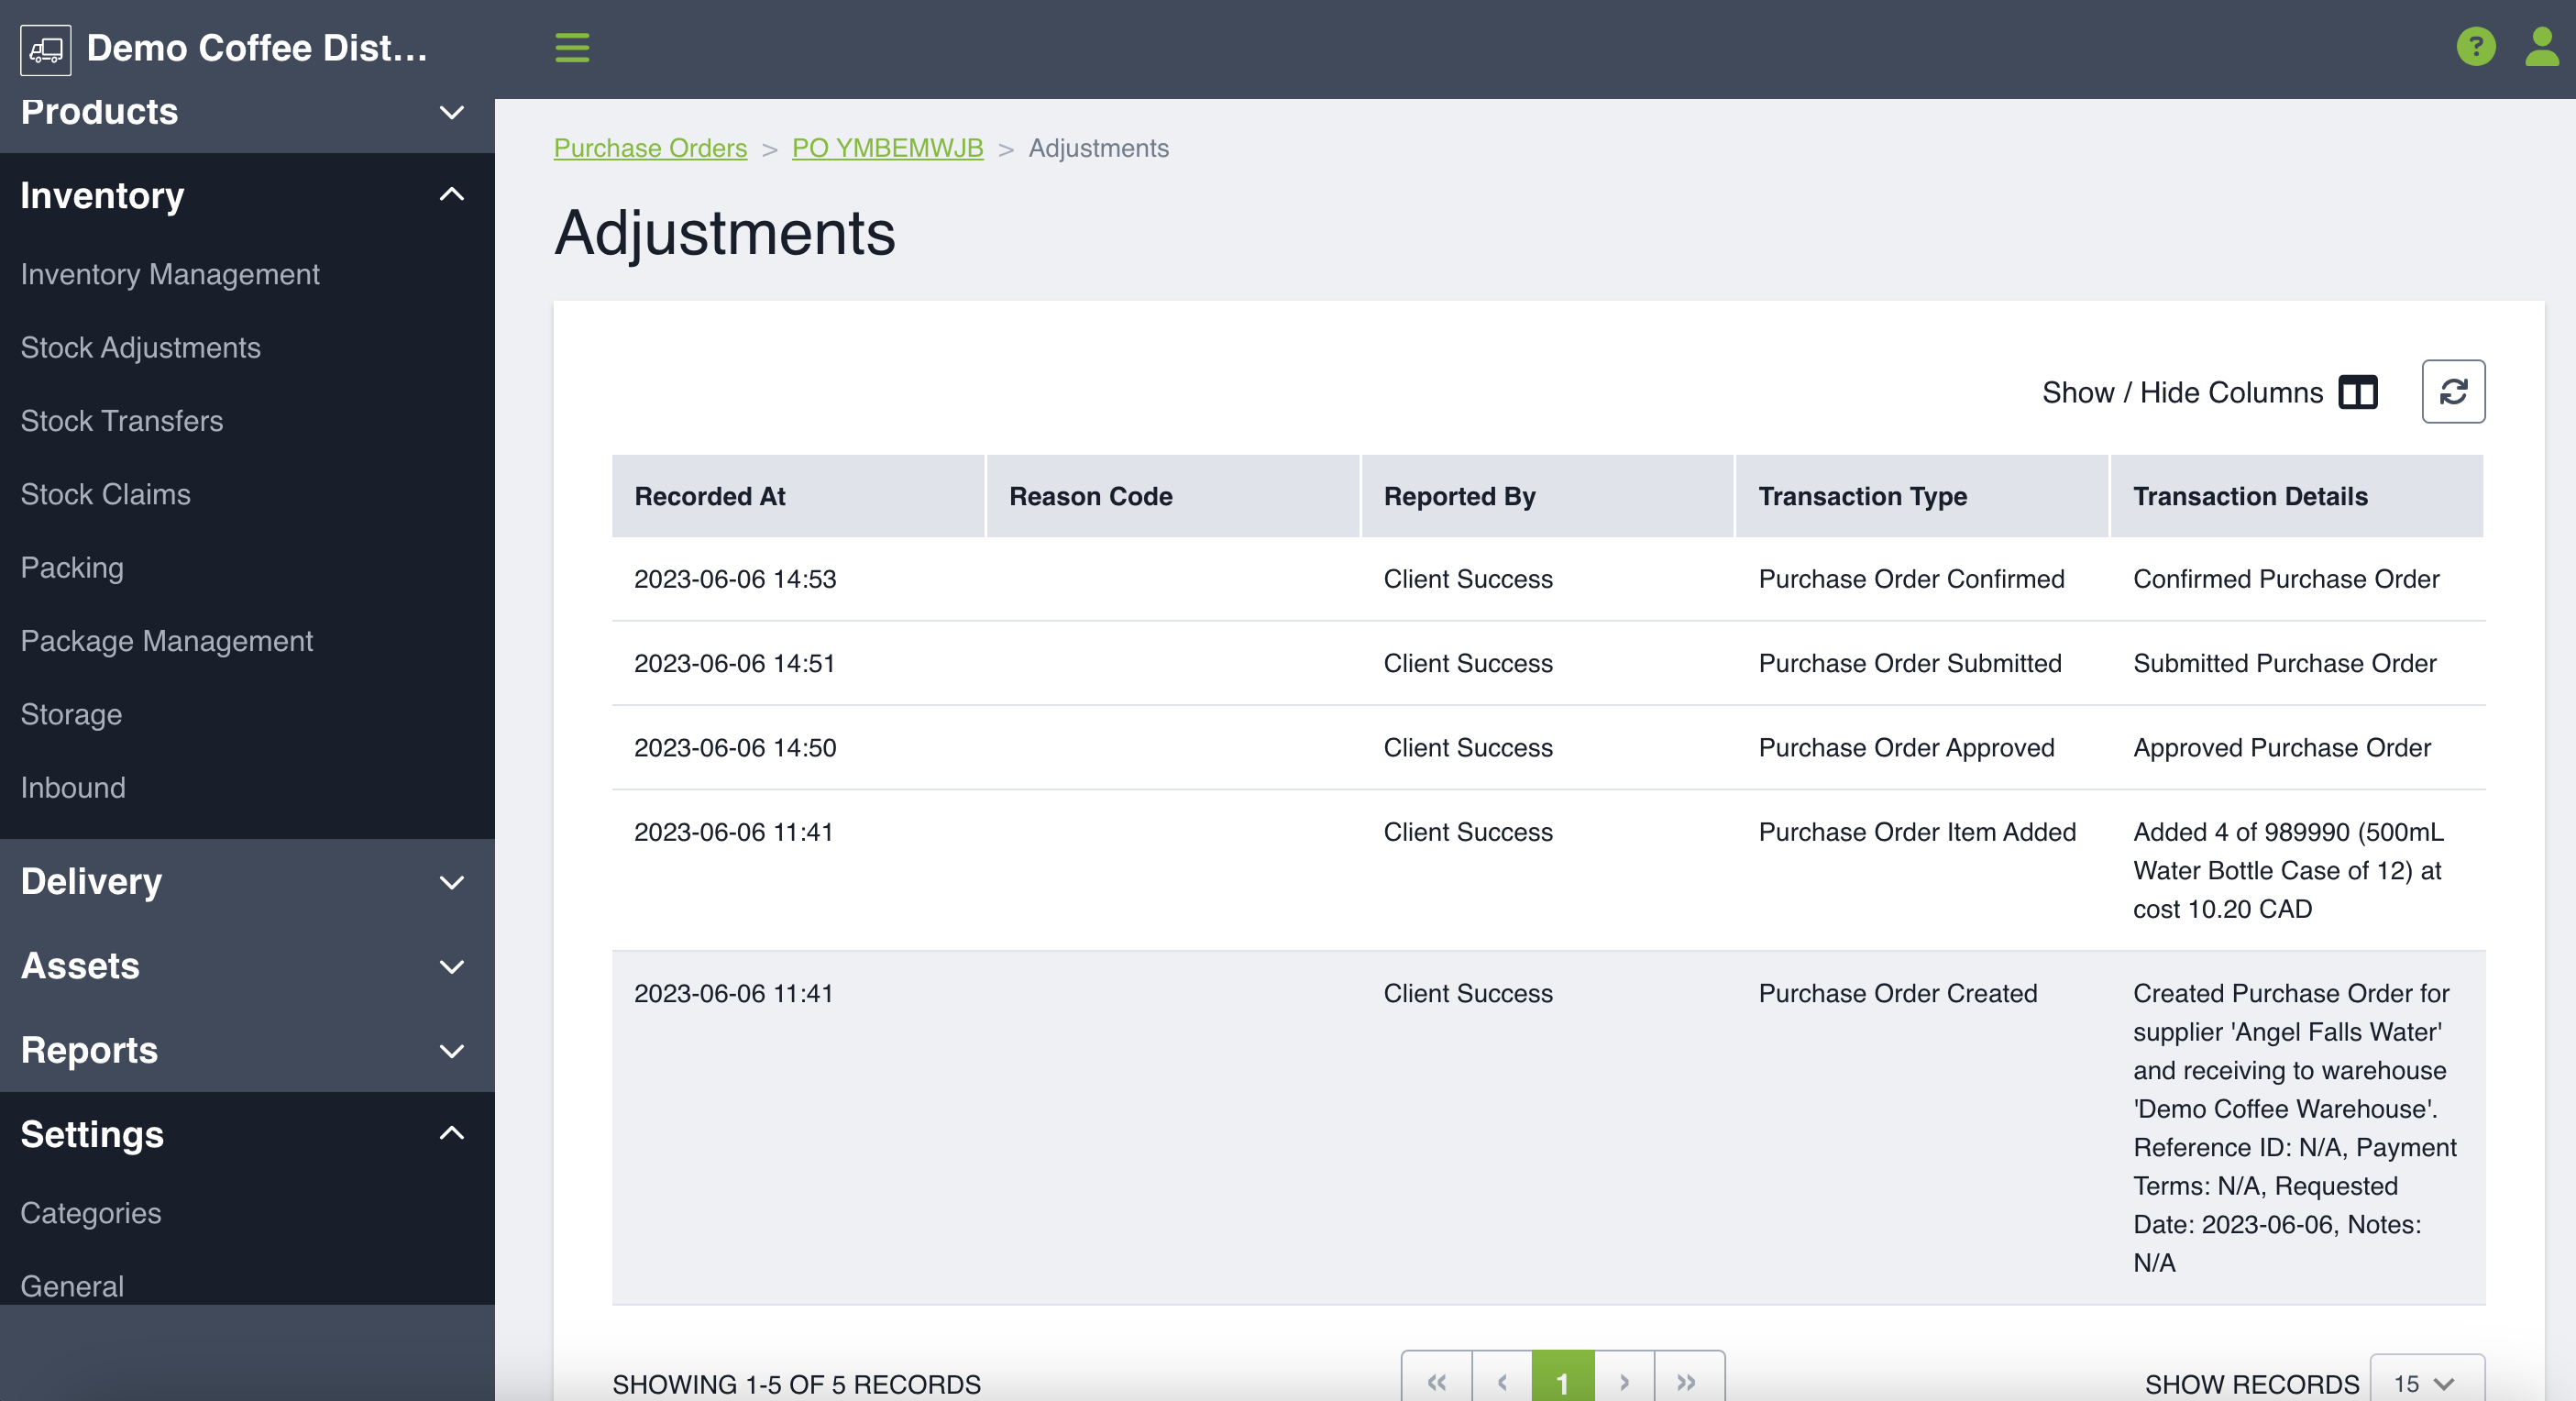
Purchase Order Adjustment Log
You can view any adjustments you have made to the Purchase Order by clicking PO Adjustment Log in the bottom left hand corner at any step throughout the process.
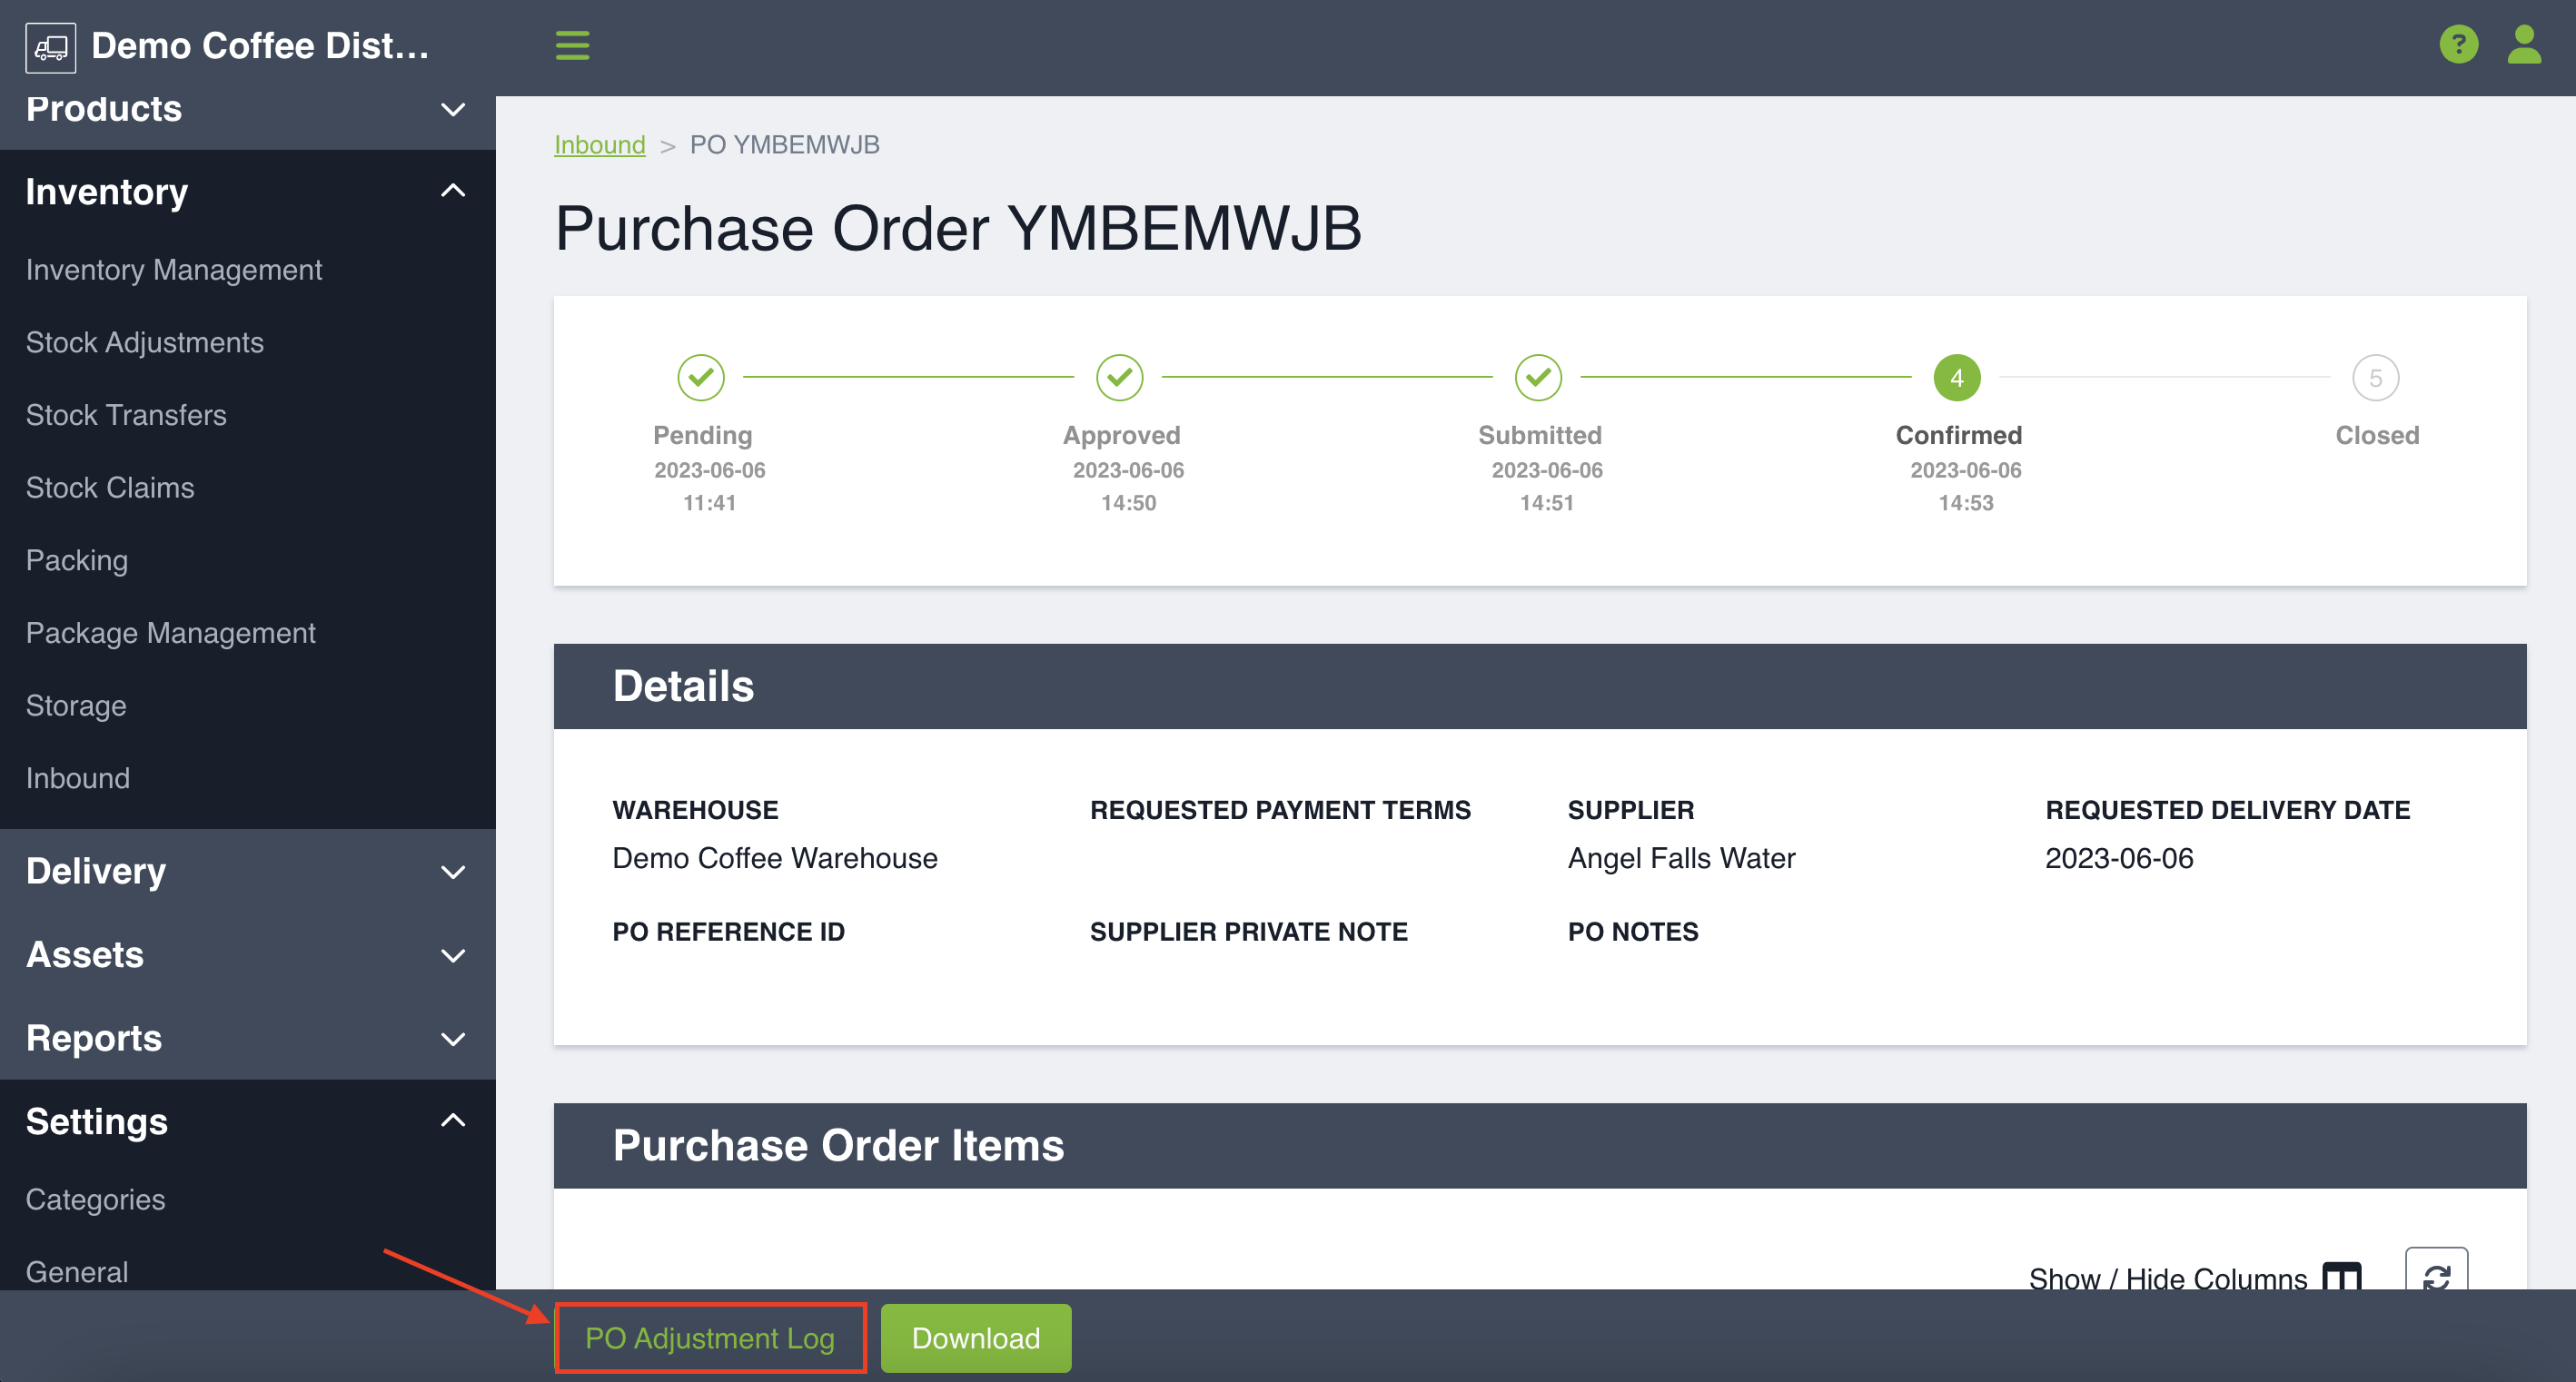
By clicking you can view the list of adjustments.