Use the importer tool to bulk load orders from third party Ecommerce sites into Routeique™ or add new products and customers.
If you collect customer orders from a third-party website such as Shopify, our importer tool is a quick and easy way to bring your orders into Routeique. It is also a great way to add new products or customers to the system in bulk.
Mapping Your Import
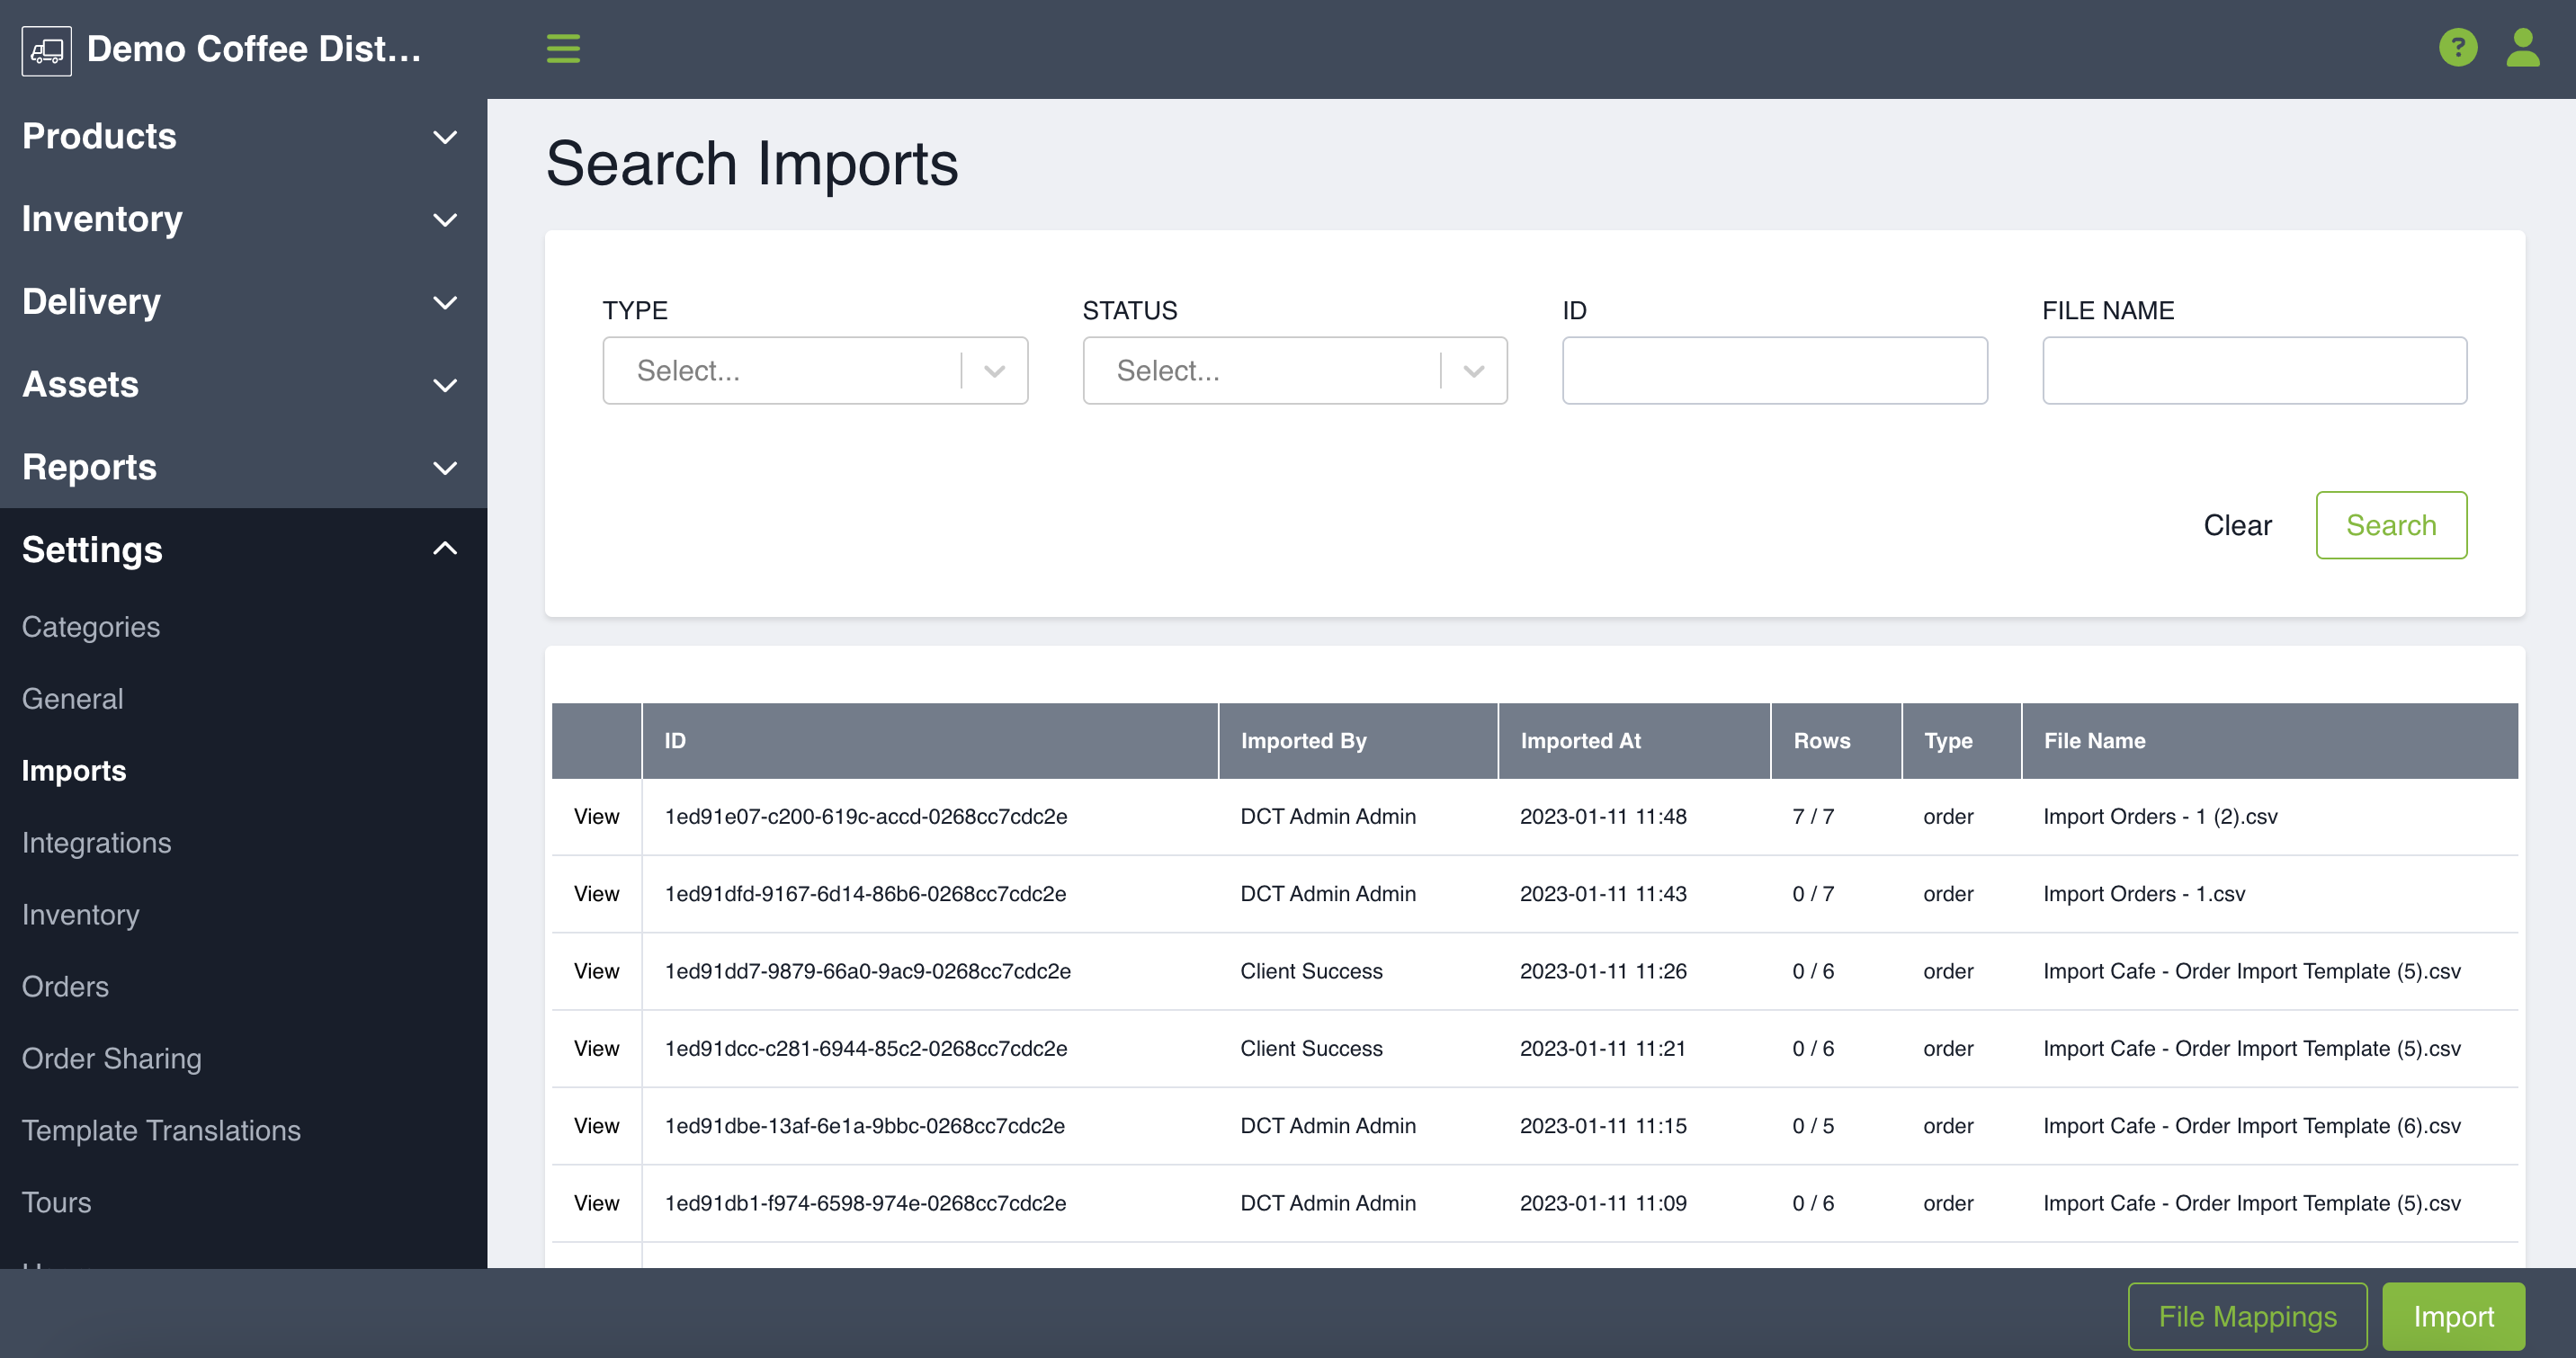
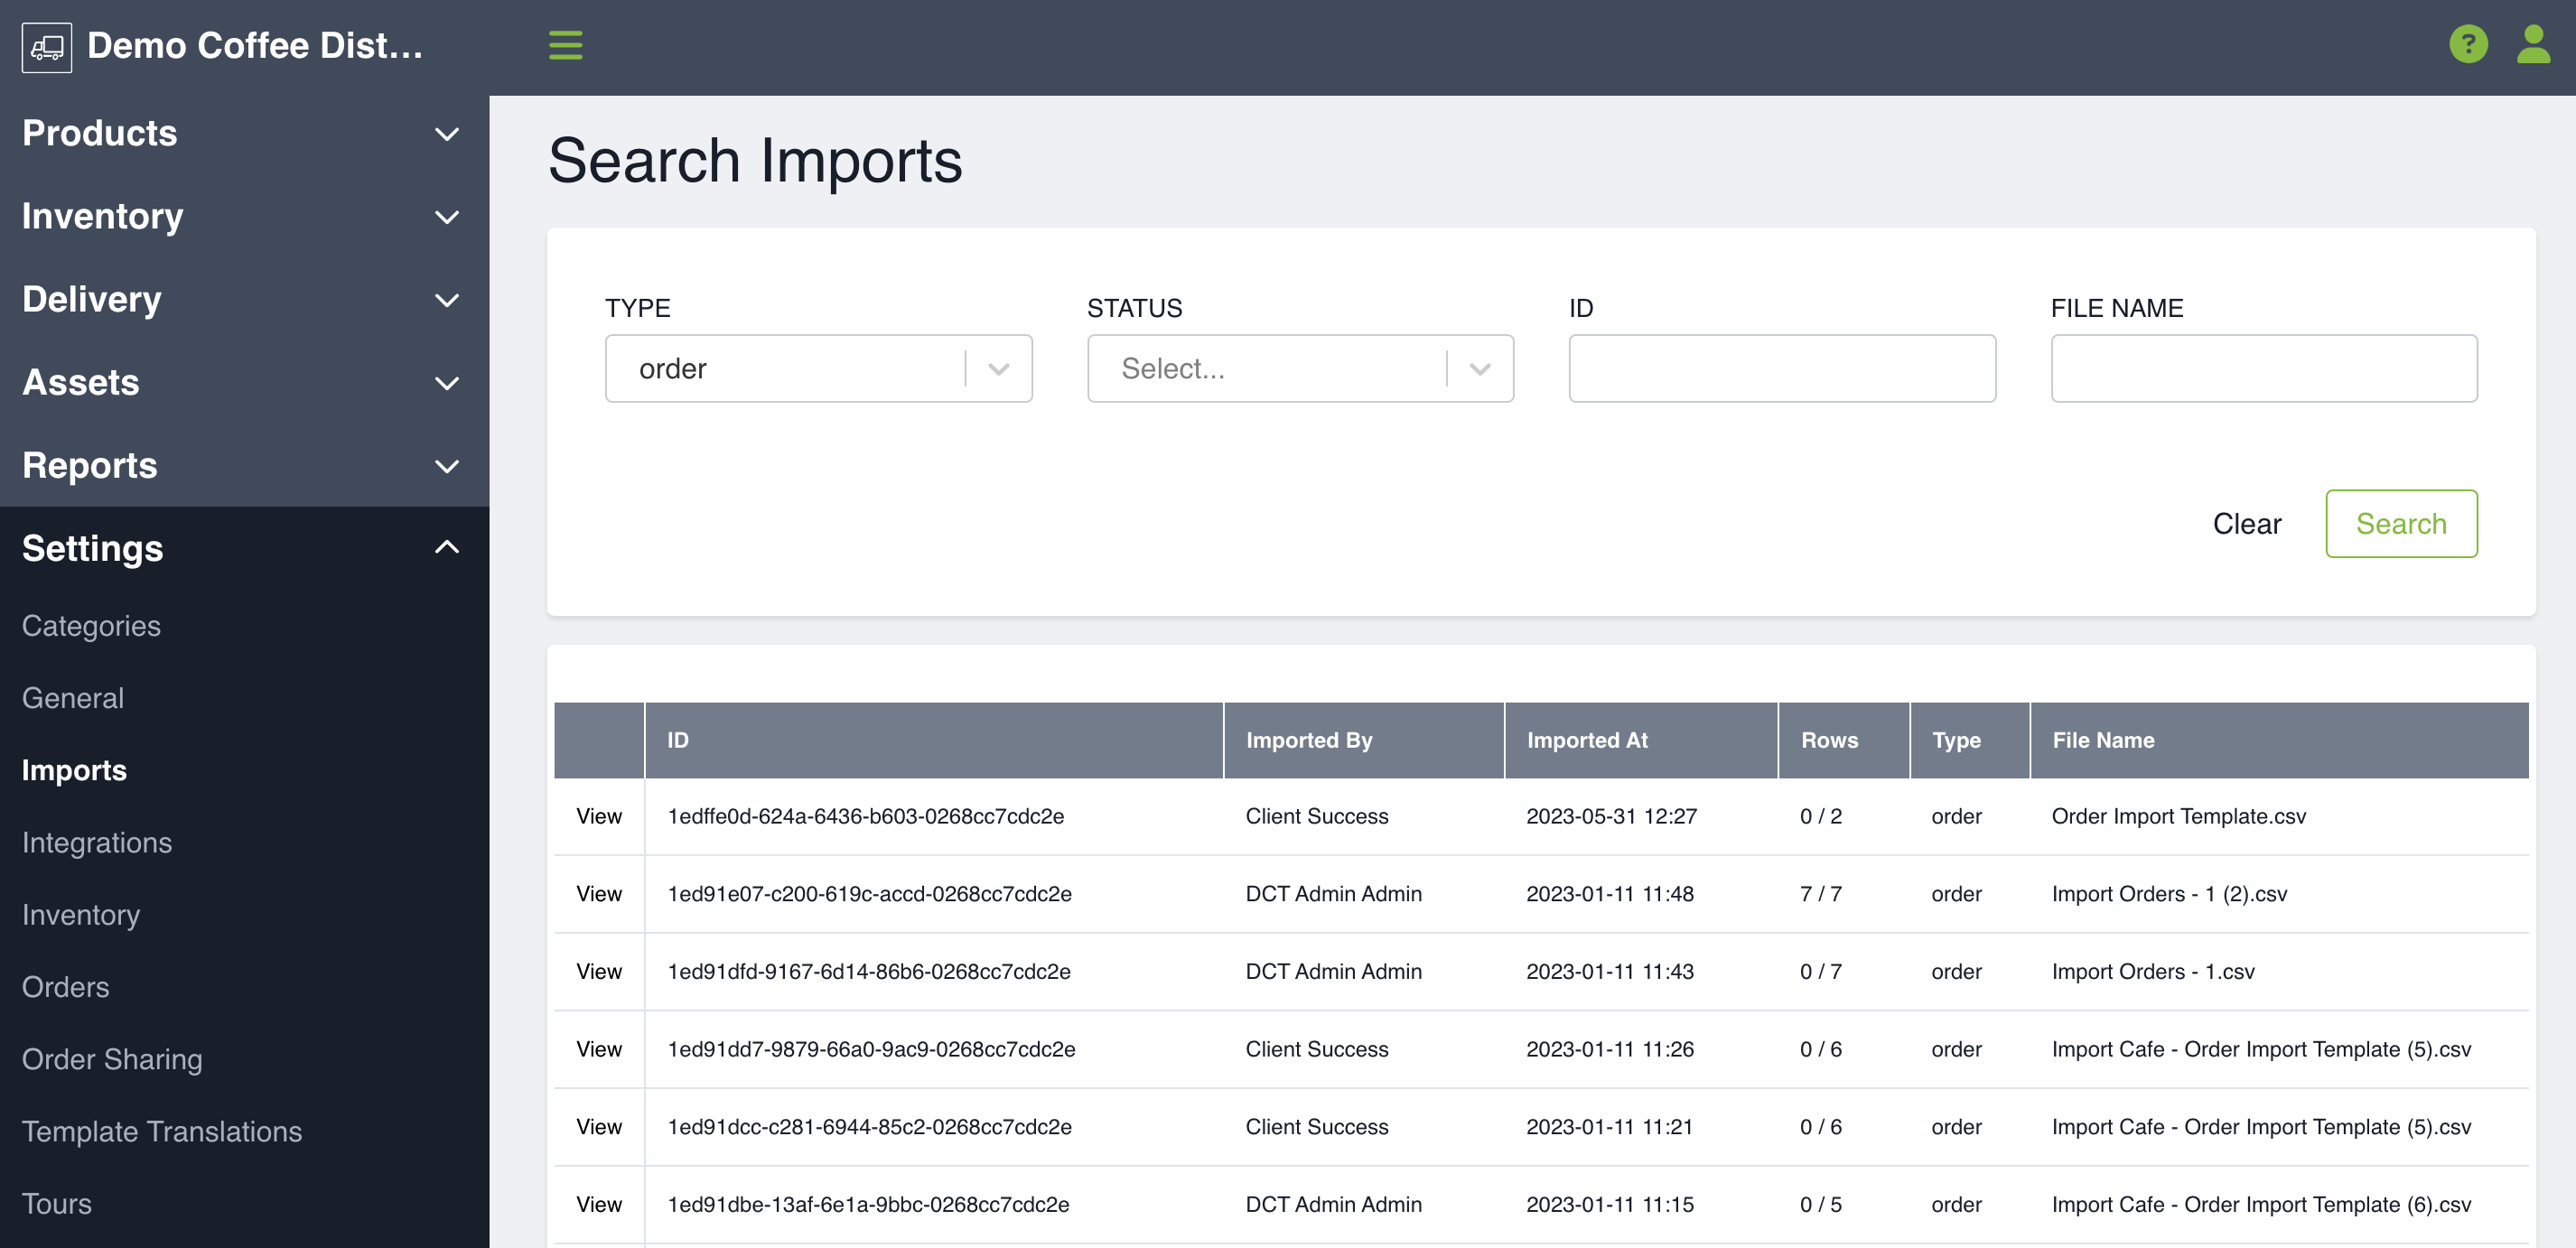
Before you import your data, you'll want to create a file mapping for bringing them in. A mapping only needs to be created before your first import of its type, each time after you can use the saved mapping. Under Settings, click on Imports. Here you will land on a page where you will see all previous imports created. Click the File Mappings button in the bottom-right corner.
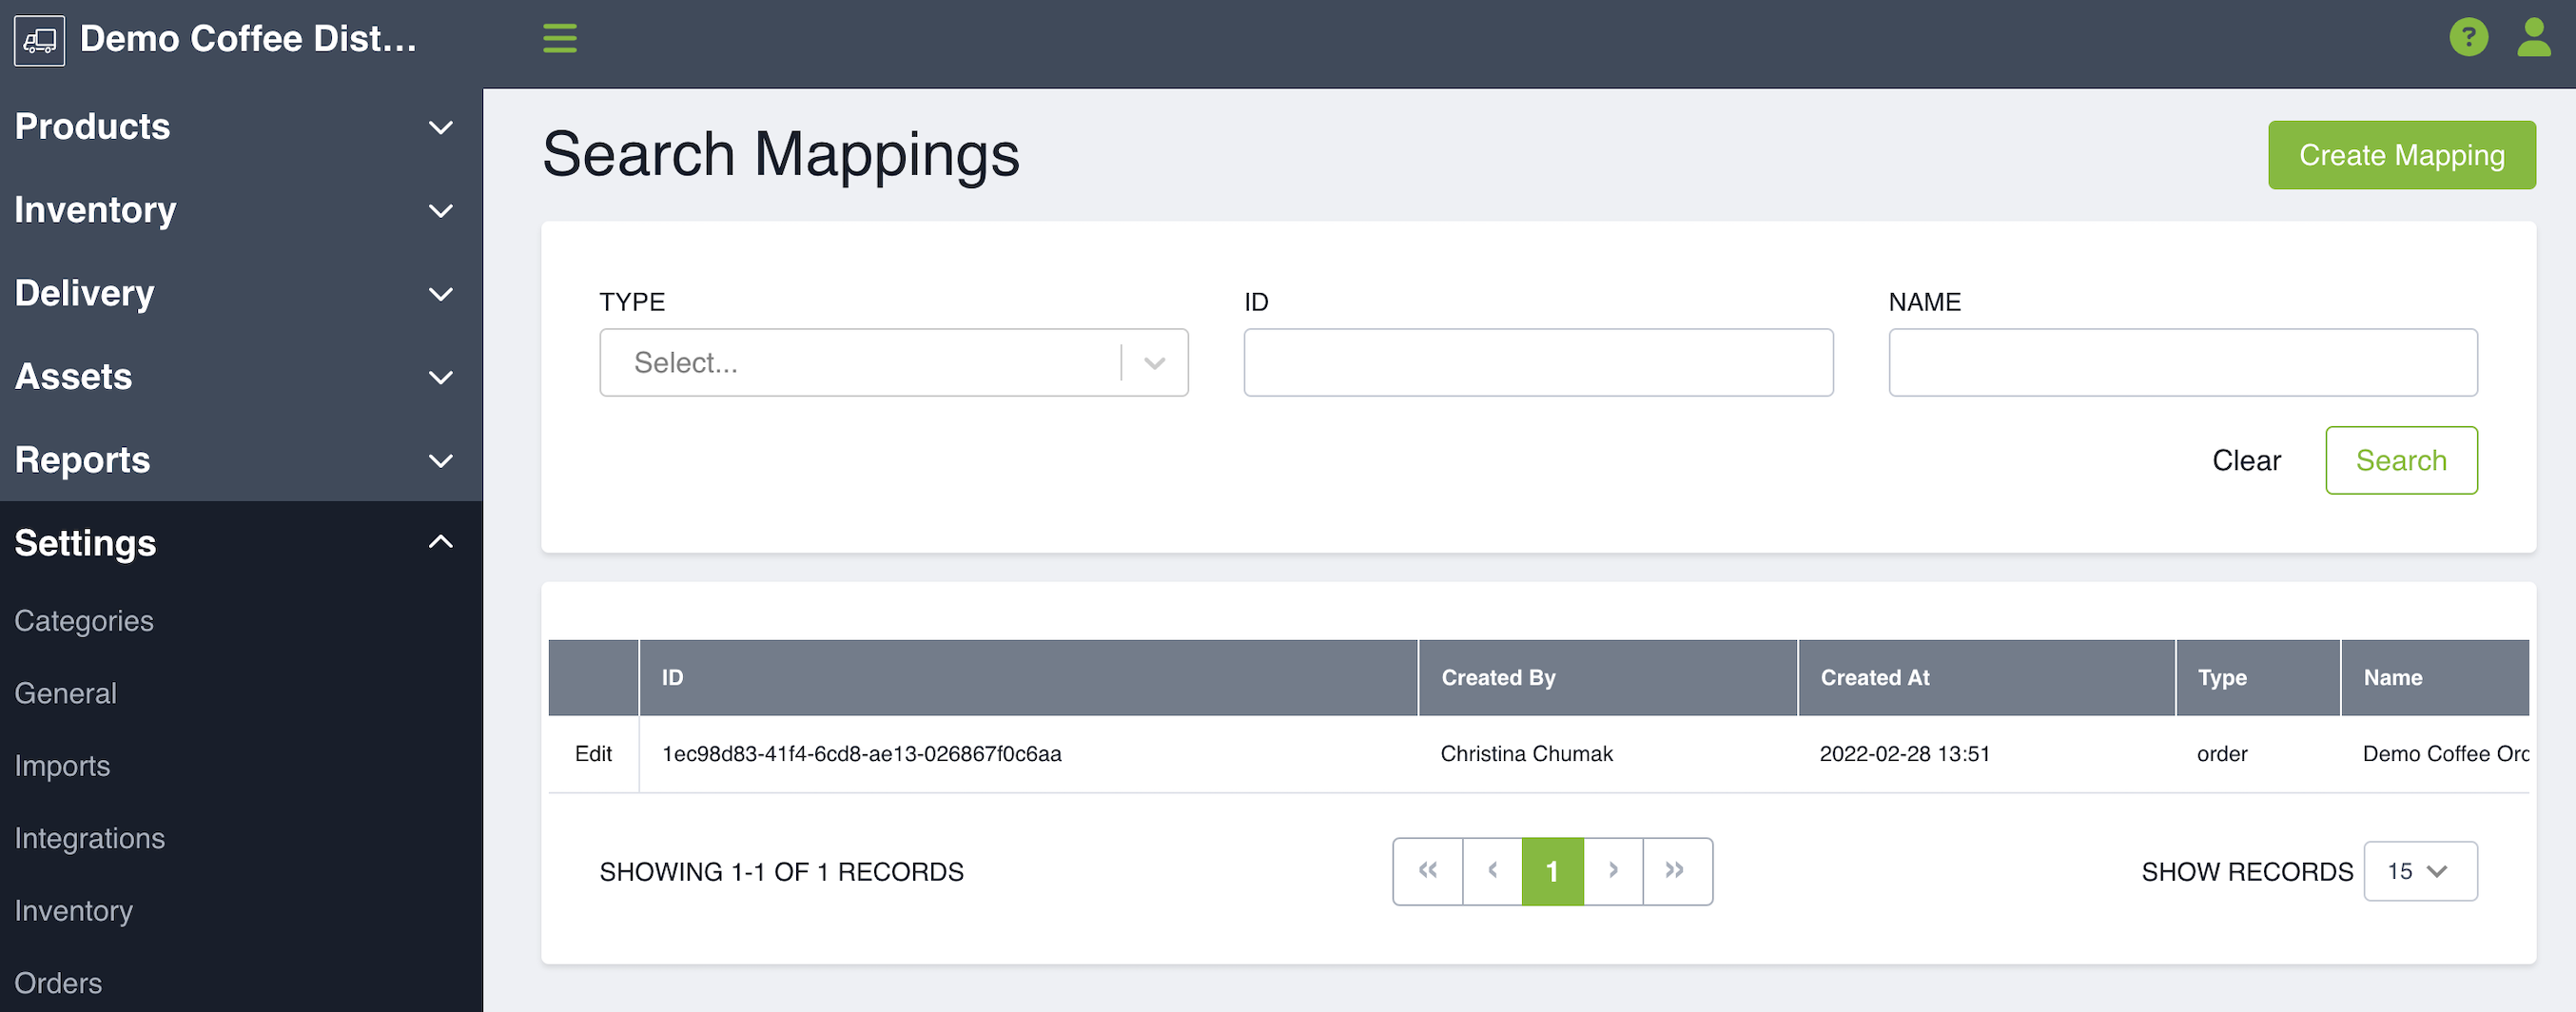
You will then be redirected to a page where you can see all previous file mappings that have been saved. To create a new mapping, click the green Create Mapping button in the top right corner.
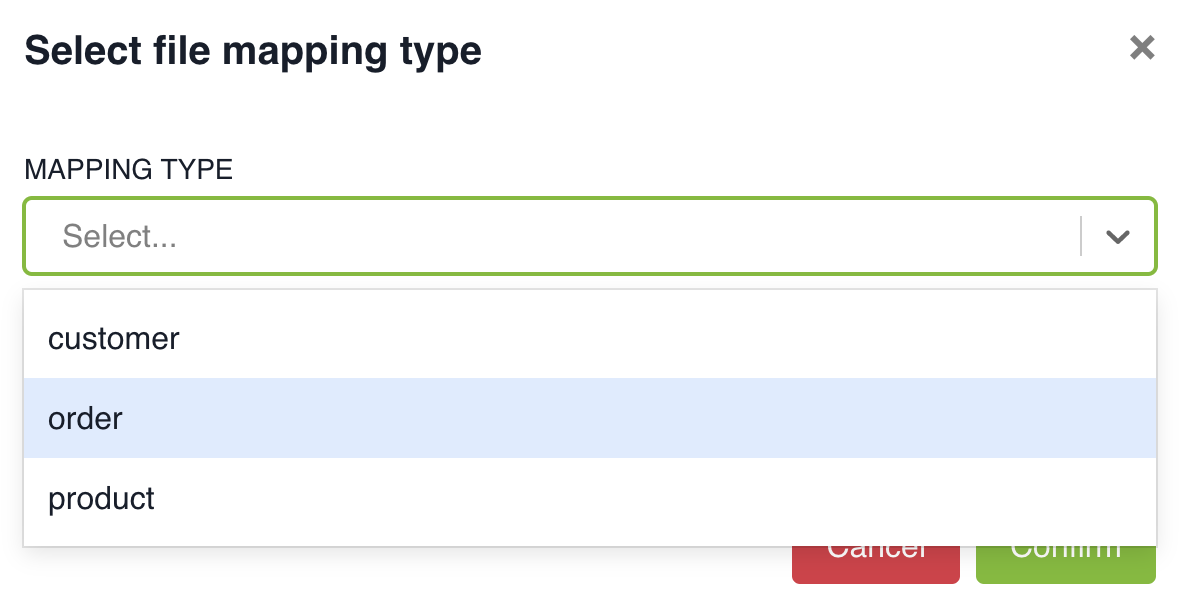
When the modal opens asking you to select the type of mapping you will be creating, select the type you will be creating and press Confirm. For example, if you are importing orders from Shopify, you will select an order mapping type.
The first step is to name your mapping so you can use it each time you have an order import.
You'll then need to upload a file that reflects the data you'll be importing. For example, if you are exporting your orders from Shopify, then upload the Shopify CSV file. If you want to create your own file to ensure you have all the necessary data, you can click on Export Template button in the top-right corner. This will provide you a template of all the fields that you can choose to include in your import.
A separate mapping should be used for each import type. However, if you have new products and/or customers on an order, you will be able to import these new fields within an order import.
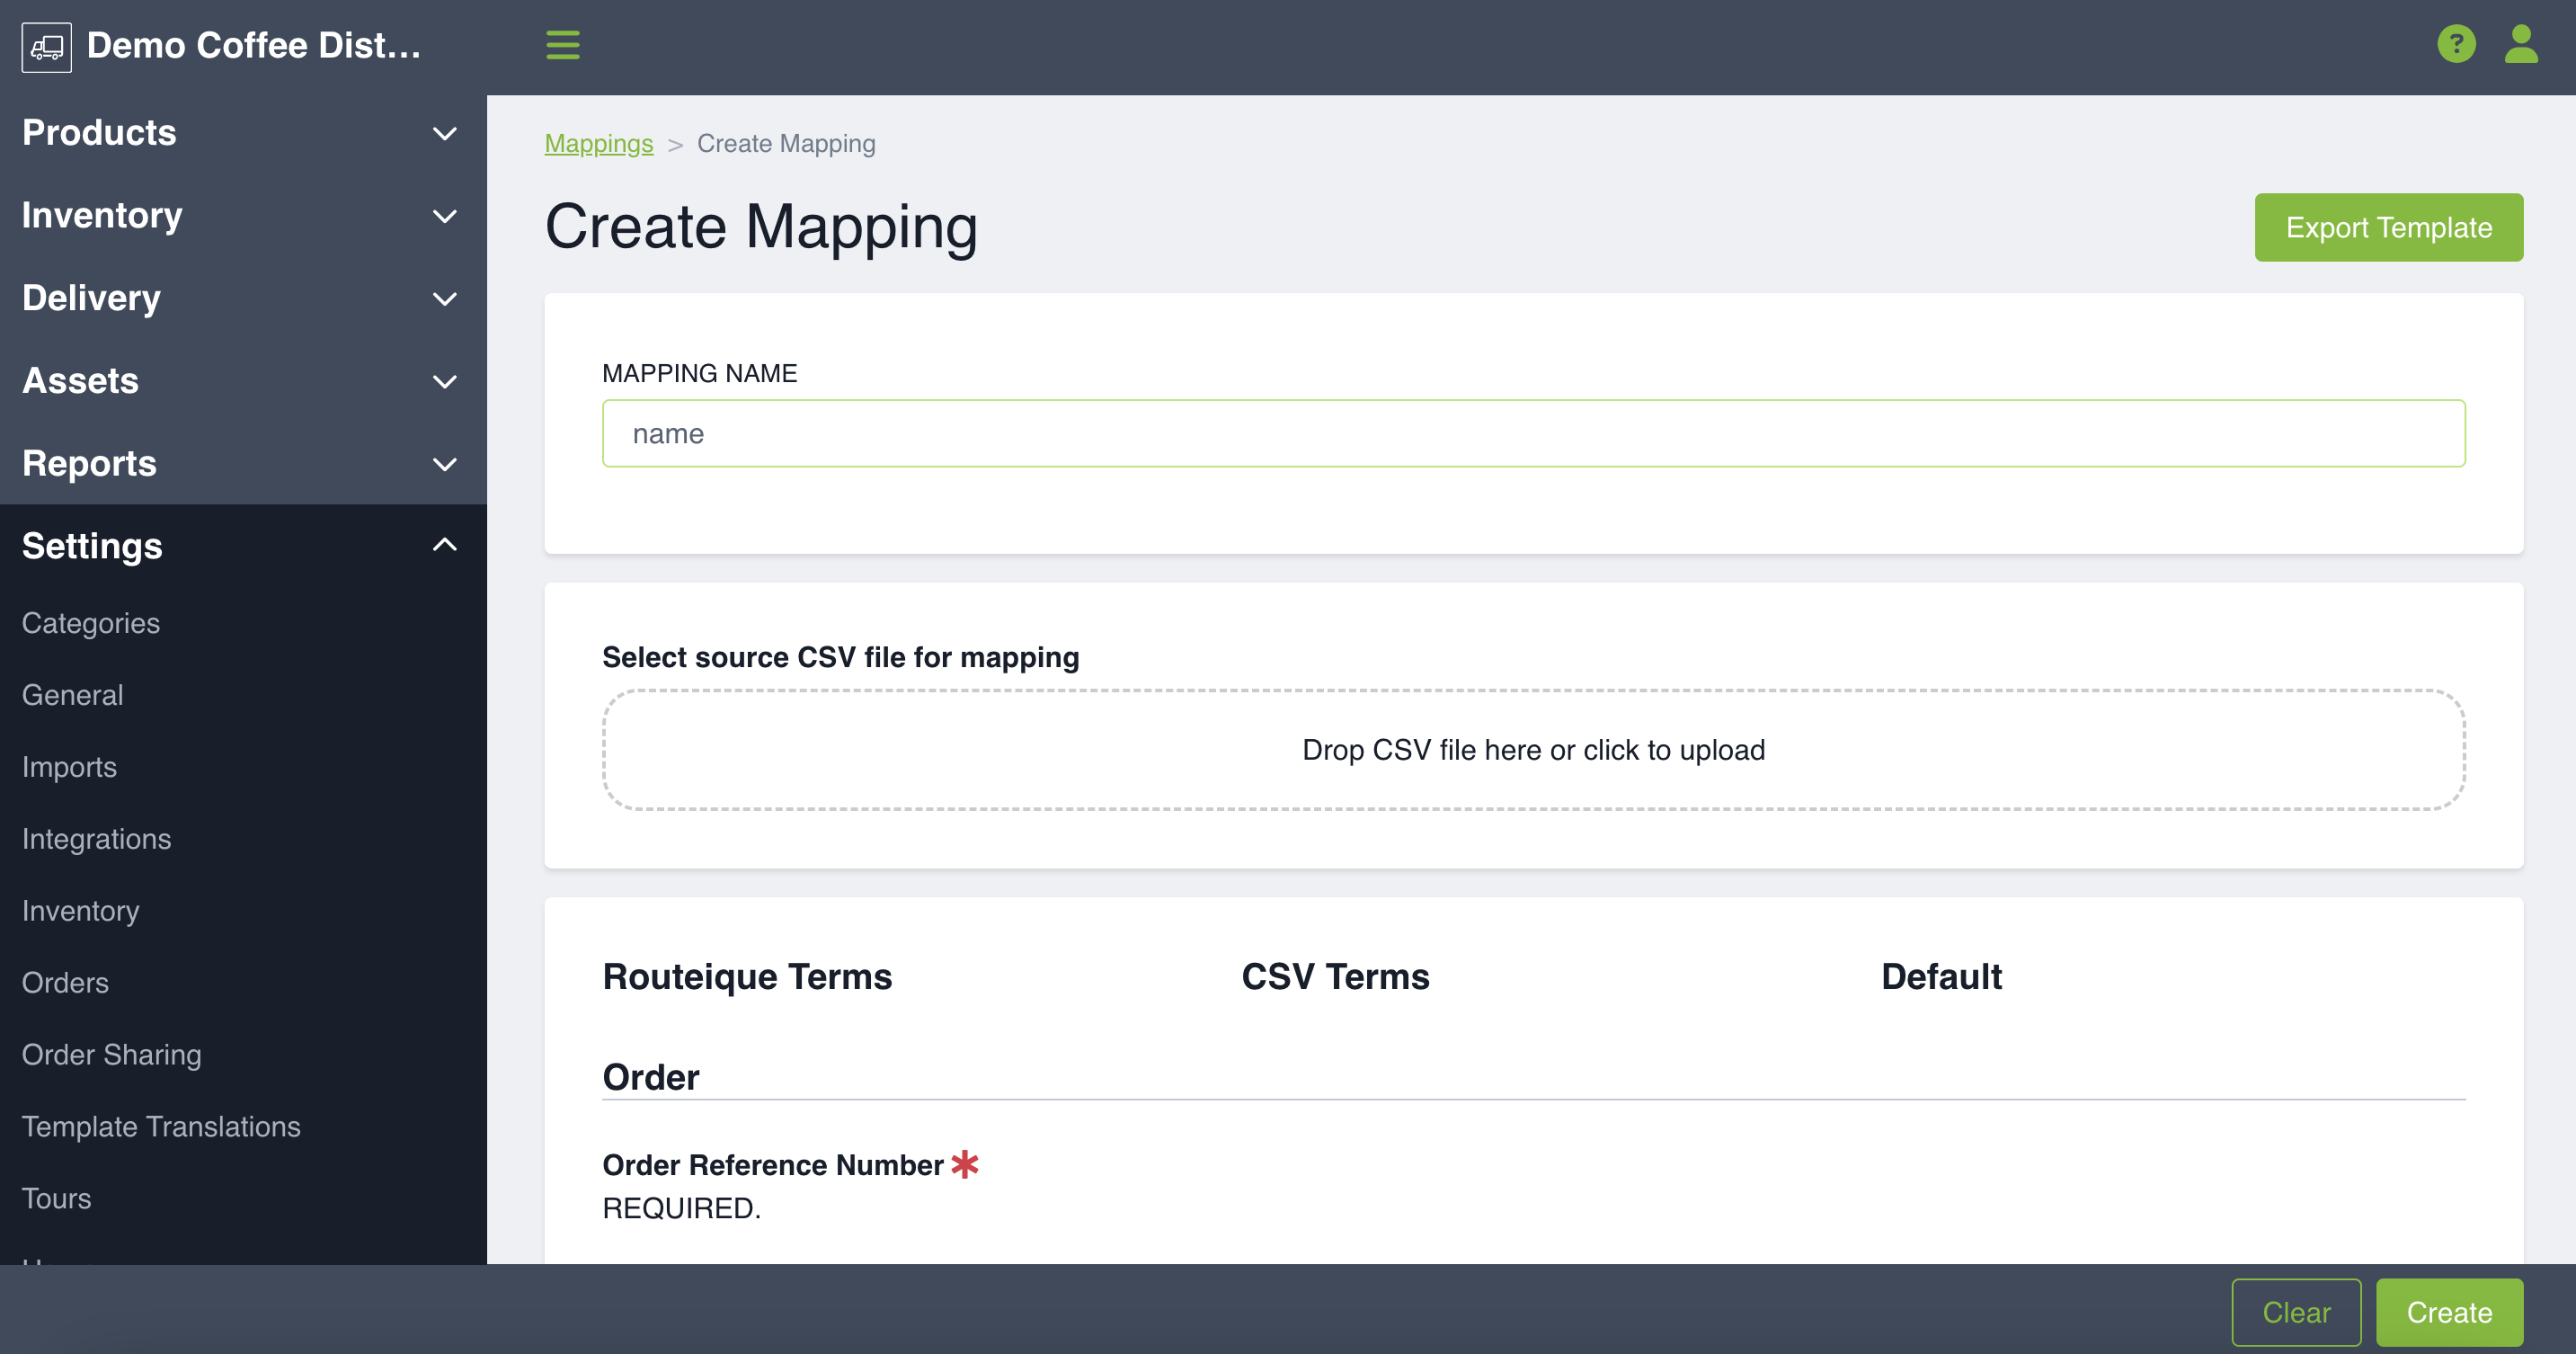
When the file has been uploaded, you can then match your CSV file terms to the terms in Routeique. If the fields are labelled exact, the system should automatically map them. However if it doesn't you can just use the drop down to select the appropriate field - or to change a field that was incorrectly mapped.
The fields that have a red asterisks beside them are required to be mapped in order to have a successful import. All other fields are optional and can be left blank if you don't have them in your file or don't want to import the data.
The Default column on the right can be set to an automatic value if it will always be the same. If you do this, you do not have to include this field in your mapping and the data for every line item will always be imported as the default option you select.
Once your mapping is complete, press Create in the bottom right corner to save it. It will now appear in your list on the search mappings page.
Edit your Mapping
From the Search Mappings page you can edit all saved mappings. Simply click on the Edit button and you will be taken to the mapping page. If you are adding new mapping fields, then you'll need to upload a new file for it to read. If you're just deleting fields you can do so by clicking the 'x' and don't need to upload a new file.

Importing Your Data
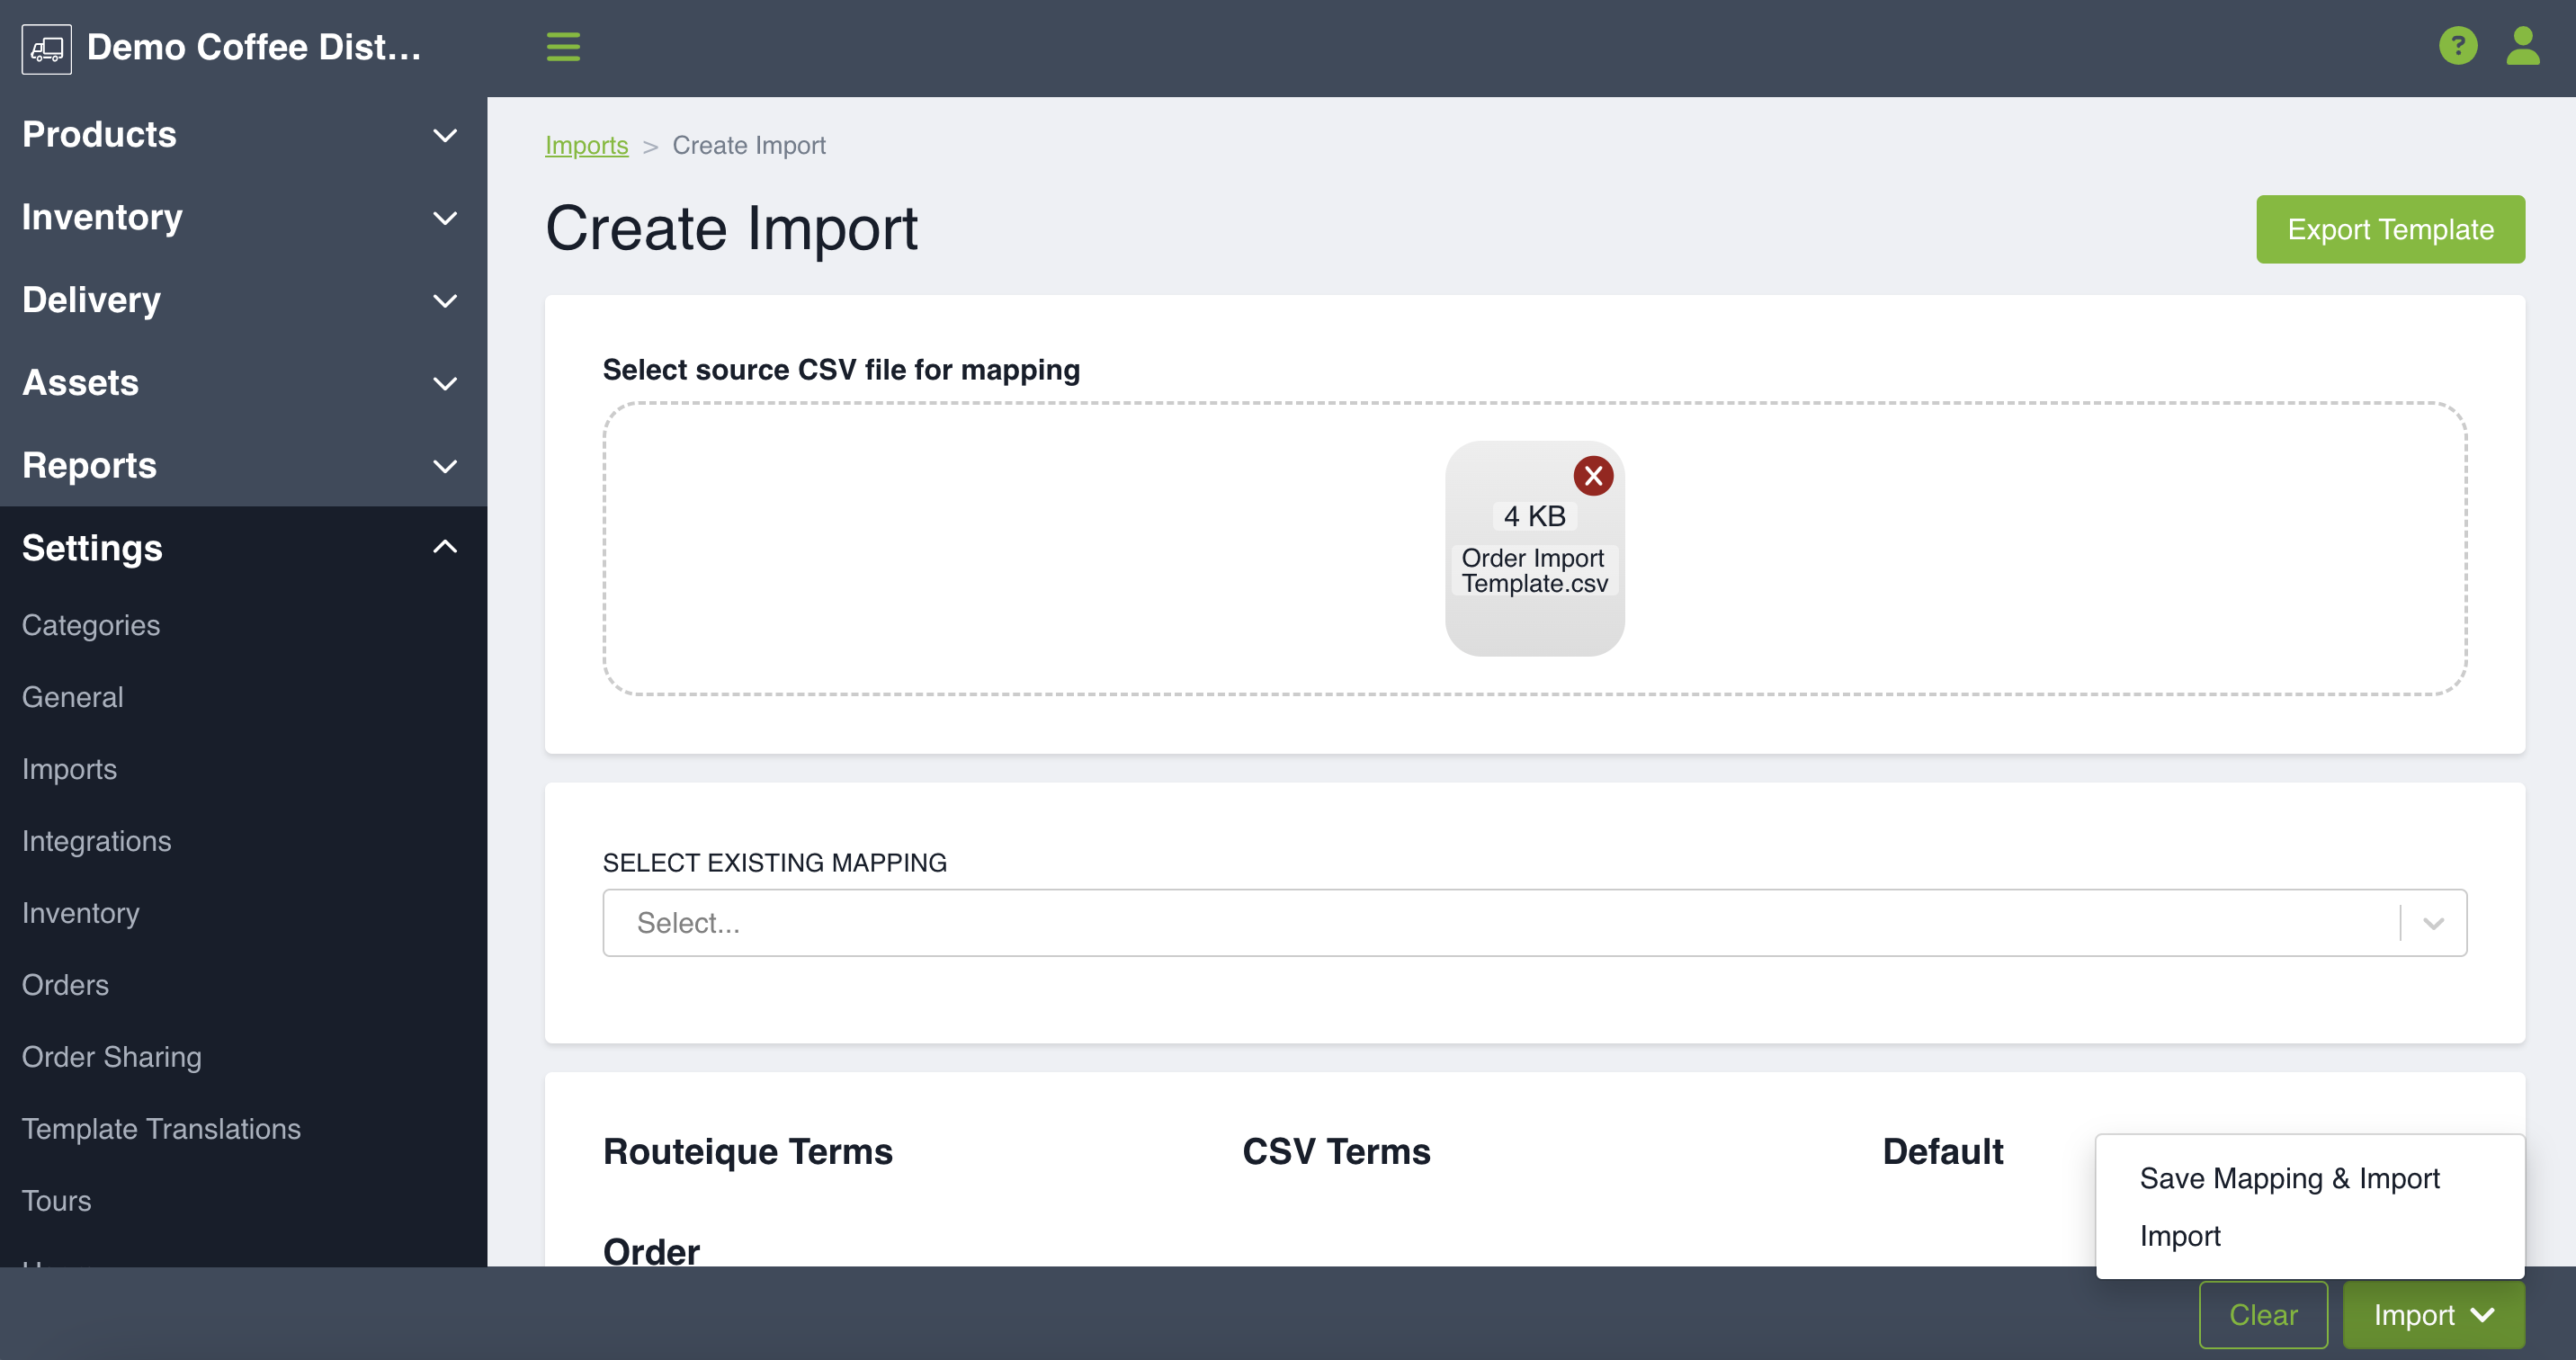
From the search imports page, click on the Import button in the bottom right corner.
A modal will open up prompting you to select your import type, Select the order import type and click Confirm.
Similar to when you created a mapping, you will need to name your import and upload the CSV file with all your data. Select the mapping that you've already created to match the import. As long as the file is the exact same as the one you used to create the mapping, everything will automatically populate in the appropriate CSV Terms and Default fields. If the file doesn't map exactly, you can always make edits on this page. When all fields look correct, click Import in the bottom-right corner. If you click the dropdown arrow next to import you will also have the option to "Saving Mapping & Import" or simply "Import."
You will see a token that your import has been completed.
NOTE: If creating an order import, Service Areas and Assigned Routes need to be set up in Routeique prior to creating your import.
NOTE: Order import will not check inventory levels. You will be able to import orders even if inventory is not available.
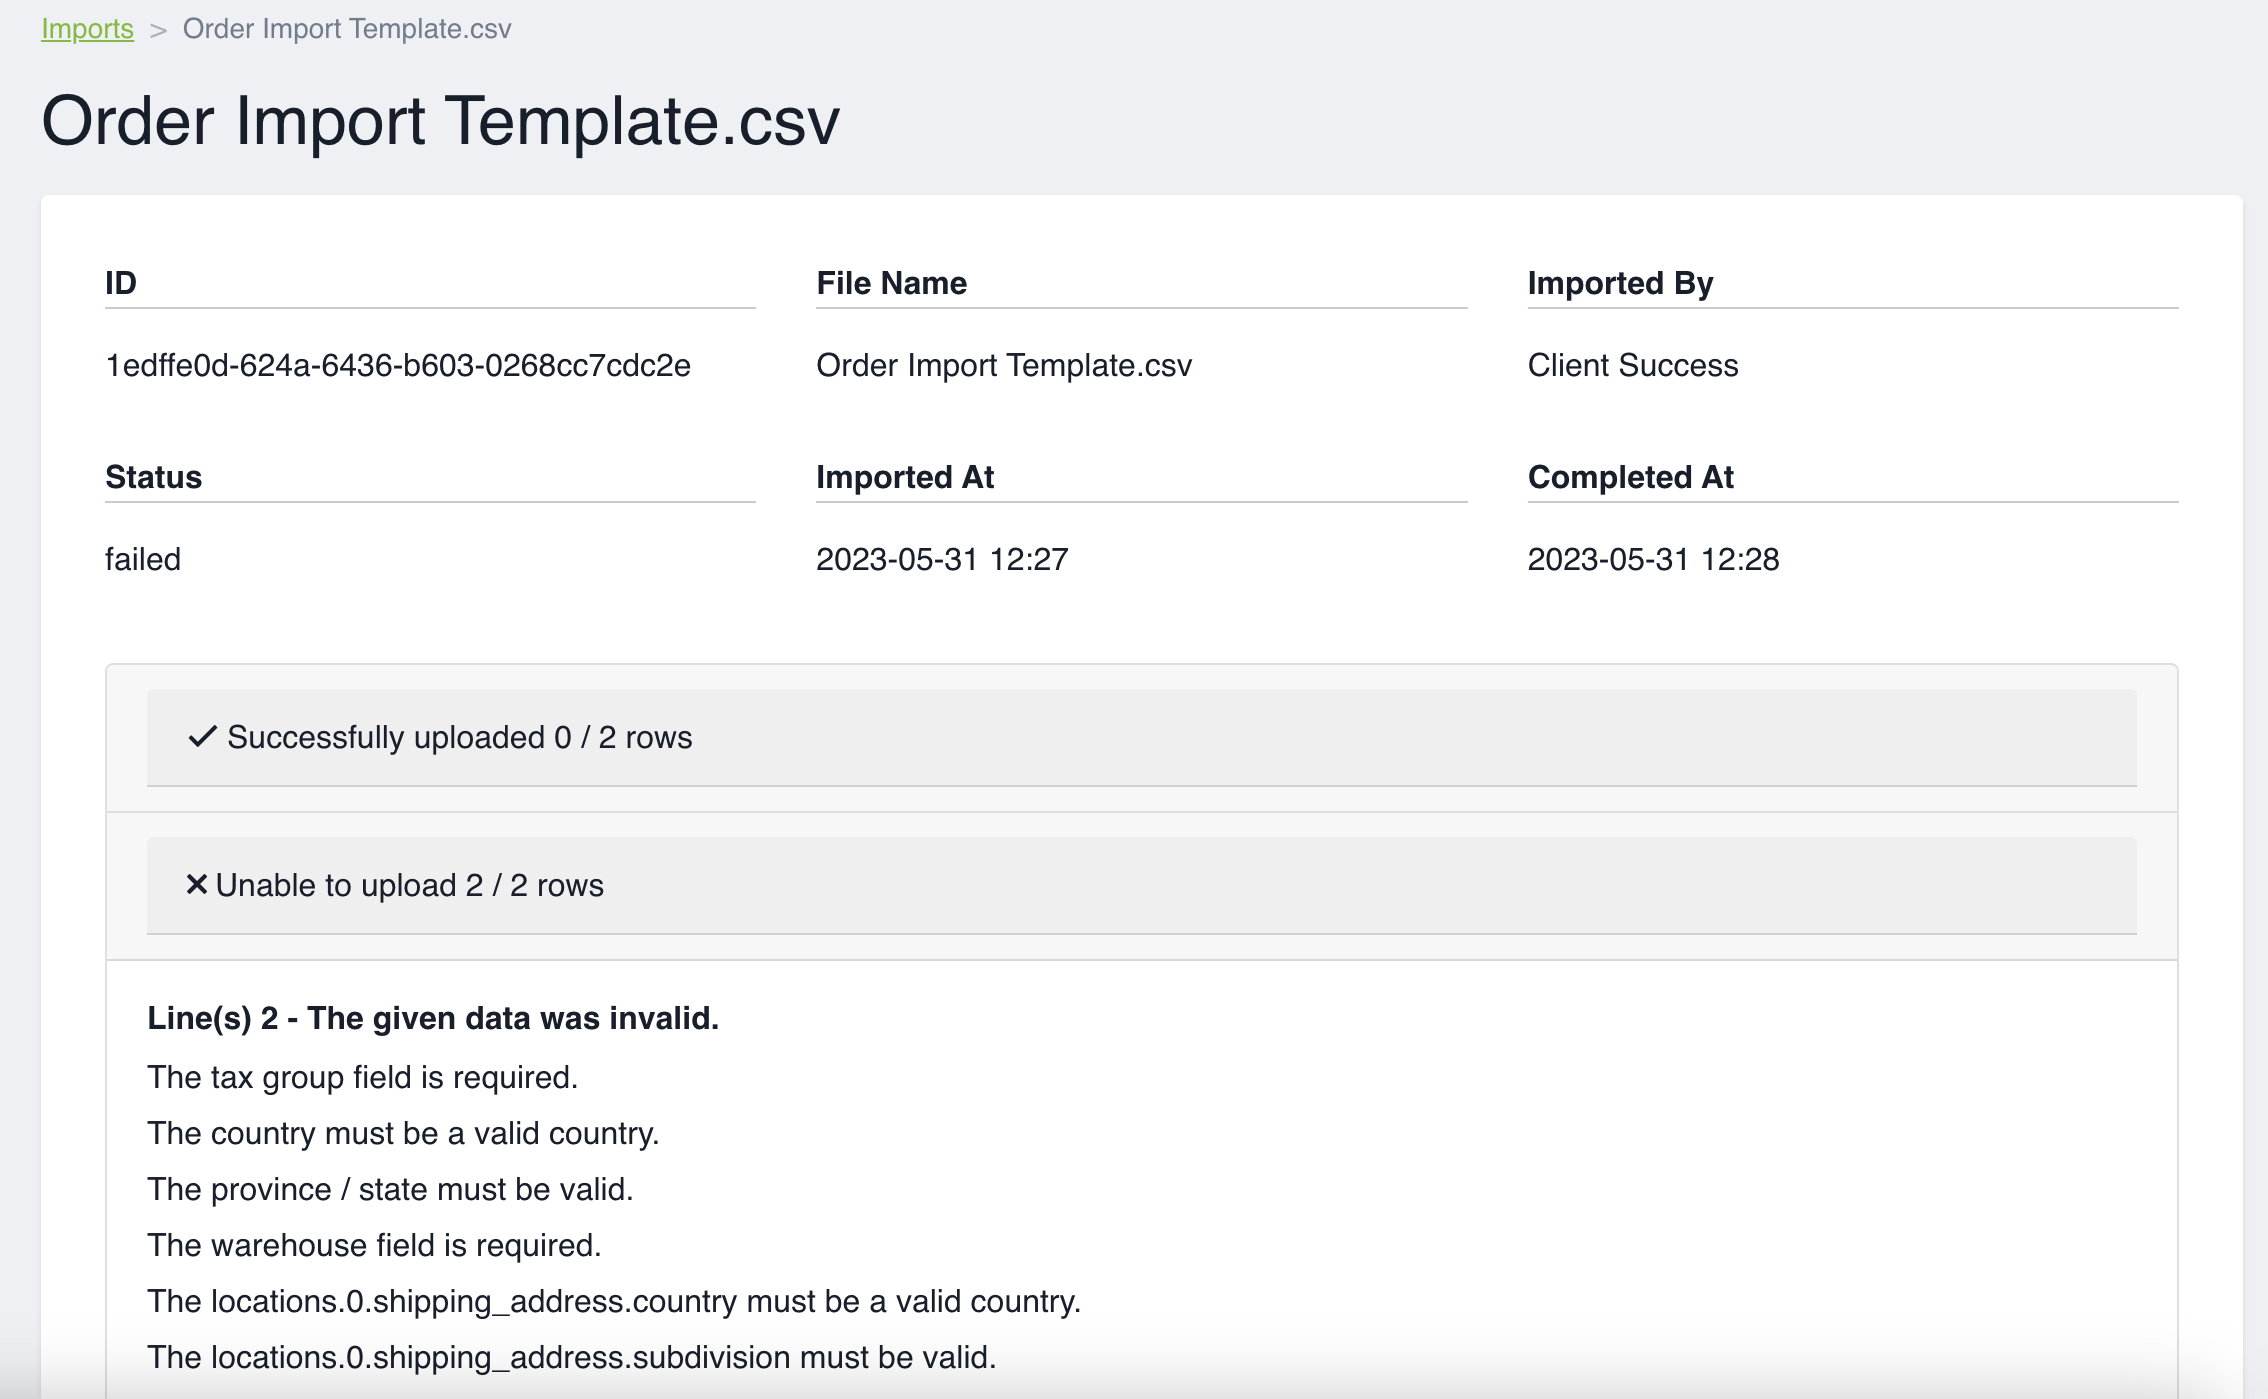
A file will be emailed to you indicating which of your lines were successful on import. If there were errors, you can click on the link in the report to see why those orders were unsuccessful. You can also visit the search import page and click the View button beside your import to see the summary of any errors that occurred.
All successful imported orders, customers or products will then be visible in their respective main Search interfaces.