Once you have put the thought into planning your cycle count you will then move to the next step which is performing the count. This user guide will take you through some tips and tricks to ensure a successful and smooth count!
Getting Started
A cycle count can only be performed on the Routeique Mobile app. All preparation will be done by the warehouse manager in the Digital Control Tower but when it comes to physically counting, this will be done in the app on the warehouse floor and in real time!
To begin, make sure you have the latest version of the Routeique Mobile App dowloaded from your Apple App store or Google Play Store.
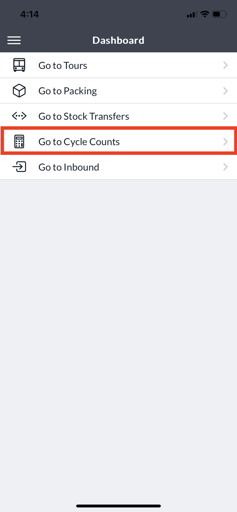
You will login with your given credentials and then you will see your Dashboard where you will click Go to Cycle Counts.
On the Cycle Counts page you will be able to search in the open field above by entering the Cycle Count ID or Reference ID. You may want to make the Reference ID something easy to remember or have the date of the count for instance so you can easily search it. You can also search by clicking additional filters and search by the cycle countID, Reference ID, Warehouse or the state of your cycle count. The last way to search is simply by scrolling through the table below.
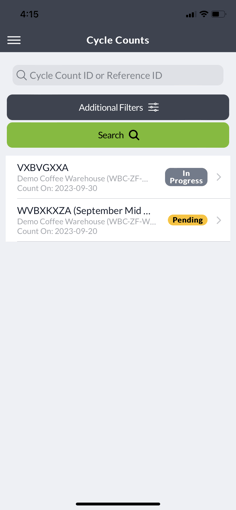
You will only be able to count or make changes to a count that is set as "Pending" or "In Progress."
Performing your Cycle Count
Once you are ready to begin your count and have selected it, you will see a details page that includes the following:
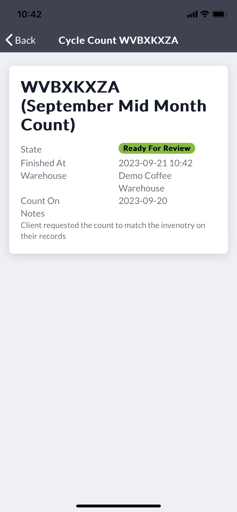
- State: Either pending or in progress
- Created at
- Count on - the date the count is scheduled for
- Warehouse - this can not be changed
- Notes - Any relevant notes (this is optional)
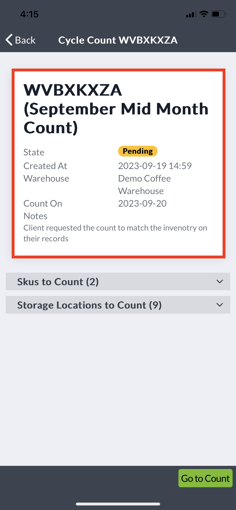
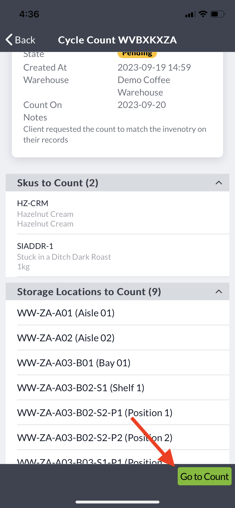
You will then also see the SKUs that have been selected to count and the storage locations you previously selected to count.
If all of the information listed looks correct you will click Go to Count in the bottom right hand corner.
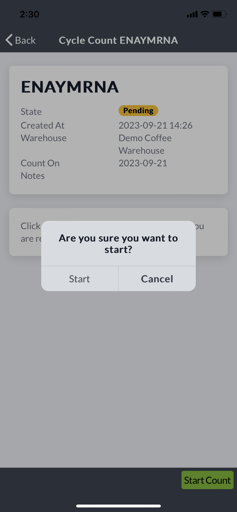
You will then once again see the Cycle Count details including the state, warehouse, created at date and time, count date and any additional notes. You will then click Start Count if you are ready to proceed. It will then prompt you to ensure you are ready to click Start you will then click either Start or Cancel.
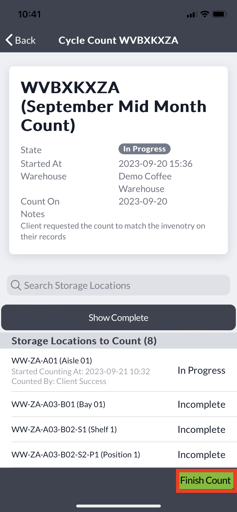
Once you click Start you will see the list of locations to count. Once you have arrived at the particular location in the warehouse you will click on the location in the mobile app. Each location should currently say "Incomplete" until you begin counting.

Click into the location you are in to begin counting. Note that only SKUs selected for SKUs to count will appear here. To count the SKU you have two options. You can either scan by clicking the scan button or you can click the pencil icon and you can search for your SKU. If there is nothing in your selected location you will click Mark as Empty. Make sure to add the quantity for your particular SKU by using the "+" button. If you are tracking lots, all lots ever associated with the particular SKU will show up in the list of SKUs. The sell by date can be used to add additional context.
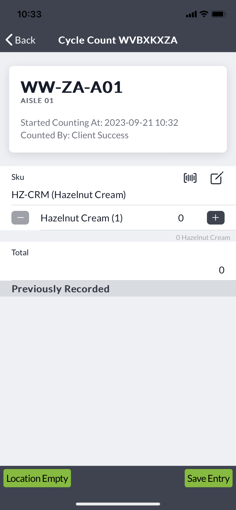
Once you have finished counting a location you will click Save Entry. You can toggle between showing complete locations which have been counted and hiding locations based on what you prefer.
Once you have counted all of your SKUs for a location you will click Finish Count. After clicking Finish you can not return to that particular location to count.
If you need to recount a location for any reason, you can swipe left when in the main table to clear the location and this will bring you to a modal prompting a reason code and any relevant notes. You may want to include the reason for the recount in this section.
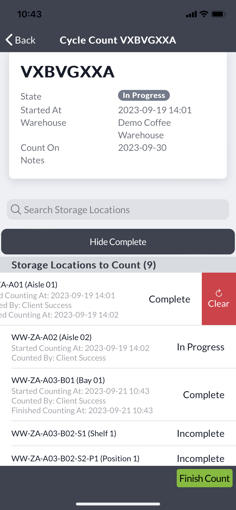
Once you have counted your locations, click Finish Count. You do not need to count all locations in order to finish the count but your count will now be put into Ready for Review Status and you will no longer be able to make any changes.