Goods Receipts allow for managing and receipt of inventory from your suppliers. Learn how to manage and receive inventory using a Goods Receipt in Routeique™.
There are two ways to generate a Goods Receipt in Routeique. One is generated automatically upon confirmation of a Purchase Order, and further instructions can be found here. Alternatively, a standalone Goods Receipt can be created when you are receiving product that was not ordered via a purchase order. You can create a Goods Receipt by navigating to Inventory on the left-hand side menu, then selecting Inbound. This will bring you to the main page for all Purchase Orders and Goods Receipts. From here, select the green button in the upper-right hand corner labeled Create, and then click on Goods Receipt.

Creating a Goods Receipt
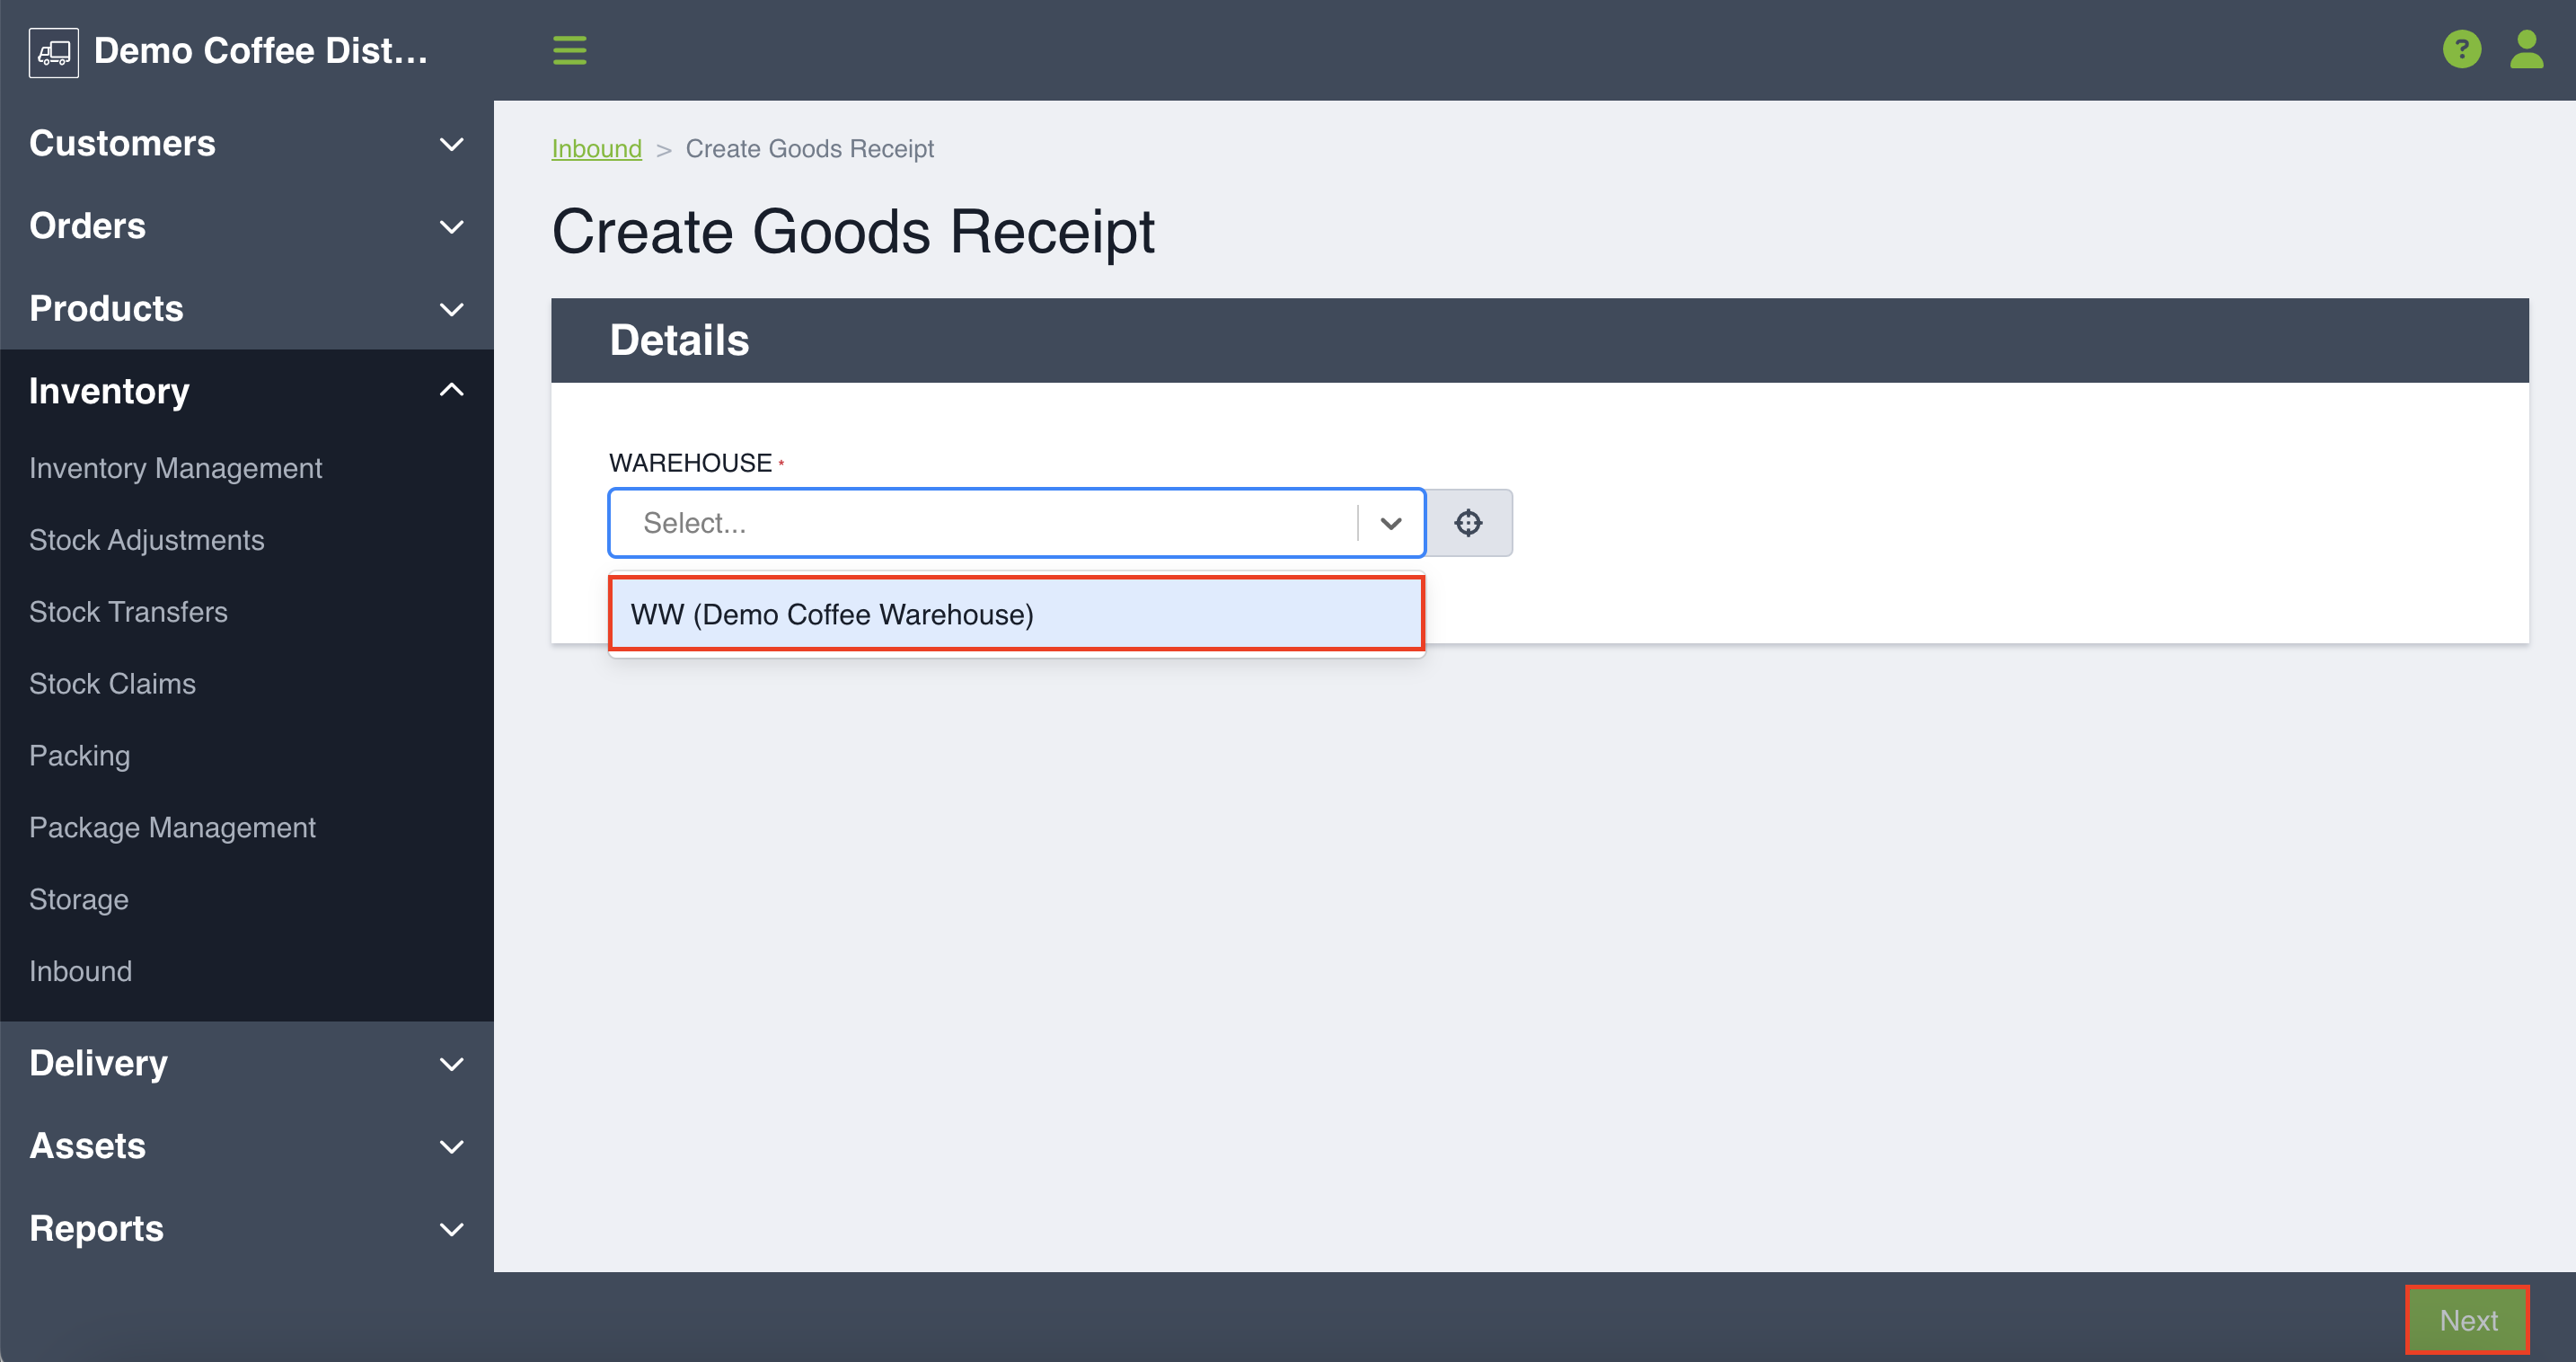
To begin, you will be asked to select your warehouse, which is a required field. Once you have filled your desired warehouse, click Next.
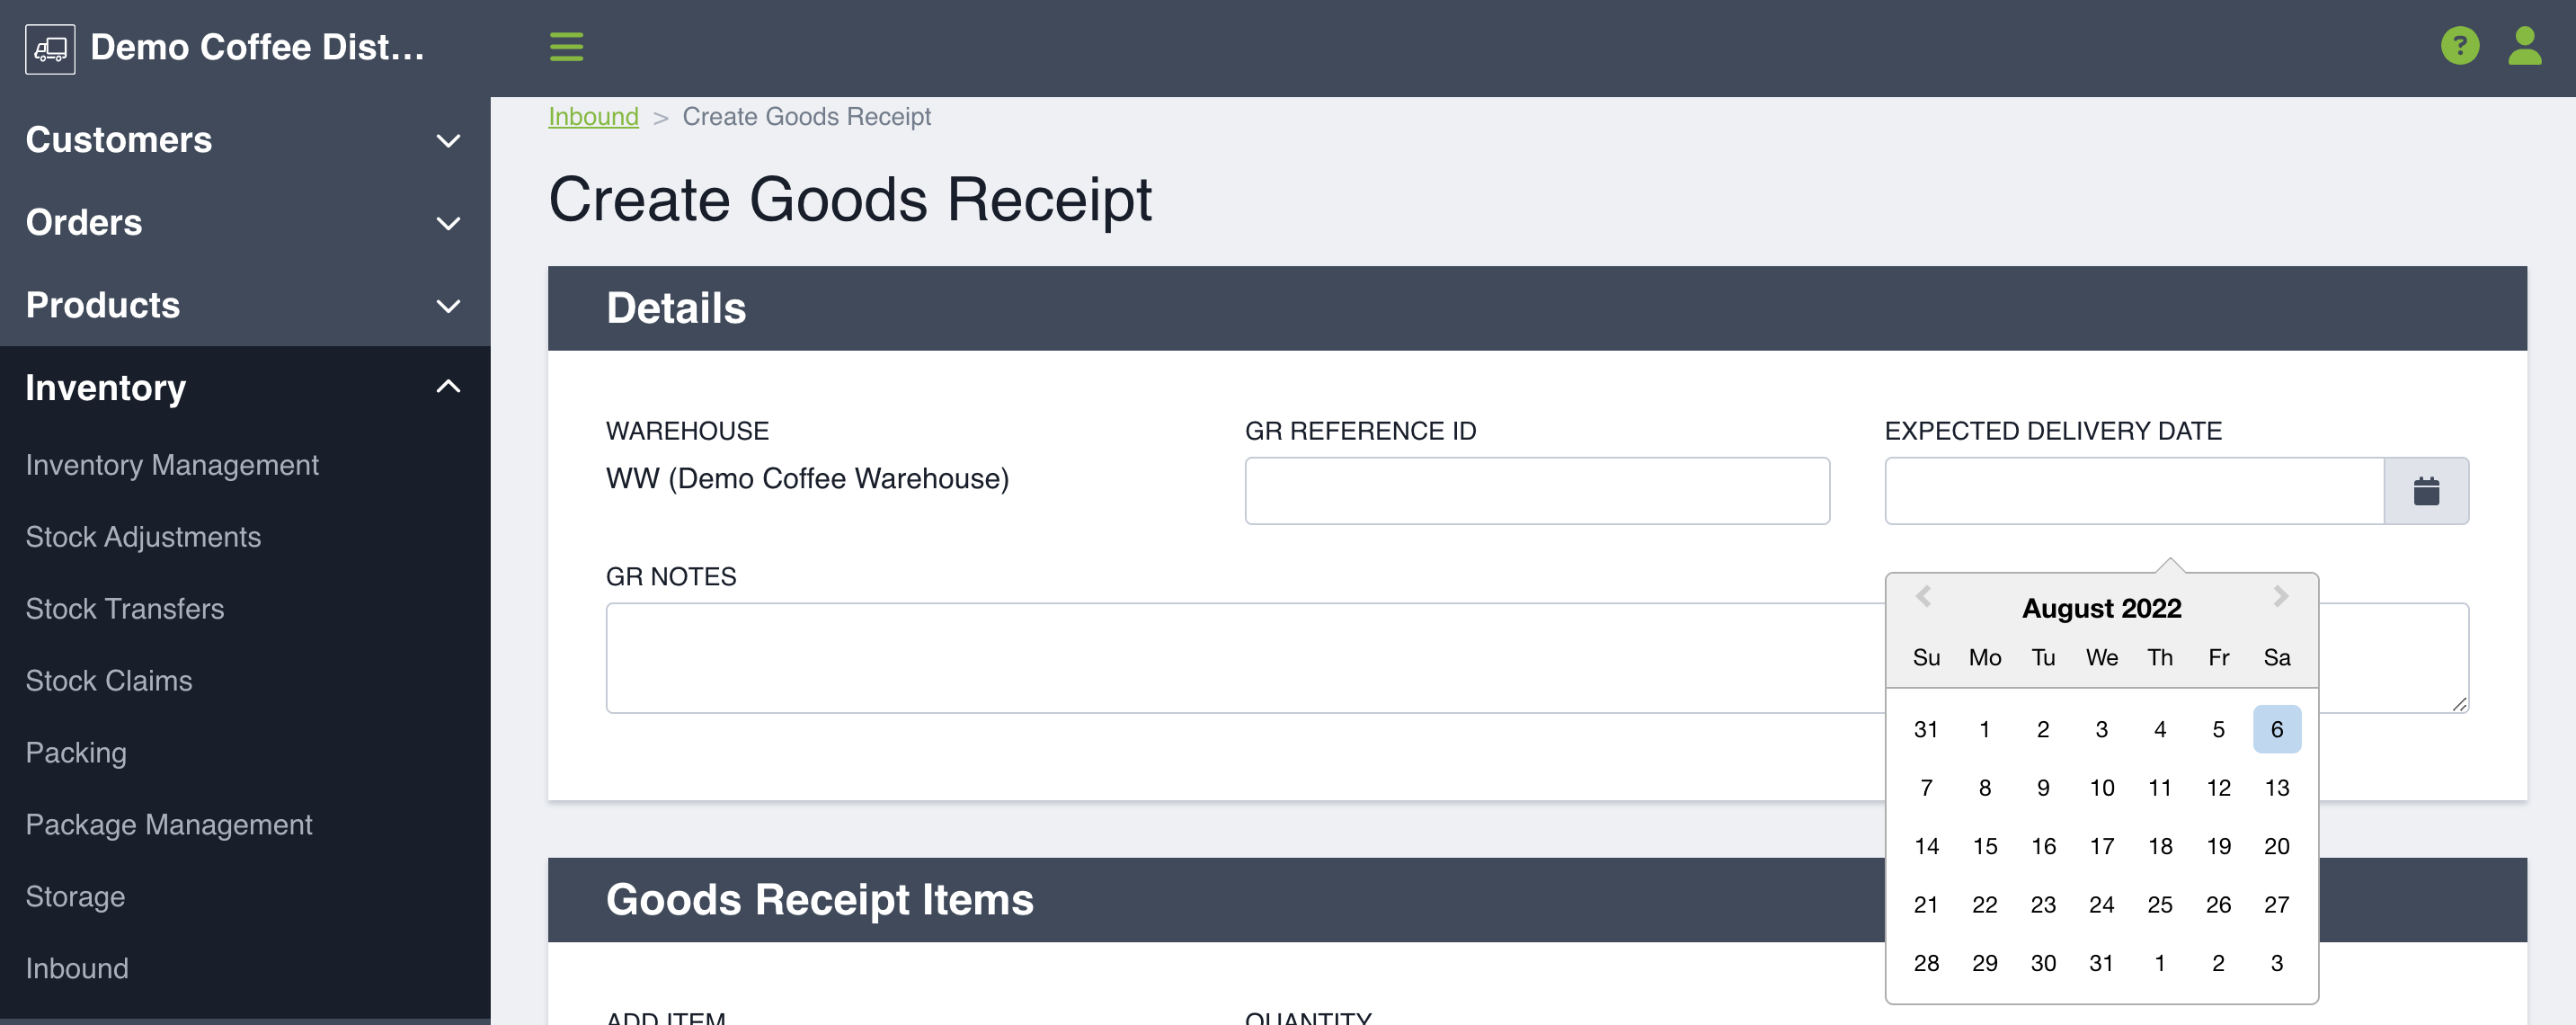
You will be brought to a page outlining your Goods Receipt Details. Your warehouse choice is locked in. You can then fill out the following fields to add additional context:
- Requested Delivery Date (Mandatory Field): Use the calendar to select the requested delivery date for your Goods Receipt.
- GR Reference ID (Optional): Create a reference idea using letters, numbers or any special characters. This ID does not need to be unique.
- GR Notes (Optional): Any accompanying notes you would like added. This note is internal and will not show up on the Goods Received Note (GRN).
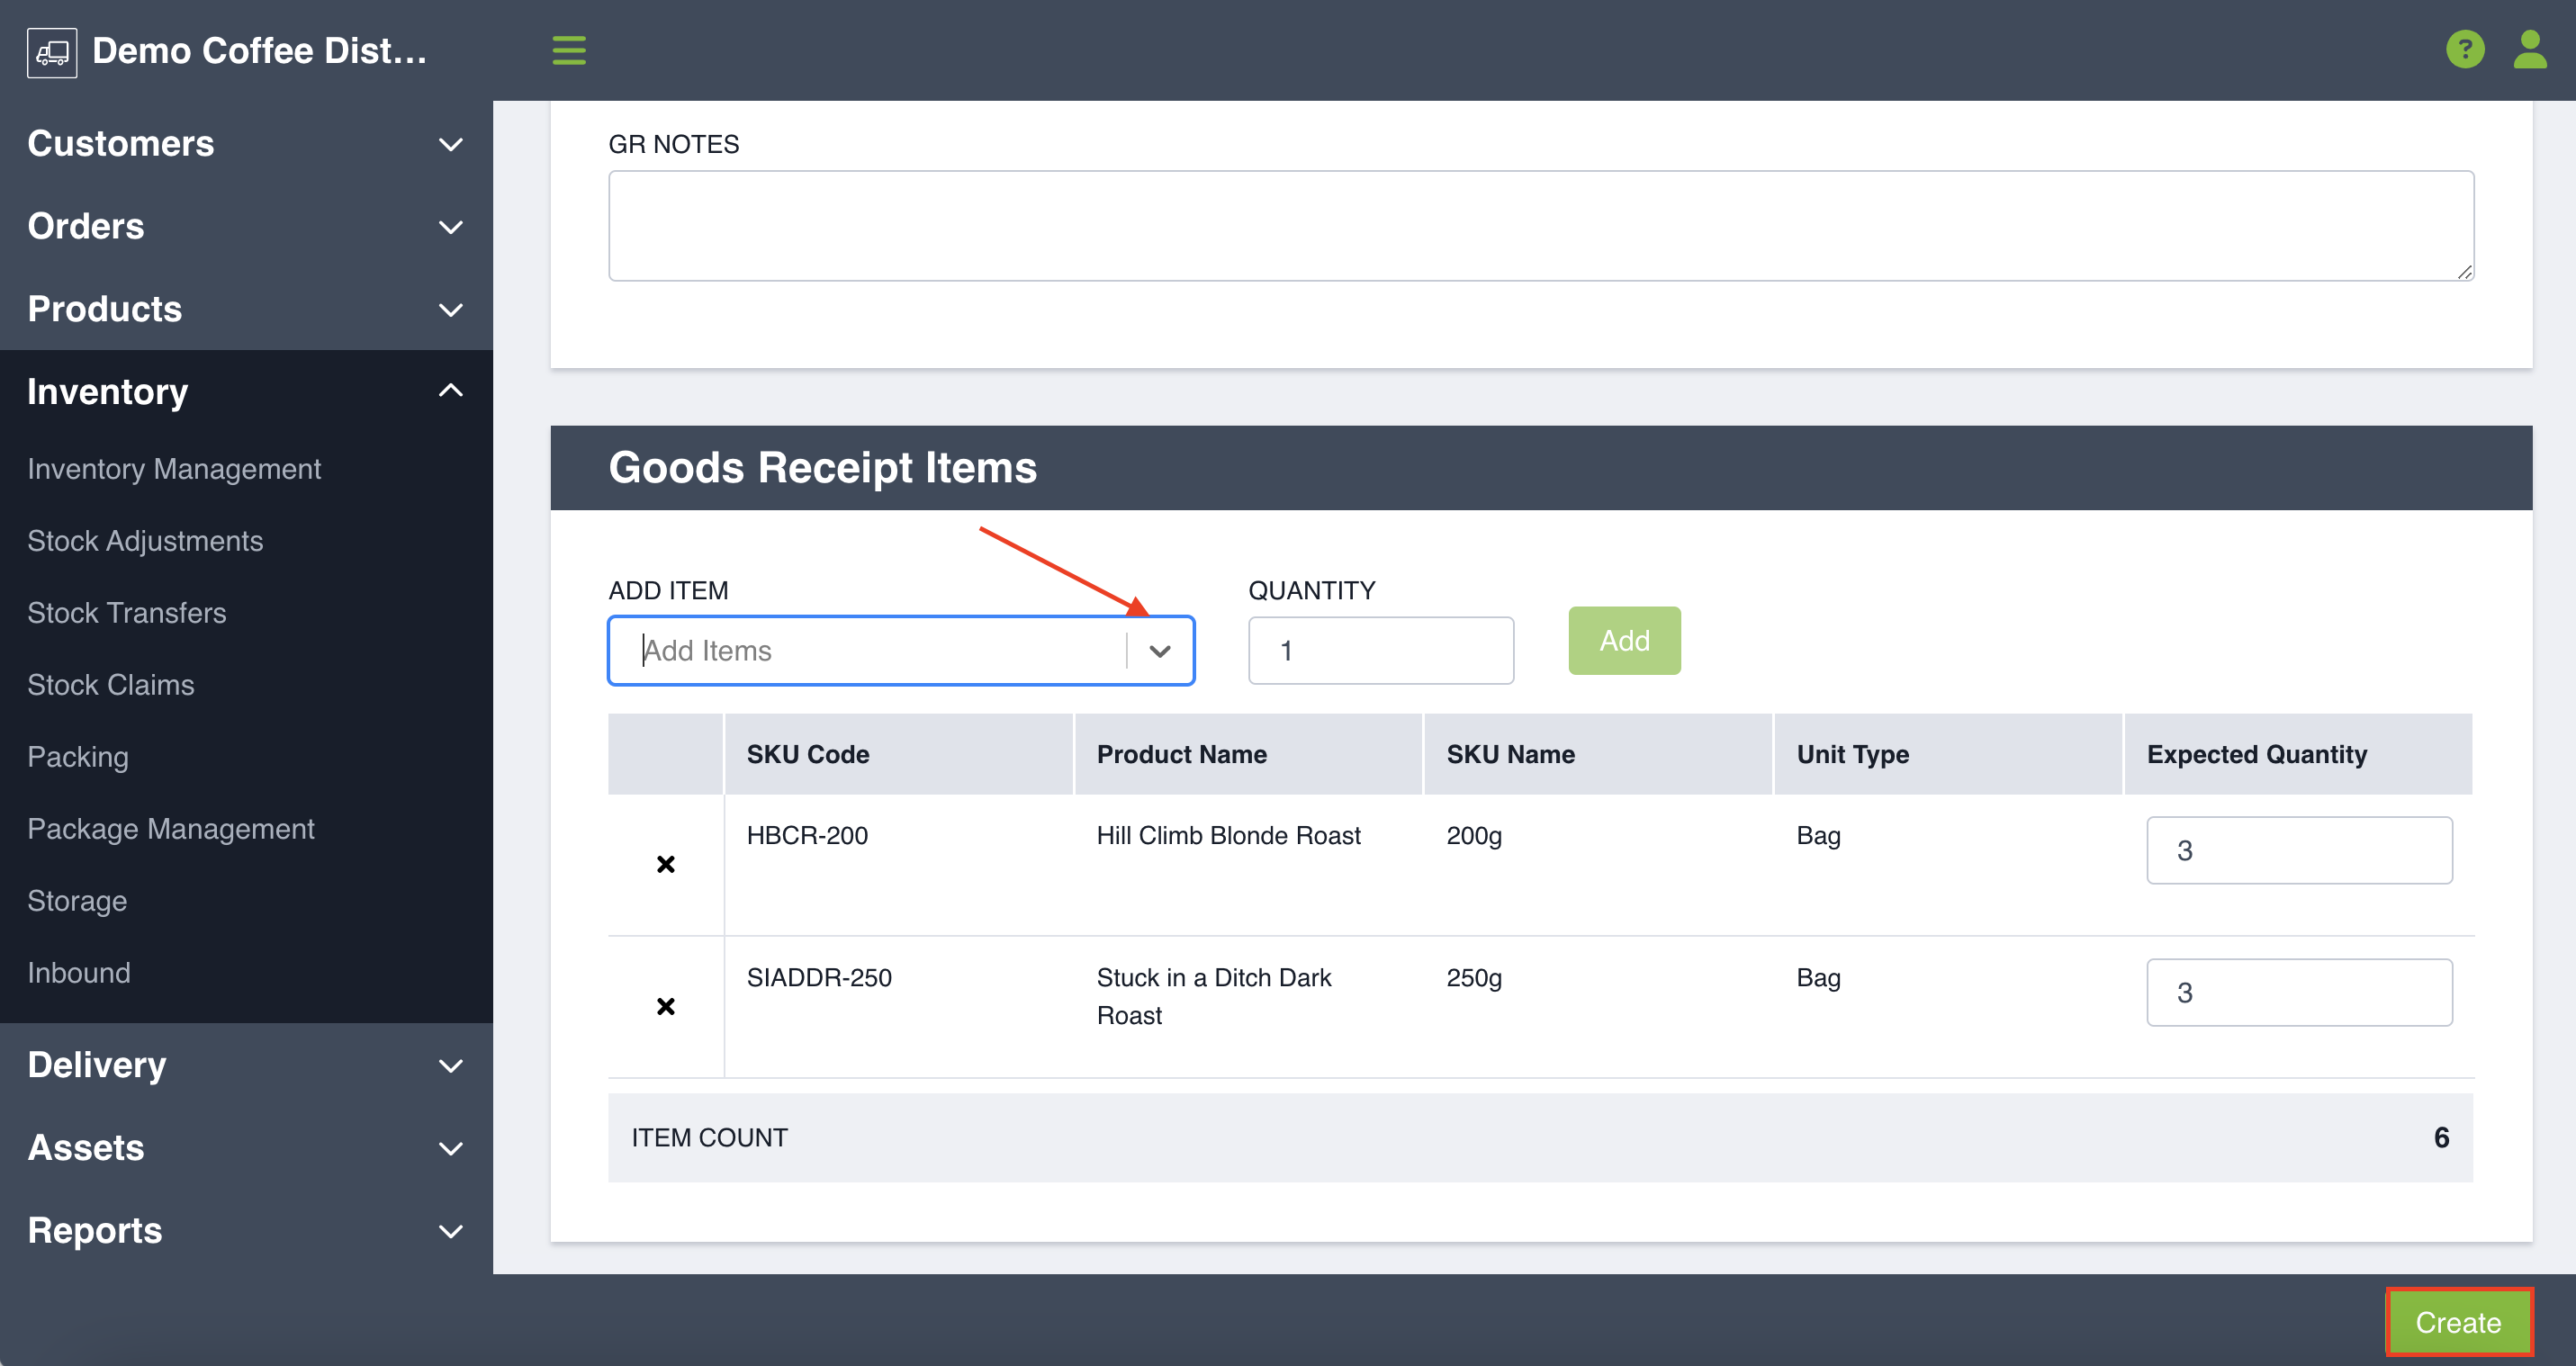
From there you can add items to your Goods Receipt. Use the dropdown or typeahead feature to select your desired SKU. All SKUs, except services, will be available to add to a goods receipt. Enter the quantity requested and then you will click Add. If you need to remove an item, simply click the x symbol next to the item's SKU code. Changing the desired quantity after adding an item to the Goods Receipt, simply type in the correct quantity into the field, or use the arrows to adjust the quantity up or down. Once you are satisfied with items added click Create in the bottom right hand corner.
Your Goods Receipt will then be marked as Pending and will be in the your search table on the main Inbound page.
You can add supporting documents to your Goods Receipt by editing the created Goods Receipt.
A typical Goods Receipt will move through 4 different states including: Pending, In Progress, Received, and Closed. A Goods Receipt can also be Refused. We will review the various states.
Receiving a Goods Receipt
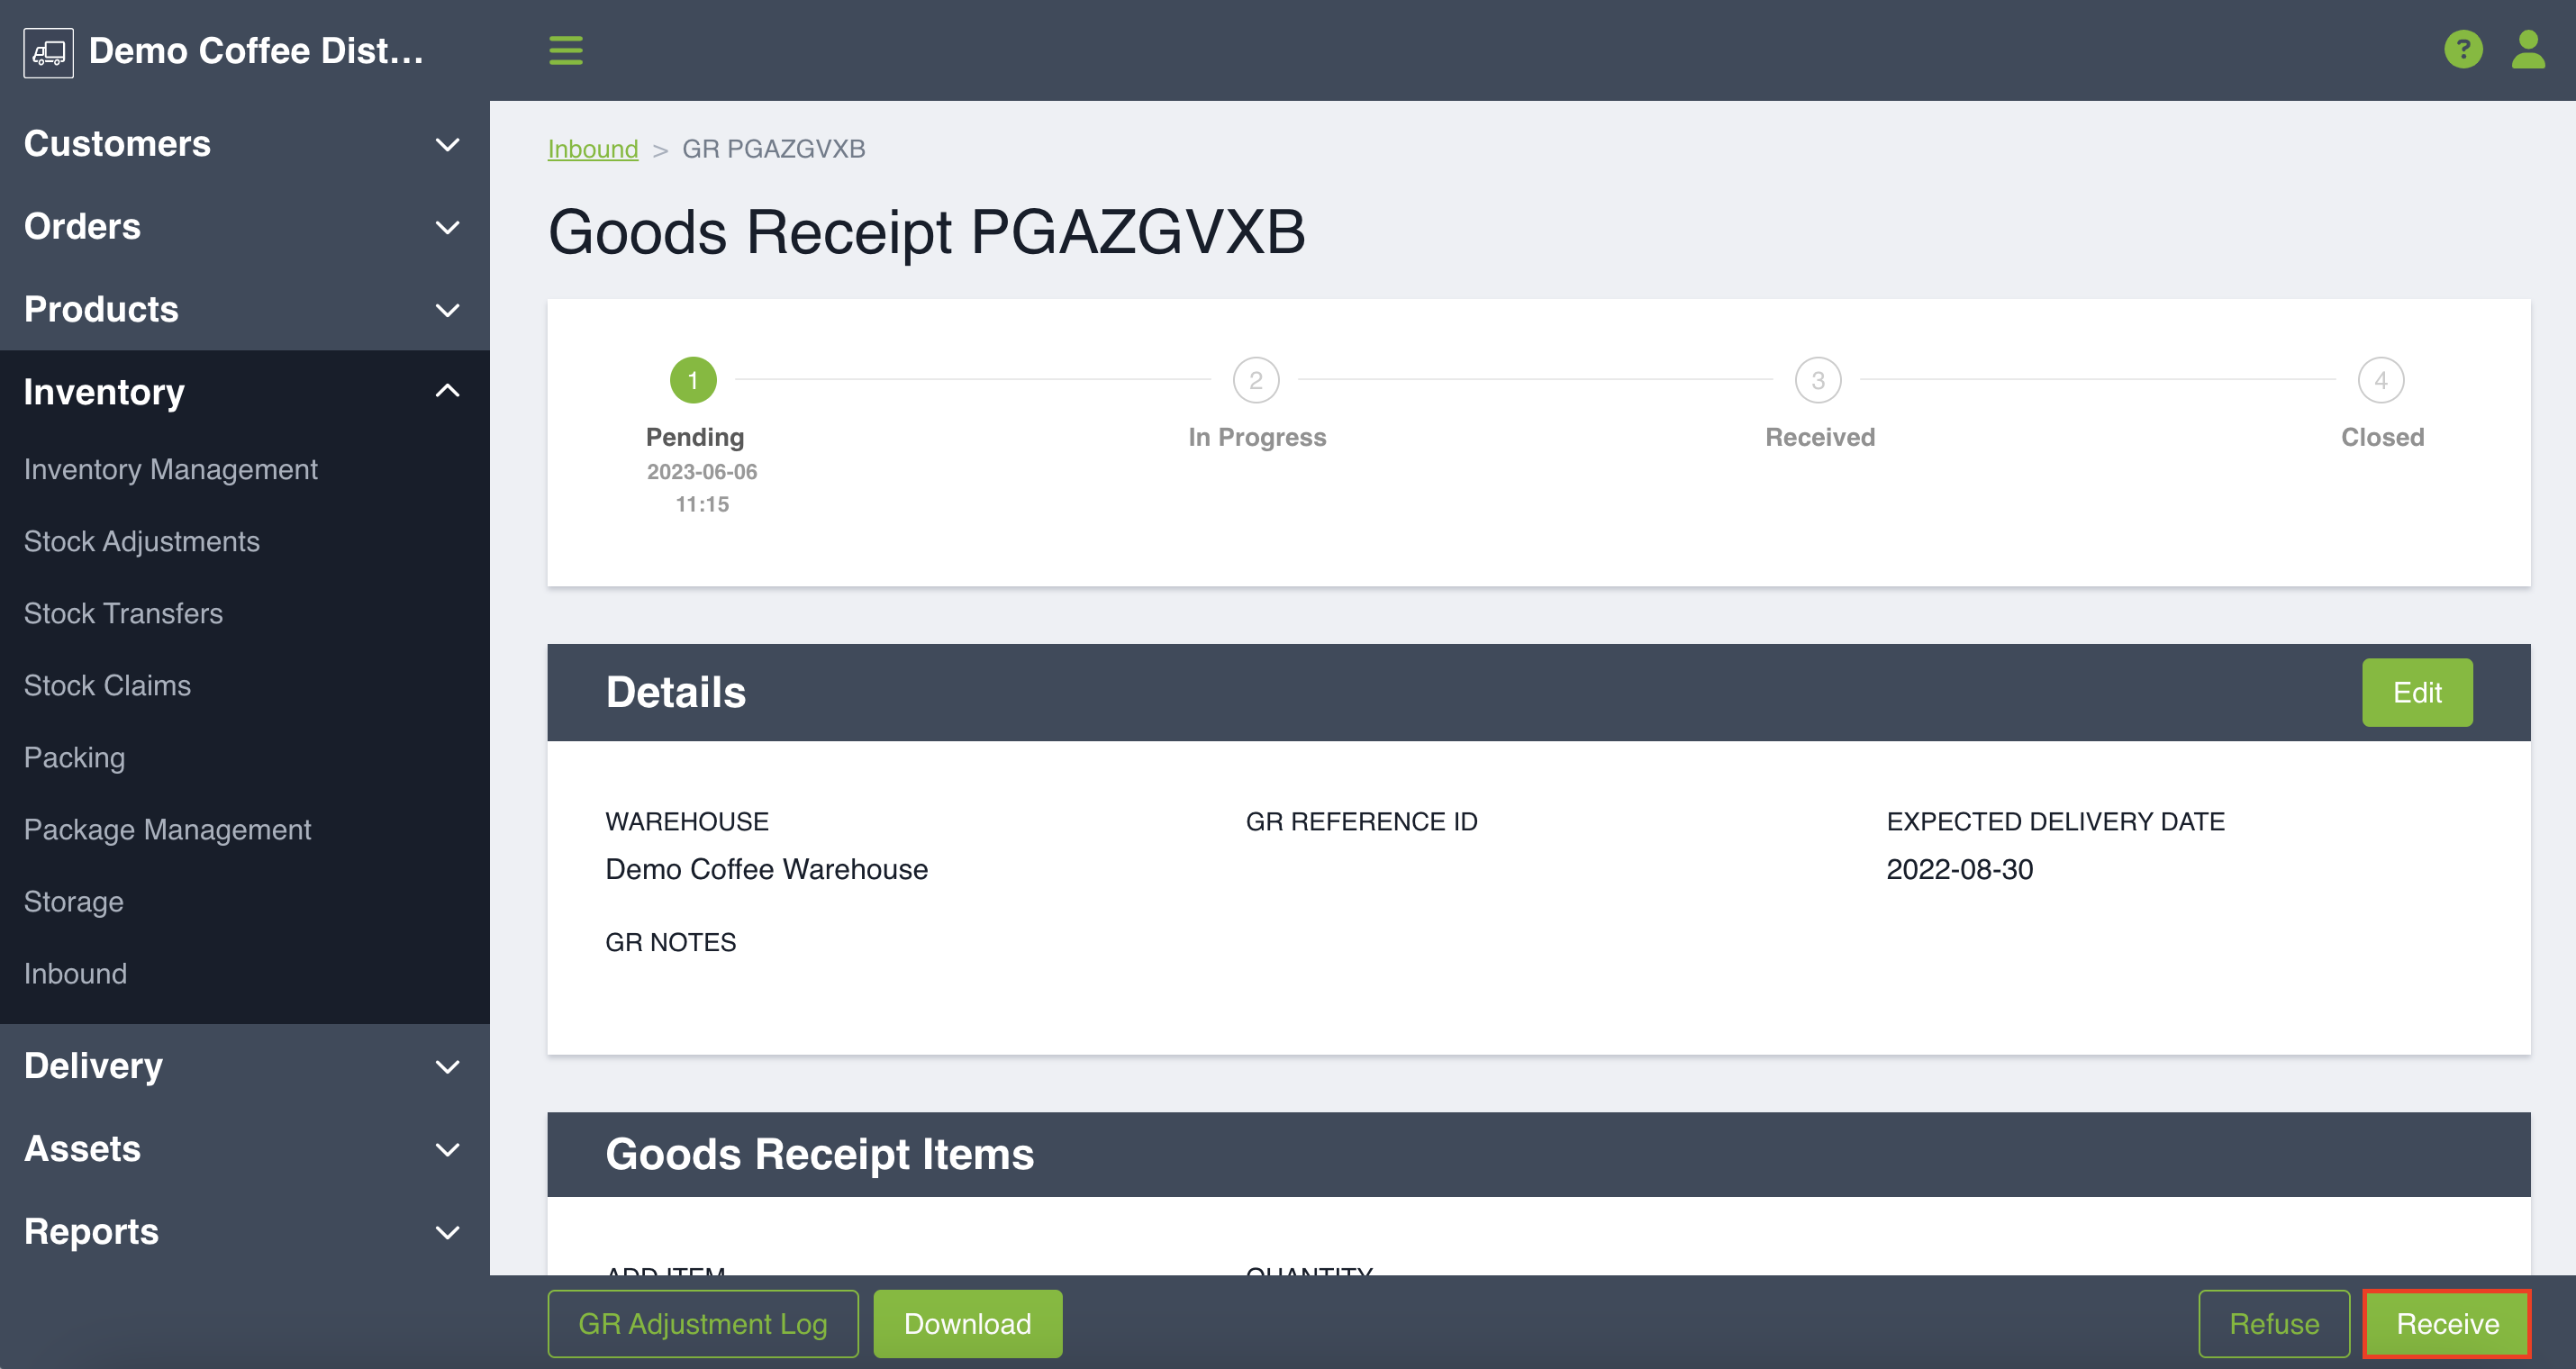
From the Goods Receipt tab on the Inbound page, select the Goods Receipt you want to receive from the table below. This will bring you to a summary page for your selected Goods Receipt.
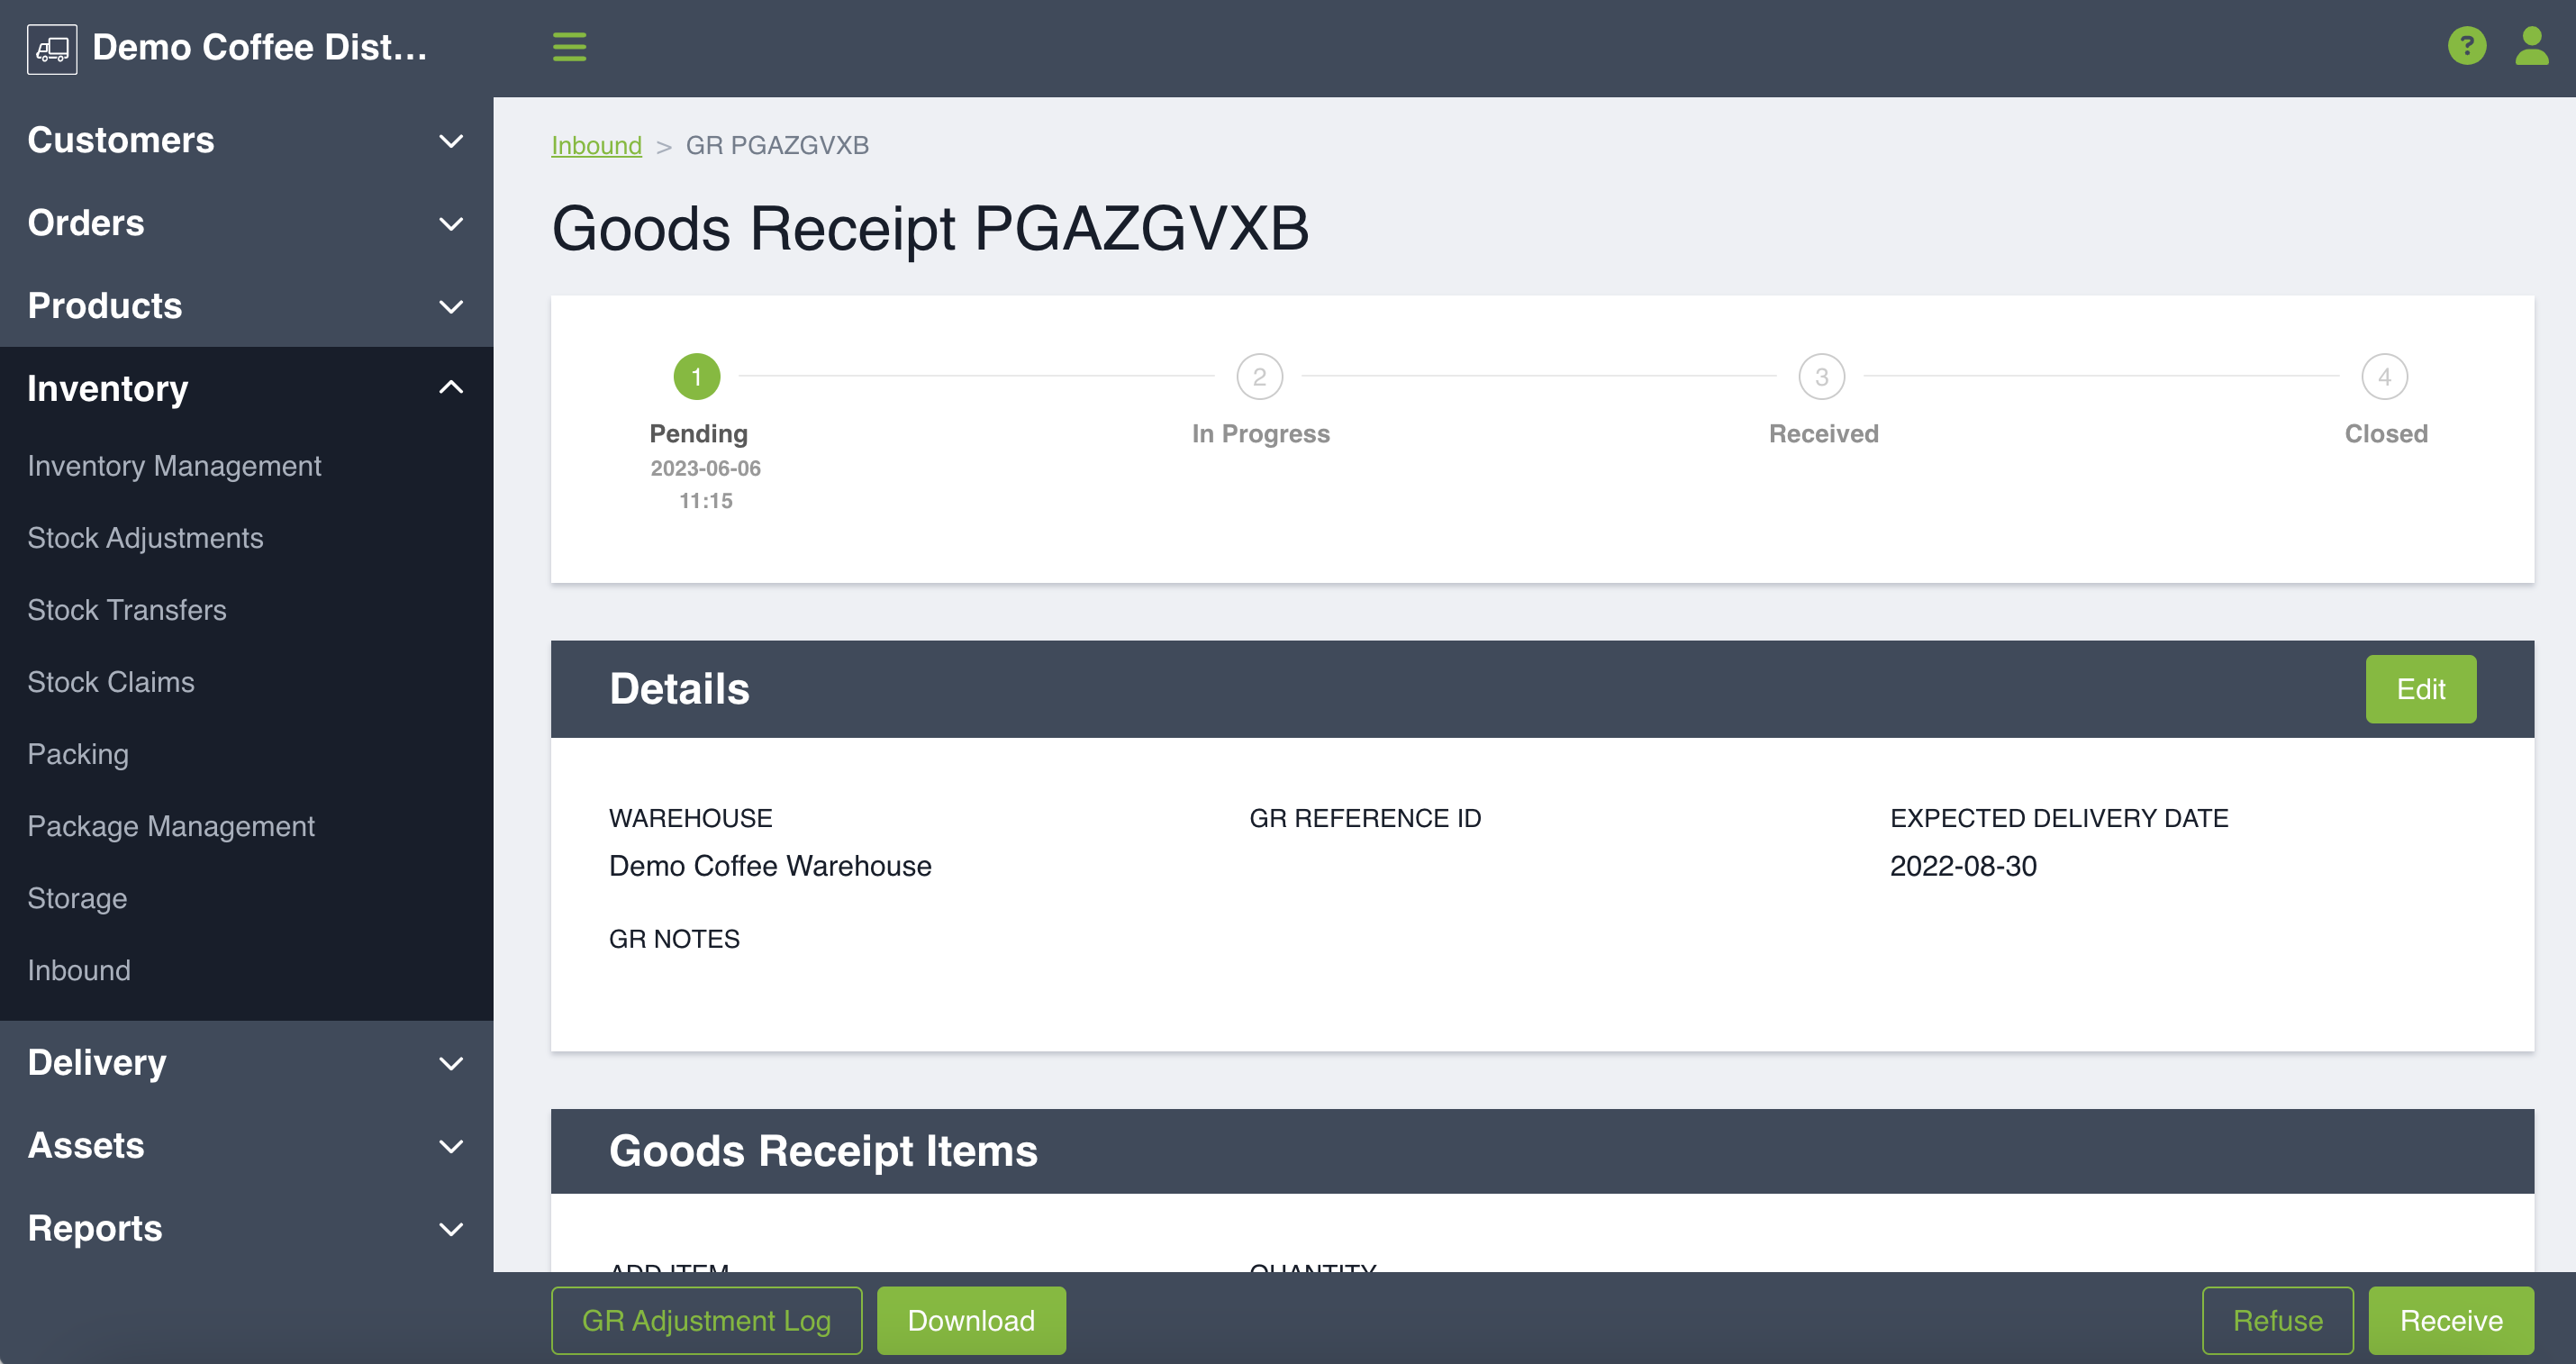
Please note you may still edit details (except Warehouse, which is fixed), items and quantities at this point. Once you start receiving, though, no more edits can take place. You may also download the Goods Received Note (GRN) by clicking Download in the bottom-left corner. When you are ready to receive your items, click on the green Receive button in the bottom-right corner.
This will bring you to a Receiving page for that particular Goods Receipt.

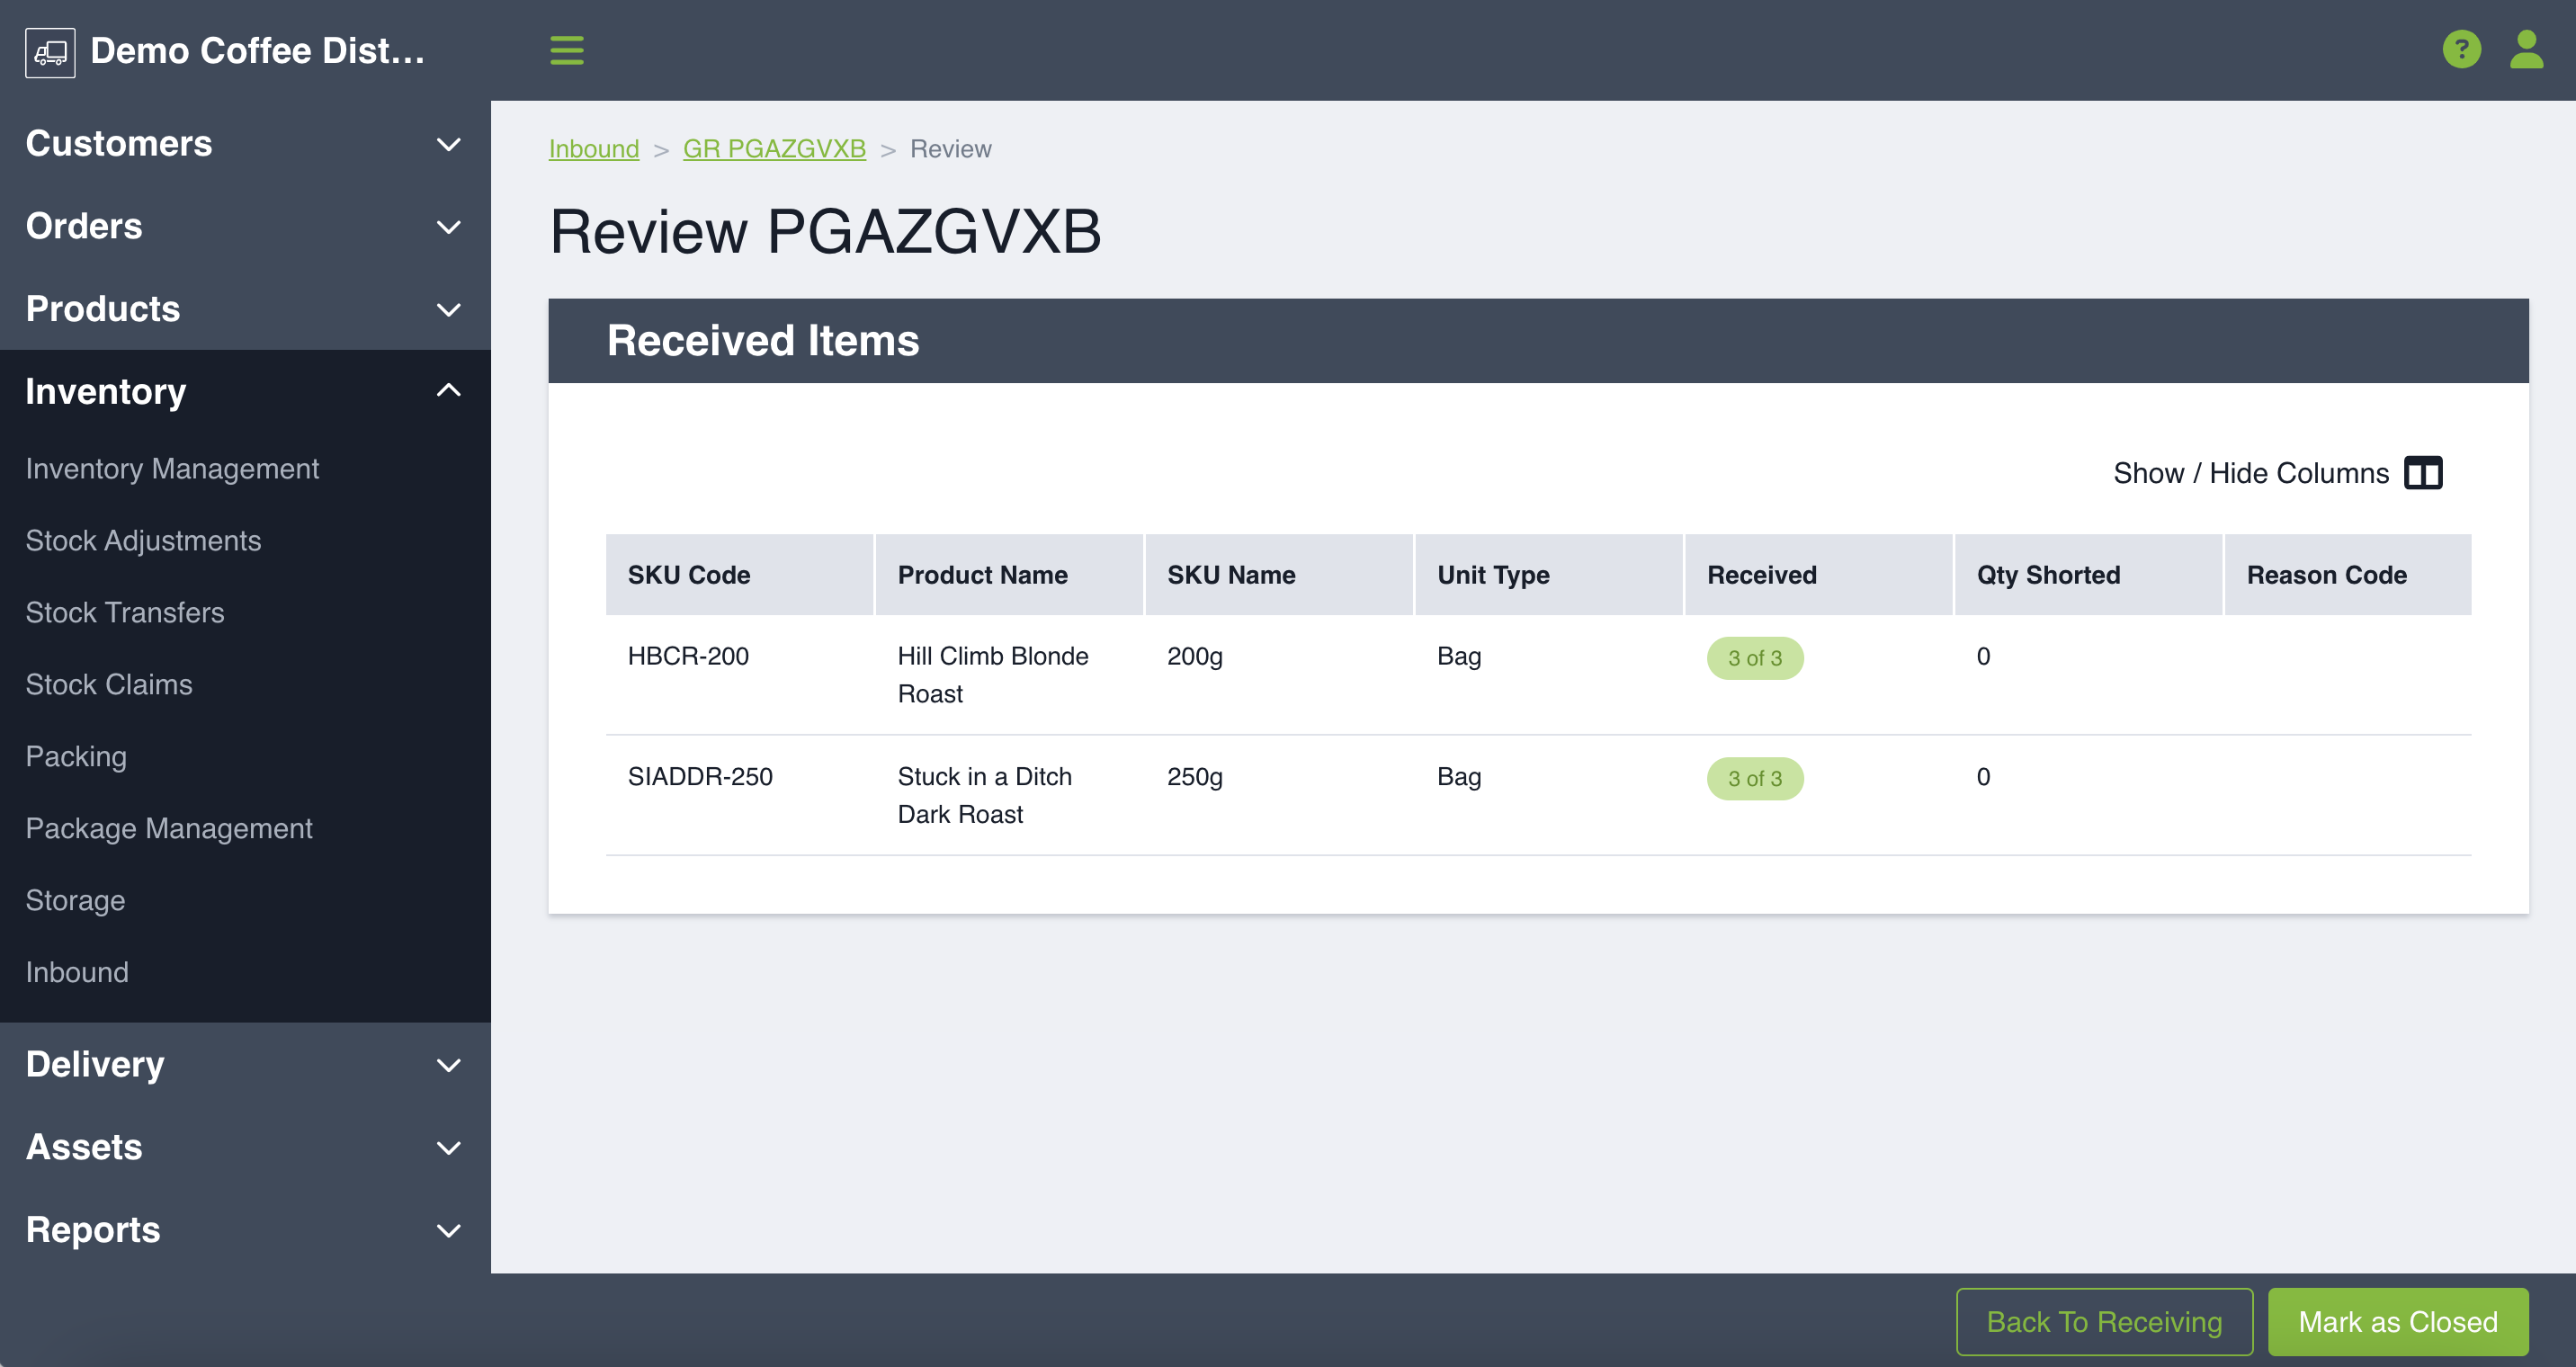
Start by selecting a SKU to receive on the left-hand side. On the right-hand side, you will select your Receiving Location by using the type-ahead, drop-down menu or by clicking on the locate icon to the right of the field. Next, you will enter the quantity of that SKU you are receiving. Please note that it is possible to receive less than the full amount, either due to a short or if you know you'll be receiving the remaining quantity at another time. If your SKU has lot tracking enabled, you can enter additional details regarding the lot including Third Party Lot Code, Sell By Date, Supplier, Lot Notes and Lot Saleability. When this is complete, click the green Save button below. Repeat for all SKUs in your Goods Receipt. At any point, you may also click the green Review button at the bottom-right hand corner to see a summary of all actions taken with respect to your Goods Receipt.
NOTE: you will not be able to receive more inventory than prescribed by your Goods Receipt. If surplus inventory is received, you can create a separate goods receipt as per the instructions above. To provide extra context, you can utilize the reference number field or provide detail in the designated GR Notes section.
Partial Receipt - In Progress Status
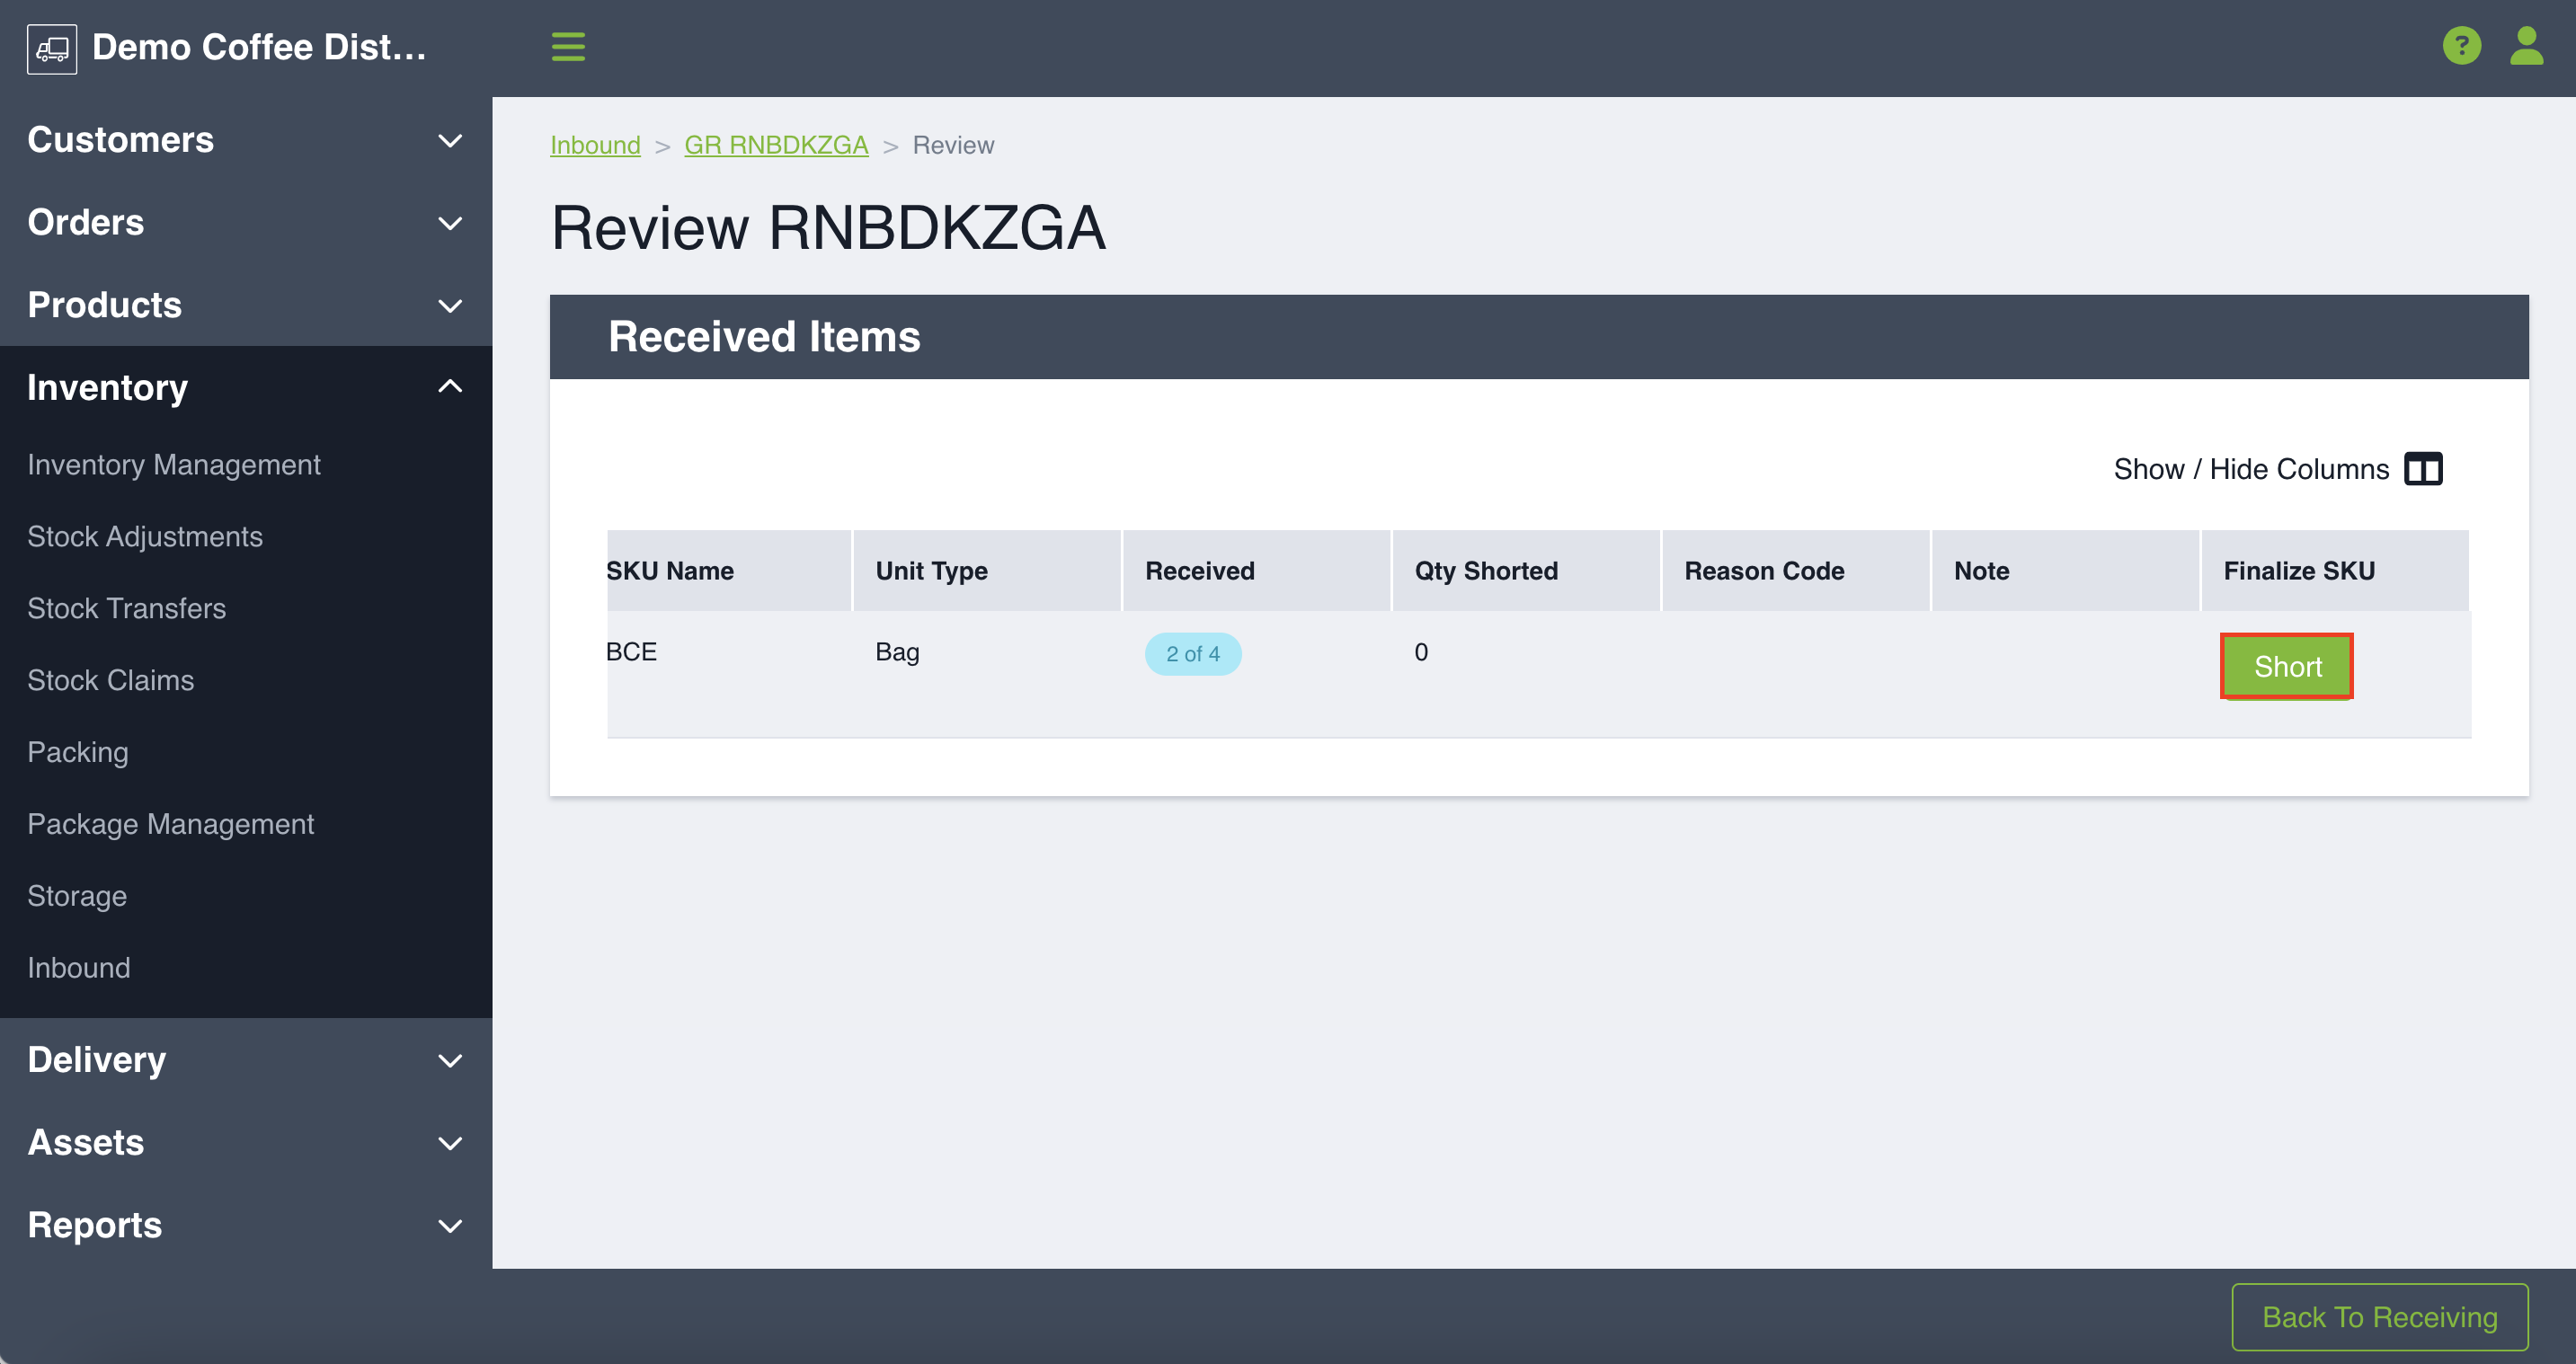
If less than the prescribed amount of items were received, the Goods Receipt will change to an In Progress status, and items will either need to be further received (by repeating the process above) or shorted to complete the process. Return to this page at any time to receive the remaining quantity as appropriate.
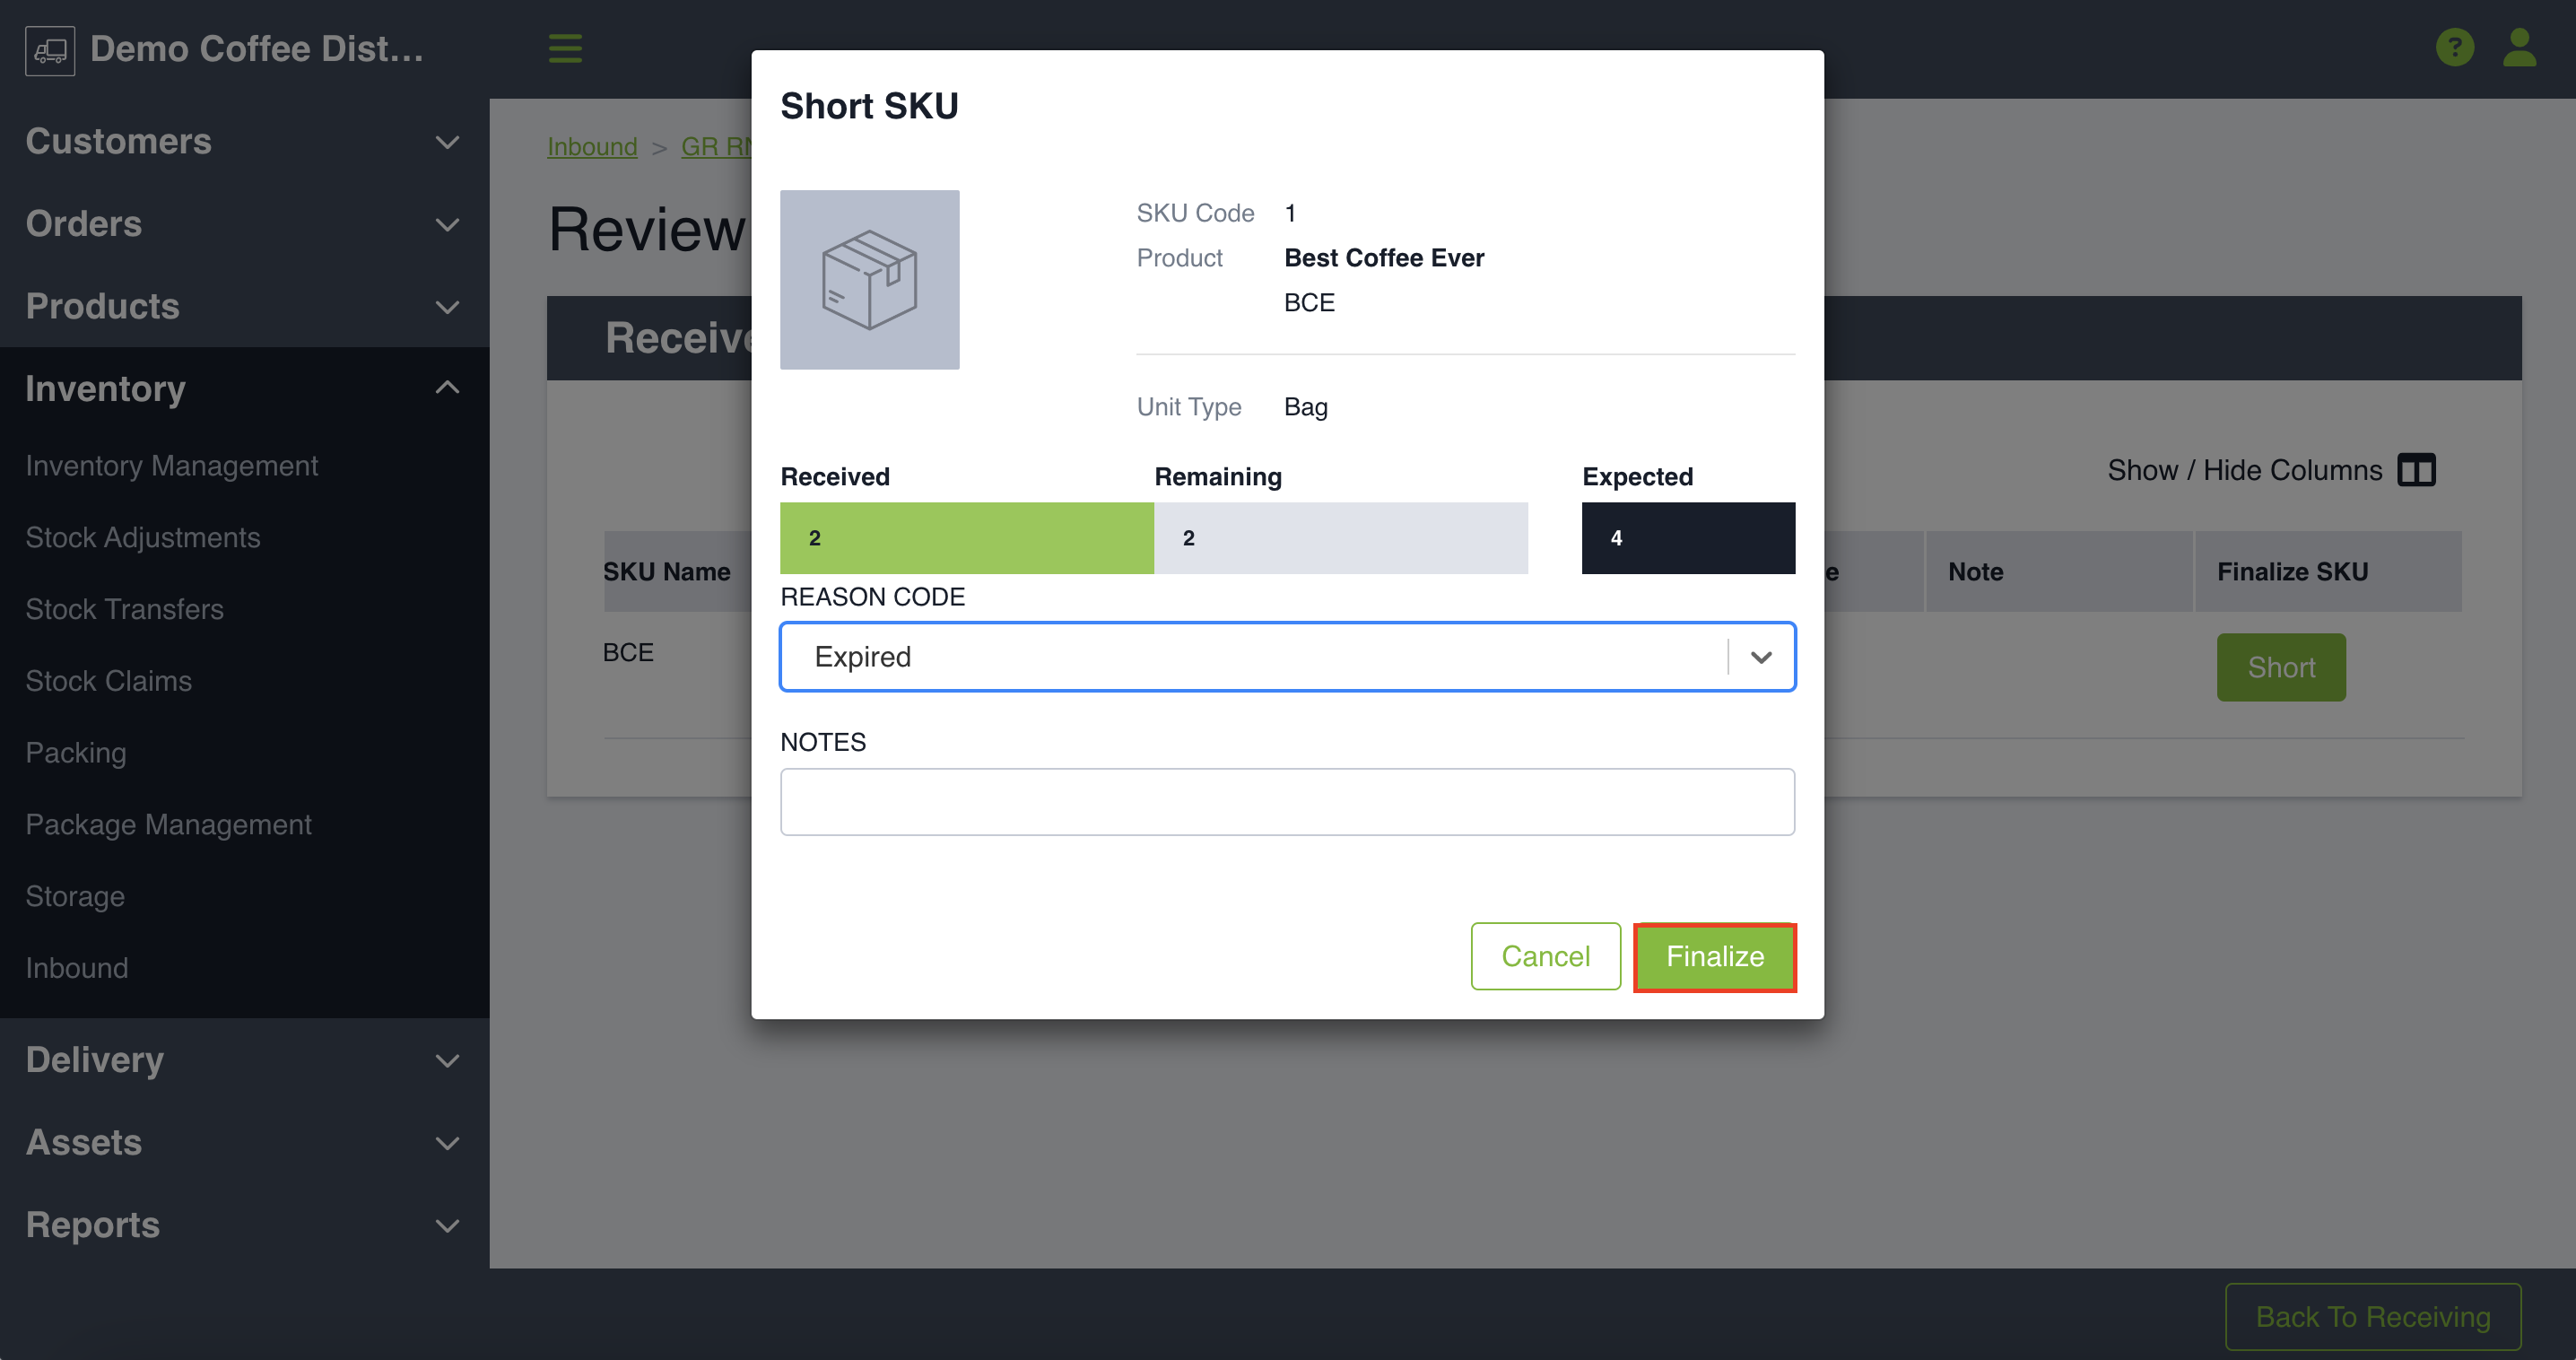
Performing a Short on a Goods Receipt
If items have been shorted upon receiving a shipment from your supplier, you may reconcile them from the Review Page of the Goods Receipt in question. Select the Short button under the Finalize column for the desired SKU, and this will bring up a modal.
You will then be prompted to select a Reason Code from the drop-down menu and add any optional notes regarding the short. Click on Finalize in the bottom-right corner to complete the process. You may undo a short prior to closing a Goods Receipt by returning to the Review page and clicking on Undo under the Finalize column for the desired SKU. A similar modal will again pop up requesting a Reason Code and optional notes. Click on Finalize when done.
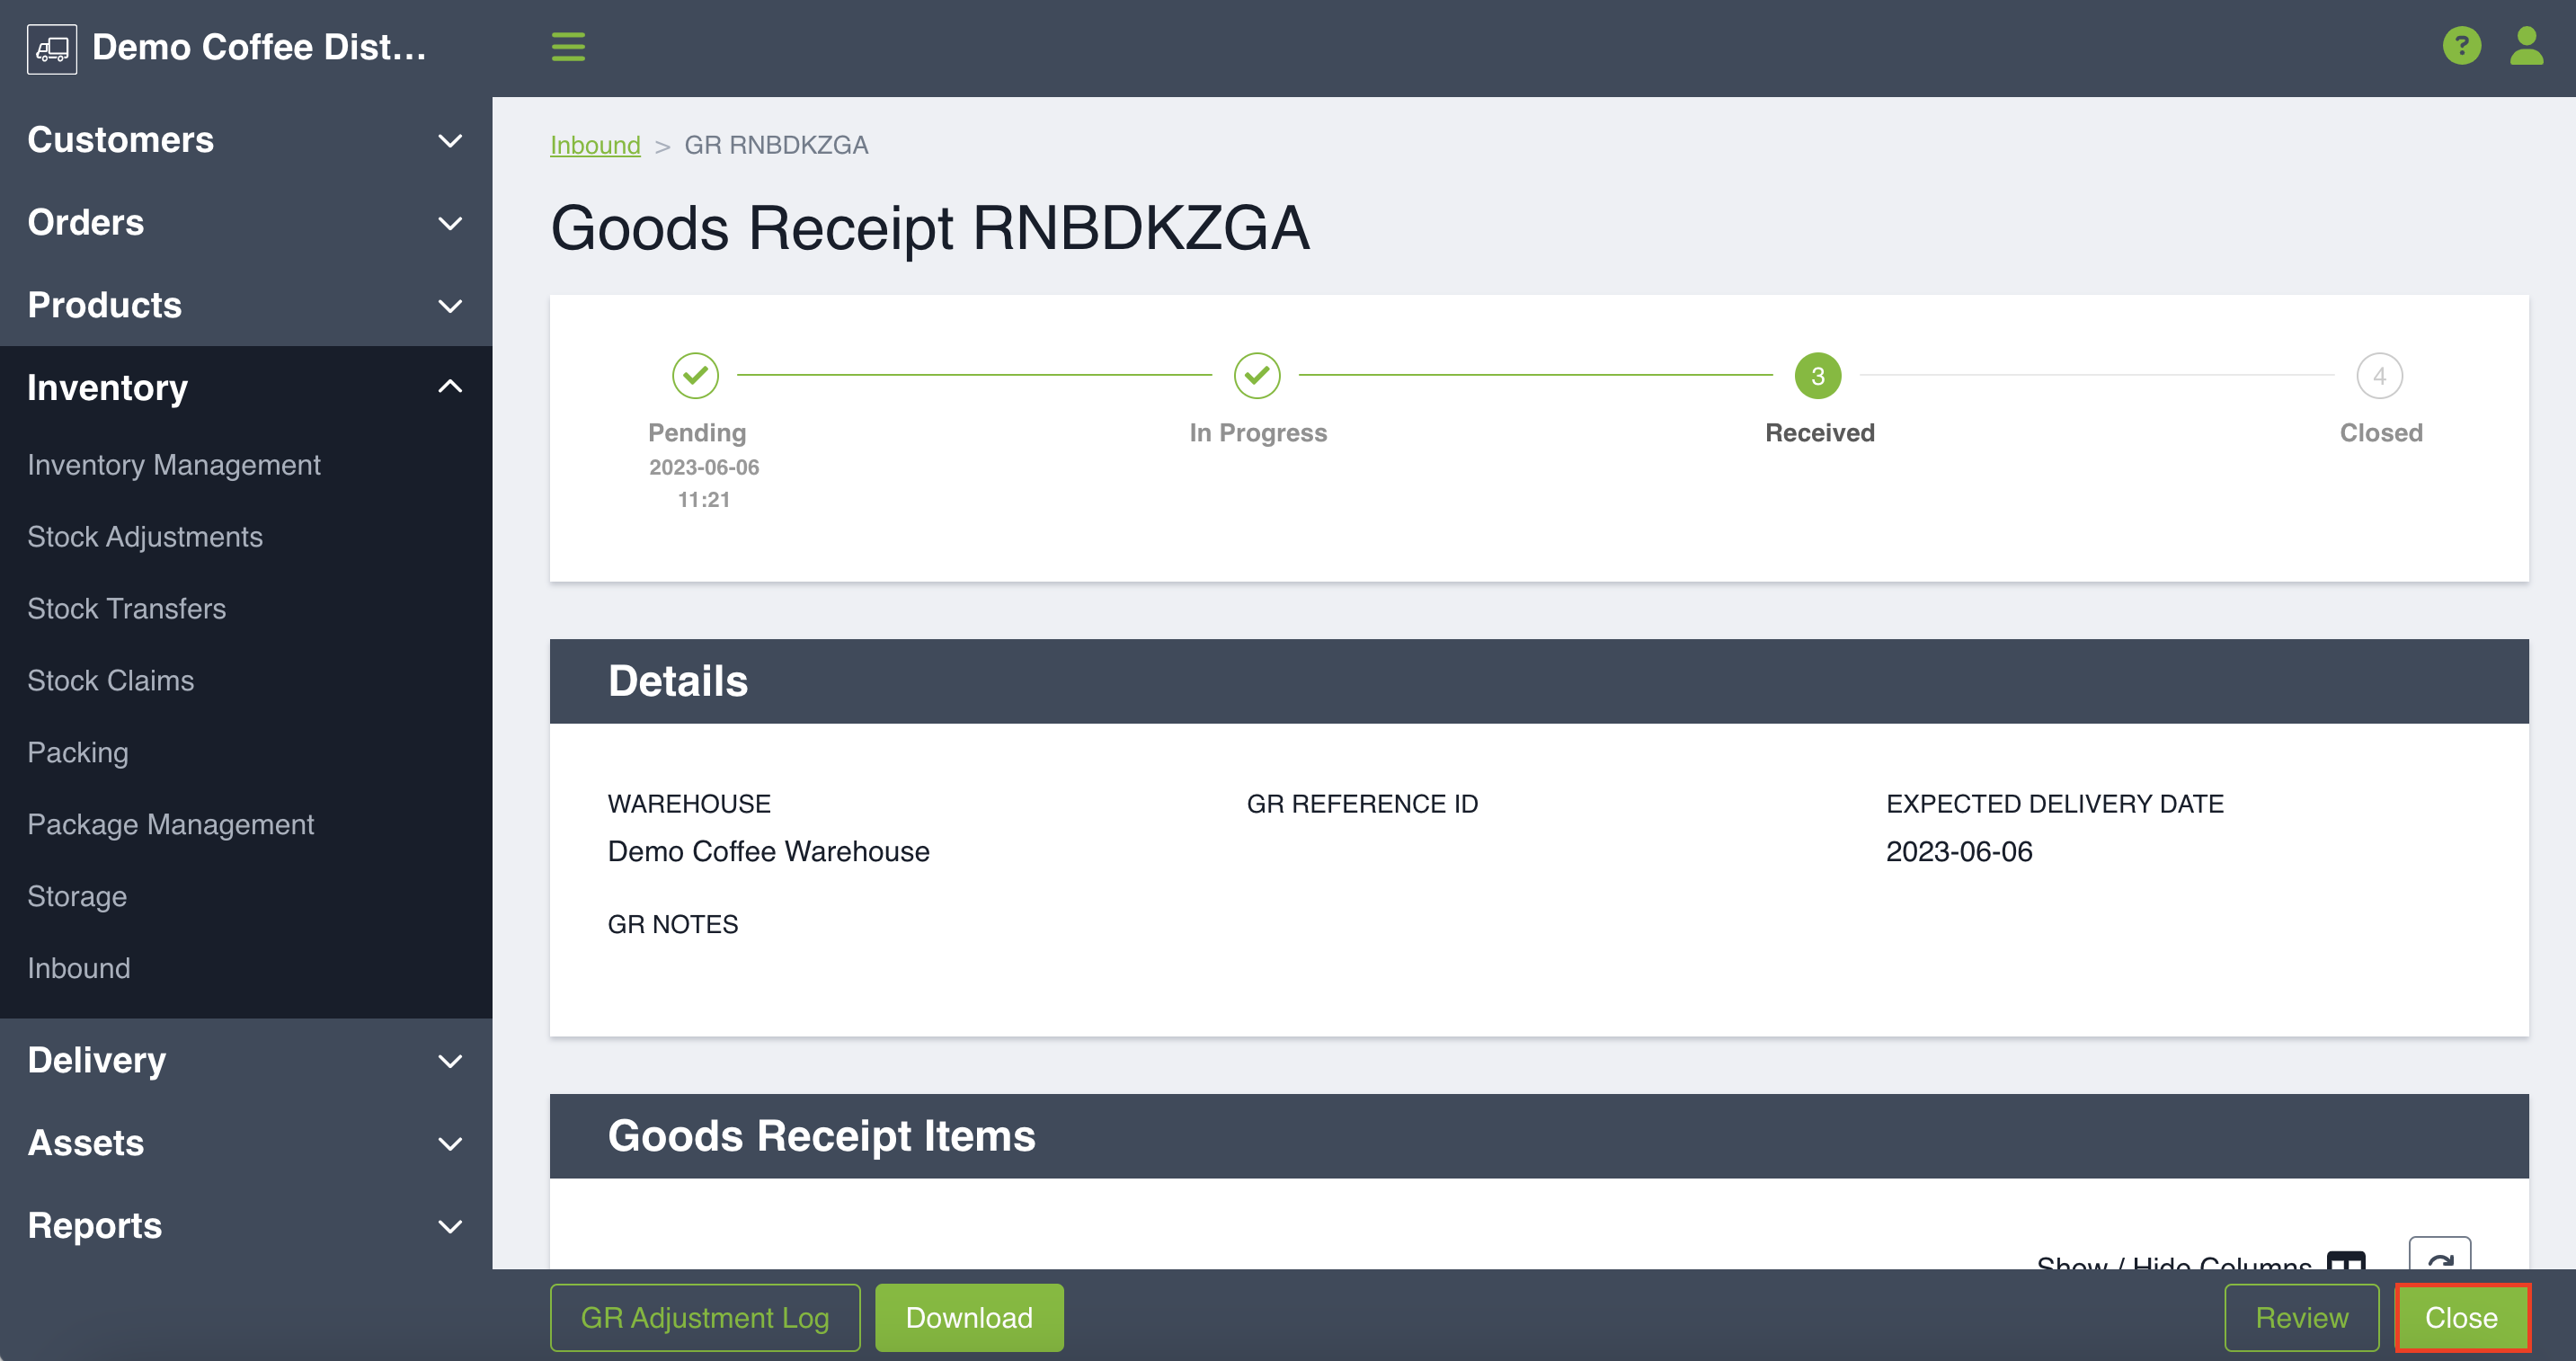
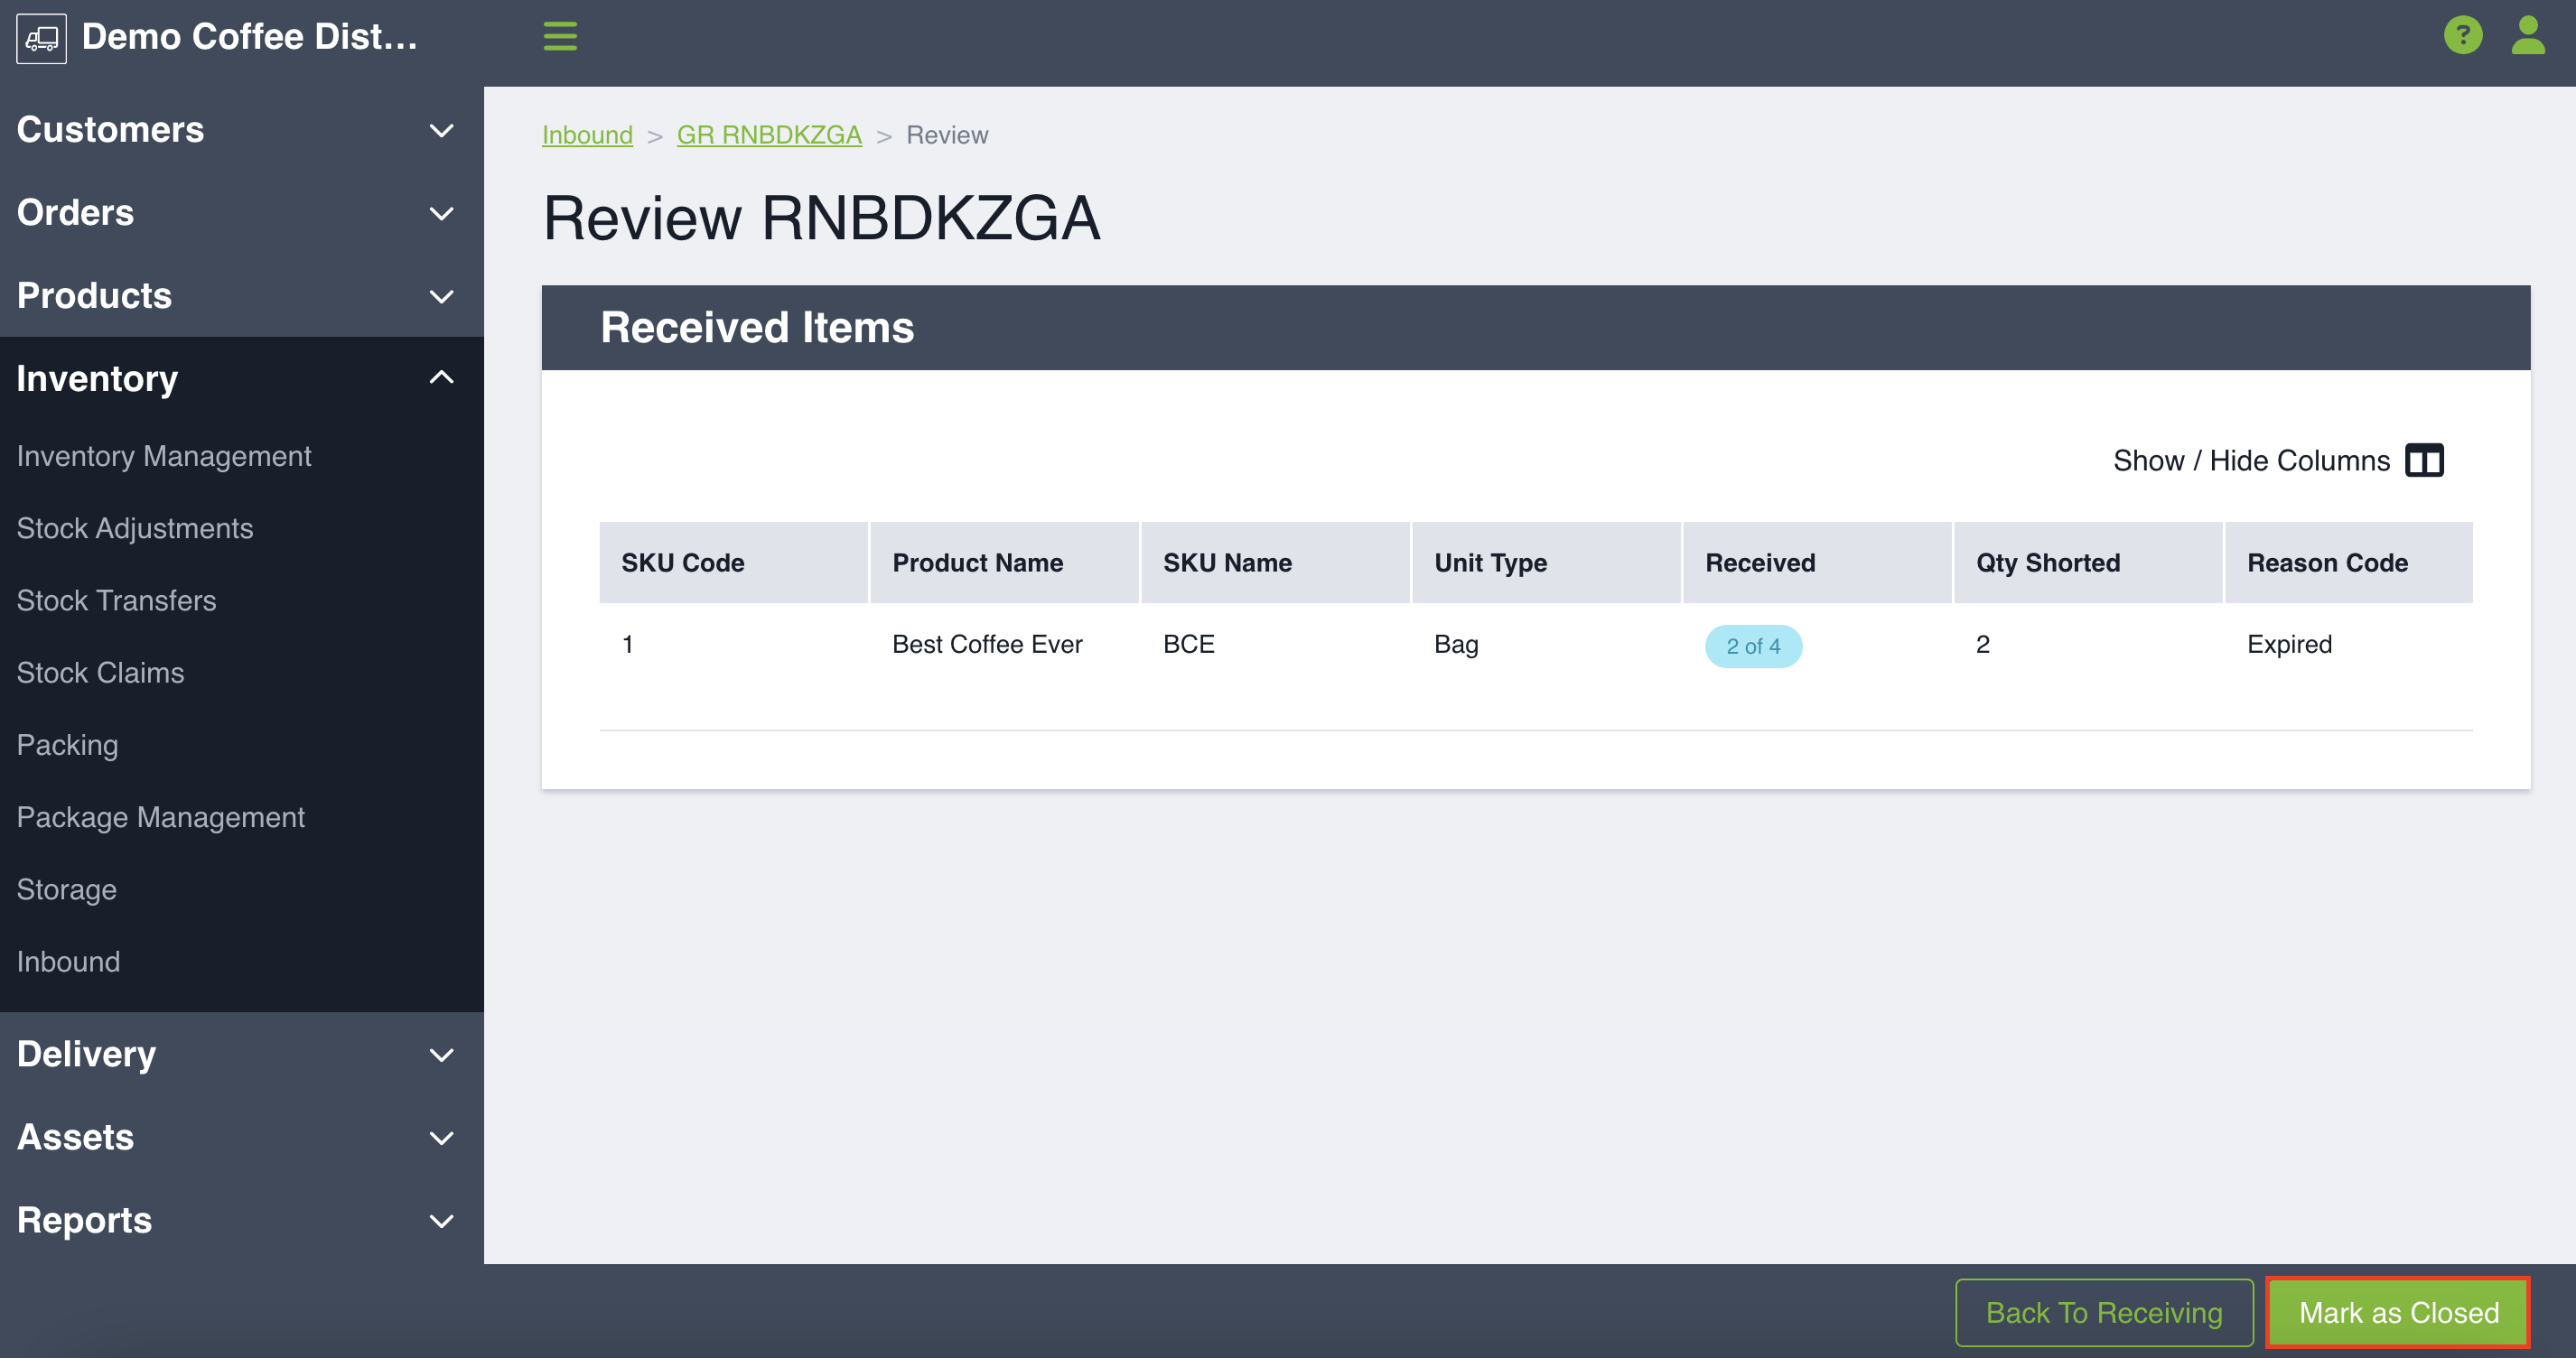
Closing a Goods Receipt
If all associated items are Received or Shorted, the Goods Receipt status will change to Received, and you will be able to close the desired Goods Receipt one of two ways:
- By clicking Close (green button in bottom-right corner) from the desired Goods Receipt summary page.
- By clicking Mark as Closed (green button at the bottom-right corner) from the Goods Receipt review page.
NOTE: No further changes can be made to a Goods Receipt once it's been closed.
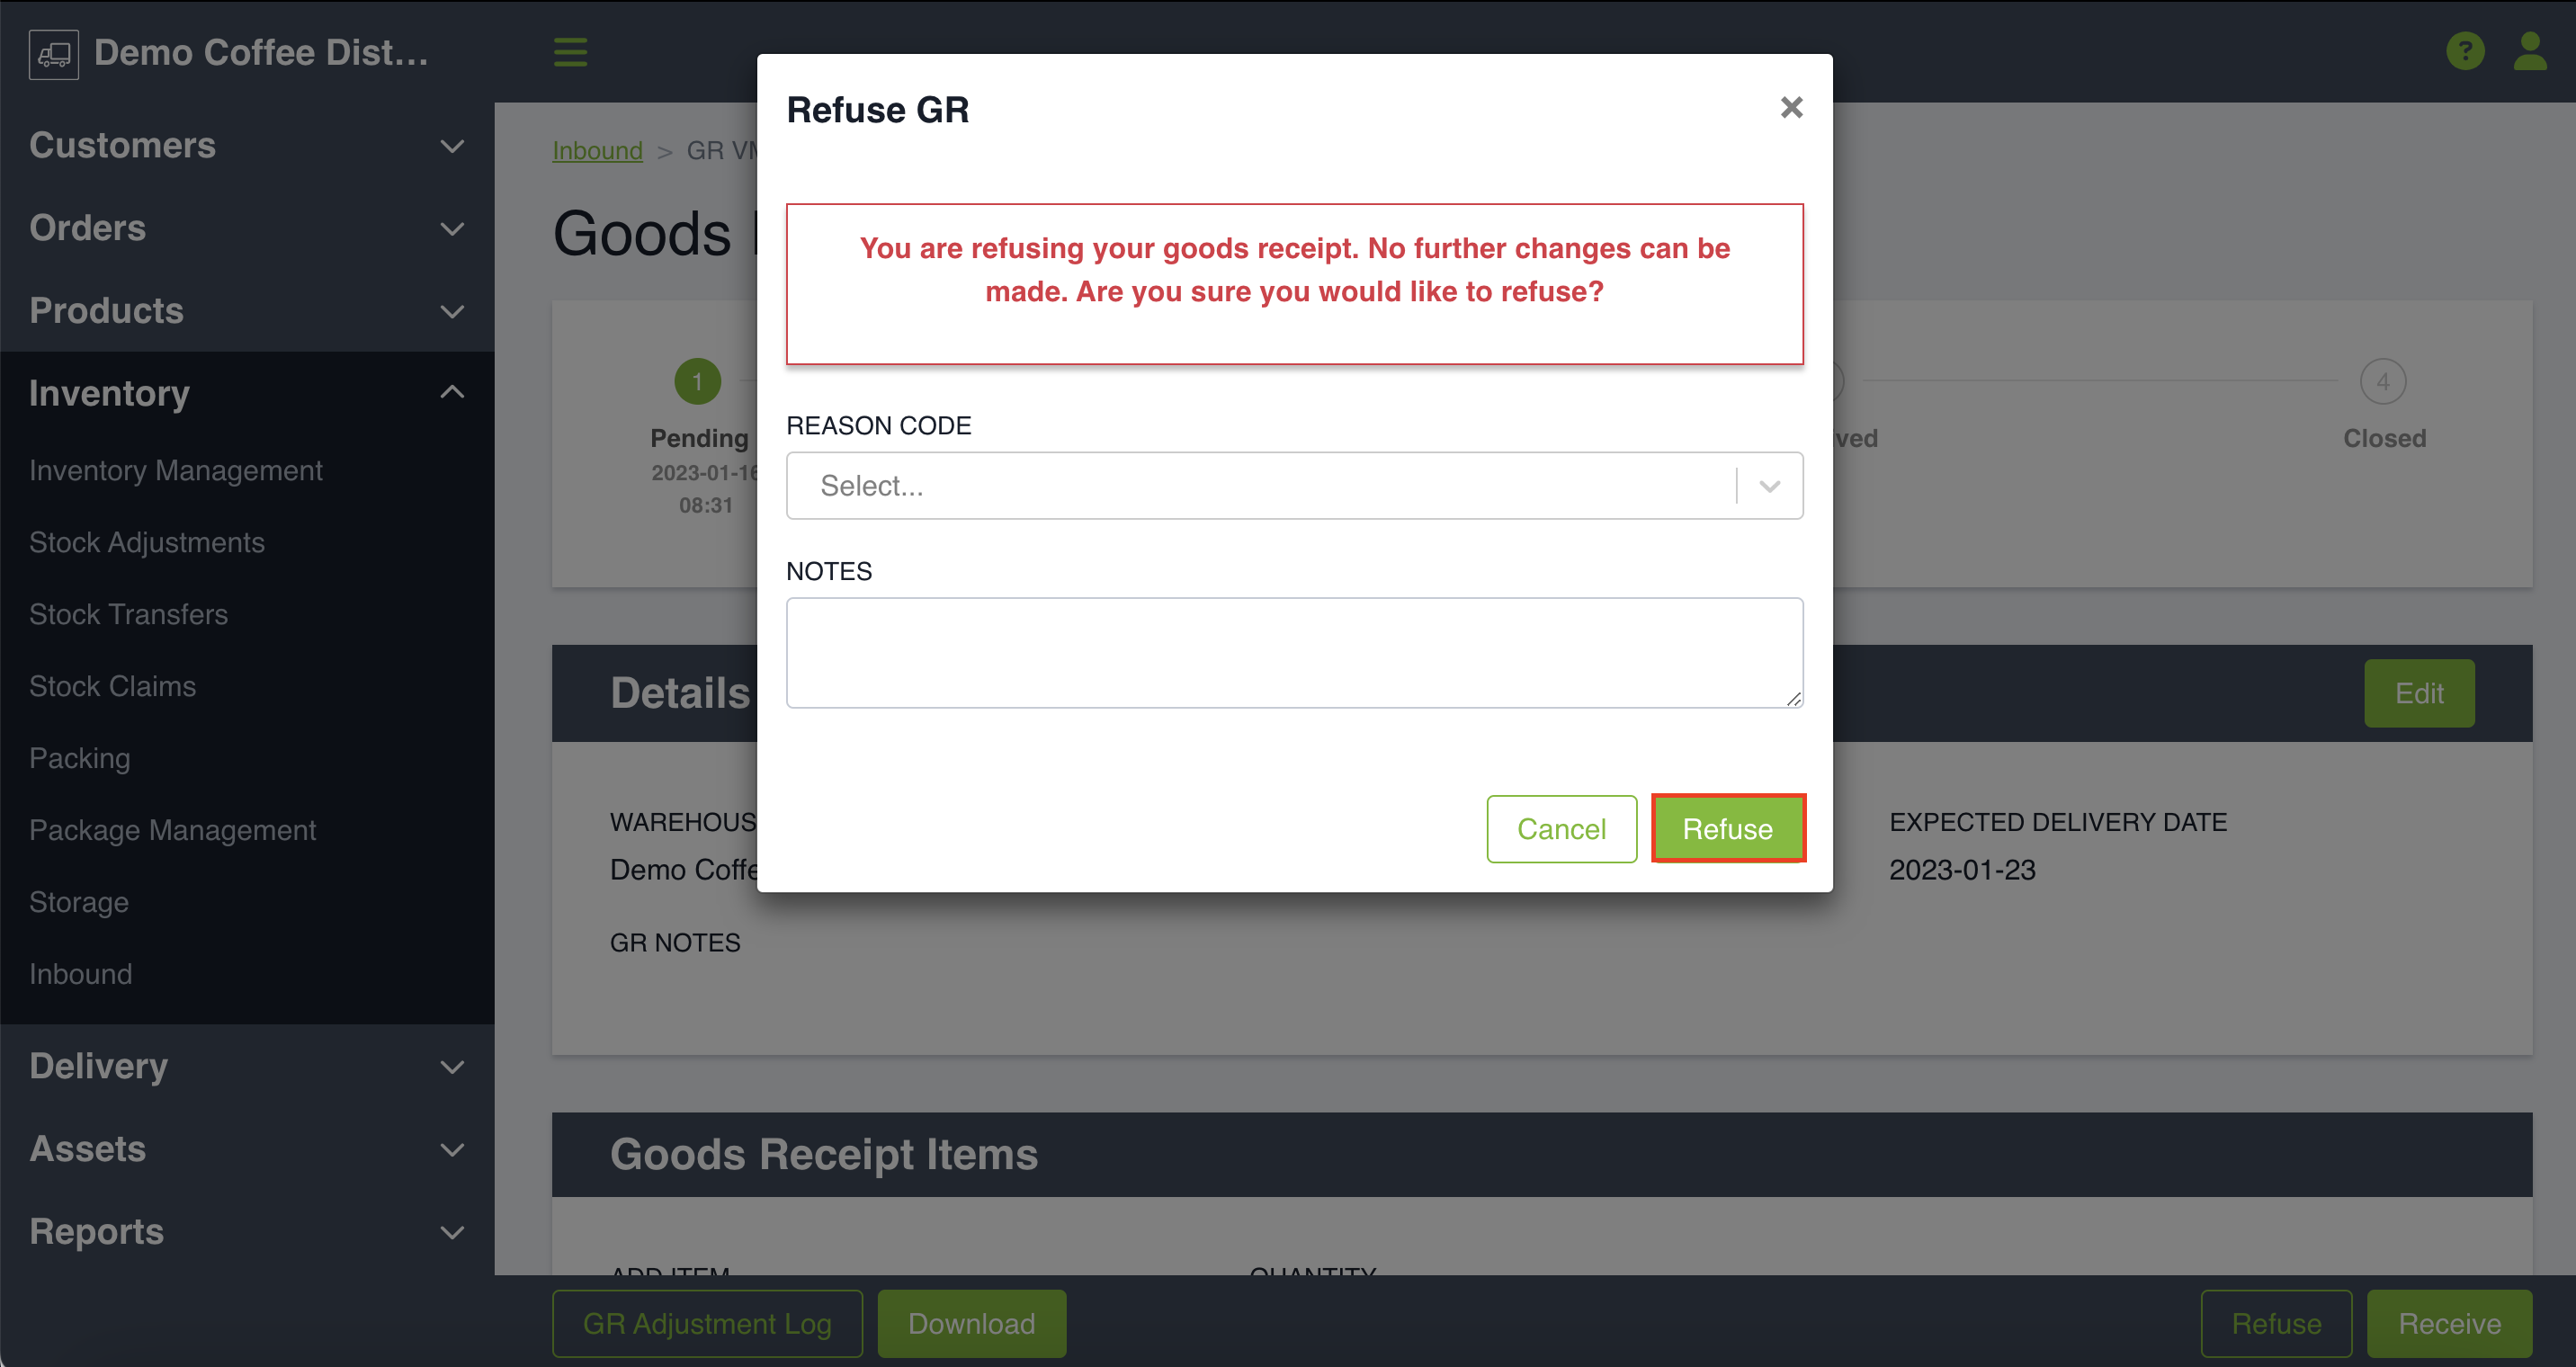
Refusing a Goods Receipt
In some circumstances, you may hear that the product you were expecting is no longer coming, or you are unable to receive anything that was sent. In these cases, you may refuse the Goods Receipt by clicking the Refuse button in the bottom-right corner. A Goods Receipt can be Refused before any receiving has taken place.
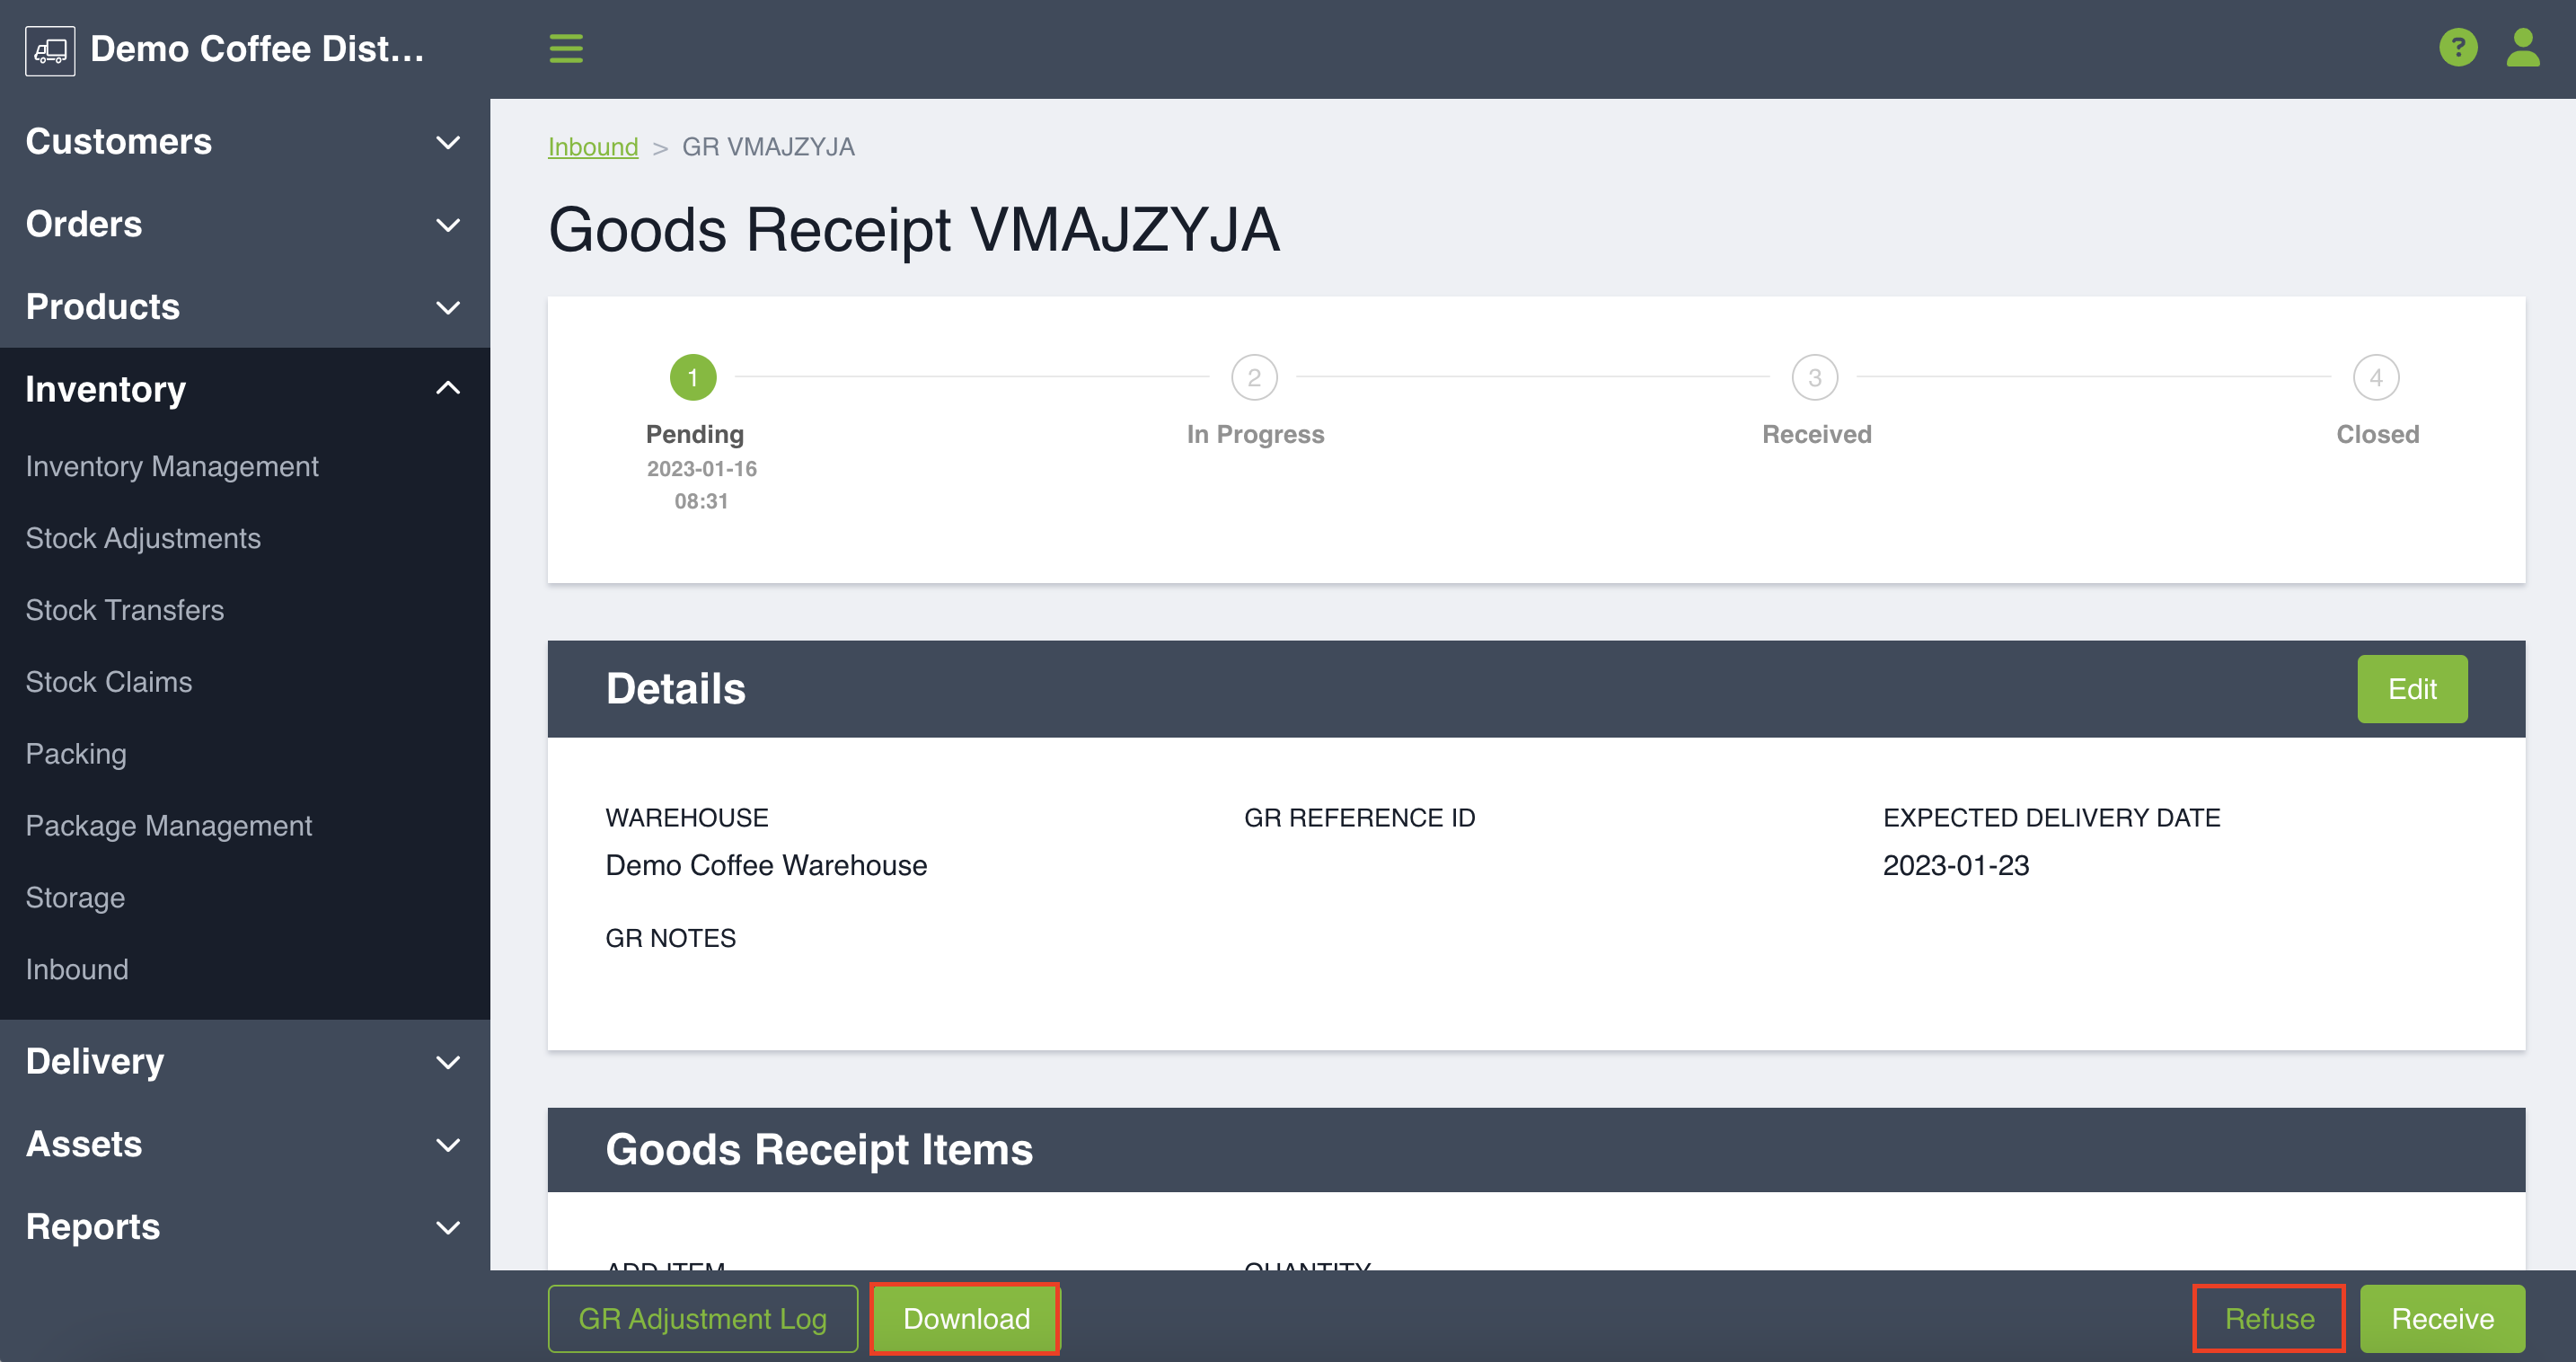
This will bring up a modal where you will be prompted to enter a Reason Code and any additional Notes that pertain to the refusal. Click Refuse again in the bottom-right of the modal to finalize the process.